Model AT12RM
Wall Clock Installation Instructions
Quick Start Steps
1. Install an AirTime ATX Series Transceiver (refer to Transceiver instructions).
2. Press the TRANS button on the front of the Transceiver to begin manual signal transmission.
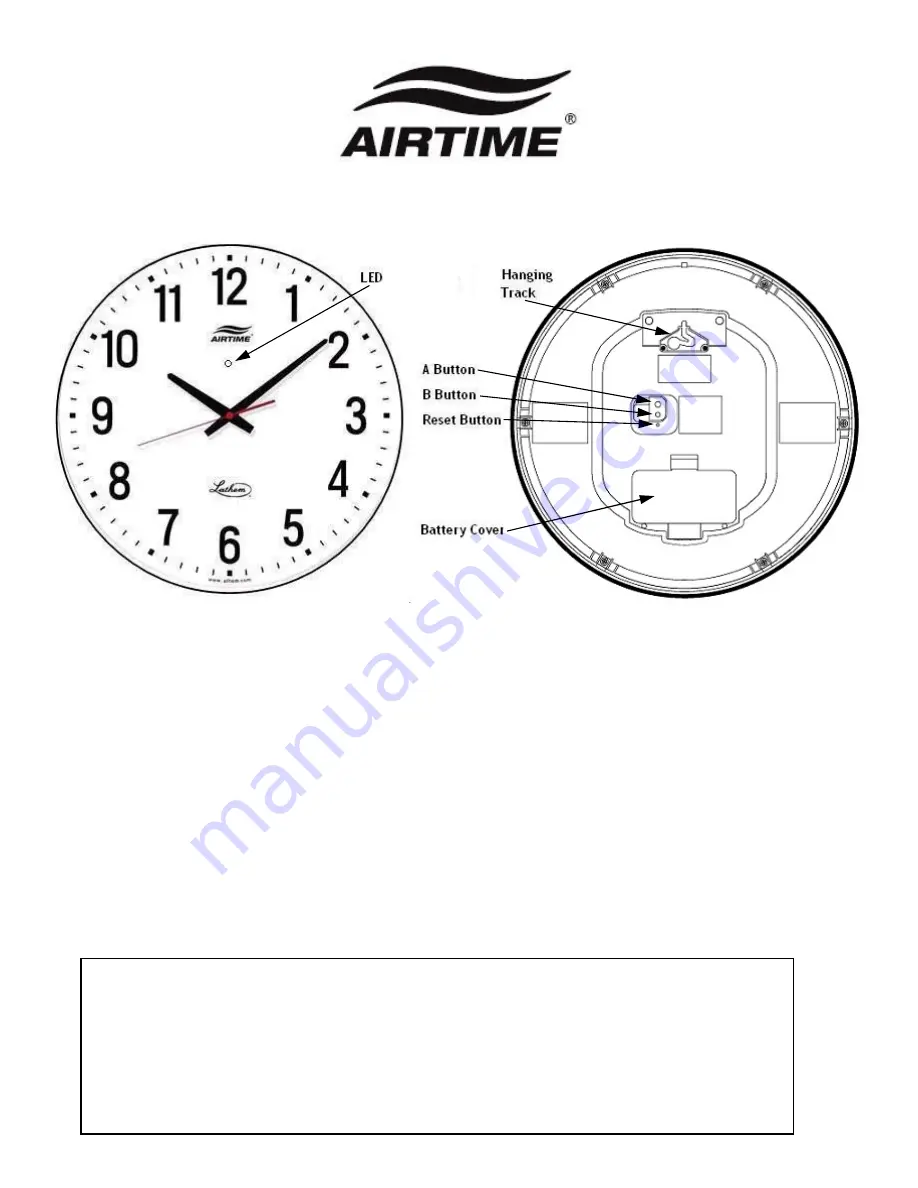
3. Insert two (2) CR123A lithium batteries (included) in the clock’s battery compartment.
4. Press the RESET button on the back of the clock for 2 seconds to begin “listening” for the signal.
5. The LED on the front of the clock flashes Green every two (2) seconds and reception starts.
6. When the signal is received, the LED will flash Green every second and correction will occur.
NOTE:
This equipment has been tested and found to comply with the limits for a Class B digital device, pursuant to Part 15 of
the FCC Rules. These limits are designed to provide reasonable protection against harmful interference in a residential
installation. This equipment generates, uses, and can radiate radio frequency energy and, if not installed and used in
accordance with the instructions, may cause harmful interference to radio communications. However, there is no guarantee
that interference will not occur in a particular installation. If this equipment does cause harmful interference to radio or
television reception, which can be determined by turning the equipment off and on, the user is encouraged to try to correct
the interference by one or more of the following measures:
• Reorient or relocate the receiving antenna.
• Increase the separation between the equipment and receiver.
• Connect the equipment into an outlet on a circuit different from that to which the receiver is connected.
• Consult the dealer or an experienced radio/TV technician for help.


