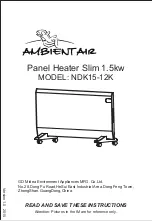
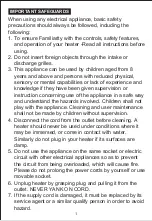
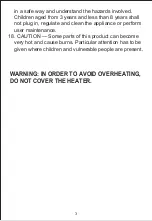
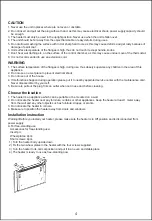
background image

Panel Heater Slim 1.5kw

MODEL: NDK15-12K

READ AND SAVE THESE INSTRUCTIONS

Version 1.0  2015

Attention: Pictures in the IM are for reference only.

GD Midea Environment Appliances MFG. Co.Ltd.   

No.28,Dong Fu Road,HeSui East Industrial Area,Dong Feng Town,

ZhongShan,GuangDong,China.

Summary of Contents for NDK15-12K

Page 1: ... 12K READ AND SAVE THESE INSTRUCTIONS Version 1 0 2015 Attention Pictures in the IM are for reference only GD Midea Environment Appliances MFG Co Ltd No 28 Dong Fu Road HeSui East Industrial Area Dong Feng Town ZhongShan GuangDong China ...

Page 2: ...he hazards involved Children shall not play with the appliance Cleaning and user maintenance shall not be made by children without supervision 4 Disconnect the cord from the outlet before cleaning A heater should never be used under conditions where it may be immersed or come in contact with water Similarly do not plug in your heater if its surfaces are damp 5 Do not use the appliance on the same ...

Page 3: ...heater in the immediate surroundings of a bath a shower or a swimming pool 16 17 Children of less than 3 years should be kept away unless continuously supervised Children aged from 3 years and less than 8 years shall only switch on off the appliance provided that it has been placed or installed in its intended normal operating position and they have been given supervision or instruction concerning...

Page 4: ... shall not plug in regulate and clean the appliance or perform user maintenance 18 CAUTION Some parts of this product can become very hot and cause burns Particular attention has to be given where children and vulnerable people are present WARNING IN ORDER TO AVOID OVERHEATING DO NOT COVER THE HEATER ...

Page 5: ...o not insert and pull out the plug with wet hand as this may cause electrical shock power supply capacity should be enough 3 The heater must only be used in the upright position Never use when the unit is fallen over 4 The unit should be far away from the object flammable or easy deform during uses 5 Do not allow smashing the surface with rod or sharp hard tools as this may cause deform and get ru...

Page 6: ...to install as a wall mounted heater 1 Take the brackets A B and C and assemble them together with four screws D see Fig 2 2 Insert the bracket assembly into the back holes E of the heater body see Fig 3 and then slide the assembly up to match the inclined plane of the back cover 3 Fix the bracket assembly to the heater body with 2 screws D see Fig 4 Fig 1 Bracket A x1 Bracket Bx1 Bracket Cx1 Screw...

Page 7: ...holes with a distance of 638mm between G with a diameter of 8 mm insert 2 expansion bolts H and 2 long bolts I into the hole The explored length of the long bolts should be over 5mm see Fig 5 Warning When drilling holes Always check to ensure there is no wiring pipework etc in the area to be drilled 5 Hang the product on the 2 bolts and slide it to a stable position See Fig 6 Fig 5 Fig 6 DISPLAY F...

Page 8: ...heat settings on this heater the default setting is High press the M button to select the heating setting 1 High 1500w will illuminate 2 Low 750w will illuminate Timer setting A Setting the timer to turn heater ON automatically In order to set this function the heater must be turned off firstly Press the timer button will illuminate and 0 will flash on the display Press or button to set the desire...

Page 9: ...connect the mains power supply before cleaning the Unit 1 Use a soft dry cloth to clean the surface of the product Wipe dry with a clean cloth 2 Use warm water with a mild detergent and a soft damp cloth to clean the product Wipe dry with a clean cloth Do not pour water onto or into the unit To store your product in the off season we recommend using the original or appropriately sized box It is im...

Reviews: