
Installation and Operating Instructions for the iAdapter™Mini
Designed by AMDi
www.amdi.net
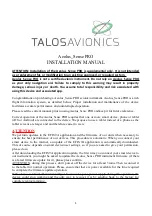
Remove the screws to open the
iAdapter™Mini
housing:
Remove the 8 (eight) screws from the back of the
iAdapter™Mini as shown in the picture below. Note
that the 4 (four) corner screws are longer than the
middle and side screws. The 4 (four) longer corners
screws MUST to be install back into the corners
when closing the iAdapter™Mini again.
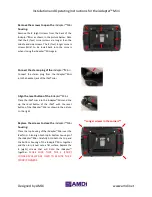
Connect the stereo plug of the
iAdapter™Mini
:
Connect the stereo plug from the iAdapter™Mini
into the headset jack of the iPad®mini.
Align the reset button of the
iAdapter™Mini
:
Place the iPad®mini into the iAdapter™Mini and line
up the reset button of the iPad® with the reset
button of the iAdapter™Mini as shown in the picture
to the right.
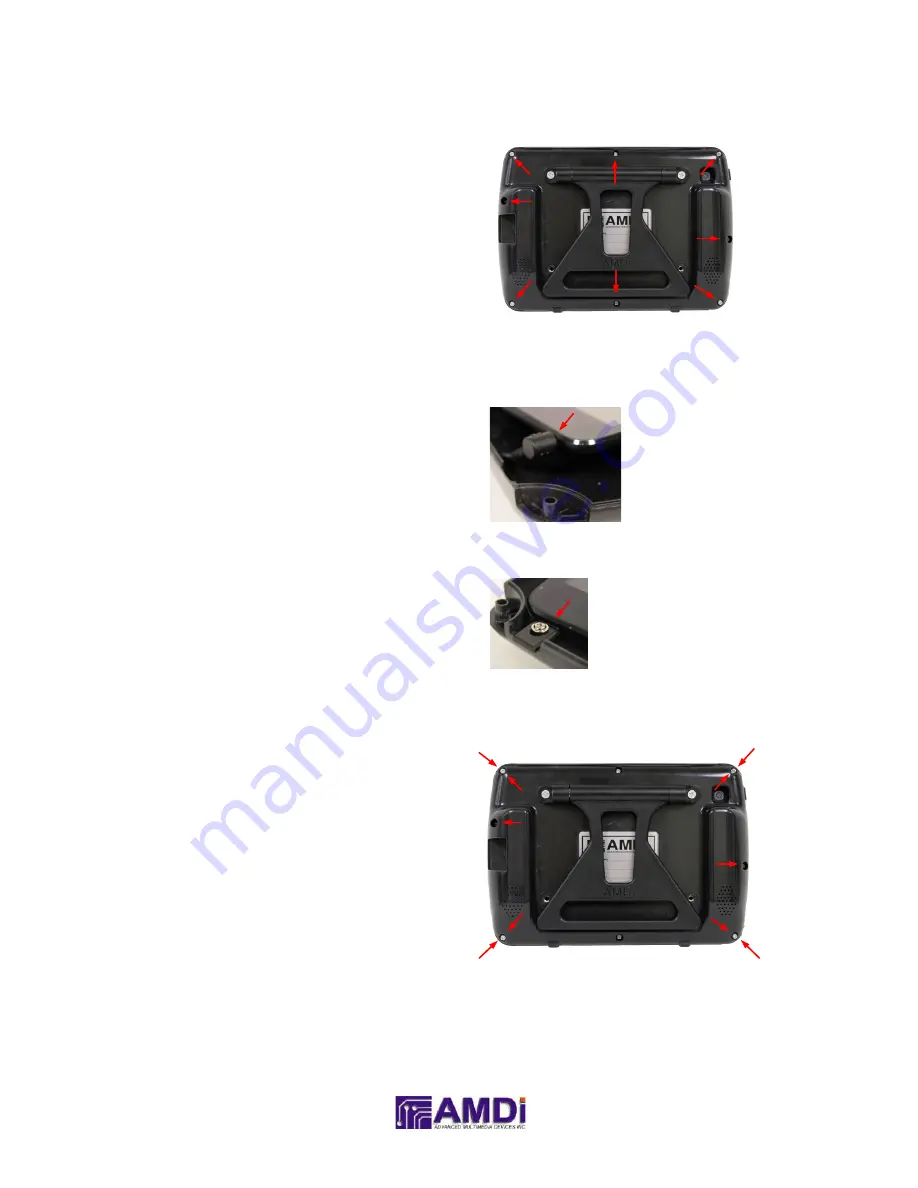
Replace the screws to close the
iAdapter™Mini
housing:
Place the top housing of the iAdapter™Mini over the
iPad®mini. Also align both top & bottom housings of
the iAdapter™Mini. Carefully hold both the top and
the bottom housing of the iAdapter™Mini together
and then turn it over onto a flat surface. Replace the
8 (eight) screws that will hold the iAdapter™
together.
MAKE SURE THAT THE 4 (FOUR)
LONGER SCREWS ARE USED TO SECURE THE 4
(FOUR) CORNERS.
**
Longer screws in the corners**