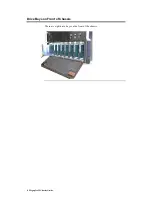
background image

Megaplex II 9U

Chassis Guide

MAN-782-CH9

2/21/00

Summary of Contents for Megaplex II 9U Guide

Page 1: ...Megaplex II 9U Chassis Guide MAN 782 CH9 2 21 00 ...

Page 2: ...American Megatrends Inc American Megatrends Inc acknowledges the following trademarks Sun SunOS and SPARCstation are trademarks of Sun Microsystems Inc LSI Logic is a trademark of LSI Logic Corp Intel is a trademark of Intel Corp UNIX is a trademark of AT T HP and Laserjet are registered trademarks of Hewlett Packard Company MicroVAX DEC and DSSI are trademarks of Digital Equipment Corporation All...

Page 3: ...s 2 Back of Chassis 2 Specifications 3 Cooling Fans 6 Connectors on Back of Chassis 7 Drive Bays on Front of Chassis 8 2 Installation 9 Unpacking and Inspection 9 Drive Installation 10 Rack Mount Installation 13 3 Field Replaceable Units 15 Replacing a Power Supply 16 Replacing a Fan Module 17 Index 19 ...

Page 4: ... action or proceeding against American Megatrends may be commenced more than two years after the delivery of product to Licensee of Licensed Software Licensee agrees to defend and indemnify American Megatrends from any and all claims suits and liabilities including attorney s fees arising out of or resulting from any actual or alleged act or omission on the part of Licensee its authorized third pa...

Page 5: ...lication as is without warranty of any kind either expressed or implied including but not limited to the implied warranties of merchantability or fitness for a specific purpose Some states do not allow disclaimer of express or implied warranties or the limitation or exclusion of liability for indirect special exemplary incidental or consequential damages in certain transactions therefore this stat...

Page 6: ... avoid injury or electrical shock do not remove cover or reach into the unit when the power cord is connected Caution Used to describe hazards to equipment Failure to comply with instruction may result in damage to the equipment Caution Support the drive canister with both hands when removing it from the chassis Failure to support the canister can result in the unit falling and striking the chassi...

Page 7: ...lies seven cooling fans four CPU activity LEDs and Alarm Mute LED and Alarm Mute switch Peripheral Drives System peripherals include mountings for two 5 25 half high CD ROM drives one 3 5 floppy drives and two 3 5 IDE system drives Power Supplies The chassis is supported by three 450W hot pluggable power supplies The N 1 redundant arrangement allows the chassis to continue operation when one power...

Page 8: ...2 Megaplex II Chassis Guide Front of Chassis Back of Chassis ...

Page 9: ...s chassis supports three 450W power supplies arranged in N 1 redundant configuration A minimum of two power supplies are required The power supplies are hot plug and accessible from the back of the case Each power supply has its own AC input plug Power supplies are auto ranging and have PFC Up to three power supplies are handled by the built in power distribution board that allows hot plug and red...

Page 10: ...ower supply assemblies and one additional rear fan For cooling the CPU area the CPU top plate must be installed and the Top Chassis cover must be closed Chassis Intrusion There is a chassis intrusion switch that detects when the top system cover is open This switch is monitored through the management software provided with Megaplex II Chassis Alarm Indication There are some LEDs and alarms that ar...

Page 11: ...e is an IDE Activity LED a power on LED a reset switch and a power on switch There are four CPU Activity LEDs There is an Alarm Mute LED There is an Alarm Mute switch Temperature Operating 0º C to 40º C Storage 20º to 75º C Humidity 0 to 95 non condensing Altitude Operating 0 feet to 10 000 feet Storage 0 feet to 40 000 feet ...

Page 12: ...6 Megaplex II Chassis Guide Cooling Fans There are three fans behind the top grill on the front of the Megaplex II chassis There is one fan on the back of the chassis ...

Page 13: ...yboard mouse serial ports 1 and 2 parallel port and VGA port The Megaplex II has two sets of keyboard and mouse ports The primary keyboard and mouse ports are located on the front of the chassis to the left of the floppy disk drive The keyboard and mouse ports on the back of the Megaplex II are maintenance ports ...

Page 14: ...8 Megaplex II Chassis Guide Drive Bays on Front of Chassis There are eight drive bays on the front of the chassis ...

Page 15: ...etain the shipping carton in case reshipment is necessary Remove the top cover of the chassis and inspect for component damage If any damage has occurred notify American Megatrends immediately See page ii of this manual for details Each shipping carton should contain the following a Megaplex II chassis eight drive slides this manual three power cords and mounting hardware ...

Page 16: ...sure that the chassis is powered down Step 1 Press both latches on the front cover to access the drive bays Step 2 Unscrew the thumbscrew at the top of the mounting bracket where the new drive is to be installed Step 3 Flip the black latch at the bottom of the bracket down Cont d ...

Page 17: ...Chapter 2 Installation 11 Drive Installation Continued Step 4 Slide the bracket out as shown below Step 5 Mount the disk drive on the front side of the mounting bracket Cont d ...

Page 18: ... the drive The back of the bracket is shown below Step 7 Insert the screws through the screw holes and the brackets and tighten all four screws Step 8 After the drive is securely attached to the bracket slide the bracket into the slot in the drive bay Step 9 Tighten the thumbscrew and flip the black latch up into a vertical position ...

Page 19: ... the branch circuit should be given before installing any equipment in a rack environment Installation Steps Use the following procedure to install the Megaplex chassis into a standard 19 RETMA rack and apply the AC input power Step 1 Remove the slides from the chassis by sliding the slides out until the rear retaining spring buttons engage Depress the buttons and slip the slides completely free f...

Page 20: ...ded for racks with countersunk holes Step 5 Bolt the rear of the slides to the rack side rails using four 10 32 x 3 8 screws A threaded bracket is provided in case the rack does not have threaded holes Hex nuts are often difficult to use at the rear of a rack to secure screws Step 6 Install the chassis slides into the outer slides in the rack Push the chassis into the rack until the rear retaining...

Page 21: ...are located at the rear of the chassis Each power supply has a power sharing board which interfaces to the power distribution board located internally in the chassis DC power is distributed from the power supply module to the power distribution board inside the enclosure and throughout the chassis Each power supply has an integrated fan These fans along with the additional chassis fans provide coo...

Page 22: ...upply Step 1 Unplug the AC power cord connected to the failed power supply module Step 2 Loosen the thumbscrews that secure the power supply module Step 3 Using the handle remove the power supply module from the chassis Step 4 Replace the failed power supply module with a new power supply module and tighten the thumbscrews Step 5 Plug in the AC power cord ...

Page 23: ...d replacement use the following procedure The fan assembly is hot pluggable You do not have to shut down the system to replace a fan Step 1 Open the top cover Step 2 Disconnect the wires and remove the fan assembly Step 3 Unscrew the fan to be replaced Step 4 Insert the new fan assembly into place and reconnect the wires Step 5 Install the top cover ...

Page 24: ...18 Megaplex II Chassis Guide ...

Page 25: ...ation 10 F field replaceable subassemblies 15 Field Replaceable Units 15 Front of Chassis 2 FTP Site iv G General Description of Chassis 1 H Humidity 5 I IDE Activity LED 5 Installation 9 L LEDs and Switches 5 O outer rails 14 P pan head screws 14 Peripheral Drives 1 Power Supplies 1 3 Power Supply Modules 15 R rack side rails 14 Rack Mount Installation 13 RED LED 4 Replacing a Fan Module 17 Repla...

Reviews: