background image

Biometric Safe Lock

Operating and Installation 

Instructions

Part #4305278 

Revised 02/10

Summary of Contents for BSL-0601A-W

Page 1: ...Biometric Safe Lock Operating and Installation Instructions Part 4305278 Revised 02 10 ...

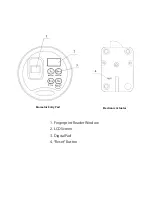
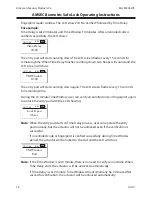
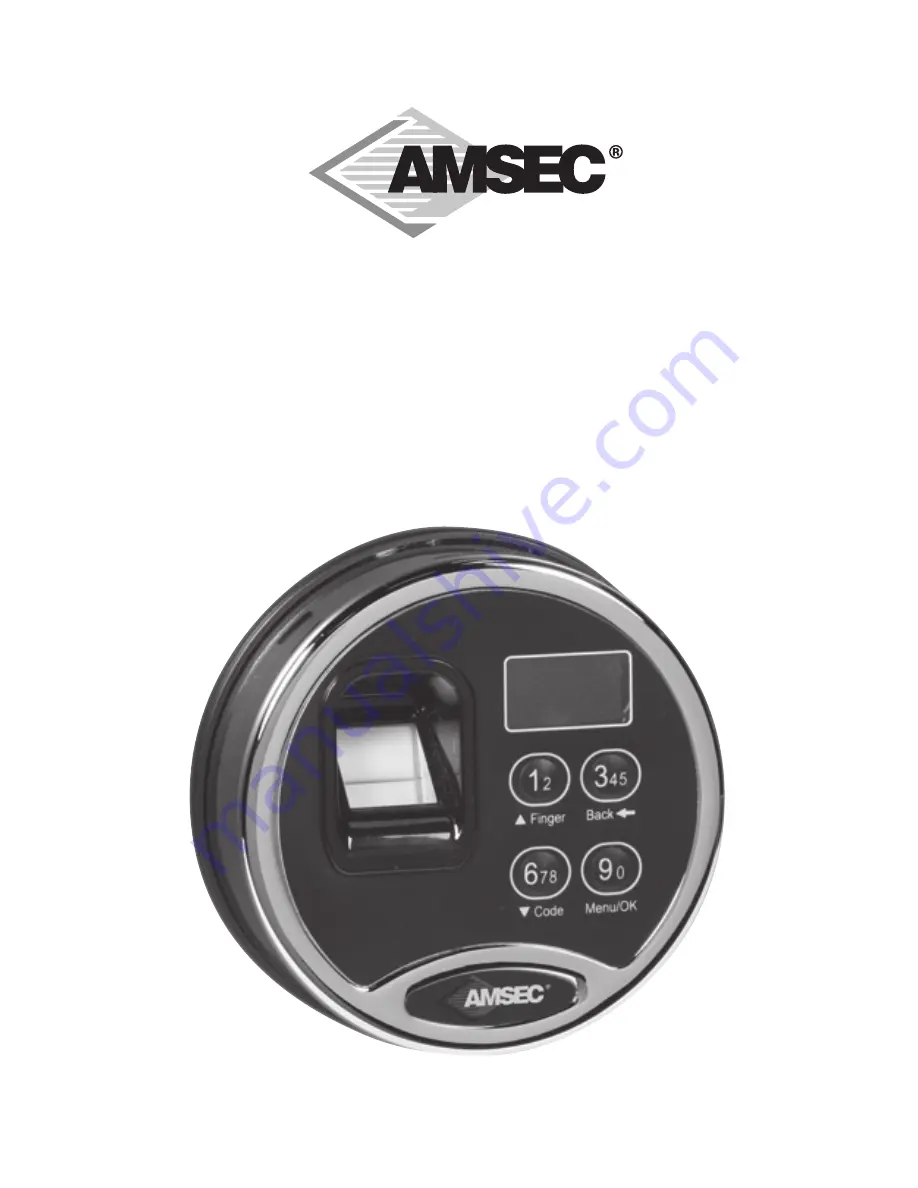
Page 2: ...Biometric Entry Pad Electronic Actuator 1 Fingerprint Reader Window 2 LCD Screen 3 Digital Pad 4 Reset Button ...

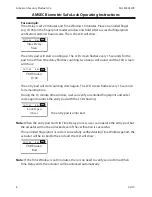
Page 3: ...ock Operations such as enrolling deleting or time delay setting are not permitted Security level classification Level 1 Entry pad can be operated by a code Factory Default Level 2 Entry pad must be operated by a fingerprint and its bound code It is a higher security level Factory default security level is Level 2 Level 3 Entry pad must be operated by a fingerprint or a code Note Security Level 3 i...

Page 4: ...10 9 Wrong try penalty Level 2 10 10 Delete one user Level 2 11 11 Delete all users Level 2 11 12 Set Security Level 12 13 Set Change the first code for quick start Level 1 Factory Default 13 14 Enroll the second and additional codes Level 1 13 15 Enroll the first fingerprint for quick start Level 3 14 16 Enroll the second and additional fingerprints Level 3 14 17 Set Change code Level 1 Level 3 1...

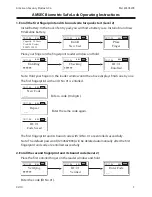
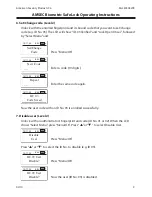
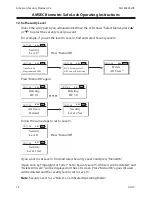
Page 5: ...V ID 01 Enrolled Note Hold your finger on the reader window until the above displays finish one by one The first fingerprint with an ID No 01 is enrolled 12 11 34 8 6V New Code __ Enter a code 10 digits 12 11 34 8 6V Repeat __ Enter the same code again 12 11 34 8 6V ID 01 Code Saved The first fingerprint and its bound code with ID No 01 are enrolled successfully Note The default password 123456789...

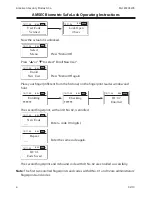
Page 6: ...inger different from the first one on the fingerprint reader window and hold 12 11 34 8 6V Enrolling 12 11 34 8 6V Checking 12 11 34 8 6V ID 02 Enrolled The second fingerprint with an ID No 02 is enrolled 12 11 34 8 6V New Code __ Enter a code 10 digits 12 11 34 8 6V Repeat __ Enter the same code again 12 11 34 8 6V ID 01 Code Saved The second fingerprint and its bound code with ID No 02 are enrol...

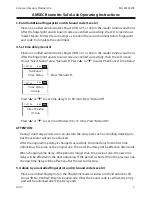
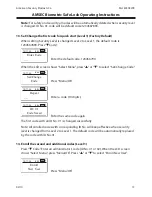
Page 7: ...V Time Delay 00 min Press or to set time delay 1 to 99 min Press Menu OK 12 11 34 8 6V Time Window 01 min Press or to set Time Window 0 to 15 min Press Menu OK ATTENTION During Time Delay period user can operate the entry pad such as enrolling deleting etc but the actuator will not be unlocked After the original time delay is changed successfully the time delay for the first time unlocking is the ...

Page 8: ...entry pad will start counting down again The LCD screen flashes every 15 seconds for remaining time During the 10 minute time window user can verify an enrolled fingerprint and enter code again to unlock the entry pad with the LCD showing 12 11 34 8 6V Lock Open 06 sec The entry pad is unlocked Note When the entry pad starts its Time Delay process user can operate the entry pad but the actuator wi...

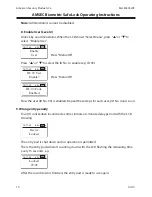
Page 9: ...1 34 8 6V New Code __ Enter a code 10 digits 12 11 34 8 6V Repeat __ Enter the same code again 12 11 34 8 6V ID 03 Code Saved Now the user code with an ID No 03 is enrolled successfully 7 Disable user Level 2 Unlock with an administrator s fingerprint and code ID No 01 or 02 When the LCD shows Select Menu press Menu OK Press or to select Disable User 12 11 34 8 6V Disable User Press Menu OK Press ...

Page 10: ...V ID 03 User Enable Press Menu OK 12 11 34 8 6V ID 03 Code Enabled Now the user ID No 03 is enabled Repeat these steps for each user ID No 4 and so on 9 Wrong entry penalty Four 4 consecutive invalid code entries initiate a 4 minute delay period with the LCD showing 12 11 34 8 6V Device Locked The entry pad is shut down and no operation is permitted Then the entry pad will start counting down with...

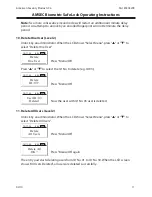
Page 11: ...elete One User 12 11 34 8 6V Delete One User Press Menu OK Press or to select the ID No to delete e g ID 03 12 11 34 8 6V Delete ID 03 Press Menu OK 12 11 34 8 6V User ID 03 Deleted Now the user with ID No 03 user is deleted 11 Delete All Users Level 2 Unlock by an administrator When the LCD shows Select Menu press or to select Delete All Users 12 11 34 8 6V Delete All Users Press Menu OK 12 11 34...

Page 12: ...eleted 12 11 34 8 6V Delete All Users Press Menu OK again 12 11 34 8 6V Deleting ID 01 12 11 34 8 6V Deleting ID 30 12 11 34 8 6V All Users Deleted 12 11 34 8 6V Security Level 2 Set Follow the same steps to set to Level 3 12 11 34 8 6V Security Level 1 Press Menu OK 12 11 34 8 6V Security Level 1 Set If you want to set Level 3 find and select Security Level 3 and press Menu OK Open Lock by Finger...

Page 13: ...een shows Select Menu press or to select Set Change Code 12 11 34 8 6V Set Change Code Press Menu OK 12 11 34 8 6V Repeat __ Enter a code 10 digits 12 11 34 8 6V ID 01 Code Saved Enter the same code again The first code with an ID No 01 is changed successfully Note All enrolled codes with corresponding ID No will keep effective when security level is changed from Level 2 to Level 1 The default cod...

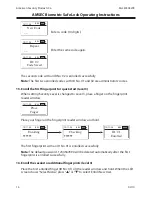
Page 14: ...ing Security Level is changed to Level 3 place a finger on the fingerprint reader window 12 11 34 8 6V Place Finger Place your finger on the fingerprint reader window and hold 12 11 34 8 6V Enrolling 12 11 34 8 6V Checking 12 11 34 8 6V ID 01 Enrolled The first fingerprint with an ID No 01 is enrolled successfully Note The default password 1234567890 will be deleted automatically after the first f...

Page 15: ... the code Level 1 or fingerprint Level 3 which you want to set Change code After successful verification follow the same steps in 13 Set Change the first code for quick start Level 1 Note User code can be set or changed only after being enabled Level 3 Unlock by an administrator When the LCD screen shows Select Menu press or to select Enable User Code and press Menu OK Press or to select the ID No...

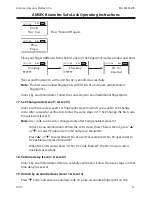
Page 16: ...y 15 seconds for remaining time During the 10 minute Time Window user can verify an enrolled code or fingerprint again to unlock the entry pad with the LCD showing 12 11 34 8 6V Lock Open 06 sec Note When the entry pad starts its Time Delay process user can operate the entry pad normally but the actuator will not be unlocked even if the verification is successful If no enrolled code or fingerprint...

Page 17: ...efault code 1234567980 will be effective as ID No 01 23 Set number of doors Unlock by an administrator ID No 01 or 02 When the LCD screen shows Select Menu Press or to select Set number of doors 12 11 34 8 6V Set Number of Doors Press Menu OK 12 11 34 8 6V Number of Doors 01 Press or to set number of doors For example to set the number of doors to 2 select 02 and press Menu OK Now the number of do...

Page 18: ...orize users with ID No from 03 to 05 press Menu OK 12 11 34 8 6V Doors 1234 Auth oxxx Door 1234 means maximum number of doors Auth oxxx means whether each door is authorized to open by the group or not Letter o means the group is authorized to open the door Letter x means the group is not authorized When one letter flashes press or to set o or x Press Menu OK to confirm Press Back the left letter ...

Page 19: ...8 6V Doors 1234 Auth xoxx Now the authorization is successful Users with ID No 03 04 and 05 can open Door 2 25 System INFO Press Menu OK The screen will show Select Menu Press or to select System INFO Press Menu OK and the LCD will show 12 11 34 8 6V Capacity 30 Users Used 00 User s 9 20071105 23 It means that up to 30 users can be enrolled into the entry pad and there is no user enrolled now The ...

Page 20: ...___________________________ City____________________ State_______ Zip Code____________ Telephone ____________________________________________ Email Address _ _________________________________________ Website ________________________________________________ If you would like us to send AMSEC Safe information to a friend or have any questions concerning our complete line of security products please ...

Reviews: