background image

AU32NC  621

EC5811

Installation Instructions
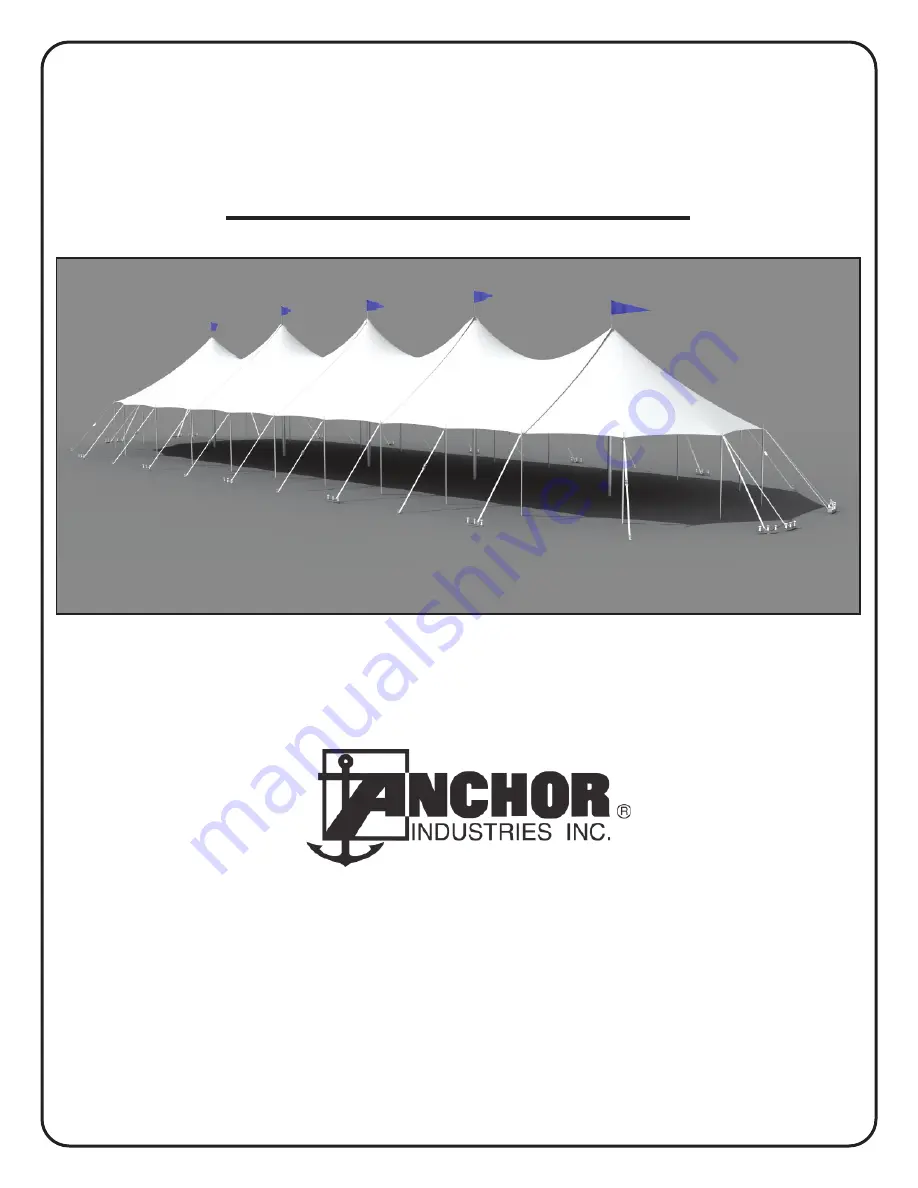
32’ Aurora Tent

Non-Certi

fi

 ed Installation

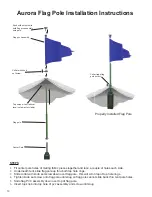
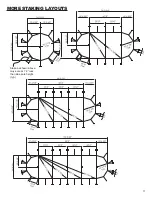
Please read all assembly / installation instructions before the installation or removal of this product.

7701 Highway 41 N

Evansville, IN  47725

Phone:  812-867-2421

Fax:  812-867-1429

1-800-544-4445

email:  tents@anchorinc.com

www.anchorinc.com

Summary of Contents for 32 Aurora

Page 1: ...on Certified Installation Please read all assembly installation instructions before the installation or removal of this product 7701 Highway 41 N Evansville IN 47725 Phone 812 867 2421 Fax 812 867 142...

Page 2: ...hart 5 Stake and Pole Layout 5 Tent Layout 6 Staking 6 Lacing 6 Lace Flap 7 Attach Guys 7 Raise Poles 8 Winch Tensioning 8 Final Adjustment 9 Take Down 9 Walls 9 Flag Pole Installation 10 More Staking...

Page 3: ...ion NULCA prior to installation Prior to actual tent assembly be sure to look up down above below for obstacles pipes wires trouble etc Be alert to avoid contact of Tent poles with any overhead power...

Page 4: ...stallation of this Tent should be performed supervised by knowledgeable tent installers with a clear understanding of safety issues as well as the methods of anchoring The installer owner must read th...

Page 5: ...Pole 2 Alum Schedule 40 Pipe 8 65732 Side Pole 3 Alum Fluted Anodized 7 65723 Side Pole 3 Alum Fluted Anodized 8 22015 2 Web Guy 33200 Winch with Plate 23100 Winch Tool 23000 2 Web Guy Winch w Plate 2...

Page 6: ...place stakes through stake bar and winch plate where shown For single guys with stakes place stake through web guy ring Drive stakes 2 0 Stake Bar Stake driven through hole in bar and winch plate Sta...

Page 7: ...aps together Walk on tent with stocking feet for protection of fabric Insert flap on loop side between flaps of hole side Attach Guys Attach snaps of guys thru both plates at lace Keep guys very loose...

Page 8: ...e tent so that bottom of poles are positioned on their respective marks Tension guy webs with ratchets all around tent until poles are vertical and plumb Do not over tension The following tensioning s...

Page 9: ...g all poles 1 Spread ground cover 2 Loosen tension on all web winches 3 Slant side poles inward 4 Remove center and side poles 5 Reverse installation steps 6 Store tent in a cool dry area Never store...

Page 10: ...o pole 1 Fit center pole holes of mating fabric pieces together and lace a couple of holes each side 2 Underneath tent slide flag pole up thru both top hole rings 3 Slide collar with knob set screw do...

Page 11: ...11 MORE STAKING LAYOUTS Stake as shown above Guys are at 1 0 less than side pole height typ...

Page 12: ...12 QUEEN KING MIDS LEFT RIGHT DESIGNATION Hole Queen Hole Queen Loop Queen Loop Queen Hole King Hole King Loop King Loop King LEFT PLAN VIEW SIDE VIEW LEFT RIGHT RIGHT...

Page 13: ...Q VLWH 6WDNLQJ LQIRUPDWLRQ SURYLGHG LQ WKH LQVWDOODWLRQ LQVWUXFWLRQV LV QRW D VXJJHVWLRQ DERXW ZKDW LV QHFHVVDU WR PHHW D VLWH VSHFL F ORDG RU DGGLWLRQDO LPSRUWDQW LQIRUPDWLRQ FRQVXOW 7KH 3URFHGXUDO D...

Reviews: