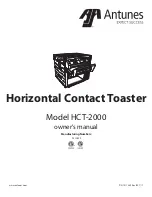
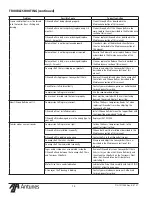
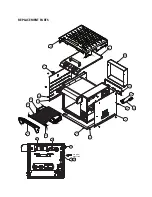
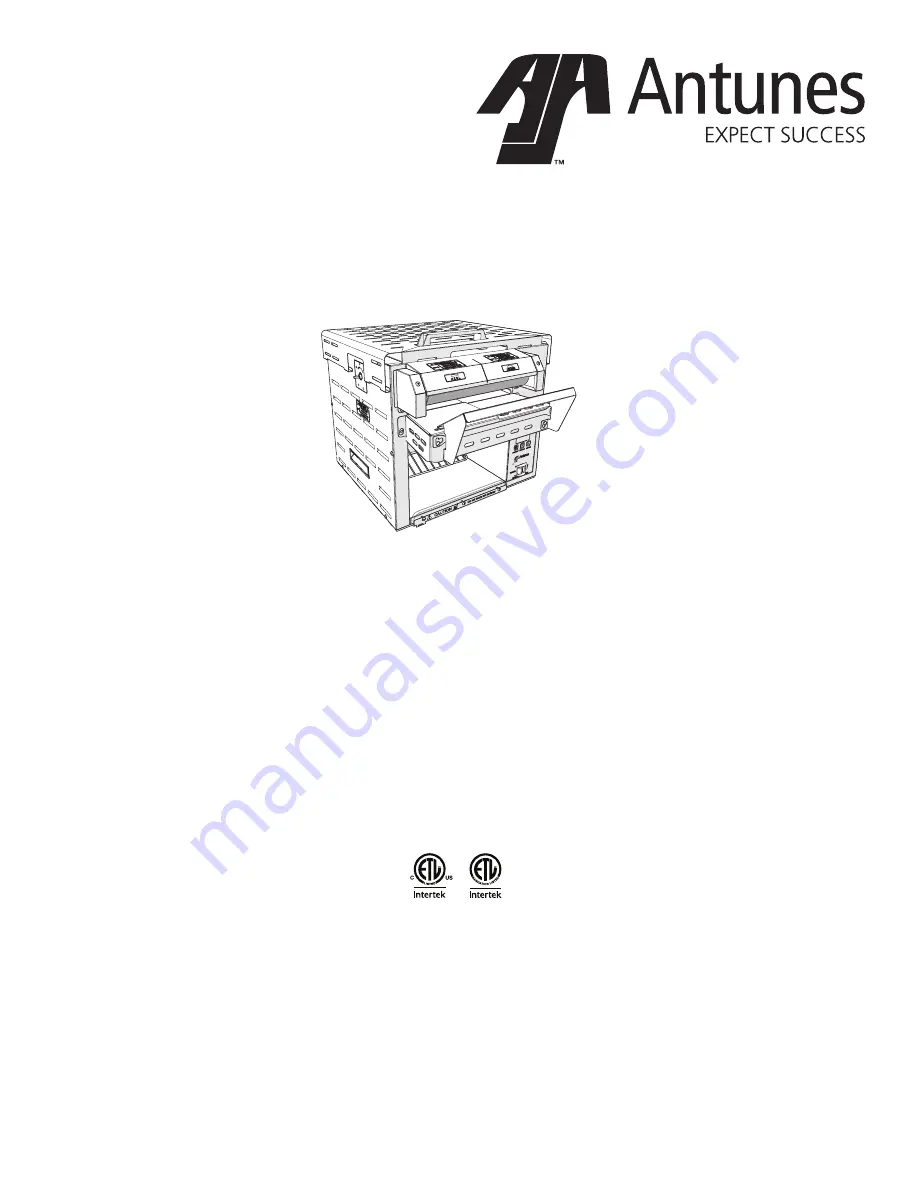
background image

P/N 1011369 Rev. B 07/17

Horizontal Contact Toaster

owner’s manual

Model HCT-2000

Manufacturing Numbers:

9210322

www.antunes.com

Summary of Contents for HCT-2000

Page 1: ...P N 1011369 Rev B 07 17 Horizontal Contact Toaster owner s manual Model HCT 2000 Manufacturing Numbers 9210322 www antunes com ...

Page 2: ...d are not covered under warranty The warranty does not extend to Damages caused in shipment or dam age as result of improper use Installation of electrical service Normal maintenance as outlined in this manual Malfunction resulting from improper maintenance Damage caused by abuse or careless handling Damage from moisture into electrical components Damage from tampering with removal of or changing ...

Page 3: ...stall ing the Silicone Belt Pin Failure to use the Release Sheet may result in damage to the equipment and loss of warranty coverage WARNINGS Be advised of the following warnings when operating and performing maintenance on this unit If the supply cord is damaged it must be replaced by the manufacturer or its service agent or a similarly qualified person in order to avoid a hazard Do not modify th...

Page 4: ...NS B C A Model Mfg No Width A Depth B Height C HCT 2000 9210322 20 25 32 523 mm 26 30 32 684 mm 18 13 32 467 mm Model Volts Watts Amps Hertz Plug Description Configuration HCT 2000 9210322 208 2400 12 50 60 6 20P 20 Amp 250 Volt Right Angle ...

Page 5: ... the Top Cover and Heat Shield 7 Plug in the power cord Figure 1 Installing Release Sheet CAUTION Bread may burn Therefore toasters must not be used near or below curtains or other combustible walls and materials Failure to maintain safe operating distances may cause discoloration or combustion Figure 2 HCT 2000 Toaster Figure 3 Bun Compression Setting Figure 4 Components Bun Thickness Adjustment ...

Page 6: ...djust the following settings Platen Heater Temperature Auxiliary Heater Temperature Motor Speed Temperature Units Manager Mode also allows an operator to view but not adjust the Ambient Temperature of the Control Compartment 1 Turn the unit off 2 Turn the power on while holding the PROGRAM button Continue to hold the button until ENA appears on the display after approximately 10 seconds 3 Release ...

Page 7: ... The unit will not restart until the control compartment ambient temperature falls below 140 F 60 C PO will flash if the incoming power drops below 190 volts The toaster will shut down StoP will flash when the motor has stopped for seven continuous seconds SpEd will flash when the motor speed has dropped 25 below the setpoint for 30 con tinuous seconds ERROR CODES If any of the following Error Cod...

Page 8: ...e most recent development from Antunes the recognized leader in bun toasting within the foodservice industry This new toaster designed specifically for Arby s restaurants features a space saving horizontal design with two lanes for toasting heels and crowns With a front load and front return the Horizontal Contact Toaster can be easily integrated into any prep line The included bun chute delivers ...

Page 9: ...lease Sheet or Silicone Belts WARNING Failure to use Release Sheets may result in damage to the unit and loss of warranty coverage Fill a clean 1 6 size 6 inch deep s s pan with hot Detergent Solution a sec ond pan with clean rinse water and a third pan with Sanitizer Solution Place a clean white towel in each pan and place near toaster Wipe the Bun Load Platform Wipe both sides of the Silicone Be...

Page 10: ...e Release Sheet Bracket onto the Bun Load Platform Insert the loose end of the Release Sheet into the toaster Figure 1 Turn the unit on and allow the Conveyor Belt to draw the Release Sheet into the unit Turn the unit off Figure 6 Removing Silicone Belt 4 Make sure flap of the Silicone Belt is accessible on the top side Pull the Silicone Belt Pin out of the zipper on the Silicone Belt Figure 6 5 D...

Page 11: ...t of the zipper on the Silicone Belt Figure 6 4 Remove the Bun Load Platform Figure 2 5 Face the front of the toaster Push the front of the conveyor IN and DOWN so it locks into place This releases the belt tension and allow it to be free 6 Remove the Silicone Belt 7 Remove one complete link from Conveyor Belt Chain by squeezing two links together to disconnect the chain on both sides Remove one l...

Page 12: ...lay flashes ERR 9 con tinuously Buns not toasting properly Loose Platen Thermocouple connection on Control Board or the Platen Thermocouple is open Re secure the Platen Thermocouple connection to the Control Board If the Control Display still reads ERR 9 check the Thermocouple for continuity Contact your maintenance person or Authorized Service Agency for service Failed Control Board Control Displ...

Page 13: ... Chain came off Sprocket s Reinstall Drive Chain Drive Chain needs lubrication Lubricate chain with Lubit 8 P N 2190152 Drive Motor has failed Contact your maintenance person or Authorized Service Agency for service Buns not toasting adequately Compression Settings are incorrect Use the recommended settings Temperature Setting is incorrect Verify that the Platen SP P is set to 570 F 297 C and the ...

Page 14: ...ce Compression Settings are incorrect Use the recommended settings Buns are not inserted into the toaster properly Buns must be inserted with the cut sides facing down on the correct Heel or Crown side New Silicone Belts do not fit Compression Settings are incorrect Set Bun Thickness Compression Knobs to 1 when replacing Silicone Belts or when adjusting the Conveyor Belt Chain Silicone Belts not i...

Page 15: ...REPLACEMENT PARTS AIR FLOW DIRECTION 77 79 69 20 87 22 9 35 29 4 88 5 41 88 21 89 91 92 93 94 95 96 ...

Page 16: ...0 31 37 65 43 2 65 66 82 63 62 64 83 1 40 71 72 84 68 85 87 23 71 86 68 65 74 8 48 37 54 49 39 11 67 37 12 54 67 47 6 65 78 65 80 87 65 26 25 55 45 52 73 65 24 65 55 53 58 53 46 73 60 53 65 42 34 57 73 66 44 33 66 66 19 15 28 55 42 3 75 ...

Page 17: ...Od X 640 Lg 2 50 2140101 Adhesive Sealant Rtv A R 51 2140125 Lubricant White Ptfe A R 52 2150181 Sprocket 25B20 1 2 Bore 1 53 2150190 Sprocket 25B28 1 2Bore SteppedTooth 4 54 2150317 Cam 2 55 2150384 Bearing Assy HighTemp 1 1 8 Od X 1 2 Id 4 56 2150421 Cam Shaft 1 57 2150430 Shaft Idler 1 58 2150431 Shaft Drive 1 59 2150432 Chain Drive 1 60 2180303 Spacer Teflon 2 61 3040105 Nut Hex Keps 4 40 1 62...

Page 18: ...18 P N 1011369 Rev B 07 17 WIRING DIAGRAM ...

Page 19: ...19 P N 1011369 Rev B 07 17 NOTES ...

Page 20: ... to abuse misuse dropping of unit shock loads or exceeding maximum weight capacity 4 lbs This warranty does not cover water con tamination problems such as foreign material in water lines or inside solenoid valves It does not cover water pressure problems or failures resulting from improper incorrect voltage supply This warranty does not cover Travel Time Mileage in excess of 2 hours 100 miles 160...

Reviews: