
Universal 2 aquaBUBBLER pre-installation guide
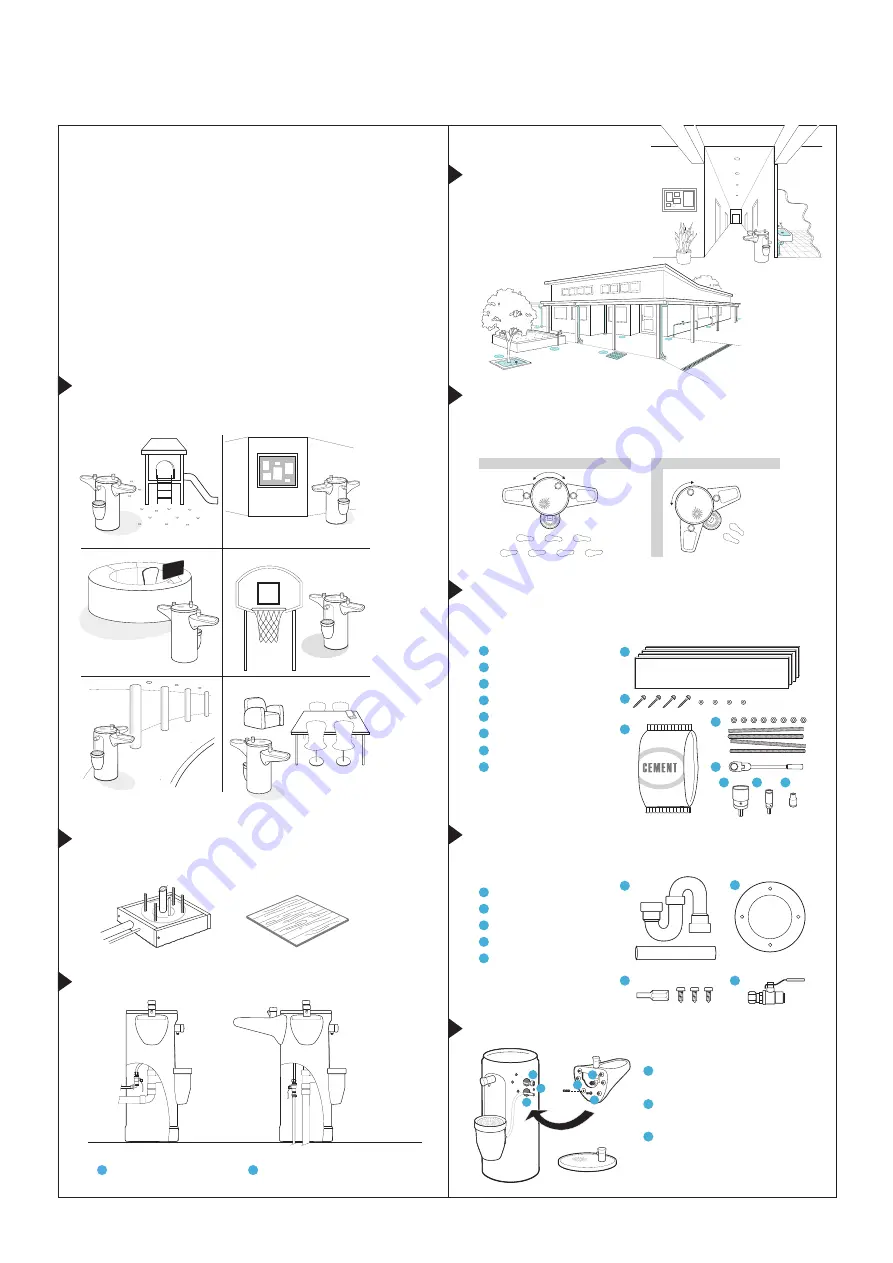
What location is best?
Access to water and drainage
Note: Blue depicts areas that are
either water or drainage
UA 2 aquaBUBBLER lid orientation options
Depending on where you install the UA aquaBUBBLER, you can
orientate the lid to best suit
WA L KWAY
WA L L
WA L L
The following step by step guide will help you organise the
installation of your UA 2
aquaBUBBLER with water bottle re-fill
station.
This will help you prepare for consultation with your plumber
and eliminate any surprises!
A
typical installation should take three to four hours, depending
on location.
The
UA 2
aquaBUBBLER must be installed by a certified
plumber; failure to do this will void all warranties.
PLAYGROUND
FOYER
CORRIDOR
UA 2 aquabubbler plumbing options
What can the UA 2 aquaBUBBLER be installed onto?
Concrete pad or timber floor
Where can I install an UA 2 aquaBUBBLER?
Indoor and Outdoor
W A
S T E
W A
T E R
Product Code :
AB2UA14
What materials
/
tools will the plumber need?
Depending on the install type, the following is required
UA aquaBUBBLER kit contents
Your UA aquaBUBBLER comes with the following…
UA aquaBUBBLER
S-Trap, waste pipe
Security drill bit
Base mounting plate
Isolation valve
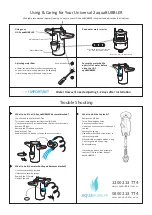
How to attach the UA protrusion?
retro fit through the side up through the center
Connect the Flexi hose to the
compressed elbow
Connect the waste pipe to black
director
Screw the wheelchair pod to the
body using a 5mm allan key
1
1
1
1
2
2
3
3
4
5
4
1
2
3
4
5
6
7
8
5
2
2
2
3
3
3
2
1
Timber boxing foundation
Screws and washers
Bag of cement
10 mm threaded rod and nuts
Flexible head ratchet wrench
40 mm hole saw
15 mm hole saw
10 mm socket
1
2
3
4
5
6
7
8


