


adjusted for the 10 unit grid
INFUSIONS
®
Accent Canopies
Assembly and Installation Instructions
1. PRODUCT DESCRIPTION
Infusions
®
Accent Canopies are available in three sizes
(2' x 5', 2' x 6', and 4' x 10') and a wide variety of translucent
and aluminum finishes. 2' x 5' and 2' x 6' canopies can be
installed as hills or valleys with either 60º or 90º arcs. 4' x 10'
canopy hill or valley arcs can be either 30º or 50º.
Infusions Canopies can be suspended individually or linked
together in a variety of ways, including side-to-side and
end-to-end. They may be suspended from the building
structure or one end may be attached to a wall.
2. DESIGN AND INSTALLATION LIMITATIONS
Infusions panels should always be installed in accordance
with all applicable building codes and regulations.
Do not cut holes in or drill through Infusions panels. Doing so
may cause the panel to bend in an irregular fashion.
Do not allow panel to get wet.
Panels are susceptible to “wicking.” If the panel is placed
in a damp or wet area, water may “wick” up through the
panel.
The lowest point of a suspended Infusions panel
should be at least 7'-6" above the finished floor
surface.
Canopies must be suspended with the extrusions
level and the tension cables no more than 30° off horizontal.
Infusions panels are not approved for exterior application.
Polycarbonate panels can be damaged by exposure to high
temperatures. Panel temperature should not be permitted to
exceed 100º F after the tensioning cables have been installed.
Follow these guidelines for minimum distance from standard
light sources:
Lamp Type
Label Wattage
Minimum Distance
Halogen FL XL
PAR 30
60
14"
Incandescent Bulb
120
15"
Quartz Halogen
Work Light
500
23"
3. FIRE PERFORMANCE
Infusions Canopies, as with other architectural features
located at the ceiling, may obstruct or skew the planned
fire sprinkler water distribution pattern or possibly delay or
accelerate the activation of the sprinkler or fire detection
systems by channeling heat from a fire either toward or
away from the device. Designers and installers are advised
to consult a fire protection engineer, NFPA 13, and their
local codes for guidance where automatic fire detection and
suppression systems are present.
IMPORTANT:
For proper fire performance, do not install
polycarbonate panels so that any portion of the panel is
suspended directly above any portion of an aluminum panel.
Infusions Canopies have been tested according to NFPA 286
and are equivalent to Class A Interior Finish as defined in
Chapter 8 of the International Building Code.
Metal panels are non-combustible.
Contact TechLine customer support at 1 (877) 276-7876 for
specific US and Canadian fire performance data.
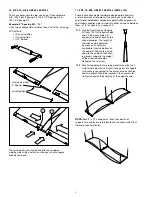
4. PANEL KIT CONTENTS
Infusions Canopy Panel Kit
Kit Contents:
• Flat Infusions Panel (1 or 2) with extrusions attached
• Cables to form arcs
NOTE:
Panel extrusions for nominal 4' x 10' panels are 48-1/2"
long. Suspension points for those panels are 44-1/2" apart.
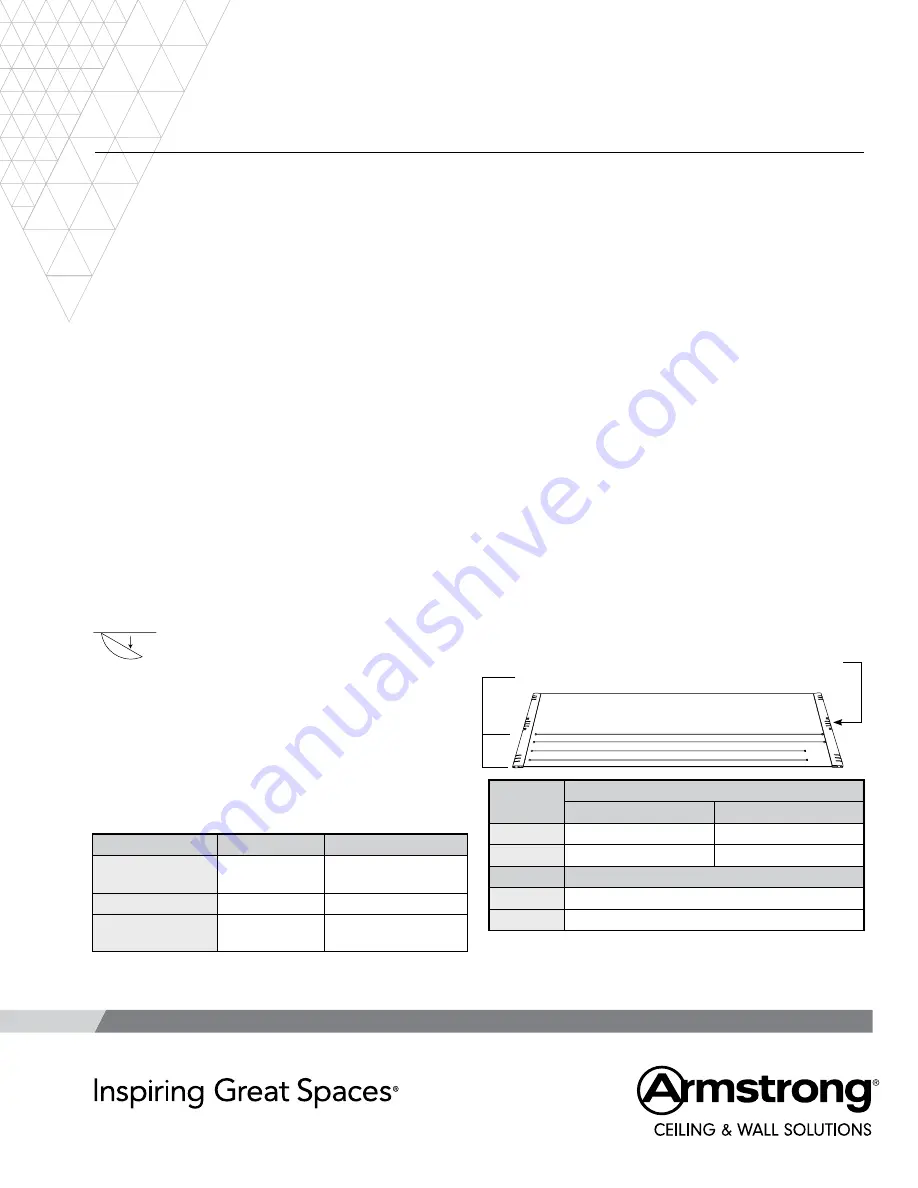
Basic Canopy Kit A
_30°
<
Tension Cable Length
Arc
2' x 5'
2' x 6'
60°
58"
69-3/4"
90°
55"
65-3/4"
Arc
4' x 10'
30°
120"
50°
117-3/10"


