background image


950-0052-01r0_fmt_en-US 


1 of 20


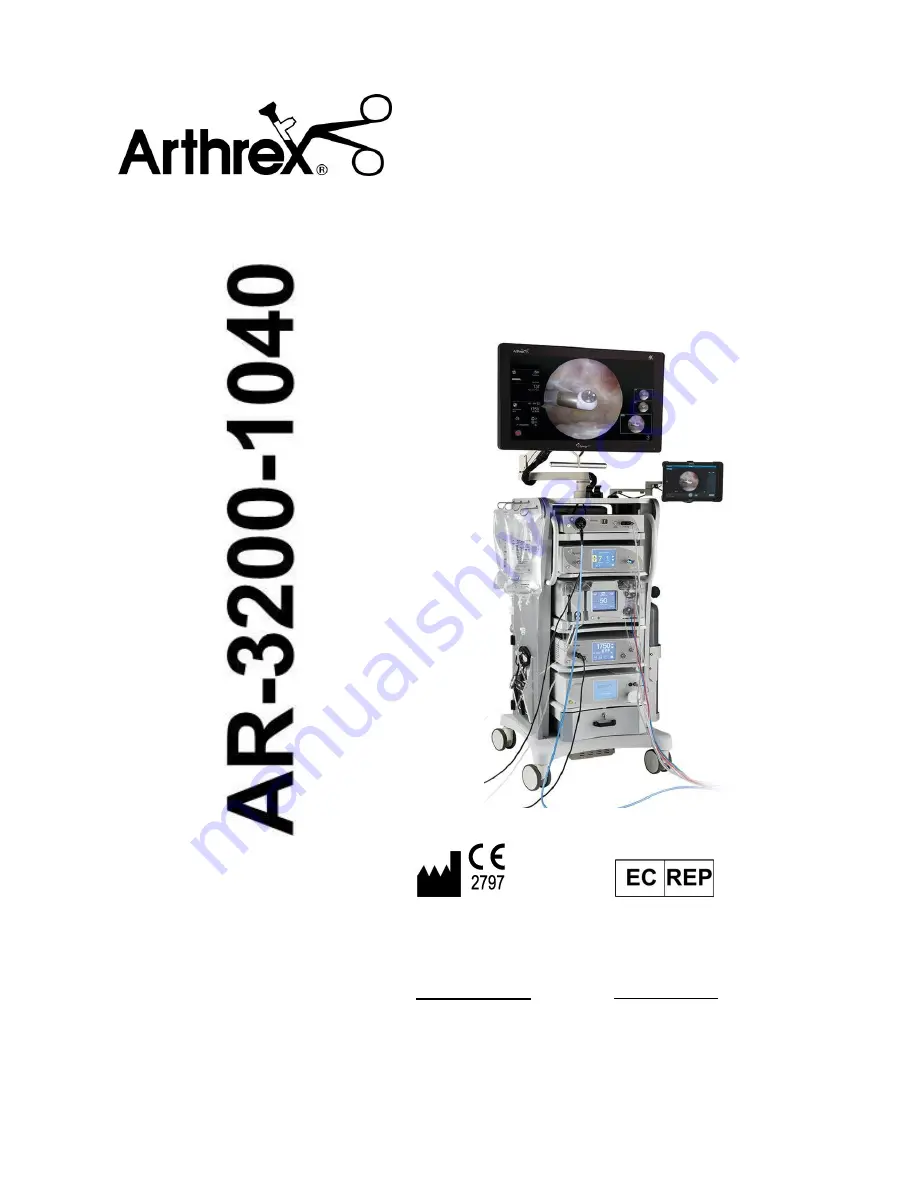
Synergy

HD3


 Cable Kit, Arthrex 

Shaver and Pump 


The  Synergy

HD3

  Cable  Kit,  Arthrex  Shaver  and  Pump 

Instructions for Use provides important information for the 
safe operation and installation of the accessory kit.   Read 
this User’s Guide thoroughly prior to using this system and 
keep it in an easily accessible place for use by all operating 
personnel.  Read  and  follow  all  safety  warnings,  cautions 
and precautions. 


Arthrex, Inc. 

1370 Creekside Blvd. 
Naples, FL 34108, USA 
+1 (800) 934-4404 
www.arthrex.com 
 
Technical Support  
1-888-420-9393 


Arthrex GmbH 

Erwin-Hielscher-Strasse 9 
81249 München, Germany 
+49 89 909005-0 
www.arthrex.de 


950-0052-01 Rev. 0 
09/2020


Summary of Contents for AR-3200-1040

Page 1: ... kit Read this User s Guide thoroughly prior to using this system and keep it in an easily accessible place for use by all operating personnel Read and follow all safety warnings cautions and precautions Arthrex Inc 1370 Creekside Blvd Naples FL 34108 USA 1 800 934 4404 www arthrex com Technical Support 1 888 420 9393 Arthrex GmbH Erwin Hielscher Strasse 9 81249 München Germany 49 89 909005 0 www ...

Page 2: ...ereof without obligation to notify any person of such revision or changes unless otherwise required by law Product Warranties Limitation of Liability Product Warranty See individual components of the SynergyHD3 Cable Kit Arthrex Shaver and Pump System for component warranties No claim shall be allowed on Products that have been altered neglected damaged or stored improperly Arthrex shall promptly ...

Page 3: ...itial Use of the Device 5 1 6 Unpacking and Inspecting the Device 5 1 7 Returning the Device 5 2 0 SynergyHD3 Cable Kit Arthrex Pump and Shaver Equipment List 6 3 0 SynergyHD3 Cable Kit Arthrex Pump and Shaver Equipment Interconnect Diagram 7 4 0 SynergyHD3 Cable Kit Arthrex Pump and Shaver Operation Instructions 10 5 0 Maintenance 18 5 1 Cleaning 18 5 2 Troubleshooting 19 ...

Page 4: ...ING The safety and or health of the patient user or a third party is at risk Comply with this warning to avoid injury to the patient user or third party PRECAUTION This contains information concerning the intended use of the device or accessory Damage to the equipment is possible if these instructions are not followed NOTE A note is added to provide additional focused information 1 3 1 WARNINGS Pr...

Page 5: ...N 60950 for Information Technology Equipment 6 CAUTION Do not install the device in a location near heat sources such as air ducts or radiators and do not expose the device to direct sunlight excessive dust or mechanical vibration 1 6 Unpacking and Inspecting the Device Upon receipt carefully unpack the System and accessories Ensure contents are complete and are free from damage If any damage is n...

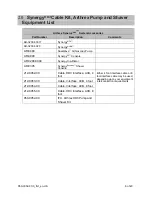
Page 6: ...py Pump AR 9800 SynergyRF Console AR 3290 0004 Synergy Insufflator AR 8305 SynergyResection Shaver Console 212 0052 00 Cable HD3 Interface ACB 4 foot Either 4 foot interface cable or 8 foot interface cable may be used depending upon your equipment interconnection requirements 212 0053 00 Cable Interface ACB 4 foot 212 0054 00 Cable Interface ACB 8 foot 212 0055 00 Cable HD3 Interface ACB 8 foot 95...

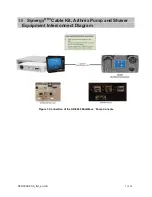
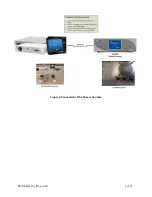
Page 7: ...950 0052 01r0_fmt_en US 7 of 20 3 0 SynergyHD3 Cable Kit Arthrex Pump and Shaver Equipment Interconnect Diagram Figure 1 Connection of the AR 6480 DualWave Pump Console ...

Page 8: ...950 0052 01r0_fmt_en US 8 of 20 Figure 2 Connection of the Shaver Console ...

Page 9: ...950 0052 01r0_fmt_en US 9 of 20 Figure 3 Connection of the Pump and Shaver ...

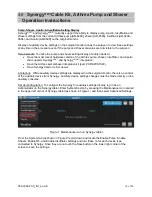
Page 10: ...gyHD3 and SynergyUHD4 integration Have the Arthrex pump shaver integration kit part AR 3200 1040 Have Synergy Version x 6 or newer Limitations While auxiliary device settings are displayed on the surgical monitor there is no control of the auxiliary device from Synergy Auxiliary device settings changes must be made directly on the auxiliary consoles Set Up Configuration To configure the Synergy fo...

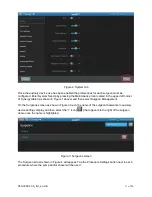
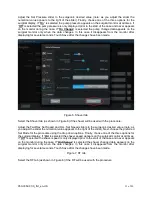
Page 11: ...as shown in Figure 1 above and then select Surgeon Management On the Surgeons screen as show in Figure 3 touch the name of the surgeon that wants to auxiliary device settings display and then select the I icon that appears to the right of the surgeon name once the name is highlighted Figure 3 Surgeons screen The Surgeon screen shown in Figure 4 will appear Tap the Procedure Settings button next to...

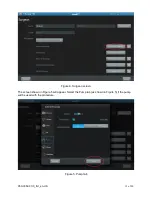
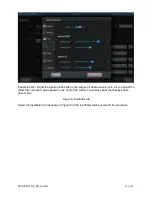
Page 12: ...950 0052 01r0_fmt_en US 12 of 20 Figure 4 Surgeon screen The screen shown in Figure 5 will appear Select the Pump tab as shown in Figure 5 if the pump will be used with the procedure Figure 5 Pump tab ...

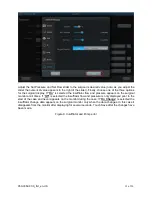
Page 13: ...tab as shown in Figure 6 if the shaver will be used with the procedure Adjust the Fwd Rev Set Speed and Osc Set Speed sliders to the surgeon s desired value note as you adjust the slider the numerical value appears to the right of the slider Next choose the preferred Set Mode for the procedure using the drop down options Finally choose one of the three options for the surgical display If On is sel...

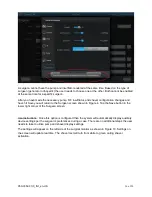
Page 14: ... the surgeon s desired value note as you adjust the slider the numerical value appears to the right of the slider Touch Save after the changes have been made Figure 8 Insufflator tab Select the Insufflator tab as shown in Figure 6 if the Insufflator will be used with the procedure ...

Page 15: ...tor flow and pressure appears on the surgical monitor at all times If Off is selected the insufflator flow and pressure is only displayed prior to the start of the case and never appears on the monitor during the case If On Change is selected the insufflator change data appears on the surgical monitor only when the data changes In this case it disappears from the monitor after displaying for sever...

Page 16: ...return to the Surgeon screen shown in Figure 4 Tap the Save button in the lower right corner of the Surgeon screen Use Instructions Once this option is configured then the system will automatically display auxiliary device settings per the surgeon s preferences during a case There are no additional steps the user needs to take to utilize pump and shaver display settings The settings will appear on...

Page 17: ...nts them removed then this can be done via the Synergy tablet During a case tap the settings icon to the left of the tablet as shown in Figure 11 Figure 11 Settings icon on tablet Tap either the pump or shaver icon to the left of the screen to open the pump or shaver settings menu From these menus staff can choose to display pump or shaver settings on the surgical display or hide those settings As...

Page 18: ... ways to protect your investment and avoid non warranty repairs For Maintenance requirements see the Equipment Manuals for the SynergyHD3 SynergyUHD4 DualWave Pump Shaver Display System Synergy Insufflator and Synergy ApolloRF devices Your authorized Arthrex service department is the most knowledgeable about the Arthrex Medical Camera Systems and or camera heads and will provide competent and effi...

Page 19: ...rm pump shaver Apollo Insufflator enabled in settings Set surgeon preference to display settings Settings appear as 0 on monitor Pump shaver Apollo Insufflator settings are set to 0 Integration cable is disconnected Pump shaver not powered on Confirm pump shaver Apollo Insufflator settings are not 0 Confirm integration cables are connected Ensure pump shaver Apollo Insufflator powered on Settings ...

Page 20: ... Arthrex Inc 1370 Creekside Blvd Naples FL 34108 USA 1 800 934 4404 www arthrex com Technical Support 1 888 420 9393 Arthrex GmbH Erwin Hielscher Strasse 9 81249 München Germany 49 89 909005 0 www arthrex de 950 0052 01 Rev 0 09 2020 ...

Reviews: