background image

USER MANUAL

4&8 CHANNELS 

DIGITAL VIDEO RECORDER

Summary of Contents for DIGITAL VIDEO RECORDER

Page 1: ...USER MANUAL 4 8 CHANNELS DIGITAL VIDEO RECORDER ...

Page 2: ... GENERATES USES AND CAN RADIATE RADIO FREQUENCY ENERGY AND IF NOT INSTALLED AND USED IN ACCORDANCE WITH THE INSTRUCTION MANUAL MAY CAUSE HARMFUL INTERFERENCE TO RADIO COMMUNICATIONS OPERATION OF THIS EQUIPMENT IN A RESIDENTIAL AREA IS LIKELY TO CAUSE HARMFUL INTERFERENCE IN WHICH CASE THE USER WILL BE REQUIRED TO CORRECT THE INTERFERENCE AT HIS OWN EXPENSE THISCLASSADIGITALAPPARATUSMEETSALLREQUIRE...

Page 3: ...TES CONCERNING THE MONITORING AND RECORDING OF VIDEO AND AUDIO SIGNALS ASTAK SHALL NOT BE HELD RESPONSIBLE FOR THE USE OF THIS SYSTEM IN VIOLATION OF CURRENT LAWS AND STATUTES COPYRIGHT THE TRADEMARKS MENTIONED IN THE MANUAL ARE LEGALLY REGISTERED TO THEIR RESPECTIVE COMPANIES 3 The lighting flash with arrowhead symbol within an equilateral triangle is intended to the user to the presence of insin...

Page 4: ...ON 14 3 0 SYSTEM SETUP 15 3 01 USER LOGIN 15 3 02 MAIN INTERFACE 15 3 03 SHORTCUT MENU 16 3 04 MAIN MENU 16 3 05 MENU SETUP INTERFACE GUI 17 3 1 RECORD SEARCH SETUP 18 3 2 RECORD SETUP 20 3 3 HARD DISK SETUP 21 3 4 BASIC SETUP 22 3 41 SYSTEM LANGUAGE SETUP 22 3 42 DATE TIME SETUP 23 3 43 PASSWORD 23 3 44 DISPLAY SETUP 24 3 45 VIDEO AUDIO SETUP 25 3 46 EXIT 25 3 5 ADVANCE SETUP 26 3 51 ALARM SETUP ...

Page 5: ...INTERFACE 36 4 31 LIVE 36 4 311 PTZ CONTROL 36 4 312 PLAY CONTROL 37 4 313 OTHER OPERATION 37 4 32 REPLAY 38 4 33 SETUP 40 4 331 RECORD 40 4 332 ALARM 40 4 333 PTZ 41 4 34 NETWORK 41 4 35 SETTING 42 4 36 HOST INFO 42 APPENDIX A HARD DISK INSTALLATION 43 APPENDIX B PRODUCT PHOTO 44 APPENDIX C Mobile Monitor Instructions 45 TABLE OF CONTENTS ...

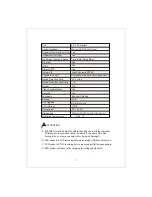
Page 6: ... Arrangement Resolution Real time 704 480 NTSC 704 576 PAL Recording 704 240 NTSC 704 288 PAL 1 0 INTRODUCTION 1 2 SPECIFICATIONS Image System NTSC PAL 704 576 704 480 Video Input BNC 4 4 Channel BNC 8 8 Channel Video Output BNC 2 Audio Input RCA 4 4 Channel RCA 8 8 Channel Audio Output RCA 1 Live Display Rate 4 30 Frame Sec 4 25 Frame Sec Storage Media 1 Hard Disk SATA Recording Mode Manual Sched...

Page 7: ... Dimensions Operation Temperature ATTENTION A PLEASE format the hard disk before changing the recording resolution Different record resolution cannot be stored in the same hard disk Failing to do so may cause data lost or hard disk damage English Chinese USB Network USB DC 19V 3A 300mm W 230mm D 55mm H 0 45 B DVR needs to STOP recording before processing USB backup function C DVR needs to STOP rec...

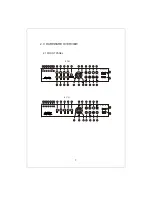
Page 8: ...P REC PAUSE FF PLAY REW USB MOUSE USB 2 0 H 264 8CH 1 2 3 4 5 6 7 8 9 10 16 11 12 13 14 15 17 18 19 20 21 22 23 24 26 27 28 29 30 25 31 REC ALM FULL HDD LINK POW OK 1 2 3 4 QUAD MENU EXIT REC STOP REC PAUSE FF PLAY REW USB MOUSE USB 2 0 H 264 4CH 1 2 3 4 5 6 7 8 9 10 16 11 17 18 19 20 21 22 23 24 26 27 28 29 30 25 31 ...

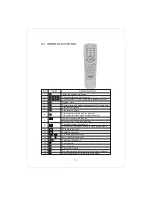
Page 9: ...el six Full Screen Number Six Channel eight Full Screen Number Eight 8 Channel five Full Screen Number Five QUAD Channel seven Full Screen Number Seven Eight Quad screen All cameras are displayed Move upward or increase the number Move downward or decrease the number Move leftward or decrease the number Move rightward or increase the number OK Press ok to enter or exit ok MENU EXIT Press MENU to e...

Page 10: ... 5 AUDIO IN 6 AUDIO IN 7 AUDIO IN 8 Camera 1 audio input with RCA connector Camera 2 audio input with RCA connector Camera 3 audio input with RCA connector Camera 4 audio input with RCA connector Camera 5 audio input with RCA connector Camera 6 audio input with RCA connector Camera 7 audio input with RCA connector Camera 8 audio input with RCA connector AUDIO OUT Audio output POWER DC 19V 3A input...

Page 11: ... enter into Ptz control interface when at single live view The left mouse button pop up The right mouse button pop up Used to tune out the pop up menu Bounce the right mouse button to close pop up menu Forward to increase Backward reduction Up down directional keys Left right directional keys ok Select and save entry Fast Forward Fast backward Play video forward The frame press pause step to move ...

Page 12: ...the event list In motion detection record of Alarm setup the user can setup ON or OFF to record the motion event or not 5 When motion detection was triggered the color of camera title will be transformed into yellow In addition when external alarm was triggered ALARM text will be displayed on the screen 3 It s optional to activate relay 2 5 VGA OUTPUT VGA Output optional VGA output can connect wit...

Page 13: ...ontact alarm input connections into a camera passive infrared detectors Example 2 Connect alarm dry contact output to alarm normally open N O GND COM NO GND 485A 485B 232TX 232RX GND 12V 8 7 6 5 4 3 2 1 ALH IN GND GND COM NO GND 485A 485B 232TX 232RX GND 12V 8 7 6 5 4 3 2 1 ALH IN Com ALH IN GND COM N O 485A 485B 232TX 232RX GND 12V Alarm 1 8 4 Camera Alarm Input Grounding Alarm contact common gro...

Page 14: ... on the shortcut menu where you can operate directly on the menu Click the left key to enter into the setting interface Click the left key to zoom in the window on the live view and playback video Double click the left key can exit to the live view and playback multi window interface Volume adjustment color adjustment PTZ setting and VGA border operation It is for setting the single channel for vo...

Page 15: ...ideo input the corresponding channel will be displayed in the main interface screen monitor In the main interface double click any channel the channel can be monitored to maximize the screen display double click again returned four channel interface in the main interface right click pop up shortcut menu click the left button select the menu item or click the Exit menu shortcut menu outside the reg...

Page 16: ...ke the setting for submenu valid It will no use when exit directly This DVR have a special feature when you move the mouse to an icon there will have the explanation information showed automatically KEYLOCK Click to lock the menu can immediately lock the system interface need to enter the login interface the device number in brackets shows and user password to unlock it Lock interface after landin...

Page 17: ...FACE GUI Press MENU on the front panel or remote control The main menu includes SEARCH RECORD HDD BASIC ADVANCE EXIT A RECORD SEARCH SETUP B RECORD SETUP C HARD DISK SETUP D BASIC SETUP E ADVANCE SETUP F EXIT Exit current menu ...

Page 18: ...alarm recording Grounding means no recording Click any date in this frame can search the recording status of that day the searching result will be showed in the below date frame 2 DATE It will show all the recording status in this day you can playback the record file in this period via click the corresponding period 3 PLAYBACK You can press or input number directly to setup playback time After set...

Page 19: ...ss PLAY to enter into playback interface If the all channels have recording files it will playback all windows at the same time If setup as on in the RECORD TIME in BASIC SETUP it will show the date time when playback record file If setup as off it will not display time When playback Can be on the screen with a mouse click to play slowly press to speed reverse play also can press to pause and fram...

Page 20: ...HANNEL You can select all channel or just one channel WEEKLY You can select all everyday weekend workday or each day DAILY There are three modes ALARM GENERAL NO RECORD if you select this that means all the day will record as this mode and if you don t want some period to record you can cancel it via NO RECORD button RECORD SIZE There are four options 15min 30min 45min 60min that means it will pac...

Page 21: ...ss than 4G it will delete HDD earliest recording file and it will stop deleting when the space is 10G CLOSE means when HDD space less than 500MB it will stop recording and an prompt will display H in live view HDD LED light Internal body buzzer alarm there are alarm output FORMAT HDD Click FORMAT under the appropriate check box then click FORMAT HDD press the screen prompts to complete the FORMAT ...

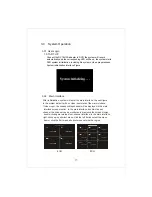
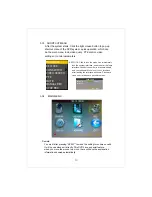
Page 22: ...ate security display video audio and exit six options OK 3 41 SYSTEM LANGUAGE SETUP Move cursor to select SYSTEM LANGUAGE and press to enter into the system language setup interface System language have Chinese and English two options you can setup the language you want in here Remark The device will restart when you setup system language success OK ...

Page 23: ...ST haven t finished yet DEFAULT The default factory settings APPLY Save the settings have been modified 3 43 PASSWORD Move the cursor to password Icon highlighted when selected press to enter into the setting interface OK DEVICE ID Press the number keys or the left and right arrow keys to setup the unite ID PASSWORD DISABLE do not use passwords ENABLE Use Password USER PASSWORD Set user s password...

Page 24: ...ITY LUMINOSITY CONTRAST SATURATION DEFAULT APPLY EXIT 5 31 31 31 Click the left mouse button directly drag the cursor to set colors including chroma brightness contrast and saturation press APPLY to save the parameters PREVIEW ON Means the channel is allowed to view the live mode OFF means not PREVIEW TIME ON Means insert clock in live view OFF means not RECORD TIME ON Means insert clock in record...

Page 25: ...00 480 CAMERA SYSTEM press to switch camera system has two options PAL and NTSC VOLUME SETUP move cursor to VOLUME SETUP press to enter into volume setup interface press or number keys or directly drag the cursor to adjust volume OK OK OK 3 46 EXIT Move the cursor to EXIT Icon highlighted when selected press to back to main menu VID AUD SETUP VGA RESOLUTION CAMARA SYSTEM 1024 768 NTSC VOLUME SETUP...

Page 26: ...rsor to ADVANCE SETUP Icon highlighted when selected press to enter into setting interface OK Advanced Features include Alarm settings System information Motion detection Mobile phone monitoring System maintenance PTZ Network setting ...

Page 27: ...s a remark in live view No enough space please change HDD after shutdown VIDEO LOSS ON when one channel has no video input it will display video loss in live view ALARM MANAGE There are three items alarm output buzzer and post REC OUTPUT when an alarm triggered the alarm output time will be 0 second 10 seconds 20 seconds 40 seconds and 60 seconds BUZZER buzzer calling time setup when alarm trigger...

Page 28: ... interface mainly display system hardware features and firmware version include device type software version MAC address serial number OK S0FT VERSI0N V01000002 UI VERSI0N V0001 MAC ADDRESS SERIAL N0 SYSTEM INFO 00 11 22 33 44 55 1234567890 SURE EX I T Note Users can not modify MAC ADDRESS or other users may have MAC ADDRESS Conflict ...

Page 29: ...e cursor to corresponding setting press to enter regional setting interface red area means it have activated motion detection transparent block means it have not activated motion detection OK Use the left and right arrow keys or use the mouse to move the cursor in a small pane green frame means the cursor has moved to this pane press to select or cancel motion detection of this small pane when set...

Page 30: ...t channels MOBILE NETWORK Select different mobile network from the options of 3G 2 5G and 2 75G and switch different network SERVICE PORT You can set the range of 1024 65535 this port on the router needs to map and set methods and network settings in the port mapping in the same manner In the Router Management Interface forwarding rule and fill in the phone monitor server port number IP address an...

Page 31: ...ETTINGS RESTART AUTO RESET When switch is on you can setup the time for device to restart SYSTEM UPDATE Copy the update file to the root directory of the thumb drive and insert it into USB 2 0 then press to upgrade the firmware and it will display the process of the system upgrading as following OK DEFAULT Restore all the settings as the factory setting WARNNIG UPDATING UPDATEING DON T Go to the U...

Page 32: ...and the default is Pelco D BAUD RATE Select the different baud rate for your PTZ there are 1200 2400 4800 and 9600 DATA BIT There are 5 6 7 8 options to select default setting is 8 STOP BIT There are 1and 2 to select the default setting is 1 VERIFY There are None Odd Even Mark Space to select the default setting is none ADDRESS Fill the code of respective PTZ NEXT PAGE Go to the next page is set A...

Page 33: ...e username and password of the internet service offer and apply it and reboot the system After rebooting the device will save it and set the PPPOE as default network type If succeed the IP address will be automatically config as dynamic IP of WAN MEDIA PORT transfers video data between client and device WEB PORT setup the port of IE browser via HTTP IP ADDRESS setup the IP address press number key...

Page 34: ...tomatically config as dynamic IP of WAN DNS press number keys to change the value DDNS move the cursor to it and press OK to enter into the interface as followings Select the PPPOE and enter the interface as followings DDNS There are ON OFF and if there is a DDNS service please setup it as ON SERVICE There are 3 services to select 3322 dyndns perfecteyes HOST NAME Input the name of the host server...

Page 35: ...s 0080 you should input http 192 168 1 100 0080 The default port is 0080 and directly input http 192 168 1 100 to access the login interface as following Select English interface in the top left side Input username and password to enter into the system The username and passport is same as the ones set in DVR PASSWORD Administrator has all authorities operator has limited authorities who they can o...

Page 36: ...aperture to control the PTZ Click to up down left right control movement of the PTZ When hold on the one direction key the PTZ will keep circling as that direction after user press the stop key in the center of the wheel ZOOM Click ZOOM to zoom in and out Click FOCUS to focus Click IRIS to change the size of aperture PTZ PRESET PAN TILT POS Setup preset point You can control it via the below three...

Page 37: ...on Screen one four nine 16 images 4 313 OTHER OPERATION 1 Select one channel at preview screen the selected channel s frame will be change to RED double click left key enter to the selected channel single screen display 2 Click one Channel via left key at preview screen then click right key will occur window shortcut Menu see below picture You can open shut down and start this channel s record via...

Page 38: ...he recording information of current month The highlighted date means that day have recording video RED FRAME means the date is system date click the date will search that days recording file list For example the above picture display 2009 OCT 8th 9th have recording video and system date is 9th OCT 2009 currently search date is 9th OCT REPLAY SUN MON TUE WED THU FRI SAT OCTOBER 2009 ...

Page 39: ...ording video the recording video will playback meanwhile the file icon will change to and will occur the below picture play buttons The above purple progress bar shows download progress green progress bar shows playback progress Switch between pause play Stop play Fast play Slow play Pause at next frame PAUSE STOP F F SLOW NEXT FRAME ...

Page 40: ...alarm PTZ network setting and system information six menus 4 331 RECORD Click to enter into setup interface you can check the parameter settings as in GUI of DVR 4 332 ALARM Click to enter into setup interface you can check the parameter settings as in GUI of DVR SETUP RECORD ALARM ...

Page 41: ... PTZ Click to enter into setup interface you can check the parameter settings as in GUI of DVR 4 34 NETWORK Click to enter into setup interface you can check the parameter settings as in GUI of DVR PTZ NETWORK ...

Page 42: ... for traffic that matches internet this bandwidth does not include audio FILE SAVE PATH capture picture and recording video save path IE login password and DST settings you can check as DVR setting 4 36 HOST INFO Click to enter into system information interface see below picture this interface shows HDD status remain record time firmware version MAC Address and all the information is fixed SETTING...

Page 43: ...or correct jumper setting on master mode of the hard drive mounting the hard drive over DVR base by facing SATA interface to DVR main board Top down match the screw holes 3 Below picture indicates a DVR without a H D D installed 5 Hook up SATA cable and power cable to the hard drive as picture below 6 Replace top cover then hook up with power and monitor A hard drive status message will appear on ...

Page 44: ...44 APPENDIX B PRODUCT PHOTO K8008 Front Appearance K8008 back Appearance K8004 Front Appearance K8004 back Appearance ...

Page 45: ...Mobile Monitor Instructions PLAY STOP Smartphone 45 APPENDIX C Mobile Monitor Instructions ...

Page 46: ...n MAIN MENU ADVANCE MOBILE setup as follow Channel Please select the channel for wireless transmission Mobile Network Please select the network your SIM card support Mobile port This port should be open in the router otherwise you can t see the live view in mobile phone Remark This port can t be the same with any other port and different DVR should have different server port 46 ...

Page 47: ...download Please copy the installation program whose name is amplayersetup CAB from the attached CD to your mobile phone the default save path is My Documents 2 Click the program and start to install it just select default path when it asks you to select install path 47 ...

Page 48: ...3 Click install button to start installation 4 After installed click the QQeye icon to run the program 48 ...

Page 49: ...ect Press it to connect to DVR Setup Press it to enter into the interface to config the parameters for mobile phone monitor Button definition PTZ direction control left right up down area select zoom in zoom out focus aperture snapshot Remark Please make sure the parameters for PTZ in DVR is correct Snapshot default save path is Program QQeye photo 49 ...

Page 50: ...Password should be the same as IE Server the public IP or dynamoic domain name of DVR Server port this port is the mobile port you setup in DVR Channel setup the default channel you want to check Please press OK after you finished setup 7 Display mode Normal Full screen Remark Click screen can switch the display mode between normal and full screen 50 ...

Page 51: ...an Operating system 1 Please copy the install program whose name is amplayersetup CAB from the attached CD to your mobile phone the default save path is memory card As follow 2 Click the program to install it 51 ...

Page 52: ...tall path you want as the follow picture 4 Please select continue when you got the follow window and make sure your mobile phone can access to internet 5 You will get a message install finished after installed successfully 52 ...

Page 53: ...een achieved as follows Feature List Video Play Channel selection which can support the 1 16 road Password equipment PTZ Zoom Aperture adjustment Full Screen Play Image capture snapshots Set function Access method Server IP Port Username Password 53 ...

Page 54: ...hen you login you will find the window as follow Button definition CH1 CH2 PTZ up left zoom in focus aperture CH3 CH4 PTZ down right zoom out focus aperture Play Pause Full screen Normal Snapshot Setup Exit Remark Snapshot default save path is C Data Images 54 ...

Page 55: ...8 When you login for the first time please setup the network parameters first press Setup to enter into the interface as follow 55 ...

Page 56: ...ver port the server port is the mobile port you setup in DVR User name can be blank Password the same as IE Channel setup the default channel you want to check Please press Apply after you finished setup 9 Display mode Normal Full screen Remark Click screen can switch the display mode between normal and full screen 56 ...

Page 57: ...N73 N75 N76 N77 N78 N80 N81 N82 N91 N92 N93 N93i N95 N96 N97 E50 E65 E61 E61i E62 E60 E70 E71 E66 E90 5700 6110 6120 6220 6121 6122 6290 6110Navigator N80 3250 5500 5700 5320 5800 6210N 6220 6650F E63 E66 E71 N79 N85 N96 E61i I400 i408 i450 i458 i500 i550 I520 i560 i570 i558 G810 G818 I8510 Pocket PC 6 0 Pocket PC 6 0 686 696 696i 699 700 818 828 838 900 830 MUSE S1 CHT9000 P800 M700 C858 9100 911...

Page 58: ...and other intelligent machines are the most used in the two systems iPhone System coming soon N810 N800 N8 E870 E860 E800 E850 N7 MPX220 MPX Q8 Q7 V1000 P51 P50 O2 Cocoon O2 Flame O2 Helen O2 XDA Atom O2 XDA Graphite O2 XDA Zinc O2 Xda Argon O2 Cosmo O2 Xda Atom O2 Xda Orbit O2 Xda Stealth HP iPAQ rw6818 Hw6515 M930w P320 P560 LamborghiniZX1 P526 P735 P535 P750 P550 MS800 MS804 MS808 MS820 g Smart...

Reviews: