background image

User's Guide

Atech Flash Technology, Inc.

iCarta

Summary of Contents for iCarta

Page 1: ...User s Guide Atech Flash Technology Inc iCarta ...

Page 2: ...l Wall Mount Spacer for iPod Bath Tissue Holder Install AC Adapter Tabletop Use Charging your iPod Listening to your iPod Listening to your iPod shuffle Listening to other audio device Rechargeable Battery Controls and Indicators 9 Setup and Operations 10 11 Maintenace 12 Troubleshooting 12 13 Warranty Information 14 1 ...

Page 3: ...in installation such as a bookcase or cabinet that may impede the flow of air through the ventilation openings 3 Heat The unit should be situated away from heat sources such as radiators heat registers stoves or other appliances including amplifiers that produce heat 4 Power Sources The unit should be connected to a power supply only of the type described in the operating instructions or as marked...

Page 4: ...has been damaged B objects have fallen into or liquid has been spilled into the enclosure C the unit has been exposed to rain D the unit has been dropped or the enclosure damaged E the unit exhibits a marked change in performance or does not operate normally 12 Periods of Nonuse If the unit is to be left unused for an extended period of time such as a month or longer the power cord should be unplu...

Page 5: ...erly To eliminate interference try one or more of the following corrective measures Reorient or relocate the receiving antenna Increase the distance between the equipment and the radio or TV Use outlets on different electrical circuits for the equipment and the radio or TV Consult your dealer or an experienced radio television technician if the problem still exists Modifying or tampering with your...

Page 6: ... easily Mounting the iCarta We recommend the unit be mounted flush against the cabinet or wall 1 Position Mounting Template on your chosen location 2 Use a pencil to mark centerpoint of the guide hole 3 Take one of the Phillips Screws and press into the marked centerpoint 4 Remove backing on Mount template place adhesive side onto on wall 5 Use the Phillips Screwdriver and start tightening the scr...

Page 7: ...kside 7 Slide the unit down until it locks into place 8 Make any adjustments to the screws to have a tighter looser fit Once the unit is securely mounted connect the AC adapter plug into the jack on the side of the unit then plug the AC adapter into AC electrical outlet ...

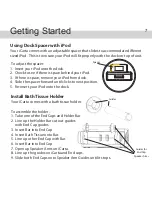
Page 8: ...e one of the End Caps and Holder Bar 2 Line up the Holder Bar cut out guides with End Cap guides 3 Insert Bar into End Cap 4 Insert Bath Tissue onto Bar 5 Line up other End Cap with Bar 6 Insert Bar into End Cap 7 Open up Speaker Arms on iCarta 8 Line up the guides on iCarta and End caps 9 Slide both End Caps onto Speaker Arm Guides until it stops Using Dock Spacer with iPod Your iCarta comes with...

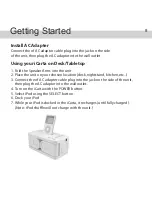
Page 9: ... the unit 2 Place the unit on your chosen location desk nightstand kitchen etc 3 Connect the of AC adapter cable plug into the jack on the side of the unit then plug the AC adaptor into the wall outlet 4 Turn on the iCarta with the POWER button 5 Select iPod using the SELECT button 6 Dock your iPod 7 While your iPod is docked in the iCarta it recharges until fully charged Note iPod shuffle will no...

Page 10: ...ors 9 iCarta 3 4 2 1 6 5 9 7 8 1 Audio Line in 2 iPod Shuffle USB connector 3 Selection Indicator iPod iPod shuffle Line in 4 SELECT 5 Adjustable spacer for iPod 6 POWER 7 VOLUME UP 8 VOLUME DOWN 9 Dock connector for iPod ...

Page 11: ...c playing from your iPod 4 Push the VOL and VOL buttons to adjust the system volume on the unit 5 Now enjoy the music from your iPod Listening to your iPod shuffle 1 Turn on the iCarta with the POWER button 2 Select Shuffle using the SELECT button 3 Dock the already playing iPod shuffle and you will hear music playing from your iPod shuffle Note If the playing song music loudness on the iPod shuff...

Page 12: ... device Rechargeable Battery iCarta Deluxe model only 1 The iCarta Deluxe with rechargeable battery must first charge for 14 hours 2 Plug in the AC adapter plug into jack on side of unit then plug the AC adapter into AC electrical outlet 3 Once battery is fully charged you can now power on the unit 4 Dock you iPod and follow the previous instructions from this guide 5 Now you can enjoy the music f...

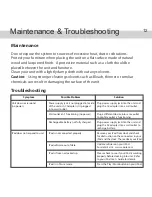
Page 13: ...pter isn t plugged into a wall outlet Plug power supply jack into the unit and plug the AC adapter into a wall outlet iPod does not respond to unit iPod is not connected properly Remove your iPod from dock and check for obstruction on the connectors in your iPod and the dock Then redock your iPod iPod software out of date Update software on your iPod For details visit www apple com iPod is in Paus...

Page 14: ...ock Then redock your iPod Playing from iPod shuffle Audio is distorted Volume level is set too high on the unit Decrease volume output on iPod shuffle iPod software out of date Update software on your iPod For details visit www apple com Playing from different audio device Decrease volume output on audio device Decrease volume on the unit Unit gets warm after extended play at high volume This is n...

Page 15: ...ing defective products to AFT Returned products must be shipped prepaid and packaged appropriately and it is recommended that they be insured or sent by a method that provides for tracking of the package Limitations This limited warranty is in lieu of all other warranties terms or conditions including warranties terms or conditions of merchantability fitness for a particular purpose satisfactory q...

Reviews: