background image

Instruction book

APF221384

G 160 VSD

Summary of Contents for APF221384

Page 1: ...Instruction book APF221384 G 160 VSD ...

Page 2: ......

Page 3: ... thereof is prohibited This applies in particular to trademarks model denominations part numbers and drawings This instruction book is valid for CE as well as non CE labelled machines It meets the requirements for instructions specified by the applicable European directives as identified in the Declaration of Conformity 2017 09 www atlascopco com ...

Page 4: ...ON 11 2 2 AIR AND OIL SYSTEM 12 2 3 COOLING AND CONDENSATE SYSTEM 14 2 4 SMARTBOX AND SMARTLINK 15 3 Elektronikon Graphic controller 18 3 1 ELEKTRONIKON CONTROL SYSTEM 18 3 2 DIGITAL OUTPUT CONTACTS 20 3 3 ICONS USED 22 3 4 MAIN SCREEN 26 3 5 CONTROLLER MENU STRUCTURE 30 3 6 WEB SERVER 34 3 7 PROGRAMMABLE SETTINGS 41 4 Installation 43 4 1 INSTALLATION REMARKS 43 4 2 DIMENSION DRAWING 44 4 3 INSTAL...

Page 5: ...LAY 59 5 6 STOPPING 60 5 7 TAKING OUT OF OPERATION 61 5 8 USE OF AIR RECEIVER 62 6 Maintenance 63 6 1 PREVENTIVE MAINTENANCE SCHEDULE 63 6 2 MOTORS 64 6 3 OIL SPECIFICATIONS 65 6 4 OIL CHANGE 65 6 5 OIL FILTER CHANGE 68 6 6 STORAGE AFTER INSTALLATION 69 6 7 SERVICE KITS 69 7 Adjustments and servicing procedures 70 7 1 AIR FILTERS 70 7 2 COOLERS 71 7 3 SAFETY VALVE 72 8 Problem solving 74 8 1 PROBL...

Page 6: ...76 9 2 REFERENCE CONDITIONS 76 9 3 LIMITS 77 9 4 SETTINGS OF SAFETY VALVE 77 9 5 SETTINGS OF OVERLOAD RELAYS FUSES AND CIRCUIT BREAKERS 77 9 6 COMPRESSOR DATA 77 10 Pressure equipment directives 79 11 Documentation 81 Instruction book 4 APF221384 ...

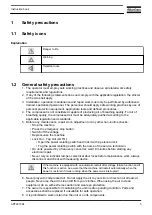
Page 7: ...f the voltage Depressurize the machine Lock Out Tag Out LOTO Open the power isolating switch and lock it with a personal lock Tag the power isolating switch with the name of the service technician On units powered by a frequency converter wait 10 minutes before starting any electrical repair Never rely on indicator lamps or electrical door locks before maintenance work always disconnect and check ...

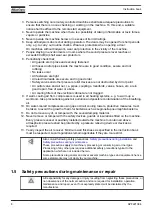
Page 8: ...et when working in the area of overhead or lifting equipment 2 The unit is designed for indoor use If the unit is installed outdoors special precautions must be taken consult your supplier 3 In case the device is a compressor place the machine where the ambient air is as cool and clean as possible If necessary install a suction duct Never obstruct the air inlet Care must be taken to minimize the e...

Page 9: ...ther high temperature piping must be clearly marked 17 For water cooled machines the cooling water system installed outside the machine has to be protected by a safety device with set pressure according to the maximum cooling water inlet pressure 18 If the ground is not level or can be subject to variable inclination consult the manufacturer 19 If the device is a dryer and no free extinguishing sy...

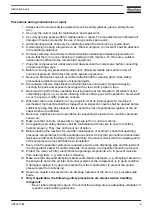
Page 10: ...orkroom take precautions against air pollution and possible contamination of the breathing air 10 On water cooled compressors using open circuit cooling towers protective measures must be taken to avoid the growth of harmful bacteria such as Legionella pneumophila bacteria 11 Do not remove any of or tamper with the sound damping material 12 Never remove or tamper with the safety devices guards or ...

Page 11: ...a machine is overheated the machine shall be stopped but no inspection covers shall be opened before sufficient cooling time has elapsed this to avoid the risk of spontaneous ignition of the oil vapor when air is admitted 13 Never use a light source with open flame for inspecting the interior of a machine pressure vessel etc 14 Make sure that no tools loose parts or rags are left in or on the mach...

Page 12: ...d disposal Dismantling Once the end of life of the machine is reached please follow next steps 1 Stop the machine 2 Check all safety precautions mentioned in the previous chapters to secure safe handling e g LOTO cool down depressurize discharge 3 Separate the harmful from the safe components e g drain oil from oil containing parts 4 Refer to the disposal topic mentioned below Disposal Used filter...

Page 13: ...re the compressor optimizes energy consumption and reduces the operating pressure band The following features are available as an option SMARTBOX When ordering the compressor it is possible except for Japan and Korea to choose the free SMARTBOX option which is mounted in the electrical cabinet The SMARTBOX allows read out of the compressor parameters on a login protected web site called SMARTLINK ...

Page 14: ...2 2 Air and oil system Flow diagrams Flow diagram of air cooled VSD compressor Drawing Reference Description 1 Customer installation 2 Atlas Copco installation Instruction book 12 APF221384 ...

Page 15: ...ed air and oil are discharged through check valve CV to air receiver oil separator AR where oil is separated from the compressed air The air is blown through minimum pressure valve Vp to air cooler Ca On Pack compressors the cooled air is discharged through the condensate trap and the outlet towards the air net Check valve CV prevents blow back of compressed air Minimum pressure valve Vp prevents ...

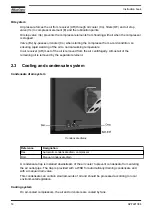
Page 16: ...ally Almost all of the remaining oil is removed by the separator element 2 3 Cooling and condensate system Condensate drain system Condensate drains Reference Designation Dac Automatic condensate drain compressor Dmc Manual condensate drain A condensate trap is installed downstream of the air cooler to prevent condensate from entering the air outlet pipe The trap is provided with a WSD for automat...

Page 17: ...h may also cause interference if the equipment is inadequately protected Observe any warning signs and manufacturer recommendations Respect a distance from the human body of at least 20 cm 8 inch during SMARTBOX operation Do not operate the SMARTBOX in areas where cellular modems are not advised without proper device certifications These areas include environments where cellular radio can interfer...

Page 18: ...gy efficiency of the compressor room You decide which performance indicators benchmarks and reports are created You can make accurate and immediate improvements when needed The results can be used for energy monitoring according to ISO50001 This product level is available as a free of charge 3 month trial Once a SMARTLINK level is chosen gaining access is the next step To gain access at least one ...

Page 19: ... credentials Go to the SMARTLINK web site http www atlascopco com smartlink log in with the user credentials Enjoy SMARTLINK In case more SMARTLINK ready machines are available you can add these via My Profile Instruction book APF221384 17 ...

Page 20: ...es that the voltage is switched on 5 Enter Key to select the parameter indicated by the horizontal arrow Only the parameters followed by an arrow pointing to the right can be modified 6 Escape To go to previous screen or to end the current action 7 Scroll keys Keys to scroll through the menu 8 Stop Button to stop the compressor LED 3 goes out 9 Start Button to start the compressor LED 3 lights up ...

Page 21: ...mpressor speed reducing power consumption and pressure band VSD compressors optimize the power consumption and reduce the operating pressure band by matching the motor speed to the air net pressure The regulator will continuously vary the motor speed maintaining the net pressure as close as possible to the programmed pressure set point The pressure fluctuations will be very low Indirect stopping E...

Page 22: ...ect stop offset the compressor will be stopped immediately The regulator will calculate the optimum moment to restart the compressor 3 2 Digital output contacts Warning Voltage free outputs may only be used to control or monitor functional systems They should NOT be used to control switch or interrupt safety related circuits Stop the compressor and switch off the supply before connecting external ...

Page 23: ... 31 15 A 250 V AC 15 A 30 V DC RC protected K03 3 X 31 15 A 250 V AC 15 A 30 V DC RC protected K04 3 X 31 10 A 250 V AC 10 A 30 V DC resistive load K05 3 X 30 10 A 250 V AC 10 A 30 V DC resistive load K06 3 X 30 10 A 250 V AC 10 A 30 V DC resistive load K07 3 X 30 10 A 250 V AC 10 A 30 V DC resistive load K08 3 X 30 10 A 250 V AC 10 A 30 V DC resistive load Instruction book APF221384 21 ...

Page 24: ...d K13 3 X 32 10 A 250 V AC 10 A 30 V DC resistive load K14 3 X 32 10 A 250 V AC 10 A 30 V DC resistive load K15 3 X 32 10 A 250 V AC 10 A 30 V DC resistive load Resistor Capacitor 3 3 Icons used Status icons Name Icon Description Stopped Running When the compressor is stopped the icon is motionless When the compressor is running the icon rotates Compressor status Motor stopped Running unloaded Run...

Page 25: ...re Automatic restart after voltage failure is enabled Week timer Week timer is active Active protection functions Emergency stop Shutdown Warning Service Service required Error Main screen Displayed when 2 or 4 line layout is picked Main chart Displayed when chart layout is picked Instruction book APF221384 23 ...

Page 26: ...enu icons Icon Description Converter s Service Alarms warnings shutdowns Week timer Info Test Counters Regulation setpoints Inputs Outputs Event history saved data Settings Instruction book 24 APF221384 ...

Page 27: ...gital input Special protection System icons Icon Description Fan overload Automatic restart ARAVF Main chart Compressor element LP HP Filter s Frequency converter Motor Expansion module Network settings problem General alarm Instruction book APF221384 25 ...

Page 28: ...il circuit Regulation General settings Access key Remote start stop Password protected Navigation arrows Icon Description Up Down 3 4 Main screen Control panel Control panel Instruction book 26 APF221384 ...

Page 29: ...en Four value lines Text on figures 1 2 Compressor Outlet 3 Inlet Guide Vanes Open 4 Blow Off Valve Closed 5 Starting 6 Menu 7 Unload Section A displays information regarding the compressor operation e g outlet pressure temperature at compressor outlet Section B displays Status icons Following icon types are shown in this field Fixed icons These icons are always shown in the main screen and cannot...

Page 30: ...vice To show more information about displayed icons select the icon using the scroll keys and push the Enter key Section C is called the Status bar This bar shows the text that corresponds to the selected icon Section D shows the Action buttons These buttons are used to call up or program settings to reset a shutdown service message or emergency stop to have access to all data collected by the con...

Page 31: ...isplay is selected a chart with an X axis covering 4 hours is displayed The value displayed on the Y axis depends on the selection made in the input screen Each chart dot represents a 1 minute average value When the Chart Low resolution display is selected a chart with an X axis covering 10 days is displayed The value displayed on the Y axis depends on the selection made in the input screen Each c...

Page 32: ...of the service plans Next Service Displays the next service task History Displays a log of all automatic shutdowns that have appeared in the past PROTECTIONS Topic Description General Displays a list of main protections Fan Displays a list of overload fan motor protections Filter s Displays a list of filter s protections Expansion module Displays a list of expansion module communication protection...

Page 33: ...ription Running hours Displays the number of hours the compressor has been running in unloaded loaded mode Loaded Hours Displays the number of hours the compressor has been running in loaded mode Motor Starts Displays the number of motor starts Load Relay Displays the number of load relay toggles thus unload load transitions Fast Starts Displays the number of manual motor starts that exceed the au...

Page 34: ...load pressure The load pressure is reduced Reduced setpoint The setpoint is reduced Setpoint 1 Value of setpoint 1 Indirect stop level 1 Value of indirect stop level 1 Direct stop level 1 Value of direct stop level 1 Setpoint 2 Value of setpoint 2 Indirect stop level 2 Value of indirect stop level 2 Direct stop level 2 Value of direct stop level 2 Setpoint used Which setpoint is used Regulation mo...

Page 35: ...chosen Gearbox Displays the vibration level at the gearbox EVENT HISTORY Topic Description Displays a log file of all shutdowns and shows the status of the type counters inputs and outputs at the moment a shutdown appeared SETTINGS Topic Description Network Displays the CAN and ethernet configuration Regulation Displays settings concerning the compressed air flow regulation General Displays settin...

Page 36: ...he web server functionality the network cable that is connected to the SMARTBOX should be unplugged and replaced by the cable of the company network If both the web server functionality and SMARTBOX are required please contact your local Customer Center for support Make sure you are logged in as administrator Use the internal network card from your computer or a USB to LAN adapter Use a UTP cable ...

Page 37: ...ernet Protocol version 4 TCP IPv4 1 see picture To avoid conflicts uncheck other properties if they are checked After selecting TCP IPv4 click on the Properties button 2 to change the settings Use the following settings IP Address 192 168 100 200 1 Subnetmask 255 255 255 0 2 Click OK 3 and close network connections Instruction book APF221384 35 ...

Page 38: ... the DNS server so it will be reserved for the controller Also get the correct Gateway and Subnet mask settings For example IP 10 25 43 200 Gateway 10 25 42 250 Subnet mask 255 255 254 0 Connect the controller to the company s network LAN by using a UTP cable min CAT 5e Adapt the network settings in the controller Go to Main Menu Instruction book 36 APF221384 ...

Page 39: ... Go to Settings 1 Go to Network 1 Go to Ethernet 1 Switch Off 1 the Ethernet communication to allow editing the settings Instruction book APF221384 37 ...

Page 40: ...rver is designed and tested for Microsoft Internet Explorer Also Opera Mozilla Firefox Safari and Chrome should work Viewing the controller data All screen shots are indicative The number of displayed fields depends on the selected options Open your browser and type the IP address of the controller you want to view in your browser in this example http 192 168 100 100 The interface opens Instructio...

Page 41: ...are available on the controller On the left side of the interface you can find the navigation menu If a license for ESi is foreseen the menu contains 3 buttons Machine shows all generator settings ES shows the ESi status if a license is provided Preferences allows to change temperature and pressure unit Instruction book APF221384 39 ...

Page 42: ...Analog inputs Lists all current analog input values The measurement units can be changed in the preference button from the navigation menu Counters Lists all current counter values from controller and unit Info status Machine status is always shown on the web interface Digital inputs Lists all digital inputs and their status Digital outputs Lists all digital outputs and their status Instruction bo...

Page 43: ...us This screen shot underneath only shows the running hours It is also possible to show the current status of the service interval 3 7 Programmable settings A number of controller parameters are programmable Check the generic screen shot on programmable parameter Y in menu X below 1 the minimum value Instruction book APF221384 41 ...

Page 44: ... 2 the maximum value 3 the selected value 4 the factory setting icon it only appears when the selected value equals the factory setting value Instruction book 42 APF221384 ...

Page 45: ...ironment includes all establishments other than those directly connected to a low voltage power supply network which supplies buildings used for domestic purposes Cooling air for starter cabinet Contamination levels ambient according to IEC 60721 3 3 Chemical gases Class 3C2 Solid particles Class 3S2 No conductive dust allowed No condensation allowed Maximum allowed relative humidity is 60 in the ...

Page 46: ...4 2 Dimension drawing Compressor dimensions Dimension drawing of air cooled G 160 VSD Pack metric units Instruction book 44 APF221384 ...

Page 47: ...nce Description 1 View from right side 2 Ventilation air inlet of the canopy 3 Front view 4 Compressor air inlet 5 Ventilation air outlet of the canopy 6 Ventilation for cubicle 7 Electric cable entry 8 Cooling air inlet of the motor 9 View from left side Instruction book APF221384 45 ...

Page 48: ...ecovery not present 17 Cooling water inlet not present 18 Water inlet of the energy recovery not present 19 Cooling water outlet not present 20 Holes for the remote control of the pressure sensing and communication 21 Manual drain 22 Automatic drain 23 4 slotted holes only for horizontally pulling unit out of container Instruction book 46 APF221384 ...

Page 49: ...4 3 Installation proposal Compressor room example Compressor room example of air cooled G 160 VSD Pack Instruction book APF221384 47 ...

Page 50: ... drop over all cooling ducts together is 30 Pa The maximum air temperature at the compressor intake opening is 46 C 55 C for HAT version minimum 0 C The required ventilation to limit the compressor room temperature can be calculated as follows Qv 0 1N dT Qv Required ventilation capacity in m3 s N Shaft input of the compressor in kW dT Compressor room temperature over the outdoor temperature in C 5...

Page 51: ...4 4 Main fuses and supply cables section maximum length Electrical connections Instruction book APF221384 49 ...

Page 52: ...ll cables on a horizontally ventilated cable tray Do not stack or group cables as this avoids heat dissipation Connect the power cable with the correct CSA certified cable lugs on the terminals in the electrical cabinet Respect a minimum distance of 10 mm 0 4 between stripped cable ends Use only the prescribed cable types CSA UL R RW T multicore 110 C 230 F Display the fuse type information next t...

Page 53: ...ubicle roof with 8 bolts 0147 1963 08 as follows Take off the top of the fan assembly fan stays Mount the fan with 8 bolts to the roof as shown in figure A the fan is made invisible to show the bolt positions Reinstall the top Connect the fan cable as shown in figure B once the dummy connector is removed The dummy connector is required to allow a qualification run at the end of the assembly line F...

Page 54: ... Completed assembly of the cubicle fan 4 7 Pictographs Control panel of Elektronikon controller Refer to the chapter Controller panel for pictographs of the Elektronikon controller Instruction book 52 APF221384 ...

Page 55: ...r before maintenance or repair 20 Before connecting the compressor electrically consult the Instruction book for the motor rotation direction 21 Torques for steel Fe or brass CuZn bolts 22 Consult the Instruction book before greasing 23 Switch off the voltage before removing the protecting cover inside the electric cabinet 24 Oil the gaskets screw on the filters and tighten by hand approx one half...

Page 56: ...ed in such a way that the compressor is lifted perpendicularly Lift gently and avoid twisting General preparations Step Action 1 Install the compressor see the sections Dimension drawing Installation proposal and Main fuses and supply cables 2 Stick labels near the control panel to warn the operator that the compressor may start automatically after a voltage failure the compressor is automatically...

Page 57: ... the motor support 3 Remove the brackets fitted next to the air receiver supports Electric cabinet Step Action 1 Check that the electrical connections correspond to the local codes The installation must be earthed and protected by fuses in all phases An isolating switch must be fitted 2 Check the wires on the transformers for correct connection 3 Check the setting of the circuit breakers see the s...

Page 58: ...ugh the grating in the air inlet panel see section Dimension drawing The correct rotation direction is indicated by arrows on the fan inlet plate 4 If the rotation direction is wrong press the emergency stop button switch off the voltage and reverse two incoming electric lines If the rotation direction of the fan motor is wrong consult your Atlas Copco customer centre 5 Run the compressor for a fe...

Page 59: ...2 Close the condensate drain valves see the section Cooling and condensate system 3 Open the air outlet valve 4 Check the oil level indicator see the section Oil change The pointer should be in the green range or orange range 5 3 Starting Warning The operator must apply all relevant Safety precautions Control panel Elektronikon Graphic controller Instruction book APF221384 57 ...

Page 60: ...mable the compressor starts running loaded 5 4 During operation Warning The operator must apply all relevant Safety precautions The operator should immediately stop the machine in case of oil leaks internally in the machine as well as externally and consult a competent technician to resolve the cause The machine should not be restarted before the problem has been remedied The load cycle of the com...

Page 61: ... motor starts and on the air consumption 3 To unload the compressor manually select Unload on the display using the cursor keys and press the Enter key To put the compressor back into automatic operation select Load on the display using the cursor keys and press the Enter key If the compressor is stopped it may start automatically 5 5 Checking the display Warning Before carrying out any maintenanc...

Page 62: ...e indicated plans or replace the component and reset the relevant timer Regularly check the Inputs and Outputs menus for a quick look at the compressor status 5 6 Stopping Important After pressing the stop button the compressor will run unloaded for 30 seconds The compressor stops after this period A start command during this period is ignored After stopping the compressor is prevented from restar...

Page 63: ...le unlock the emergency stop button by pulling it back 3 Close the air outlet valve 4 Open the condensate drain valves 5 Switch off the voltage 5 7 Taking out of operation Disconnecting the compressor At the end of the service life of the compressor proceed as follows Step Action 1 Stop the compressor and close the air outlet valve 2 Switch off the voltage and disconnect the compressor from the ma...

Page 64: ...g for inside inspection The bolts must be removed and fitted with the correct tool The bolts must be tightened with a torque of 355 Nm 85 Nm Damaged bolts must not be re used O rings must be replaced 5 The safety valve is designed in such a way that the pressure will not permanently exceed the maximum allowable operating pressure of the vessel except for short pressure surges up to 1 1 times the d...

Page 65: ...ty General When servicing replace all removed gaskets O rings and washers Preventive maintenance schedule The maintenance schedule is prior to the maintenance warnings displayed on the controller It is the responsibility of the owner to carry out the required maintenance at the appropriate moment Period Running hours Operation Daily 8 Check readings on display Daily 8 Check that condensate is disc...

Page 66: ...ped called Level A Level B Level C Each level stands for a number of service actions to be carried out at the time intervals programmed in the Elektronikon regulator When a level is reached a message will appear on the screen After carrying out all service actions the interval timers must be reset using the Reset key in the Service menu Consult your Atlas Copco Service Centre 6 2 Motors Warning St...

Page 67: ...las Copco Roto Xtend Duty Fluid Atlas Copco Roto Xtend Duty Fluid is a high quality synthetic lubricant for oil injected scroll and screw compressors which keeps the compressor in excellent condition Roto Xtend Duty Fluid can be used for compressors operating at ambient temperatures between 0 C 32 F and 46 C 115 F see section Service kits Important Never mix oils of different brands or types 6 4 O...

Page 68: ...Vent filler and drain plugs Oil drain plugs on compressor elements Vent filler and drain plugs on air cooled compressors Instruction book 66 APF221384 ...

Page 69: ...ter draining 4 Remove filler plug Fill the air receiver oil separator with oil until the level reaches the filler opening Refit and tighten plug Tighten the vent plug of the oil cooler 5 Disconnect the air inlet hose from the inlet bend Pour 10 liter of oil into the compressor stage Reinstall the air inlet hose 6 Run the compressor loaded for a few minutes to allow the oil cooler by pass valve to ...

Page 70: ... Service Plan reset the service warning Refer to the Service menu section 6 5 Oil filter change Warning Stop the compressor and switch off the voltage The operator must apply all relevant Safety precautions Position of oil filters Procedure Instruction book 68 APF221384 ...

Page 71: ...er plug of the air receiver 5 Reset the service warning after carrying out all service actions in the relevant Service Plan Refer to the Service menu section 6 6 Storage after installation Procedure Run the compressor e g twice a week until warm If the compressor is going to be stored without running from time to time protective measures must be taken Consult the Atlas Copco Customer Centre 6 7 Se...

Page 72: ...ltage The operator must apply all relevant Safety precautions Position of air filters Air filters 1 Procedure Step Action 1 Remove the filter elements 1 2 Fit the new filter elements 1 3 Reset the service warning after carrying out all service actions in all applicable service plans Refer to the service menu section of the regulator Instruction book 70 APF221384 ...

Page 73: ...n and switch off the voltage The operator must apply all relevant Safety precautions Procedure Cooler block 1 of air cooled G 160 VSD Keep the cooler block clean to maintain the cooling efficiency On air cooled compressors proceed as follows Instruction book APF221384 71 ...

Page 74: ...th an air jet in the reverse direction to normal flow Use low pressure air if necessary the pressure may be increased up to 6 bar e 87 psig 5 If it is necessary to clean the coolers with a cleaning agent consult Atlas Copco 6 Mount the service panel 7 Close the door 7 3 Safety valve Warning Stop the compressor and switch off the voltage The operator must apply all relevant Safety precautions Never...

Page 75: ...r cooled compressor The valve can be tested on a separate compressed air line Consult the Atlas Copco Customer Centre if the valve does not open at the correct pressure see the section Settings of safety valve Instruction book APF221384 73 ...

Page 76: ...ll relevant Safety precautions Control panel Elektronikon Graphic controller Faults and remedies A service message appears on the display Stop the compressor and carry out the indicated service actions Reset the message Refer to the Service menu section A shut down warning message appears on the display The alarm LED 4 will light up indicating that the temperature at the outlet of the compressor e...

Page 77: ...inspected by your Atlas Copco Customer Centre Condition Fault Remedy Condensate is not discharged from condensate traps during loading Discharge pipe of condensate trap clogged Check and correct as necessary WSD electronic water drain malfunctioning Consult Atlas Copco Condition Fault Remedy Compressor air delivery or pressure below normal Air consumption exceeds air delivery of compressor Check e...

Page 78: ...ssure bar e psig Depends on programmed unloading and loading pressures Pressure drop over air filters bar Below 0 05 Pressure difference over oil separator bar Below 0 8 Oil injection pressure at the compressor elements bar e psig Depends on programmed unloading and loading pressures Compressor outlet temperature air cooled Pack compressors C Approx 28 Cooling air inlet temperature of Pack compres...

Page 79: ... cooling air temperature C 40 Maximum working pressure See section Compressor data 9 4 Settings of safety valve Compressor type Setting For VSD Pack compressors 15 bar 9 5 Settings of overload relays fuses and circuit breakers Setting of fan protection for air cooled compressors Supply voltage V Q25 Q26 A 460 5 0 9 6 Compressor data Data for 125 psi 8 6 bar 60 Hz compressors Units G 160 VSD Maximu...

Page 80: ...Units G 160 VSD Sound pressure level dB A 80 Instruction book 78 APF221384 ...

Page 81: ...ve 2014 29 EU are excluded from 2014 68 EU according to article 1 2 c The following pressure bearing parts are subject to 2014 68 EU Pressure Equipment Directive greater than or equal to category II Oil separator vessel Cat IV Design standard ASME section VIII div 1 Material SA 395 according ASME BPVC section II A The design pressure of the vessel is 15 bar e 218 psi Fatigue is calculated for an i...

Page 82: ...l 14 bar Vessel shell 5 9 mm Vessel bottom bowl 5 8 mm Cover 8 5 mm 1076 mm 1284 mm 550 mm 0 8 0 85 Used abbreviations V Volume dP Pressure difference MWAC Minimum wall thickness after corrosion H Height of the vessel TH Total height including the supports D Diameter of the vessel CF Casting factor according ASME BPVC section VIII div 1 E Welding coefficient factor Instruction book 80 APF221384 ...

Page 83: ...11 Documentation Instruction book APF221384 81 ...

Page 84: ......

Page 85: ......

Page 86: ...ke performance stand the test of time This is what we call Sustainable Productivity Atlas Copco Airpower Oil free Air Division Boomsesteenweg 957 2610 Wilrijk Belgium Phone 32 0 3 870 21 11 Atlas Copco Airpower NV All rights reserved Designs and specifications are subject to change without notice or obligation ...

Reviews: