background image

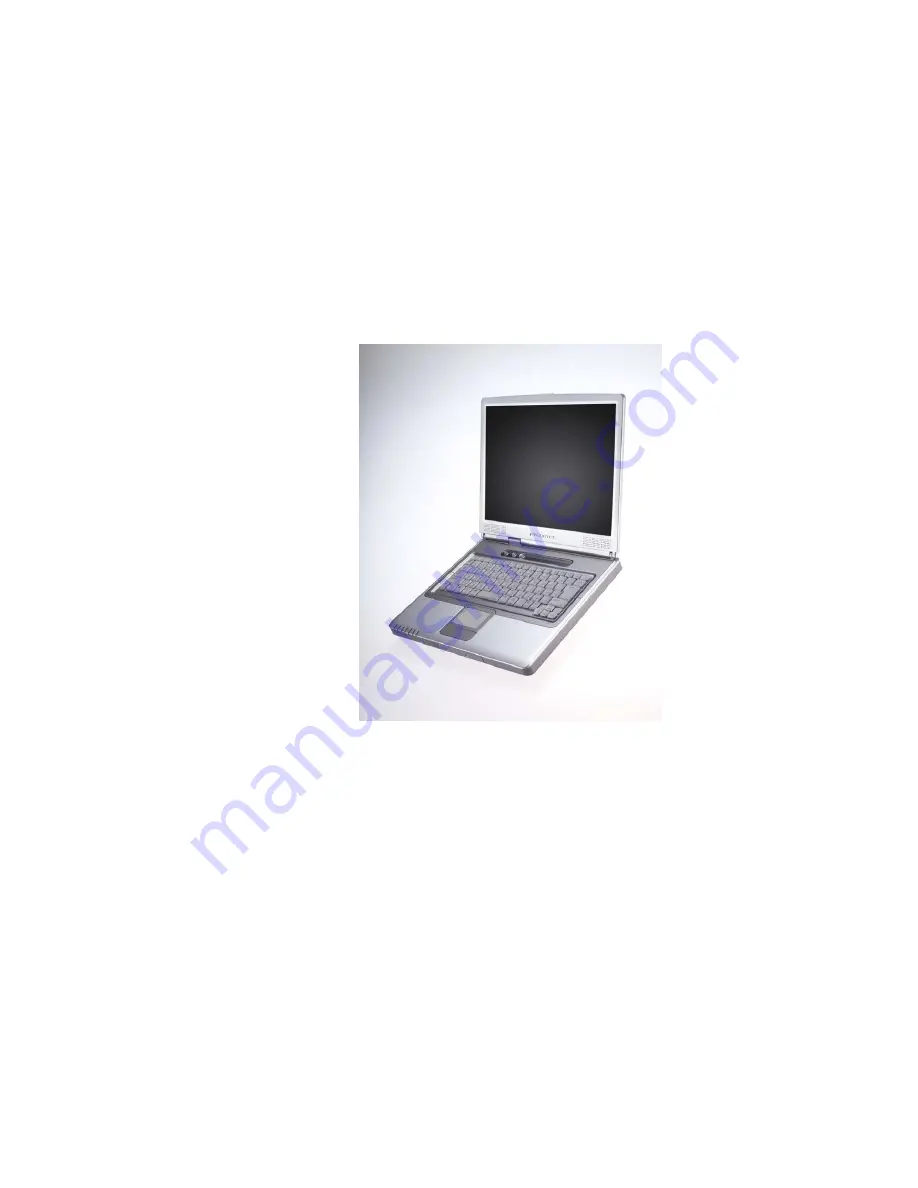
AVERATEC 
5400 Series 
User Guide 


Copyright

©

2004 

All Rights Reserved - Printed in Taiwan


Notebook Computer User Guide 

Original Issue: 2004/06 

This manual guides you in setting up and using your new notebook computer. Information in this manual has been carefully 
checked for accuracy and is subject to change without notice. 

No part of this manual may be reproduced, stored in a retrieval system, or transmitted, in any form or by any means, electronic, 
mechanical, photocopy, recording, or otherwise, without prior written permission. 


Summary of Contents for 5400 Series

Page 1: ...u in setting up and using your new notebook computer Information in this manual has been carefully checked for accuracy and is subject to change without notice No part of this manual may be reproduced stored in a retrieval system or transmitted in any form or by any means electronic mechanical photocopy recording or otherwise without prior written permission ...

Page 2: ...icrosoft MS DOS Windows and Windows Sound System are trademarks of Microsoft Corporation AMD and Athlon XP M are a registered trademark of AMD Corporation Sound Blaster Sound Blaster Pro are trademarks of Creative Technology All other brands or product names mentioned in this manual are trademarks or registered trademarks of their respective companies ...

Page 3: ... antenna Increase the separation between the device and receiver Connect the device into an outlet on a circuit different from that to which the receiver is connected Consult the dealer or an experienced radio television technician for help You may find helpful the following booklet prepared by the Federal Communications Commission Interference Handbook stock number 004 000 00345 4 This booklet is...

Page 4: ...t any interference received including interference that may cause undesired operation European Notice For the following equipment Notebook PC is herewith confirmed to comply with the requirements set out in the Council Directive on the Approximation of the Laws of the Member States relating to Electromagnetic Compatibility 89 336 EEC Low voltage Directive 73 23 EEC and the Amendment Directive 93 6...

Page 5: ...Notebook User Guide In France the equipment must be restricted to the 2 4465 2 4835GHz frequency range and must be restricted to indoor use 5 ...

Page 6: ...new Professional Multimedia Notebook This notebook incorporates the strongest features which integrate the latest technologies available in the notebook industry Your new notebook computer not only drives today s multimedia applications but also be ready for tomorrow exciting new software ...

Page 7: ...roduction on your computer features Chapter 2 Provides step by step instructions to help you begin using your notebook as quickly as possible Chapter 3 Describes how to operate the standard features of your computer Chapter 4 Illustrates how to integrate video and sound chips into impressive presentation Chapter 5 Illustrates how to connect external device to your computer Chapter 6 Explains how t...

Page 8: ... this notebook is a natural traveling companion With leaps in technology your Notebook PC runs a wide range of general business personal productivity entertainment and professional applications It is ideal for use in the office at home and on the road Your Notebook PC makes an ideal choice for use in the office the schoolroom at home on the road and all other occasions 9 ...

Page 9: ...l Outline Dual In Line Memory Module up to 2 GB using 128 MB 256 MB 512 MB or 1024 MB DDR SDRAM SO DIMMs PCMCIA Provides one PCMCIA slot that allows you to insert one Type II card Graphics System Fast S3 UniChrome Pro IGP graphics processor PCI Local Bus Architecture 32 bit PCI Enhanced IDE optimizes the data transfer between the CPU and hard disk drives Support ultra DMA ATA 100 133 PIO Mode up t...

Page 10: ...wer Options properties by pointing your mouse to Control Panel of Windows Suspend hot key allows you to suspend the system operation instantly and resume at the press of the power button System Password for User and Supervisor included on the BIOS SETUP Program to protect unauthorized use of your computer 1 2 Unpacking the Computer Your computer comes securely packaged in a sturdy cardboard shippi...

Page 11: ...onent to make sure that nothing is missing and or damaged If any of these items is missing or damaged notify your point of purchase immediately Be sure to save the shipping materials and the carton in case you need to ship the computer or if you plan to store the computer away sometime in the future ...

Page 12: ...lay 2 Power On Resume Button 3 Easy Buttons 4 6 Built in Stereo Speakers 5 Status LED Indicator 7 Keyboard 8 Glide pad Pointing Device Color LCD Display The notebook computer comes with a color LCD that you can adjust for a comfortable viewing position The LCD is a 15 TFT color LVDS with 1024x768 XGA Extended Graphics Array resolution panels The features of the Color LCD Display are summarized as ...

Page 13: ...sing Internet and e mail functions instantly and easily Description of the easy buttons appears in the latter part of this section Built in Stereo Speakers Integrated left and right mini stereo speakers for sound and audio output for your multimedia presentations or listening pleasure Status LED Indicator Keeps you informed of your notebook computer s current power status Descriptions of the statu...

Page 14: ...patible with two Glide Pad click buttons These two buttons array below the Glide pad The two click buttons located at each side support tapping selection and dragging functions These buttons work like a standard computer mouse Simply move your fingertip over the Glide Pad to control the position of the cursor Use the selection buttons below the Glide Pad to select menu items ...

Page 15: ... 1 Power Indicator 2 Battery Charging LED 3 Wireless LAN Access 4 Drive Access 5 Caps Lock 6 Scroll Lock 7 Num Lock Status LED Icons Power Indicator Lets you know that the power to the system is turned on This LED is positioned so that you can see the power state whether the LVDS panel is opened or closed Lights green when the system is powered on using the AC adapter or battery Lights green blink...

Page 16: ...ess device Drive Access When LED in green light indicates that the system is accessing either the Hard Disk or DVD CD RW Combo drive Caps Lock When LED in green light indicates that the Caps Lock key on the keyboard is activated When activated all alphabet keys typed in will be in uppercase or capital letters Scroll Lock When LED in green indicates that the Scroll Lock key on the keyboard is activ...

Page 17: ...on 2 E Mail Button Internet Button This technology is designed specifically for providing a very convenient way in connecting to the Internet E mail Button This is the most convenient way to access your E mail application such as Microsoft Outlook or Outlook Express ...

Page 18: ...lease the latch to open the cover Optical Disk Drive The ODD Optical Disk Drive device supports DVD ROM CD CD R CD RW DVD R RW and DVD R RW media Allows you to read from and write to the medium listed above 1 5 The Rear Side of the Notebook The system ports at the back of your notebook computer can connect various devices like a external monitor Each port is described as followings 19 ...

Page 19: ... Kensington security system or a compatible lock to secure your notebook computer DC Power Port Lets you connect the AC power adapter in supplying continuous power to your notebook and recharging the battery Air Intake Brings air into your computer to keep it within operating temperature VGA Port Lets you attach an external CRT monitor for wider display You can run the LCD display and the external...

Page 20: ...ough a local area network LAN Modem Port 56K internal fax data modem for use to connect to dial up networks and send receive faxes using your notebook computer 1 6 The Left Side of the Notebook The left side of your notebook computer provides the features shown in the following figure 1 USB Port 2 Headphone Jack 3 Microphone Jack 4 PCMCIA slot Left Side Features USB Port The Universal Serial Bus U...

Page 21: ...ne Jack Allow you to connect an external microphone for monophonic sound recording directly into your notebook computer PCMCIA Slot Lets you connect various PC cards such as memory card Supports both 32 bit CardBus and 16 bit PC cards 1 7 The Right Side of the Notebook The right side of the notebook computer offers the features shown in the following figure 1 Battery Pack Right Side Features Batte...

Page 22: ...etach the battery 1 8 The Underside of the Notebook The bottom of the notebook computer offers the following features 1 Battery Bay 2 Battery Release Latch Bottom of the System Battery Bay Equipped with a Lithium Ion Li Ion battery pack Battery Release Latch Push the latch to the right and slide the battery cover Lift and remove the battery pack 23 ...

Page 23: ...ered on Battery Pack Aside from the AC adapter your computer can also be powered through the internal battery pack The battery pack uses rechargeable Lithium Ion Li Ion battery cells that provide long computing hours when fully charged and power management enabled You should always leave the battery inside your computer even when using the AC adapter as it also acts as a back up power supply in ca...

Page 24: ...Introduction1 25 This device can write data to CD R CD RW DVD R and DVD RW media DVD R RW combo This device can write data to CD R CD RW DVD R and DVD RW media ...

Page 25: ...ed 2 2 Getting Started Your Notebook is designed and pre configured for easy setup and use This chapter describes the installation steps you should follow to get the notebook up and running as quickly as possible 27 ...

Page 26: ...pack allows you to operate the notebook without an external power source When you connect the AC power adapter the battery immediately starts to recharge For maximum battery performance fully discharge the battery first before recharging it when you start to use it first time To do so unplug the AC adapter turn off power management features through Setup and Windows and turn on the system Once the...

Page 27: ...e most convenient way to install the battery pack into your computer Removing the Battery Pack To remove the battery pack slide the latch to the end of right side to release the battery pack and then take out the battery pack with your finger Replacing the Battery Pack 29 ...

Page 28: ...ore in the hard disk drive You will be unable to restart the notebook until you have connected to the AC adapter or installed a charged battery To replace the battery pack refer to the previous sections on Installing the Battery Pack and Removing the Battery Pack For Window Me 2000 XP the suspend mode Hibernate or Standby can be chosen in the Power Options Properties Be sure to save your data be o...

Page 29: ...ect the power adapter 1 Plug the AC power cord into the power socket of the AC power adapter 2 Plug the other end of the AC power cord to a live AC wall outlet 3 Plug the connector of the AC adapter to the DC IN port found at the rear side of the notebook Whenever possible it is advisable to always have the AC adapter be connected to the notebook and the battery pack installed This ensures continu...

Page 30: ... supplies i e AC adapter 2 3 Starting Your Computer The Power On Resume Button is found on the top of the base unit Press the Power On Resume Button to start your computer and check that if the Power LED turns on After a few seconds the computer s display will turn on and your computer will begin to execute the Power On Self Test POST to check if all system components are running properly Any erro...

Page 31: ... after powering on your notebook to suit your viewing pleasure The Brightness hot key control adjusts the brightness of the LCD The brightness hot key control will not set the LCD completely dark or bright it provides sufficient lighting to the LCD to match the external lighting of the surrounding The brighter the room the more you need to increase the brightness of the LCD 2 5 2 6 Turning off You...

Page 32: ...User Guide up against the LCD screen which may degrade the LCD when done regularly More importantly never close the LVDS panel for a long period of time when computer is on and power saving features are disabled ...

Page 33: ...in your day to day computer work If you are new to computers and to your operating system you also need to read the manual for the operating system on how to work with your computer It is very important to familiarize yourself well with the operating system The succeeding chapters not only guide you to go beyond the basics but also try other exciting features ...

Page 34: ...cations 3 2 Understanding the Keyboard Functions Your notebook computer is equipped with an 87 key keyboard that provides all the functionality of a full sized 101 or 102 key IBM keyboard Aside from the standard typewriter layout keyboard of your computer there are a number of extra features and function controls on the built in keyboard including Windows system hot keys ...

Page 35: ...ue on keypad are preprogrammed with dual functions Control keys Ctrl Alt Fn and Shift are controls used in conjunction with other keys to change their functions To use control keys press and hold the control key while pressing another key For example Press Ctrl C means to hold down the Ctrl key and type the letter C Key combinations work especially to the application you are running Windows keys U...

Page 36: ...een the cursor is a blinking underline block or vertical bar depending on the application The cursor indicates where the next text typed is inserted Typewriter keys Typewriter keys also called alphanumeric keys are used to enter text and characters Keys with blue print on them behave differently when combined with control keys ...

Page 37: ...ys Used for multitasking operating system Pause key Press this key to temporarily halt execution of a command Pressing any other key to resume execution of a command Fn Break key Press the two keys to temporarily halt execution of a command Pressing any other key to resume execution of a command Ins key Known as the Insert key Press this key to toggle the keyboard data entry from insert to type ov...

Page 38: ...right This key works much the same as in ordinary typewriter Ctrl key Known as the Control key Used in most application program in combination with other keys to execute a certain command Alt key Known as the Alternate key Used in most application program in combination with other keys to execute a certain command Fn Num Lock Activates the embedded 15 key numeric keypad The keys are color coded bl...

Page 39: ...eft one space at a time Right arrow key Moves the cursor to the right one space at a time SCREEN CONTROL KEYS Keypad Function Description Home key Moves the cursor to the beginning of a screen or line PgUp key Moves the cursor up one screen at a time PgDn key Moves the cursor down one screen at a time End key Moves the cursor to the end of a screen or line WINDOWS HOT KEYS Keypad Function Descript...

Page 40: ... key serving dual functions When pressed in conjunction with the Fn key these keys set specific system parameters and are sometimes referred to as hot keys Keypad Function Description Enable or Disables the built in wireless LAN Switches display between LCD CRT or LCD and CRT simultaneously Enable or Disables the built in system speaker Increases the brightness of LCD display incrementally Decreas...

Page 41: ...the Control Panel and double click on the Mouse icon The options let you control the size and color of the cursor cursor speed the accepted double click speed and selection button orientation The Glide Pad works a mouse pointing device replacement that is used under Windows based operating system You can use the standard Microsoft driver that is compatible with the Glide Pad device and is normally...

Page 42: ... move the mouse cursor place the finger lightly on the sensor pad and move in the desired direction If you reach the end of the pad lift your finger and place it back down on the other side of the pad 2 To select an item click on the item by pressing the left button or by simply tapping on the surface once A light quick tap always works best To execute an item click the left button twice or do a q...

Page 43: ...e object 3 4 Configuring Your Screen Display The VGA display function of your notebook is based on a high performance AGP local bus controller and is fully IBM VGA compatible This controller offers a large set of extended functions and higher resolutions especially useful when connecting an external high resolution and high frequency display device POSSIBLE DISPLAY CONFIGURATIONS The table below s...

Page 44: ...ings tab to set your desired configuration Make sure to follow the configuration table above 3 5 Knowing the Power Saving Features One of the great features in your notebook computer aside from its superior performance is the ability to save energy power Your computer is designed to incorporate intelligent and advanced power management functions that turn off power of most components when system i...

Page 45: ...r Management function of the Control Panel in Windows To resume full on state press the power button Suspend to Disk mode When this mode is activated the context of the entire system is saved to disk and all components and devices are powered off while all clocks are also stopped except Real Time Clock or RTC You can activate this by setting the Hibernate Windows Me 2000 XP mode on the Power Manag...

Page 46: ...t manually Your dealer should already have done all of this for you You can refer to Chapter 6 on how to run the BIOS SETUP program You can increase the system s storage capacity by replacing the standard hard disk drive with a drive of greater storage capacity If you wish to replace your hard disk contact your local dealer for more information about this dealer installable device Always turn off ...

Page 47: ...e to secure the disc 3 To remove the disc press on the center spindle and pull up the disc from the side until the disc snaps out of the spindle lock If the eject function is disabled by software or a power failure occurs the Emergency Eject Hole allows you to manually remove a CD from the reader 4 To close the DVD ROM drive simply push the CD tray inside The CD ROM LED will activate when the disc...

Page 48: ...r Product l 3 8 Using PCMCIA Cards WHAT IS PCMCIA PCMCIA or Personal Computer Memory Card International Association is a non profit trade association that defines the industry standard for the PC Card technology The goal of PCMCIA is to ensure that any PC Card can work in any mobile computer built with a PCMCIA slot A PC Card is a peripheral device that can add a wide variety of capabilities to yo...

Page 49: ...ards are Type II extended cards The extended card has an additional physical component that protrudes beyond the traditional card size The extension can be as large as 40 mm deep by 9 65 mm high This extension provides room for additional electronics as well as a location for external connectors The wireless LAN card and GPRS card are examples The extended part is for additional electronics and an...

Page 50: ... swapping capability that allows you to exchange cards while the computer is turn on and start using it immediately Inserting PC Cards To insert a PC card into the PCMCIA slot 1 Locate the PC card slot cover on the left side of the computer 2 Insert the side of PC card with the 68 pin socket into the PCMCIA slot The face label of the card should also be facing up 3 When the full length of the card...

Page 51: ...ouble click the PC card icon on the right bottom side of the task bar 2 Select the socket from the list that you want to remove and click Stop button The system then disables the function of PCMCIA card 3 Then you can remove the inserted PC card push the button found on the right side of the PC slot to release the eject button Then push it again to release the PC card 53 ...

Page 52: ...nction cards MFC need additional driver installation and configuration in making the card work This additional driver may already be built in under Windows that Windows will try to detect and prompts you if you want to install the driver If the driver is not included under Windows you will need to insert the driver CD provided by the PC card manufacturer into the CD ROM drive and install to Window...

Page 53: ...e that there are no conflicts of resource amount those devices HOT SWAPPING PC CARDS Just like floppy disk drive your PCMCIA slots allow you to replace one PC card with another even while your computer is on However you need to remember the rule that if the PC card is in use you must not remove it PC cards draw power even when not in use To save energy press the button to disconnect the card when ...

Page 54: ...ake full use of all the multimedia features of your computer in having fun and excitement during work or leisure You will learn how to mix and match the built in sound system use DVD DVD CD RW Combo DVD Dual drive in creating an exciting full multimedia presentation 57 ...

Page 55: ...one 4 2 Audio Sound System Features Your computer has a built in 16 bit stereo sound controller that allows you to record store and playback voice music and other sound effects with built in mixer controls An integrated full duplex microphone and twin mini speakers are also built in into your computer to allow you to record and playback sound anytime and anywhere On the left side of your computer ...

Page 56: ...ince Windows pre installed your audio driver was already configured for you 4 4 Windows Multimedia Programs Windows provides several multimedia programs that you can run with the built in features of your computer Pointing the Start button Programs Accessories then Entertainment you will find the Multimedia programs group The section below use Window XP as examples Figure 4 1 Entertainment Program...

Page 57: ...s files on your hard disk These voice or sound files can then be played back through the internal speaker or earphone jack using an external speaker headphone or earphone set You can also use the files as voice annotations on many applications for more real presentation This section will describe briefly how you can record sounds under Windows operating system To record sounds you need to run the ...

Page 58: ...from different input sources you must first set the proper audio input recording device under the Recording Control panel To do this 1 Double click on the Volume Control on the taskbar or click Start button then point to Programs Accessories Entertainment and then click on Volume Control 2 Click Properties in the Options main menu 3 Click the round button for Recording and tick off each component ...

Page 59: ...operties 4 Click OK and the Recording Control dialog box will appear Here you will select the input device for the recording source If you want to record from the DVD CD RW Combo or DVD Dual drive with audio music you must click on CD Player ...

Page 60: ...t side of your computer Use only microphone with 1 8 inch mini jack connector Follow the same procedure for recording voice USING THE BUILT IN DVD ROM DVD CD RW COMBO DVD DUAL DRIVE You would normally use the DVD ROM DVD CD RW combo or DVD dual drive for recording audio music from the Audio CD Follow these steps 1 Activate CD Player volume on the Recording Control as discussed earlier 2 Run the So...

Page 61: ...y run after you have inserted an audio compact disc and will start playing the audio CD Figure 4 5 Play Audio CD by Windows Media Player 4 Select the starting point where you want to start recording 5 Switch to the Sound Recorder and press the Record button 6 Switch immediately to the Windows Media Player and press the Play button You can adjust the volume control so you can also hear the music wh...

Page 62: ...indows Media Player Follow these steps 1 Click on Start point to Programs Accessories and then Entertainment 2 Click on Windows Media Player to start program 3 Click on the File menu and select the file you want to play 4 When the file is recognized and open click on the Play button to start playback 4 7 Using DVD DVD is the breakthrough in superb full motion picture playback One disc can contain ...

Page 63: ...c for mass data storage and safely retaining The CD R disc can be written several times until the CD R is full the CD RW disc furthermore can write and erase data repeatedly Please refer to the related user manual about the CD RW software Please pay attention to the copyright of the software or data you want to backup Backup or distribute the software or data might be illegal according the restric...

Page 64: ...ibes how you attach peripheral devices to your notebook You can attach a printer or mouse connect an external monitor and keyboard or any other peripheral device You will learn how to use these peripheral devices with the step by step instructions depicted in this chapter 67 ...

Page 65: ...usly on a computer with peripherals such as floppy drive mouse digital cameras scanners printers modems keyboards games devices and additional plug in sites or hubs 5 2 Using an External Monitor Port Your computer has a 15 pin Monitor port for supporting any external CRT or LCD color monitor You need a display signal cable usually provided with the monitor One end of the cable must have a 15 pin c...

Page 66: ...ter is set at default to run at simultaneous display mode 6 If you only want to show the display on the external monitor CRT LCD and shut off the LCD display you can use the Fn F3 hot key to switch display type between LCD and CRT Keep pressing the hot key until you get the display to external CRT LCD only Refer to Chapter 3 regarding the possible External CRT resolutions and how to change the dis...

Page 67: ... T 100Base TX LAN module that connects your computer to other computers networks through a local area network LAN and supports data transfer rates up to 100Mbps The 10Base T standard also called Twisted Pair Ethernet is connected with RJ 45 connectors The 100Base TX is based on the older Ethernet standard Because it is 10 times faster than Ethernet it is often referred to as Fast Ethernet The buil...

Page 68: ... online service or bulletin board The modem module is available as an option The built in fax data modem provides on standard phone connector To connect the analog phone cable to your modem 1 Purchase an analog phone cable Each end of the cable has a RJ 11 connector 2 Connect one end of the cable into a standard wall outlet 3 Connect the other end of the cable into the computer modem port 71 ...

Page 69: ... environment without using any wire to traditional RJ 45 jack User can enjoy the wireless connection within the range of a Wireless Access Point WAP of LAN WAP is the wireless transmission and receiving device and generally connects to the server of a LAN environment or acts as a LAN hub with wireless connection Access point can be set in an office environment airport major railway station etc tha...

Page 70: ...e disk drive configuration and password setup This information is then stored in the CMOS RAM and will remain permanent unless you change it again This chapter discusses on how you will activate the BIOS Setup program and change the system configuration to suit your desired operation You must be careful to set the configuration properly in order for your computer to run smoothly If you are not sur...

Page 71: ...ever you turn on the computer the system will read the settings stored in the CMOS RAM and compare them to the equipment check conducted during the Power On Self Test POST If an error occurs an error message will be displayed on the screen and you will then be prompted to run the Setup Program As the POST Power On Self Test executes during the boot up process the screen will display the following ...

Page 72: ...ys its own screen Parameters The left side of the screen This area lists the parameters and their current settings Key Status Bar The bottom part of the screen These lines display the keys available to move the cursor select a particular function and so forth To exit the BIOS Setup program simply press the Esc key and select from the Exit menu whether you want to Save changes and exit Discard Chan...

Page 73: ...ate 06 18 2004 or Enter selects field 4 Primary Master 40008MB Secondary Master Installed CD DVD QuickBoot Mode Enabled Boot Summary Screen Disabled System Memory 640 KB Extended Memory 494 MB CPU Type AMD K8 2800 CPU Speed 1600 MHz BIOS Version 1 0A 0517 0812 F1 Help Select Item Change Values F9 Setup Defaults Esc Exit Select Menu Enter Select Sub Menu F10 Save and Exit ...

Page 74: ...the system time from your operating system Primary Master This field display various parameters for the hard disk drive If type Auto is selected the system automatically sets these parameters If type User is selected Cylinders Heads and Sectors can be edited Secondary Master This field is for information only as the BIOS automatically detects the DVD ROM DVD CD RW Combo QuickBoot Mode This field a...

Page 75: ...formation detected by the BIOS during Power On Self Test POST BIOS Version This field is for information only as the BIOS displays the BIOS version during the Power On Self Test POST 6 2 1 INTERNAL HDD SUB MENU Phoenix BIOS Setup Utility Main Advanced Security Boot Exit Primary Master 60012MB Item Specific Help Type Auto User you enter parameters LBA Format of hard disk drive installed Total Secto...

Page 76: ...types as CD ROM User Auto or None by pressing Space bar Set this option to Auto so your computer will automatically detect the drive type during power on Set this option to None when your computer is not installed any devices Press Esc to return to the Main Menu 6 3 Using the Advanced CMOS Setup Phoenix BIOS Setup Utility Main Advanced Security Boot Exit Item Specific Help 4 Chipset Configuration ...

Page 77: ...em Change Values F9 Setup Defaults Esc Exit Select Menu Enter Select Sub Menu F10 Save and Exit Graphics Aperture Lets you specify the memory size of the Graphics Engine Please set it to default value Frame Buffer Size Lets you specify the speed of AGP rate for video devices Please set it to default value All items on this sub menu cannot be modified unless you are qualified system supervisor Plea...

Page 78: ...t Menu Enter Select Sub Menu F10 Save and Exit Supervisor Password Is Set Clear selections show that the notebook is under controlled by Supervisor Password or not User Password Is Set Clear selections show that the notebook is under controlled by User Password or not Set Supervisor Password Supervisor password gives you the authority in accessing the setup utility You also need to enter this pass...

Page 79: ...oot sector on hard disk will protect against viruses In this situation only the supervisor can access the Boot Sector of fixed disk Normal Write Protect Virus check reminder This field always displays the virus check message every time you boot your computer You can set the reminder message to Disabled Daily Weekly or Monthly System backup reminder This field always displays the system backup mess...

Page 80: ...s or Collapses devices with a or Ctrl Enter expands all Shift 1 enables or disables a Device and moves the Device up or down n May move removable device between Hard Disk or Removable Disk d Remove a device that is not Installed F1 Help Select Item Change Values F9 Setup Defaults Esc Exit Select Menu Enter Select Sub Menu F10 Save and Exit To select the boot device you can use the up or down arrow...

Page 81: ...nges Battery Refresh F1 Help Select Item F5 F6 Change Values F9 Setup Defaults Esc Exit Select Menu Enter Execute Command F10 Save and Exit Exit Saving Changes Saves all changes to CMOS while running the BIOS setup program and exit from the system setup program Exit Discarding Changes Allows you to discard all changes made while running the BIOS setup program and exit from the system setup program...

Page 82: ...Customizing Your Notebook 6 87 Save Changes Saves Setup data to CMOS Battery Refresh Conditions the battery so that the battery can be fully charged ...

Page 83: ...puting and multimedia technology Lightweight and compact your Notebook PC runs on a whole wide range of general business personal productivity and professional applications it is ideal for use in the office at home and on the road Your Notebook PC also allows you for several levels of customization and expansion that are previously available only on desktop PCs 89 ...

Page 84: ...cloth for cleaning The socket outlet shall be installed near the notebook computer and shall be easily accessible Please keep the notebook computer away from humid environments Lay the notebook computer on a reliable surface when installing A drop or fall may cause injury and damage to your computer The openings on the enclosure are for air ventilation and circulation to protect your notebook from...

Page 85: ...he notebook computer should be noted If the notebook computer is not in use for a long time disconnect it from the power outlet to avoid possible damage by transient over voltage Never pour any liquid into openings or any part of your notebook as this may cause fire electrical shock and damage to your notebook Never open the body of your notebook computer For safety reason this notebook computer s...

Page 86: ...tion according to IEC 60704 1 is equal or less than 70dB A 7 2 Cleaning Your Computer When it is necessary to clean the plastic case and keyboard use a soft lint free cloth slightly dampened with a mild detergent solution or use the contents of any commercially available computer cleaning kit Never use alcohol petroleum based solvents or harsh detergents to clean the notebook Also never spray any ...

Page 87: ... off the LCD power and display when the system is in inactivity for some time Adding screen savers is also acceptable Follow the safety guidelines mentioned earlier and how to clean your computer 7 4 Maintaining Your Hard Disk Losing your data has worse consequences as a system break down Users must make it a habit of performing daily or weekly data backup Here is some maintenance you could do Reg...

Page 88: ... Never use an external charger other than the one supplied with your computer Do not leave batteries in hot locations for more than a day or two Do not leave your battery in your computer for longer than 1 month without plugging in the power adapter Do not leave battery in storage for more than 2 months without recharging it to prevent over discharge Over discharge will hurt the battery Dispose de...

Page 89: ...ave Don t forget to bring along the AC adapter and extra battery pack Try to bring backup software as well Check the voltage rating and the outlet type of your destination If the power cord of the adapter is different then you need to purchase a suitable one Consult your dealer Carry your computer in its carrying case or in a briefcase Never check in the computer as a luggage Remember to apply tho...

Page 90: ... Information This appendix gives information on the technical and hardware specifications of your computer Please note that the information mentioned here may not be exactly the same with your computer as specification is subject to change without notice 97 ...

Page 91: ...using 200 pin SODIMM 128MB 256MB 512MB and 1024KB module PC 333 400 DDR SDRAM modules LCD DISPLAY 15 Color TFT LCD XGA 1024x768 resolution Maximum 16M 32 bit true colors VGA SYSTEM S3 UniChrome Pro Simultaneous LCD and external monitor CRT display Extended Display to an external display device Up to 1280x1024 resolution non interlaced on external display ...

Page 92: ...7 Built in 2 High Quality Speakers One Microphone Line In Jack One Headphone Line out Jack Sound volume adjust by Keyboard hot keys PCMCIA 32 bit CardBus PCI Local Bus PCMCIA controller Supports 1 x Type II PC card Supports 32 bit CardBus and 16 bit PC Cards GLIDE PAD Integrated Glide Pad pointing device with left and right buttons KEYBOARD 87 Int l 88 UK 89 JPN Keys with Windows systems hot keys ...

Page 93: ...two for 1 1 One DB 15 Pin VGA Port One RJ 11 Port for Modem Module One RJ 45 Port for LAN Module AC DC POWER SUPPLY ADAPTER Miniature Size Adapter AC 100 240Volt 50 60 Hz 120W 19 Voltage BATTERY 9 cell Li Ion Battery Pack with Smart Battery function Approximately 2 Hours Battery Life WEIGHT AND DIMENSION 13 2 W x 11 42 D x 1 5 H Approximately 7 9 lbs ...

Reviews: