


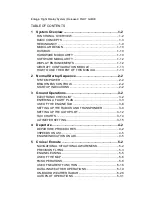
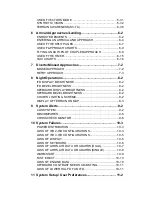
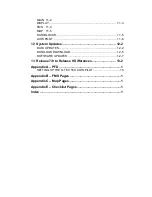
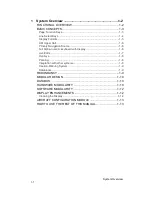


Summary of Contents for Entegra
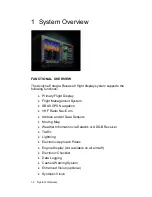
Page 1: ......
Page 2: ......
Page 40: ......
Page 48: ......
Page 92: ......
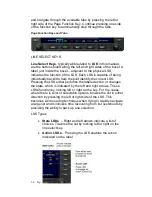
Page 112: ......
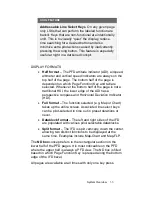
Page 116: ......
Page 117: ...System Alerts 9 1 9 System Alerts 9 2 CAS SYSTEM 9 2 MISCOMPARES 9 6 CROSSCHECK MONITOR 9 8 ...
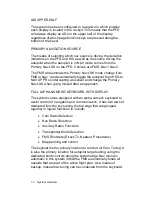
Page 125: ......
Page 136: ......
Page 150: ......
Page 190: ...D 2 Appendix D SYS Pages MAP MAP TAB ...
Page 191: ...Appendix D SYS Pages D 3 MAP SPLIT TAB ...
Page 192: ...D 4 Appendix D SYS Pages MAP CHART TAB ...
Page 193: ...Appendix D SYS Pages D 5 MAP CHART TAB ...
Page 209: ...Appendix D SYS Pages D 21 ...
Page 210: ...D 22 Appendix D SYS Pages SYS ALERT TAB ...
Page 213: ...Appendix D SYS Pages D 25 SYS SETUP TAB ...
Page 214: ...D 26 Appendix D SYS Pages SYS ICE O2 TAB KC 100 ONLY ...
Page 220: ......
Page 224: ......


