background image

Region code of DVD/Video player for home is 4 or ALL. In inserting a disc with other region code, it does not

operate. Please only use a disc with region code 4 or ALL. 

is a ‘Prohibition’ mark. If this mark is displayed in operating the product, please wait for a while, then use

it. If "

Prohibition" mark  continues to  be displayed in  pressing a  button after  that, it means the button does

not function in the currently played disc.

Press a product button on the remote control then use the product. 

• DVD operation  : [DVD] button 
• Video operation  : [VCR] button 

W991

Instruction Manual

P/N:97P95600D0-5W

Summary of Contents for W991

Page 1: ...f this mark is displayed in operating the product please wait for a while then use it If Prohibition mark continues to be displayed in pressing a button after that it means the button does not function in the currently played disc Press a product button on the remote control then use the product DVD operation DVD button Video operation VCR button W991 Instruction Manual P N 97P95600D0 5W ...

Page 2: ...FF 20 Output Select 21 DVD Playback 22 VCR Playback 23 Recording 24 VCR Operation Tuning in New Stations 27 Timer Recording 30 More Functions 32 Connections and Copying 35 DVD Operation Playing a desired scene 37 Confirming the current PLAY mode on screen 41 Selecting an AUDIO language SUBTITLE language and 3D AUDIO 43 Selecting ZOOM and Multi Angle 44 About MP3 CDDA JPG and MPG discs 45 Displayin...

Page 3: ...ervicing This unit is fully transistorized and does not contain any parts that can be repaired by the user 1 READ INSTRUCTIONS All the safety and operating instructions should be read before the unit is operated 2 RETAIN INSTRUCTIONS The safety and operating instructions should be retained for future reference 3 HEED WARNINGS All warnings on the unit and in the operating instructions should be adh...

Page 4: ... To prevent battery electrolyte leakage which may result in injury and damage to the unit or other objects observe the following precautions A All batteries must be installed with the proper polarity B Do not mix new with old or used batteries C Only use batteries of the same type and brand D Remove the batteries when they are not to be used for a long period time E When the batteries have become ...

Page 5: ...st service center Checking and Replacement of Antenna Antenna is subject to change in its direction or damage by wind and rain For clean screen contact and consult your nearest service center about checking and replacement Copyright Do not use your recordings without permission of a copyrighter except personal usage Tape and Disc Handling Do not use any tape and disc below Damage of video head or ...

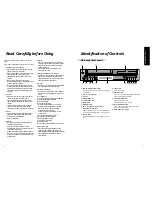
Page 6: ...picture Stop Child Lock VCR OPERATION Operation Display Window Identification of Controls ANT IN ANT OUT R L OUT IN AUDIO VIDEO R COAXIAL L Y Pr Pb DIGITAL COMPONENTOUT AUDIOOUT OPTICAL AUDIO OUT DIGITAL AUDIO OUT DVD VCR DVD POWER CORD It is a jack for supplying power to the unit Connect to outlet in a wall AUDIO OUTPUT Jack COMPONENT OUTPUT Jack DIGITAL OUTPUT COAXIAL Jack To enjoy sound quality...

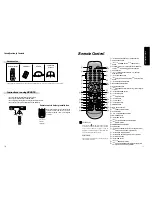
Page 7: ... track 3 VCR Record SPEED button 4 VCR Record button 5 VCR TV VCR button 6 DVD 3D button 7 VCR CM SKIP 8 VCR Replay button 9 POWER button 0 DVD SELECT button VCR INPUT Selection button CLEAR button DVD VCR OSD DISPLAY button OK ENTER button Q DVD MENU button q DVD Chapter Title Time SEARCH button W DVD ZOOM button w FORWARD SEARCH button E STOP button e DVD NEXT button Move into a next chapter or ...

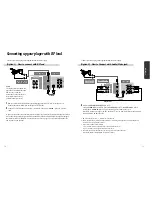
Page 8: ...e circular cable RF cable surplus cable plugged in ANT IN jack in rear panel of TV Connect the cable to ANT jack in rear panel of DVD Video Connect TV to DVD Video Connect TV jack in DVD Video with ANT IN jack in TV with RF cable INPUT 1 ANT IN INPUT 2 REAR PANEL OF DVD VIDEO REAR PANEL OF TV AUDIO VIDEO CABLE If there is AUDIO VIDEO INPUT jack in TV Connect VIDEO OUT jack in DVD Video to VIDEO IN...

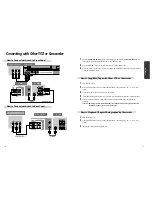
Page 9: ...r or playback video with DVD Video insert recording tape attached recording tab in DVD Video Turn on DVD Video Press INPUT button of remote control and adjust DVD Video to display AV or AV F in TV screen Press PLAY button in Camcorder or playback video Press REC button in DVD Video if you want to record contents of camcorder or playback video Press Pause button in DVD Video when unnecessary or und...

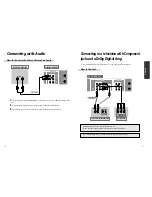
Page 10: ... For Input Select in stereo unit Select External Input connected with DVD Video Playback DVD disc or Hi Fi videotape you can hear sound in speaker of stereo unit Use in COMPONENT In jack attached in TV or amp supporting Dolby Digital NOT SUPPLIED L AUDIOIN R REAR PANEL OF DVD VIDEO DOLBY DIGITAL DECODER AMPLIFIER TV CONNECTIONS COMPONENT IN CONNECTING CABLE Manufactured under license from Dolby La...

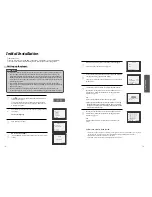
Page 11: ...t does not apply to models which do not generate the RF output signal CHECK IT COUNTRY SET AUSTRALIA NEW ZEALAND PR SELECT OK CONFIRM SETUP END Press the OK button to confirm the recommended RF channel Should you wish the stations to have the same numbers as those used on the TV follow the instructions in Sorting programme locations on page 28 Else exit the basic installation function and enjoy yo...

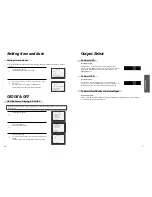
Page 12: ...D characters are not displayed in the normal picture 3 This player is set to OSD On Screen Display ON mode before shipping and you can change it to OFF mode VCR SETUP CLOCK SET LANGUAGE SET RF OUTPUT SET OSD ON OFF PR SELECT OK CONFIRM SETUP END OSD ON OFF ON OFF PR SELECT OK CONFIRM SETUP END SETUP TIMER PROGRAM PR PRESET VCR SETUP TAPE CONTROL PR SELECT OK CONFIRM SETUP END OSD On Screen Display...

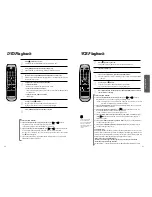
Page 13: ...n 1 2 3 To stop it press button For pause press PLAY PAUSE button in playback mode If you press this button once more it starts playback again 4 Press EJECT button in the front part or OPEN CLOSE button on remote control to remove the tape 5 If the product which has a auto detector detects a contaminated head s it shows the conditions to notice the contamination on screen Various Playback Methods ...

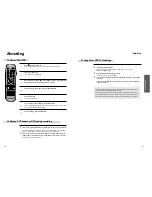
Page 14: ...E button After pressing PAUSE button if the pause status continues for five minutes the recording is released automatically 6 To exit recording press STOP button 7 Recording To Record With VCR To Enjoy a TV Channel or DVD during recording Recording This product incorporates copyright protection technology that is protected by U S patents and other intellectual property rights Use of this copyright...

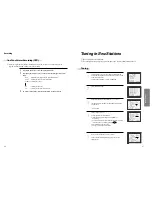
Page 15: ...1 Select MANUAL SET 2 Choose any unused location number or P xx It s simplest to use the same location number on both the TV and video and confirm 3 Set the station you want the programme location number the broadcast system you want Aerial CH or Cable CC You can directly enter the real channel number with the 0 to 9 buttons or search by pressing œ œ The fine tuning you can adjust Change or create...

Page 16: ...OSEARCH CH__ FINE TUNING NAME O___ If the location numbers used for programmes stored in your TV and player are different you can change them on the player To do this move the stations to the right numbers until they are arranged the way you want 1 1 Call the player s SETUP choose PR PRESET then PR ALIGN 2 2 Select the programme to swap Confirm by pressing OK button Move the station to the desired...

Page 17: ...r the recording on the cassette the video switches automatically to LP for double recording capacity The recorder will eject cassettes which have the safety tab removed The player will be powered on and record the program at the set time In case the player is powered on after setting of timer recording the player cannot record in VCR mode but can record in DVD mode PR SELECT AV 0 9 SETUP PR CORREC...

Page 18: ...play Remaining time and cassette length Searching for a recorded program via index Reset the counter COUNTER RESET 0 00 00 If you press the PLAY button for 5secs during stop or still mode it goes Auto repeat mode This player plays repeatedly the tape from the beginning to end parts To release this mode press the button or mode operation button PLAY FF REW or STOP Call the player s SETUP choose VCR...

Page 19: ...t you can listen to Choice of sound output Connections and Copying If you are using a RCA cable select the AV input on the TV to see the picture from the player If you are not using a RCA cable select the button number on the TV reserved for video input to see the picture from the player If you are not using a RCA cable your player can transmit pictures and sound to the TV via the coax aerial cabl...

Page 20: ...apter or track or first scene of current chapter or track Press the TITLE PBC or MENU button A list of the titles on the disc is displayed For the case of VCD disc menu screen will appear only when the disc has PBC function and PBC ON is activated 1 Press the ENTER button or PLAY button after pressing the œ button to select the desired title For the case of VCD disc press the Number button The sel...

Page 21: ...ts only in PBC OFF mode DVD C H A P T E R T I T L E O F F VCD T R A C K A L L O F F CD MP3 Repeat one Repeat all R a n d o m O F F Each time you press REPEAT button in playback mode repeat playback starts as below A A B O F F Playing desired scene Repeating a defined period Repeating a defined period from A to B Playing desired scene If you want to search with a title number press SEARCH button on...

Page 22: ...Press MARK during play and press ENTER at the starting point to be viewed listened to again 1 Recalling Clearing a marker Press MARK during playback Press œ to select the marker to be recalled cleared Press PLAY to recall a marker Or press CLEAR to clear a marker Play resumes from the point corresponding to the selected marker or the selected marker is cleared 2 1 Searching VCD with a track or tra...

Page 23: ...de Confirming the current CD MP3 JPG MPG disc mode MUSIC file select JPG file select MPG file select current cursor file name For more information refer to 45 48p Selecting an AUDIO language SUBTITLE language and 3D AUDIO The user may select an audio language and subtitle language if a disc includes Multi language Keep pressing AUDIO button till the user s preferred language appears in playback mo...

Page 24: ...this DVD player Press the DVD open OPEN CLOSE button the disc tray opens Put a MP3 or CDDA disc on the disc tray with the label side up Press the DVD open OPEN CLOSE button the disc tray closes The unit will take a short while to load the disc and display the directory structure 1 The below figure appears 2 Select the file to listen to or view Move the cursor to desired file which you want to list...

Page 25: ...y 5 MUSIC MP3 001 018 0 00 34 0 03 59 Repeat one max 6 01 musicfamily i am Smooth PROGRAM LIST _ _ 1 01 musicfamily i 2 02 musicfamily i 3 03 musicfamily i 4 04 musicfamily i 5 05 musicfamily i 6 06 musicfamily i 7 07 musicfamily i MUSIC MP3 001 018 0 00 34 0 03 59 REPEAT FILE max 6 02 musicfamily i am Lager T LIST _ _ 1 01 musicfamily i 2 02 musicfamily i 3 03 musicfamily i 4 04 musicfamily i 5 0...

Page 26: ... movie or file press To skip to previous movie or file press œœ To view fast forward playback press To view fast reverse playback press œœ If you press DISPLAY button it shows the current disc mode If a disc includes menus the user may use them Press MENU button In case of a DVD disc it shows menus in the disc Also they are different according to discs If it is a VCD2 0 select PBC ON mode by press...

Page 27: ...ess CLEAR if an incorrect language code is entered 5 Language Setup OSD AUDIO SUBTITLE DISC MENU FRENCH SPANISH GERMAN ITALIAN PORTUGUESE SWEDISH DUTCH AUTO OSD AUDIO SUBTITLE DISC MENU SPANISH GERMAN ITALIAN PORTUGUESE SWEDISH DUTCH AUTO OTHERS Enter the appropriate code number for the initial settings AUDIO SUBTITLE and or DISC MENU Code Language Code Language Code Language Code Language Code La...

Page 28: ...CED connect Y Pb Pr on the DVD VCR to the INTERLACED input on your TV If SCAN MODE is set to PROGRESSIVE connect Y Pb Pr on the DVD VCR to the PROGRESSIVE SCAN input on your TV TV ASPECT SCAN MODE INTERLACED PROGRESSIVE Audio Setup Select a Digital Output Set audio output to coaxial or optical You can set the outgoing digital signal to BITSTREAM or LPCM 2 Select a Dynamic Range You can set the Dyn...

Page 29: ... STOP or RESUME STOP press SETUP button 1 OSD SCREEN SAVER DEFAULTS PARENTAL PASSWORD ON ON RESET 8 ADULT OSD SCREEN SAVER DEFAULTS PARENTAL PASSWORD ON OFF OSD SCREEN SAVER DEFAULTS PARENTAL PASSWORD ON OFF OSD SCREEN SAVER DEFAULTS PARENTAL PASSWORD RESET Are you sure OK CANCEL OSD SCREEN SAVER DEFAULTS PARENTAL PASSWORD 1 KIDS 2 G 3 PG 4 PG 13 5 PG R 6 R 7 NC 17 8 ADULT OSD SCREEN SAVER DEFAULT...

Page 30: ...ted interactively with the TV monitor by looking at the menu shown on the TV monitor It stands for PlayBack Control CHAPTER It means the information recorded in a DVD A title in a DVD is divided into many tracks of which a track is called as a chapter A certain scene of a screen can be quickly searched with the chapter number TITLE It means the information recorded in a DVD A DVD can be divided in...

Page 31: ... message is displayed in a screen While recording and playing the top of screen extremely waves A screen is not clear A screen at pause is trembling or slow screen is not clear Checks Symptom Please check whether a power plug is inserted in an electric outlet Please check whether a videotape is inserted in Try to insert a plug again Please check whether a power plug is inserted in an electric outl...

Page 32: ...recorder Try to record it with the recorder You may start recording it in REC PAUSE Please start recording it from stop condition Please select CABLE not NETWORK from the CHANNEL SETTING Trouble Shooting DVD The recorder does not play No sound comes through A disc is playing but screen does not appear or poor screen appears Sound is irregular REMOTE does not work Dolby Digital sound does not work ...

Page 33: ... AUDIO input 8 8dBm RCA JACK VIDEO output common use of DVD and VCR VIDEO output terminal 1 0 Vp p unbalanced RCA JACK VIDEO output DVD only Component output 75Ω In load Y 1 0Vp p Pb 0 7Vp p Pr 0 7Vp p AUDIO output common use of DVD and VCR Audio output terminal 2 kinds 5 8dBm VCR 2Vrms DVD RCA JACK AUDIO output DVD only Analogue AUDIO output 2 0Vrms Digital audio output OPTICAL COAXIAL Playable t...

Reviews: