background image

Read these instructions carefully 

before use and keep them for 

future reference. Your child’s 

safety may be affected if you do 

not follow these instructions.

www.babyjogger.com

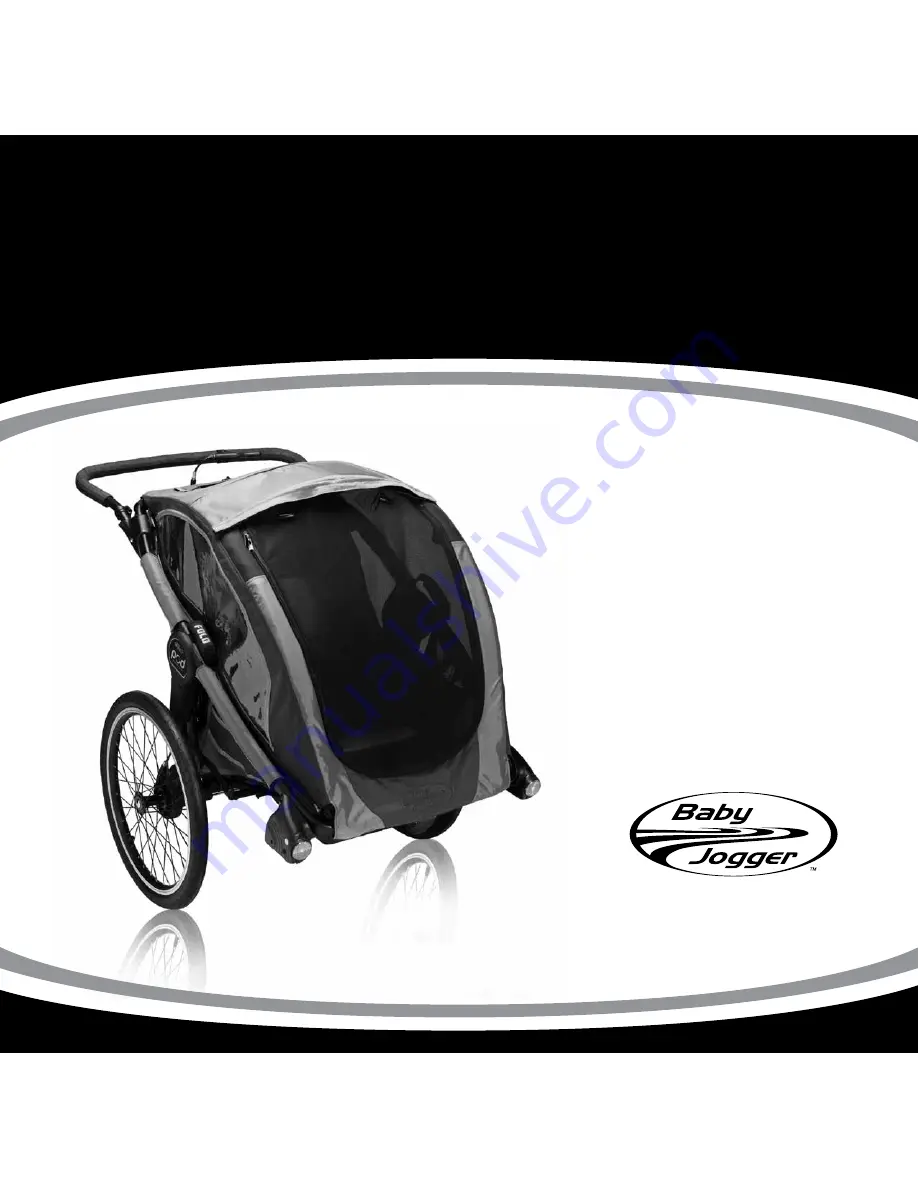
POD

 Assembly InstructIons   

Summary of Contents for POD

Page 1: ...Read these instructions carefully before use and keep them for future reference Your child s safety may be affected if you do not follow these instructions www babyjogger com POD Assembly Instructions...

Page 2: ...a Ensure the seating compartment is properly ventilated and the child children stay adequately hydrated Recommended temperature limits are 32 F to 100 F 0 C 38 C Do not use with children who exceed th...

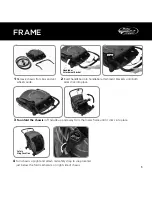
Page 3: ...both sides click into place 3 To unfold the chassis Lift handle up and away from the lower frame until it clicks into place 4 Turn chassis upright and attach red safety strap to snap located just belo...

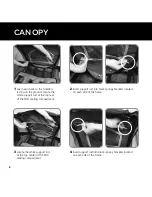
Page 4: ...od at the top rear of the POD seating compartment 2 Insert support rod into black canopy brackets located on each side of the frame 3 Locate the white support rod at the top center of the POD seating...

Page 5: ...wheel out after installing 2 To remove rear wheels Press the wheel release button while sliding the wheel away from the wheel mount Wheel Mount Release Button 2 Lift up on the brake pedal to disengag...

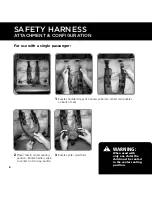
Page 6: ...ust be seated in the center seating position 3 Buckle center waist belt 2 Place child in center seating position Buckle harness yoke to center crotch strap buckle 1 Buckle shoulder straps of harness y...

Page 7: ...tion Buckle harness yoke to the crotch strap buckle The center crotch buckle will not have a harness yoke attached 1 Buckle shoulder straps of harness yoke into two right buckles on back of seat 4 Rep...

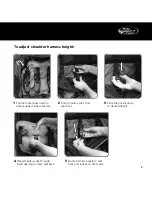
Page 8: ...uide on upper buckle to lengthen or shorten To adjust crotch strap 1 Thread webbing strap through plastic guide on lower buckle to lengthen or shorten To adjust waist belt 1 Thread webbing strap throu...

Page 9: ...ess yoke from seat back 1 Pull mesh seat back down to expose upper harness buckles 3 Slide the buckle down to desired height 5 Fasten harness buckle to seat back and repeat on other side 4 Thread harn...

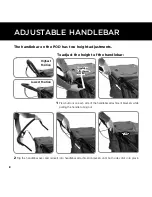
Page 10: ...to handlebar attachment brackets until both sides click into place 1 Press buttons on each side of the handlebar attachment brackets while pulling the handle tubing out To adjust the height of the han...

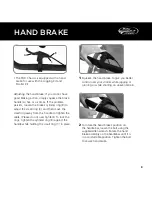
Page 11: ...olt to secure hand brake Adjusting the hand brake If you do not have good braking action simply squeeze the brake handle A five or six times If the problem persists loosen the brake s cylinder ring B...

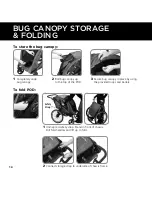
Page 12: ...o the top of the POD 3 Secure bug canopy in place by using the provided loops and barrels To store the bug canopy 1 Unsnap red safety strap Stand in front of chassis Pull fold handles and lift up to f...

Page 13: ...rom the beach can rust the wheels footbrake and parts of frame Spraying regularly with a silicone lubricant will keep your chassis and wheels clean and safe Storage Store your POD in a dry well ventil...

Page 14: ...r Jogger or Trailer mode sold separately allowing you to choose how you want to use your POD All conversion kits are easy to install with no tools necessary so you are free to change your activity on...

Page 15: ...ccidents or injuries related to leaving your child ren unattended This warranty specifically excludes claims for indirect incidental or consequential damages The implied warranties of merchantability...

Page 16: ...oduct and we are proud to manufacture it If you have any questions or comments please give us a call at 1 800 241 1848 Baby Jogger is a Division of Dynamic Brands 8575 Magellan Parkway Suite 1000 Rich...

Reviews: