
Quick Start Guide - Barracuda NG Firewall 5.2
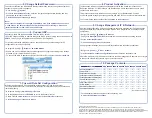
1. Network Deployment
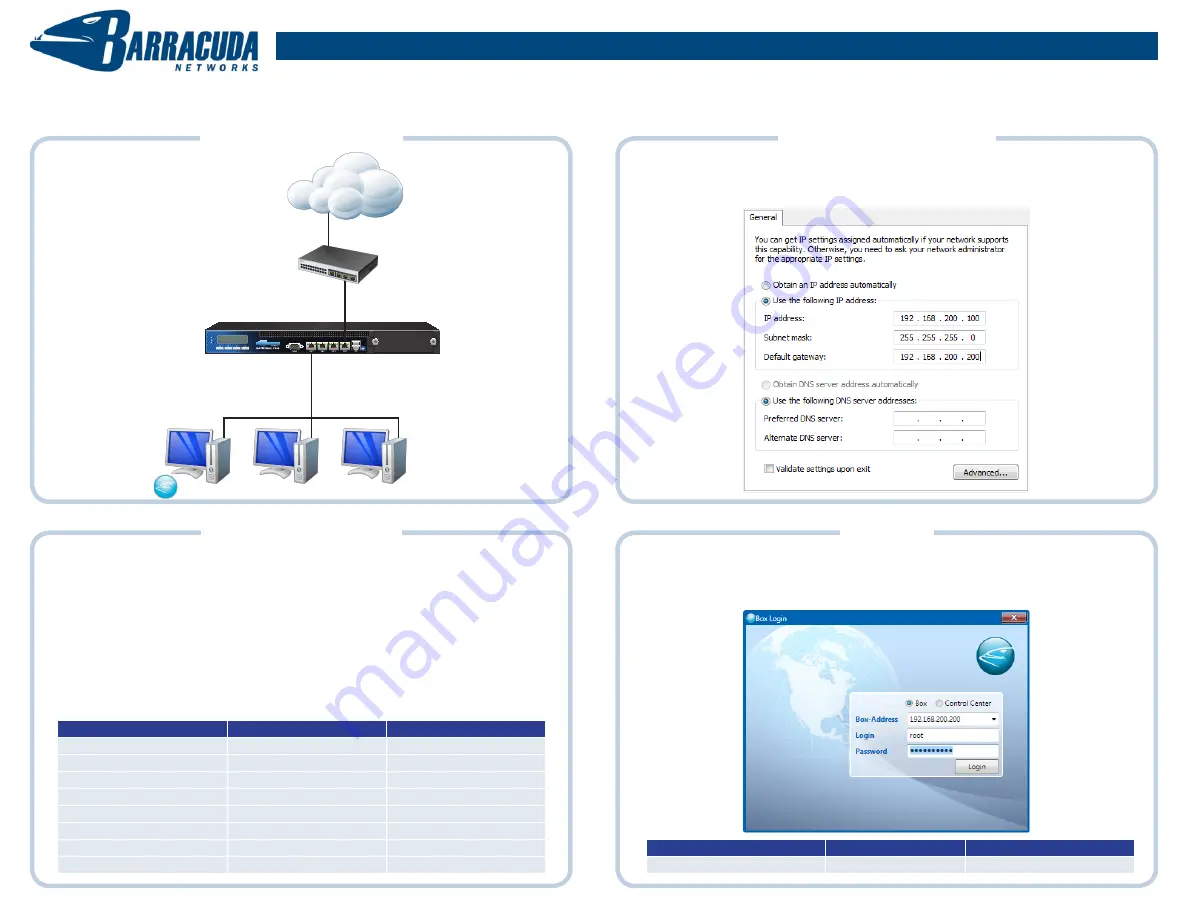
3. Network Configuration
4. Connect
2. Physical Connection
This Quick Start Guide will help you with the initial configuration of your Barracuda NG Firewall. It shows how to connect to your Barracuda NG Firewall, connect an Internet Service Provider, how to configure the
firewall rule set to get a connection to the Internet, install your licenses and activate the unit.
• Connect an AC power cord to the Barracuda NG Firewall.
Note: Immediately after connecting the power cord to the Barracuda NG Firewall (F10/
F10x/F20x), the appliance starts booting and loads the operating system
.
• Either use the crossover network cable (red) to directly connect to the management port of the
appliance or use the standard network cable (grey) and connect to the same network switch as
the Barracuda NG Firewall.
The table below lists the default port configuration for certain appliance types. Models F10 to F30x
have a pre configured WAN port to connect your ISP. Models F400 to F900 need to be configured
manually.
Model
Management Port
WAN Port
F10
PORT1
PORT4
F100 / F101
PORT1
PORT4
F200 / F201
PORT1
PORT4
F300 / F301
PORT1
PORT4
F400
PORT1
F600
PORT1
F800
1st port of left module
F900
MGMT
Since every Barracuda NG Firewall is shipped with a default network configuration it is necessary
to configure your personal computer accordingly.
Launch the network adapter configuration dialog of your MS Windows operating system and modify
the IPv4 configuration.
Management IP Address
Login
Password
192.168.200.200
root
ngf1r3wall
Launch the NG Admin application located on the USB Thumb Drive shipped with your Barracuda
NG Firewall. This application is used to manage your Barracuda NG Firewall.
Select
Box
, enter the default management IP address, the default user credentials, and click
Login
.
Internet
ISP Modem
PORT1
PORT4
NG Admin
192.168.200.0/24
.100
.200


