background image

User Manual

MODEL: ATV40FHDS-1220

40

AFTER SALES SUPPORT

1300 886 649

info@tempo.org

MODEL: ATV40FHDS-1220  PRODUCT CODE: 703576  12/2020

AUS

Summary of Contents for ATV40FHDS-1220

Page 1: ...User Manual MODEL ATV40FHDS 1220 40 AFTER SALES SUPPORT 1300 886 649 info tempo org MODEL ATV40FHDS 1220 PRODUCT CODE 703576 12 2020 AUS ...

Page 2: ...o the highest standards of performance and safety and as part of our philosophy of customer service and satisfaction are backed by our comprehensive 1 Year Warranty Domestic use only This product is intended for indoor domestic use only It is not suitable for commercial industrial or outdoor use Do not use this product for anything other that its intended purpose and only use it as described in th...

Page 3: ...ps 5 Attaching the Stand 6 Wall Mounting the TV 7 Connect to Power 8 Connect your Antenna 8 Controls and Connections 9 Get to Know your TV 9 Buttons on the TV 9 Ports on the TV 10 Remote Control 12 Setup 12 Using the Remote Control 13 Buttons Functions 14 TV Guide 40 Recording 41 Recording Live TV 42 Scheduled Recording 42 Playback 42 Pause Live TV Time Shift 43 USB Mode 44 Set up 44 Troubleshooti...

Page 4: ...V B Remote Control C AAA Activ Energy Batteries 2 D TV Stands 2 E Screws for TV Stands 4 F Warning Sheet G TV Toppling Safety Message H Quick Start Guide I Warranty Certificate J General Safety Warnings K User Manual You will need Phillips head screwdriver for stand installation Antenna cable to watch live TV Internet connection to access Smart TV apps D E F G H I J ...

Page 5: ...s enough space around vents for airflow The remote control works up to 6 metres away from the TV Unplug the TV before cleaning it Clean using a dry cloth only do not use water or chemicals Use only the power supply provided It is highly recommended to use safety straps for securing the TV in place Keep liquid children and pets away from the TV at all times ...

Page 6: ... of the TV 3 Attach the stands to the TV at the installation points using the screws provided Grab a screwdriver for this bit Make sure the legs are facing away from each other not leaning inwards Attaching the Stand Unplug the TV from the power outlet before installing or removing the stand Only touch the frame not the screen It is highly recommended to use safety straps for securing the TV CAUTI...

Page 7: ...e mounting bracket to wall mount this TV screws are not included Unplug the TV from the power outlet before wall mounting Contact a professional for assistance with wall mounting the TV Required VESA Mounting Bracket 4 x M6 10mm screws or longer as required The screws in the package are for securing the TV stands only If you are wall mounting the TV consult a qualified installer for advice on brac...

Page 8: ...Power Make sure the TV is switched off at the power outlet until you have finished connecting your cables Connect your Antenna Antenna cable not included ABC HD SBS ONE HD 7HD 9HD 10 HD PRIME7 HD WIN HD Example HD Channels Don t forget to plug in the TV to the power outlet Leave the power switched off until installation is finished Image is an example only Plug on your TV may vary ...

Page 9: ...ur TV On Standby light and Remote sensor Bottom View When the TV is on standby press this button to turn the TV on When the TV is on press once to access the on screen control menu While in this menu press once to switch between menu options press and hold to select When the TV is on press and hold for 5 seconds to turn the TV off ...

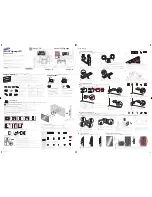
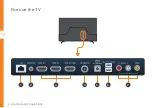
Page 10: ...10 CONTROLS AND CONNECTIONS Ports on the TV 3 7 4 5 6 1 2 ...

Page 11: ... any HDMI device Supports Full HD resolution 4 ANTENNA IN FREE TO AIR TV Connect your antenna for live TV Antenna cable not included 5 DIGITAL AUDIO OUT OPTICAL SOUND Connect an external digital audio device Use an Optical cable not included to connect the TV with an amplifier soundbar or other audio decoding device for digital audio signal output 6 USB STORAGE Plug in a USB stick to PVR record an...

Page 12: ...ries together Do not use different types of batteries e g Manganese and Alkaline batteries together Remove the batteries from the remote if you do not intend to use it for a long time When discarding used batteries follow any guidelines for recycling and disposal of batteries that apply in your local area Keep batteries away from children and pets Never throw batteries into a fire or expose them t...

Page 13: ...ngle of up to 30 degrees to either side of the sensor as illustrated below Image is an example only Remote sensor location on TV may vary 6m Remote Hints and Tips Do not drop step on or otherwise impact the remote control This may damage the parts or lead to malfunction Do not place objects between the remote control and the remote sensor Do not use this remote control while simultaneously operati...

Page 14: ... GREEN YELLOW BLUE Functions are according to the on screen display MENU Press once to enter the quick settings menu Press twice to enter the main settings menu Press the UP DOWN LEFT RIGHT buttons to navigate OK Confirm your selection GUIDE Launch the TV Guide DTV Buttons Functions MUTE Mute or restore sound LIST Display the DTV channel list Return to the previous screen or channel EXIT Exit Quit...

Page 15: ...ser Launch the Web Browser app Start playback Pause playback Reverse playback Skip to previous chapter track S MODE Change the sound to one of the preset settings P Go to the next or previous channel Switch between TV and Teletext mode Launch the YouTube app Launch the Amazon Prime Video app REC Press to start recording Stop playback Advance playback Skip to next chapter track Teletext is no longe...

Page 16: ...o select an input source other than DTV or setup Netflix the setup wizard will exit and will not let you tune TV channels To tune channels go to Menu Channel Auto Tuning If you make an error you can update your preferences in the settings menu later If you are using a wired network connect an ethernet cable to the TV and select Wired Mode The TV will automatically connect to the Internet If you ar...

Page 17: ...een keyboard Use the buttons on the remote control to select a character and press OK to enter it Input the correct password and press OK to close the on screen keyboard Select Connect and press the OK button to connect to the network If connection is successful a tick will appear next to your Wi Fi network s name If the TV isn t connecting to the internet check the troubleshooting section for mor...

Page 18: ...ng from the modem and connect to the network If connection is successful you will see Connected on screen If you want to assign your own network settings select the IPv4 or IPv6 protocol and set it to Manual Enter your personal network settings select Connect and press OK If connection is successful you will see Connected on screen Press the EXIT button to close the menu Make sure you have an ethe...

Page 19: ...ture Mode User Mode Settings Contrast Brightness Colour Sharpness Tint Backlight TV Setting Menus Menu Navigation Buttons Function Remote Button Display the quick menu press once Display the main menu press twice Enter a sub menu OR Select an option Adjust a value Return to the previous menu Exit a menu Press the MENU button twice to display the TV main menu settings See the guide below for all th...

Page 20: ...nced Settings WOW IP Settings System 29 Language Subtitle Subtitle Hearing Impaired Audio Languages Subtitle Languages HbbTV Country HDMI CEC PVR File System Environment Restore Factory Default PVR File System 31 Select Disk Format Start Speed Check Record List Time Shift Size Lock 32 Lock System Set Password Block Channel Parental Lock Timer 33 Auto Sync Time Zone Clock Sleep Timer Auto Sleep No ...

Page 21: ...Tuning Manually select the broadcast channel frequency and tune digital TV channels ATV Manual Tuning Manually select and tune analog TV channels Analog TV is no longer supported in Australia Dynamic Rescan Automatically update the channels list based on the broadcast stream Channel Edit See the next page for more information Signal Information Display current signal information DTV mode only Chan...

Page 22: ... Move the channel location on the list Press YELLOW to select the channel then use the buttons to select a position and press OK to confirm it Skip Press BLUE to skip the highlighted channel Delete Press RED to delete the highlighted channel Fav Press GREEN to add a channel to the favourites list ...

Page 23: ...he contrast of the bright and dark areas of the picture The closer to 100 the higher the contrast Brightness Adjust the overall screen brightness The closer to 100 the brighter the picture Colour Adjust the saturation The closer to 100 the deeper the colour Sharpness Adjust the sharpness of the picture The closer to 100 the sharper and clearer the image Tint Adjust the tint of the picture Valid on...

Page 24: ... image detail and visual effects Original Contrast Colour Brightness Sharpness Option Description Noise Reduction Reduces screen noise static MPEG NR Reduces MPEG video noise to improve picture quality Dynamic Contrast Adjusts the difference between the bright and dark sides of the screen according to the brightness of the image Film Mode Detects a film signal and automatically adjusts the picture...

Page 25: ... Equalization Adjust selected frequencies Surround Adjust surround sound effect from your TV speakers Dialogue Enhancer Improves the clarity of voice AVC Auto Volume Control Adjust the increase or decrease of audio when you change channels video sources or content Below options are available when sound is set to User ...

Page 26: ...nged persons DTV only subject to program AD Volume Adjusts the volume for the Audio Description AD when it s switched on Audio Delay S PDIF Delay Synchronize the sound from an external home theatre system with the TV picture Speaker Delay Synchronize the sound from the TV speakers with the TV picture Sound Reset Reset all audio settings back to factory defaults Want to set up your TV with HDMI ARC...

Page 27: ...ection Wired Network Settings Option Description Connection Type Switch between Wired and Wireless connections IPv4 Switch between Auto and Manual for advanced network setup IPv6 Connect with IPv6 standard Available options Auto Manual Disabled default Connect Connect to your home network Make sure you have a network cable connected to the TV ...

Page 28: ... on screen keyboard appear Visible Tick this box to see the password in plain text Connect Connect to the wireless network Advanced Settings Enter advanced wireless settings WOW Turn WOW ON OFF IP Settings Auto TV will automatically connect to the network once you ve connected to the wireless network Manual Manually assign following network settings IP address Subnet Mask Gateway DNS Keep it simpl...

Page 29: ...epending on the program Subtitle Languages Select your preferred subtitle language Available for digital channels depending on the program HbbTV Switch the HbbTV function On or Off Country Display the current country setting HDMI CEC See the next page for information PVR File System See page 31 for more information Environment Set the TV to Home mode recommended or Store mode Home mode is for gene...

Page 30: ...ontrol to select the HDMI input source Option Description HDMI CEC Turn HDMI CEC On Off Auto Standby When this is set to On turning off the TV will turn off the connected device as well ARC Audio Return Channel If this function is enabled sound from the TV can be sent to a HDMI ARC supported external audio device HDMI 1 port supports ARC functionality Auto Power On When this is set to On turning o...

Page 31: ...s the speed of the storage device Record List Show the list of recorded programs Time Shift Size Select the memory size for the Time Shift function Options 512MB 1 GB 2GB 4GB To make changes to PVR Personal Video Recording ensure your USB drive is inserted into the TV Check the troubleshooting section if you re having problems setting up your USB device ...

Page 32: ...ed channels Select the channel and press YELLOW to block or unblock the selected channel Parental Lock This item is used to block access to specific program ratings See options below Lock Enter the factory password 0000 using the number buttons on the remote and select OK on screen If you changed your password but forgot it you can still use the master password Factory Password 0000 Master Passwor...

Page 33: ...your timezone Clock Displays the DTV signal time or set the time manually Sleep Timer Select the desired Auto Sleep Standby duration Auto Sleep Sets the time when the TV will enter Standby mode due to inactivity No Signal Power Off When set to On if there s no input signal nor press button operation the TV will enter standby status automatically about 5 minutes later Timer ...

Page 34: ... device Internet Update Check Update the software using the internet NetReady Version Display current software version information Installation Guide Access the first time installation setup guide View End User License Agreement Read and accept decline the EULA App Settings Display information about Netflix ...

Page 35: ...interchange Radio and DTV programs when there is a radio program in DTV mode Aspect Ratio Adjust the video size The available video size may be different for different input source Subtitle Languages Select your preferred subtitle language available for DTV if multiple subtitle languages are broadcasted Quick Menu The Quick Menu gives you access to selected menu settings without the hassles of nav...

Page 36: ...sible Options On Off Audio Languages Select your preferred audio language available for digital channels if multiple audio languages are broadcasted Audio Only Turns off the TV screen and listen only to the audio Press the OK button to get the picture on screen again More Access the full menu settings ...

Page 37: ...her NetRange Smart TV apps Toon Goggles Screencast Web Browser You cannot download any extra apps on this TV Function Remote Button Display the Home App screen Select different Apps Open your desired App Smart TV Applications Netflix is a streaming service that offers unlimited viewing of a wide variety of award winning TV shows movies and documentaries A paid subscription is required This TV can ...

Page 38: ... the app Turn on Wi Fi and Wireless Display a k a Wi Fi Display Wi Fi Direct Cast Screen function on your smart phone or tablet Please refer to your device s instruction manual for information on how to turn on wireless display Your mobile device will display a list of available devices Choose Smart TV xxxx to connect Your mobile device will connect to the TV and will display the device screen on ...

Page 39: ...he site Press the RED button to bring out the address bar Press the OK button on the address bar to type the web address You can enter the web address using the on screen keyboard remote keyboard or connected wireless keyboard Select the Add to bookmark icon and press OK to add the web address as a favourite Select the Settings icon to access the browser menu settings Press EXIT to exit the web br...

Page 40: ...recording RED View scheduled recordings and reminders YELLOW Schedule a reminder for selected program BLUE Exit TV Guide menu TV Guide Free to air TV To access the TV Guide press the GUIDE button on the remote To activate the TV Channels use the buttons to select a channel in the left column then press OK to confirm TV Guide Functions GUIDE ...

Page 41: ...he signal is interrupted while in recording mode the recording will stop until the signal is established Do not turn the TV off while it is in time shift mode The file recorded can only be used on this TV Do not copy it to any other device When connecting or disconnecting the USB storage device ensure the TV is not in USB mode otherwise the USB device or the files stored on it may be damaged Back ...

Page 42: ...at the bottom of the screen Stop Recording Press STOP once display the dialogue box Select YES to stop recording Select NO to continue recording Scheduled Recording See TV Guide Functions on page 40 to schedule recordings and manage schedules Recording Live TV Before you can record with this TV including time shift recording you must insert your USB storage device into the USB port Recording sched...

Page 43: ... the or OK button to resume playing the program Stop Time shift Press the STOP button to exit time shift Before you can record with this TV including time shift recording you must insert your USB storage device into the USB port Recording scheduled recording and pause live TV functions only work in DTV mode free to air The USB storage device won t retain recorded data after you exit the time shift...

Page 44: ...ct Media mode Function Remote Button Choose a Source or File Start playing your media Return to previous screen Exit media mode USB Mode Set up You can only play Photos in the Photo category Music in the Music category and so on Make sure you select the correct category for the file you wish to play ...

Page 45: ... Navigate to a folder or file Display your photo Hide or display the on screen toolbar Change advanced settings Return to file list or Function Remote Button Navigate to a folder or file Play your track Rewind or fast forward the current track Restart or skip the current track Change sound mode and balance settings Return to file list or ...

Page 46: ... Play your video Pause your video Resume playback Stop playback Rewind or fast forward the current track Restart or skip the current track Change advanced settings Return to file list or Only supported file types will be displayed See the specifications table for supported file types ...

Page 47: ...l outlet is turned on and the power indicator at the bottom of the TV is lit If using a multi outlet check if it is working properly To check whether a power strip is working properly plug the TV s power plug directly to a wall outlet and observe its operation Try to power on using the power button on the TV There is no picture sound or distorted picture sound in DTV mode Ensure the antenna cable ...

Page 48: ...al audio device Move the TV away from electronic equipment or devices that could cause interference If you are using an external audio device via a HDMI cable ensure that the device supports HDMI ARC and if applicable the ARC setting is turned On refer to the connection guide in the user manual of the connected device Ensure on the TV Menu System HDMI CEC ARC setting is turned On If you are using ...

Page 49: ...the problem persists contact your Internet Service Provider or modem manufacturer USB storage device is not recognised or media files don t play properly This TV has been tested with the majority of Flash memory based devices and hard disks media players with HDD on the market however it may not be compatible with certain devices If the external hard drive has its own power adaptor use it Only use...

Page 50: ...MPEG 1 MPEG 2 TS Music MP3 Photo JPEG USB output DC 5V 500mA Power source AC 100 240V 50 60Hz Power consumption 65W Specifications Dimensions W x D x H With stand 904 3 x 180 1 x 561 5 mm Without stand 904 3 x 80 3 x 514 5 mm Weight Net 5 7 kg Gross 7 9 kg For Technical and Warranty Support 1300 886 649 www tempo org info tempo org Distributed by Tempo Aust Pty Ltd PO Box 6056 Frenchs Forest DC 20...

Page 51: ...t with your household rubbish An environmentally friendly method of disposal will ensure that valuable raw materials can be recycled Electrical and electronic items contain materials and substances which if handled or disposed of incorrectly could potentially be hazardous to the environment and human health National Television and Computer Recycling Scheme The careful disposal of e waste is import...

Page 52: ...is warranty are in addition to all rights and remedies in respect of the product that the consumer has under the Competition and Consumer Act 2010 and similar state and territory laws Our goods come with guarantees that cannot be excluded under the Australian Consumer Law You are entitled to a replacement or refund for a major failure and to compensation for any other reasonably foreseeable loss o...

Page 53: ... data elsewhere prior to sending the product for repair You should also be aware that rather than repairing goods we may replace them with refurbished goods of the same type or use refurbished parts in the repair process Please be assured though refurbished parts or replacements are only used where they meet ALDI s stringent quality specifications If at any time you feel your repair is being handl...

Page 54: ...54 Notes ...

Page 55: ...55 Notes ...
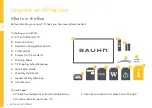
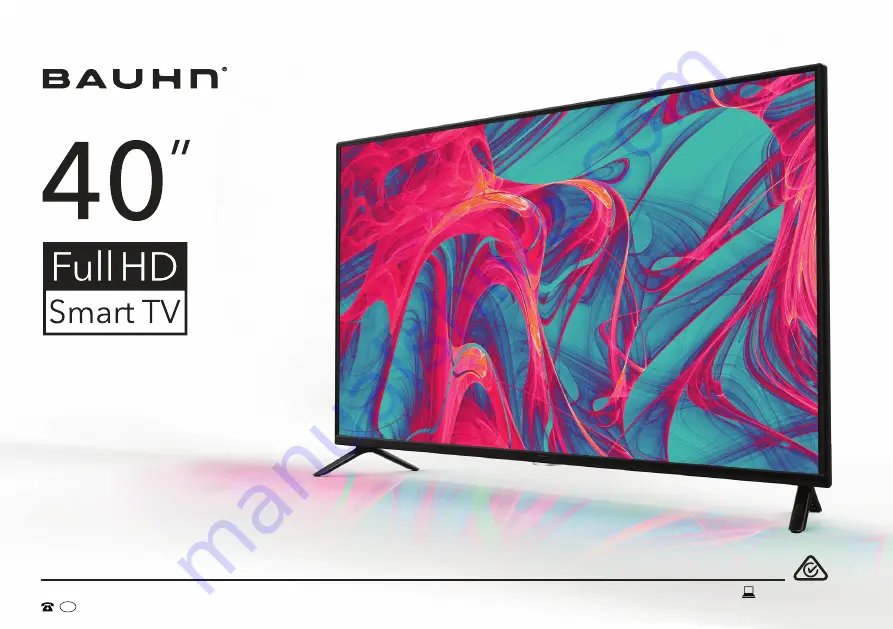
Page 56: ... if it fails to perform to your expectations please contact our After Sales Support Centre on 1300 886 649 ALDI gurantees that our exclusive brand products are developed to our stringent quality specifcations If you are not entirely satisfied with this product please return it to your nearest ALDI store within 60 days from the date of purchase for a full refund or replacement or take advantage of ...

Reviews: