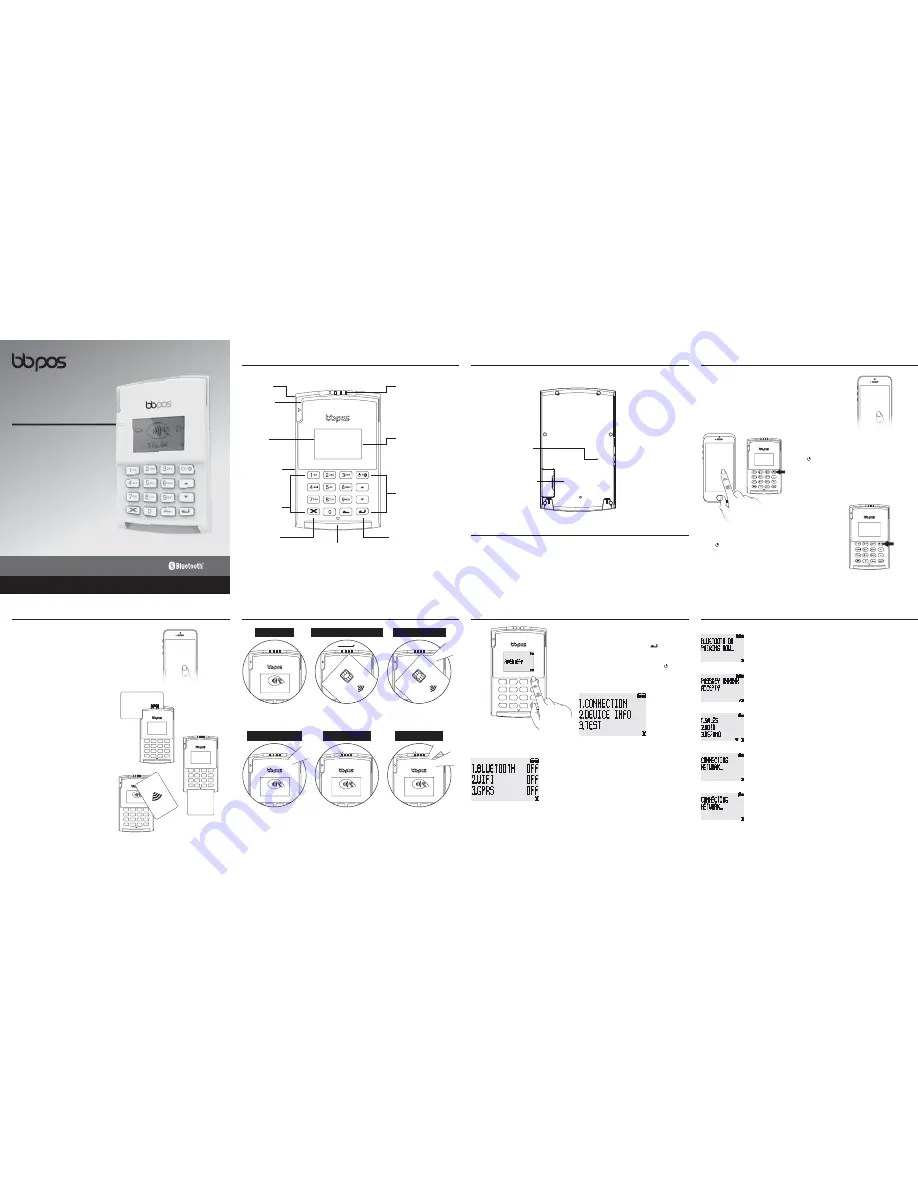
Quick Start Procedures
Quick Start Procedures
STEP 1
This device can support iOS (iOS 5.0 or above), Android
(Android 2.1 or above), Windows Phone 8 & MS Windows.
Download official application from app stores.
APP
DOWNLOAD
APP
DOWNLOAD
STEP 2
Turn on the device pairing function of your
smartphone/tablet. Then, press and hold
“ ” to turn on WisePad until “STANDBY”
displays on the LCD.
**Please ensure that
Bluetooth®
function of
your smartphone/tablet is ON before devices
pairing.
STEP 3
Press “ ” to enter the Setting Menu, then press “1”
for Bluetooth pairing.
Scanned
Device List
STEP 4
Select WisePad 2 in the Scanned Device List
on your
smartphone/tablet. Then, your WisePad 2 will show the
Home Menu when the devices are paired.
**For first time pairing, you need to follow the instructions to input
“PASSKEY” to complete pairing with your Android devices.
STEP 5
You can follow your application
instruction
to start the transaction process, then
tap/swipe/insert the payment card and
input PIN (per request) to complete the
transaction.
**Remarks: If you pay via swiping card or inserting
EMV IC card, please ensure that the magstripe or
EMV chip of the card is facing the right direction. If
you pay by using NFC card, please ensure you tap
the NFC payment card within 4cm range on top of
the NFC marking.**
00 XXXX 5522
Va
lid
Thru
00/00
ALDSON
C
ARD
1100 2200 XXXX 5522
Member
Since
00
Valid
From
00/00
Valid
Thru
00/00
JIMMY DONALDSON
CREDIT CARD
NFC LED indicators
LED indicator
Power on / Setting
Up and Down buttons
CLEAR & ENTER Buttons
Lanyard hole
For magstripe
card reading
with LED indicator
Secured PIN pad
for PIN input
LCD display
CANCEL button
For EMV card reading
with LED indicator
Index & Accessories (Fig.1)
Index & Accessories (Fig.1)
FRONT
Reset button
SAM card slots
Package Contents
Device x
1
Lanyard x
1
USB cable
x 1
Instruction Manual
x 1
BACK
NFC Status Indicators
First LED ON
Ready for tapping card
LEDs ON in ascenging order
Reading card information
4 LEDs ON + “Beep”
Card reading process
successfully completed
First LED ON + “Beep”
Transaction completed
First LED flashing
Standby mode
Error, please retry
Error, please retry
~Beep~
~Beep~
~Beep~
1100 2200 XXXX
Member
Since
00
Valid
From
00/00
Va
lid
Thru
00/00
Cardholder Na
CREDIT C
ARD
1100 2200 XXXX
Member
Since
00
Valid
From
00/00
Valid
Thru
00/00
Cardholder Na
CREDIT C
ARD
~Beep~
Fig. 3c - Home Menu
Fig. 3a -
Bluetooth®
Pairing
Fig. 3d - Connecting WiFi
Fig. 3e - Connecting GPRS
Fig. 3b - Passkey Screen
i.
Bluetooth®
connection
Enter the
Bluetooth®
pairing mode (Fig. 3a) after pressing “1”.
**For first time pairing, you may need to input “PASSKEY” to complete
the pairing process with your Android devices. (Fig 3b)
After device is successfully paired, WisePad 2 will enter the
Home Menu (Fig. 3c).
ii. WiFi network connection
Enter the WiFi network connecting mode (Fig. 3d) after
pressing “2”.
After network is successfully connected, WisePad 2 will enter
the Home Menu (Fig. 3c).
iii. GPRS connection
Please ensure the SAM/SIM cards are properly inserted to
card slots before GPRS connection.
Enter the GPRS network connecting more (Fig. 3e) after
pressing “3”. After network is successfully connected,
WisePad 2 will enter the Home Menu (Fig. 3c).
Fig. 1a
Fig. 1b - Setting Menu
Fig. 2 - Connection Menu
Set Up Connection
Set Up Connection
STEP 2
(refer to Fig. 3)
Choose connection method, press
“1” to connect via Bluetooth®
“2” to connect WIFI
“3” to connect
STEP 1
Press and hold the Power On/Off button to
turn on WisePad 2, then press “ ” to
confirm. (refer to Fig. 1a)
When “STANDBY .....” is shown, press “ ” or
“X” to enter the Setting Menu. (Fig. 1b)
mPOS Solution Combining NFC, MSR
and EMV Chip Reading Functions
WisePad
™
2
www.bbpos.com
Compatable with:
iOS, Android, Windows Phone 8, MS Windows
.JDSP 64# QPSU
GPS DIBSHJOH PQFSBUJPO


