background image

Instructions for Use

Summary of Contents for TRAFFIC ASSIST

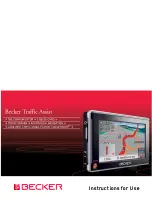
Page 1: ...Instructions for Use ...
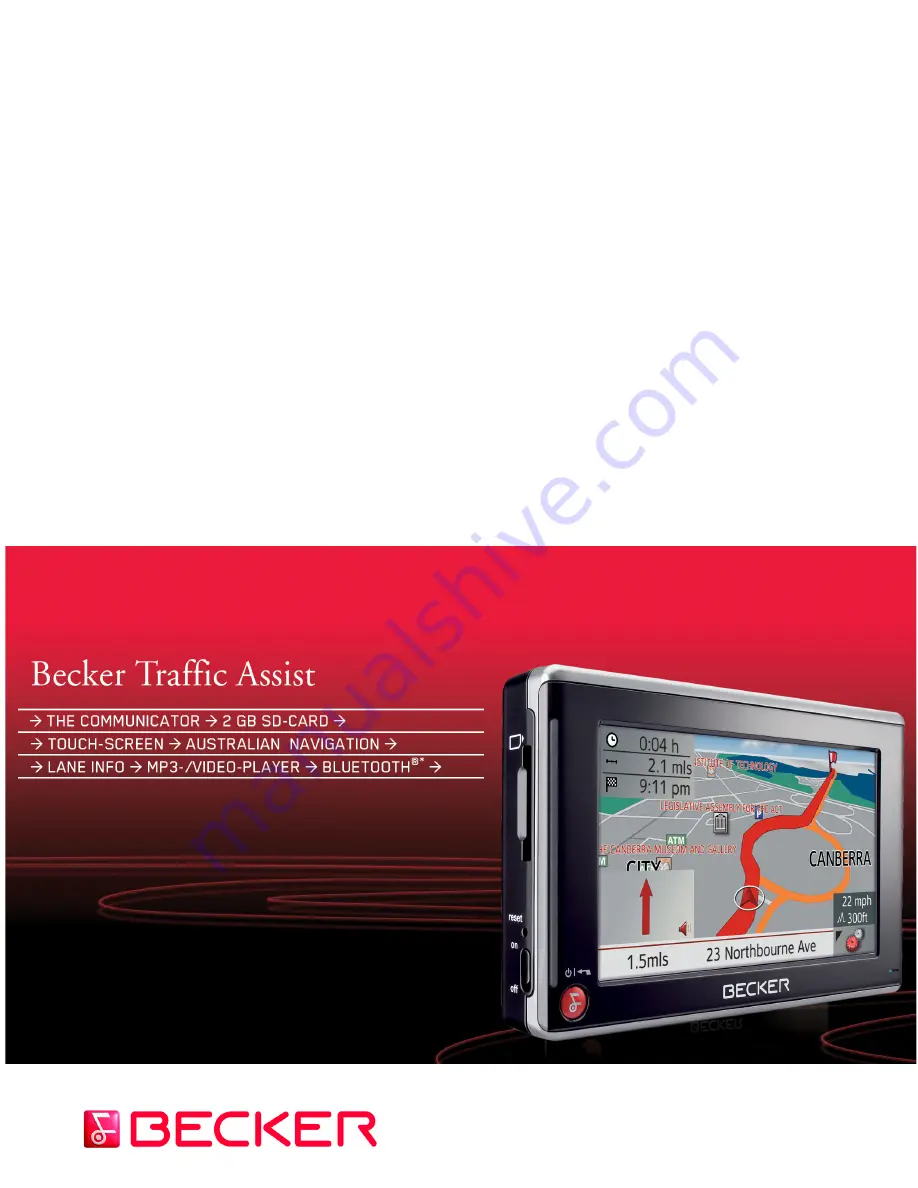
Page 2: ...DANGER The warnings contain safety information regarding hazardous situations which if not avoided will result in death or seri ous injury WARNING These warnings contain safety informa tion regarding hazardous situations which if not avoided could result in death or serious injury CAUTION These warnings contain safety informa tion regarding hazardous situations which if not avoided could result in...

Page 3: ...y card 22 Ejecting the memory card 22 Power supply 23 Using the battery 23 Connecting to the socket 23 Connecting up to power supply 23 Removing the power supply 24 Connecting to the cigarette lighter 24 GPS antenna 24 Unit antenna 24 Connecting up external antenna 25 Connecting USB storage media 25 Docking station optional 25 Switching the Traffic Assist On Off 26 Switching On 26 Switching Off 27...

Page 4: ...gation menu Select on map 51 Navigation menu Route planning 52 Route list 53 Using a route 53 The New key 54 The Edit key 54 The Calculate key 55 The Start key 55 Navigation menu Enter coordinates 55 Navigation menu Settings 56 The Routing options key 57 The Auto mode key 58 The Format key 58 The Map info key 59 The Route info key 59 The Speed key 60 The TMC key 61 The Time Zone key 61 The Smart S...

Page 5: ...g playback 86 Folder overview 87 Track repeat random play function 87 Setting volume 88 Navigation during MP3 player operation 88 Shutting down the MP3 Player 88 Pictures mode 89 Selecting pictures display 89 The Picture Viewer 89 Operating the Picture Viewers 90 Scrolling 90 Slideshow 90 Full screen 90 Shutting down the Picture Viewer 90 Folder viewing mode 91 Operating folder viewing mode 91 Sub...

Page 6: ... 107 Disposal 107 Applies only to the Bluetooth enabled Traffic Assist 7977 The information and data contained in these documents are subject to change without prior notice No part of these documents may be repro duced or transmitted for any purpose without express written permission from HARMAN BECKER Automotive Systems GmbH All technical informa tion drawings etc are subject to copyright law Cop...

Page 7: ... its intended purpose The volume of the navigational unit should be set so that noises outside the vehicle can still be heard The SD memory card can be removed Small children could swallow it Ensure the unit is installed outside the deployment zone of the airbags Airbag deployment could dislodge the unit and propel it toward an occupant or impair the function of the airbags resulting in personal i...

Page 8: ... the unit For example there may be regulations in your state which forbid mounting the unit on the windshield HARMAN BECKER assumes no liability for driver errors or the non observance of applicable laws In order to prevent theft of the unit please take the unit with you when leaving the vehicle unattended The grid voltages V indicated on the home charger the car charger adapter and the unit must ...

Page 9: ...dampness and dirt The Traffic Assist can be used as a navigational unit MP3 device for playing music Picture viewer Video player Can be used as a very convenient hands free unit via Bluetooth Navigation Thanks to the GPS Global Positioning System you no longer need to spend hours searching through road atlases Once outside buildings the receiver an tenna integrated in the unit gives you con tinuou...

Page 10: ...e the Traffic Assist is started up the delivery should be checked to ensure that it is complete and in the correct condi tion see also page 15 Carefully unpack the content of the package and check it Delivery contents 1 Traffic Assist the mobile navigation system with integrated MP3 player video player picture viewer and ex tremely convenient Bluetooth hands free unit 2 Unit holder 3 12 V car powe...

Page 11: ...n integrated antenna a touchscreen an integrated loudspeaker for the out put of messages during navigation and for MP3 files and phone calls a microphone On the sides of the unit there are also light bars as well as various connections and ports You will find more details of the unit under See Technical Data on page 105 Note The packaging should be disposed of cor rectly in accordance with nationa...

Page 12: ... more memory space you must save further images or music tracks to a sepa rate card not included The separate card must be formatted with the FAT 16 file system When not in the unit the memory card must be stored in a protected dry place away from direct sunlight in the packag ing supplied Avoid touching or dirtying the contact strip You will find more details about the mem ory card under Technica...

Page 13: ...of the connection can be found under Docking station optional on page 25 External GPS antenna You can use an external antenna to im prove reception in vehicles where only limited GPS reception is available not in cluded in the scope of supply Please con tact your local dealer for more informa tion Details of the connection can be found under Connecting up external antenna on page 25 Docking statio...

Page 14: ... com The Software update menu item is lo cated under SERVICE SUPPORT Repairs The unit must not be opened if it is dam aged Please contact your local dealer Emissions and disposal Information on emissions electromagnet ic compatibility and disposal can be found in the NOTICE on page 106 WARNING The use of headsets or ear phones at high volumes over an extended period can cause permanent hearing dam...

Page 15: ...iew Traffic Assist Scope of supply 1 Traffic Assist PND Personal Navigation Device 2 Memory card containing navigational data 3 USB connection cable 4 Cable for power supply from car s cigarette lighter 12 Volts 5 Unit bracket 1 2 3 4 5 ...

Page 16: ...ed 2 Touchscreen key Press activates the corresponding key command 3 Microphone with flashing activity indicator for Bluetooth 4 Becker key Press returns to numerous applications Press for longer switches the Traffic Assist on and off 5 Mood light 2 4 5 1 3 Applies only to the Bluetooth enabled Traffic Assist 7977 ...

Page 17: ... TRAFFIC ASSIST Rear of unit 1 Point for connecting up an external antenna external antenna not included in the scope of supply 2 Interface for docking station docking station not included in the scope of supply 2 1 ...

Page 18: ...ON OFF switch Right side of unit 4 Volume control Move upward increase volume Move downward decrease volume Press mute 5 3 5 mm connection for headset headset not included in the scope of supply 6 USB port for data carrier containing MP3 or image files 7 Mini USB connection 1 2 4 5 3 6 7 ...

Page 19: ...Connection for telephone mute cable accessory 2 Connection for audio signal cable accessory external micro phone accessory Right docking station 3 Connection for TMC antenna TMC is not supported in Australia 4 Connection for external power supply 4 3 2 1 ...

Page 20: ... components in your unit damage the rechargeable batteries and cause certain plastics to warp or melt Do not store your mobile navigation system in cold environments During operation when the unit warms up to operating temperature moisture may form internally causing damage to elec tronic components Do not drop your mobile navigation system unit protect it from shocks and do not shake it Improper ...

Page 21: ... Start up Once the Traffic Assist has been unpacked and checked for damage the unit can be started up The individual start up stages are Insert memory card Connect to power supply Switching on the unit Ensuring antenna reception if naviga tion is desired Memory card The map data is preinstalled on the card supplied with the unit If you intend to listen to music watch videos or view im ages using t...

Page 22: ...ou can pull it out with two fingers Use your finger to gently press the memory card against the spring force into the card slot and then release it The card is ejected Remove the memory card and place it in the packaging while ensuring not to touch contact bar Note A small slider is located on one side of the card If this is pushed in the direction of the arrow the Memory Card is protected from be...

Page 23: ...hout employing excessive force Note You can charge the Traffic Assist via the car charger cable included in the scope of delivery or via the optionally available grid power supply unit When the Traffic Assist is connected to a PC it is supplied with power via the PC and does not consume battery power Note Note that if the battery is completely dis charged it may take up to a minute be fore the dev...

Page 24: ...ains section if you are not planning on using the Traffic Assist for a long time Note If the cigarette lighter has just been used and is still warm wait until this has cooled down in its mounting Note If the engine is switched off using the vehicle s power supply through the cigarette lighter will slowly drain the vehicle battery Do not therefore op erate the Traffic Assist for extended peri ods w...

Page 25: ...ailable docking station replaces the carrier plate of the Traffic As sist included in the scope of delivery The connections on the docking station can be used to connect the Traffic Assist to an audio system already installed in the vehicle Telephone muting You can connect your Traffic Assist to your audio system using an optionally available cable for telephone muting If the cable is correctly co...

Page 26: ... Switching the Traffic Assist On Off The unit is switched on and off using the key Switching On Set the On Off switch on the left side of the unit to On Press the key for a few seconds The unit is switched on The manufactur er s logo appears on the touchscreen The following question appears shortly thereafter If you agree with this request press the OK key WARNING Deactivate the Becker moodlights ...

Page 27: ...Assist in sleep mode in the event of short interruptions to operation up to a week This significantly reduces the switch on time and the Traffic Assist finds the satel lites required for navigation much faster NOTICE Please check local and state traffic regula tions prior to installation of the unit For example there may be regulations in your state which forbid mounting the unit bracket on the wi...

Page 28: ... outside the deployment zone of the airbags Air bag deployment could dislodge the unit and propel it toward an occupant or impair the function of the airbags resulting in personal injury or death See your vehicle s owner s manual or contact the manufacturer of your vehi cle for more information Ensure that the electrical connection cable does not hamper you from ac cessing the vehicle s controls s...

Page 29: ...wivel the carrier plate 6 to the desired position with the other hand Tighten the fastening screw 1 suffi ciently so that the Traffic Assist is held securely in place when the vehicle is in motion Adding the Traffic Assist The Traffic Assist is equipped with four guides and the carrier plate 6 has corres ponding retaining lugs Position the Traffic Assist with the gui des on the carrier plate retai...

Page 30: ...ctu ated calibration should be undertaken The calibration function is started from the Settings menu see also page 96 Basic information about the menus During operations you are assisted by various menus and entry windows The main menu The top menu level is the main menu The individual applications are started from the main menu Main menu of the Traffic Assist 7977 Main menu of the Traffic Assist ...

Page 31: ... pressing the OK key and the entry passed on to the Traffic Assist for processing Adopting suggestions When a navigation destination is entered the Traffic Assist compares the entry with the set of data on the memory card The Traffic Assist then only makes those let ters which are possible available for selec tion and adds a sensible suggestion to the letters already entered The suggestion and the...

Page 32: ...on is adopted and the selec tion list is closed Special characters Special characters and umlauts do not have to be used when entering the names of towns and streets Special characters can be useful when naming destinations and routes To change to the special character key pad press the key The special character keypad is displayed Enter the special character you want As soon as you have entered a...

Page 33: ... delete the character to the left of the cursor press the key Inserting spaces If you have an entry with two words e g for names of towns the words should be separated by a space To enter a space press the key The Becker key The key is integrated in the bottom left hand corner of the casing It has various functions Pressing and holding this button switches the Traffic Assist to standby or on again...

Page 34: ...a personal computer s DVD drive this program will usually start up automatical ly The program guides you through the installation process Otherwise you will have to start the pro gram manually Open Windows Explorer Select your DVD drive folder Double click on the Setup exe file Transferring files Files can be transferred indirectly via the memory card or directly via the USB port Transferring usin...

Page 35: ... Traffic Assist remove memory card and plug into an SD card reading device or use the USB cable to connect the Traffic Assist to the computer boot up the computer and insert the DVD use the installation program to transfer the map required slide the memory card back into the Traffic Assist or correctly remove the USB cable switch the Traffic Assist back on The new map is available right away Trans...

Page 36: ...set button If the messages reappear or the unit does not function correctly for any other reason please contact your local dealer You can also try to find a solution to your problem in the FAQ in the Support area on the Becker homepage www mybeck er com NOTICE Never open the unit yourself Modifica tions to the unit may void the warranty Please contact your authorized dealer if you are unable to re...

Page 37: ... to establish a position If four or more signals are available the height above sea level can also be calculated Traffic Assist determines the direction of and distance to the destination with the aid of a digital road atlas on the SD card and the navigation computer For safety directions to the designation are mainly provided verbally The direc tion display and map diagram on the touchscreen are ...

Page 38: ...g to enter a new destination not yet provided Map display The map display can also be called up This doesn t just display the current posi tion but also allows a new destination to be selected Rapid access Rapid access allows you to select from the key functions to quickly start navigation Rapid access is illustrated below using sample destinations Structure of rapid access Navigation menu and map...

Page 39: ...ars and directions to the destination be gin Scrolling in the destinations memory You can use the keys to scroll through the list display in the direction in dicated on the arrow The current list page and the total number of its contents appear between the keys Note The last 50 destinations are automatically stored in the destinations list Once the memory s capacity has been fully used up the olde...

Page 40: ...omatic deletion This function is only available in the case of unprotected destina tions Unprotect this entry Protection of the destina tion is disabled This function is only available in the case of protected destinations Move this en try up The destination is moved forwards by one position This function is only available in the case of protected destinations Move this en try down The destination...

Page 41: ...featuring the map icon on the upper edge of the screen Calling up the Navigation menu The extended options of the navigation menu are provided by pressing the Navi gation menu key See The Navigation menu on page 41 The Navigation menu If you do not want to select a destination quickly or if the planned destination is not yet available in the destinations memory you can use the navigation menu to d...

Page 42: ...and start route guidance See Navigation menu Select on map on page 51 Enter coordinates The geographic coordinates for a destination can be entered and route guidance started via the Enter coordinates button See Navigation menu Enter coordi nates on page 55 Route planning A route with several stopovers can be planned using the Route planning but ton See Navigation menu Route plan ning on page 52 S...

Page 43: ...tate territory you want If necessary press the arrow keys on the right hand edge of the screen to scroll through all the des tination states territorys available Select address You can enter the exact destination ad dress in the address entry screen The following details can be entered in the address window Town Postcode Street and building number Intersecting roads as an aid to orienta tion You c...

Page 44: ...xisting town and or postcode Smart speller Select between town entry and postcode entry Enter the letters of the destination town and or the letters numbers of the post code one after another The OK key The OK key can be used to transfer the destination selected into the route calcula tion menu If the destination required ap pears in the upper edge of the display once the first letters or numbers ...

Page 45: ...so present in the data Press the letters of the destination street one after another The OK key The OK key can be used to transfer the destination selected into the route cal culation menu If the destination required appears in the upper edge of the display once the first letters or numbers have been entered you can transfer the destination immediately with OK without using the list function Press...

Page 46: ...The input menu for the house number appears Enter the house number and then press OK The procedure is essentially the same as for entering a road See Selecting the street on page 45 When entering a house number you can also use the house number list The procedure is essentially the same as for the road list See Using the list of streets on page 45 Set options and start navigation Displaying destin...

Page 47: ...an set one of the following options Press the button to start route guidance to the entered coordinates Setting Meaning optimum With this option the op timum route in terms of travel time and mileage is calculated fast With this option the shortest route possible for the time required is calculated short With this option the shortest route is calculat ed in terms of miles traveled scenic With this...

Page 48: ... away All the data entered so far are processed in the route calcula tion Press the Start key to start navigation The route is calculated The map display then appears and directions to the destina tion begin Canceling navigation Press the key Press the Yes key to confirm that you want to stop Note If no GPS signal is available at the time of route calculation the following display appears If the G...

Page 49: ...be searched for From the All categories box select a main category e g Petrol station Only those points of interest currently nearby are displayed Select the subcategory from the subse quent menu e g Aral Esso You will find information about scrolling in lists in the Scrolling through the lists on page 32 chapter Press the Point of interest button to access the input menu Select the desired POI vi...

Page 50: ... on page 32 chapter Point of interest In a town Touch the In a town button Select the desired state territory In the Town or Postcode box enter the town in which you want to search for a point of interest Press the All categories button Select a main category e g Culture Only the categories available in the town indicated are displayed Select the subcategory from the subse quent menu e g Museum To...

Page 51: ... information regard ing the selected POI Press the button for this purpose The available information on the selected POI is displayed exact address and phone number if available Navigation menu Select on map If the destination required cannot yet or can no longer be found in the destina tions memory the Select on map button allows you to select it directly No address details are asked for in this ...

Page 52: ...ing The route planning menu allows you to create and select individual routes For this purpose enter the individual destina tion points along the desired route These points will then be navigated to consecu tively without having to make further en tries In Navigation menu press the Route planning key to access the route menu The map symbol appears at the top right of the route menu The name of the...

Page 53: ...also rename or delete the route in this window Press the key to return to the route list Selecting a route Press a route to select it The route is loaded and displayed in the route menu Using a route The following buttons are available Key Meaning Shows all stages inside actual route in the map These keys can be used to scroll up and down through the lists New Opens the address win dow for enterin...

Page 54: ...dual entries by pressing the but tons Once all the entries have been made in the route planning window save the destination data by pressing the OK button The entry menu appears Give the destination a meaningful name Press OK Route planning is complete The Routing options entry window opens The Edit key Existing routes can be changed in the Edit menu Press the Edit key to change existing routes Th...

Page 55: ...al distance from the first to the last points on the route and the probable length of the journey for this route are displayed in the Route planning window under the list of route points The Start key Press the Start key in the route planning menu The route options are displayed again Press the key again to start naviga tion Navigation menu Enter coordinates You can also enter a destination via ge...

Page 56: ...ce to the navigation functions can be found in the Settings menu Scroll to the menu item Settings in the navigation menu using the button and then press it This takes you to the setting menu Structure Various buttons are available in the setting menu The functions of the various keys are ex plained below Note The coordinates entered must correspond to WGS84 World Geodetic System 1984 Note All sett...

Page 57: ...Ferries and Toll roads you can set one of the following options Confirm your selection by pressing the OK key Setting Meaning optimum With this option the op timum route in terms of travel time and mileage is calculated fast With this option the shortest route possible for the time required is calculated short With this option the shortest route is calculat ed in terms of miles traveled scenic Wit...

Page 58: ...y Setting Meaning Begin with Select whether the stand ard map view is to be the 3D or the 2D view 2D Autozoom In the case of 2D view navigation select wheth er you would like the auto zoom low normal high or no auto zoom view as standard With the Autozoom op tion the zoom range var ies according to your speed When you drive slowly the scale is de creased When you drive faster the scale is in creas...

Page 59: ...ts of interest are dis played in the map Street names 2D If you activate this entry all street names are dis played in the 2D map Street names 3D If you activate this entry all street names are dis played in the 3D map Info box If you activate this entry the point of compass the speed and the sea level are displayed Setting Meaning Show street Displays the current next street Info final des tinati...

Page 60: ...ect whether the speed limits should be dis played never always or only when the limit is ex ceeded In town Select the amount over the speed limit at which you would like to receive an acoustic warning within built up areas Out of town Select the amount over the speed limit at which you would like to receive an acoustic warning out side built up areas Warning Choose whether you would also like an a...

Page 61: ...function is not available for Australia Setting Meaning Automatic tuning Select whether to run an automatic search for the station with the best re ception function acti vated Press the arrow buttons to activate the automatic station search The cur rently received TMC sta tion is displayed in the adjacent field The set ting can only be per formed if the Automatic tuning function is deacti vated Re...

Page 62: ...ads Press Junction Info in the settings menu The Junction Info settings window ap pears Press on the desired entry in order to ac tivate or deactivate the corre sponding function Confirm your selection by pressing the OK button Setting Description Reality View When the function is ac tivated realistic images of the current lane situa tion at motorway junc tions are displayed if available Signpost ...

Page 63: ...ion menu on page 42 Changing an already entered home address Press Change The fast access function appears further operation is the same as for entering the home address see above The Volume key With the Volume settings window you can set the general volume for voice an nouncements for each start of the Traffic Assist or switch off voice announcements completely Depending on the situation you can ...

Page 64: ...e Load map button displays the loaded map data Press Load map in the settings menu The Load map settings menu appears Select the desired map by pressing the relevant button The Offroad key In the Offroad settings menu you can set whether the Traffic Assist starts guidance to the destination if you are in an non digitised offroad area if your destination is in an non digitised area With an activate...

Page 65: ...e guidance the Traffic Assist di rects you to an digitised road near to your offroad destination When you reach the calculated point grey destination flag on the digitised road the Traffic Assist directs you in air direction to your entered destination by using an di rectional arrow Start point in offroad area If you start your guidance in non digitised offroad area the Traffic Assist guides you i...

Page 66: ...ration mode with a toolbar is always displayed in the lower right hand corner of the map Map display with driving guidance 1 Vehicle speed and altitude above sea level 2 Route 3 Vehicle location 4 Road to which the next driving ma noeuvre leads 5 Traffic lane recommendation only appears on some multi lane roads red arrows recommended lanes 6 Estimated time of arrival remaining journey time and rem...

Page 67: ...der The Map info key on page 59 Information appears in the bottom left corner of the preview area The distance remaining is indicated by means of the number of miles or kilom eters below an arrow If there are two im pending driving manoeuvres in quick suc cession a small arrow appears over the first manoeuvre to indicate that another one is coming up Depending upon the setting additional informati...

Page 68: ...The bar display indicates the volume Press or to increase or decrease the volume Press in order to mute the announcements Press again in order to cancel the mute function The bar display disappears again automat ically after three seconds if no button is pressed Icon Meaning See Display route toolbar on page 69 Readout TMC messages The TMC function is not available for Australia See Daytime Night ...

Page 69: ...stored in the map data and pro vides various functions for further action Move or zoom the map until you see the desired point Press and hold on the desired point un til the information window appears Make the necessary selection as necessary See Navigation menu Select on map on page 51 Zooming and the map toolbar The map can be zoomed into in steps via the zoom buttons Press Zoom in to expand or ...

Page 70: ...ous design Change display toolbar For the map display 2 D view or 3 D view are available Change the display using the 3D key Press the 3D key The display is changed Press the key again to return to the previous display Point northwards toolbar Use the compass key to orient the map on the touchscreen towards the north Press the compass key The map is pointed north on the touch screen Available POIs...

Page 71: ...st starts route calculation to the stopover To set a POI category You can set which categories the Traffic Assist should take into account when displaying the POIs Press the POI button The current settings are displayed Press one of the categories set e g Petrol station The complete category list appears If necessary scroll in the list and press one of the categories which you would like to set as...

Page 72: ...ions are available Note If you wait too long before moving the point the position information regarding the selected point appears on the map See Playback of MP3 files during an ac tive navigation on page 73 Selection Meaning Navi menu Terminates driving guid ance and switches to rap id access mode Map icon Switches to the map dis play Interim desti nation Allows you to enter an interim destinatio...

Page 73: ...on Meaning Block road The driving directions planned by the Traffic Assist may be hindered by unanticipated road blocks This function notifies the system of the length of a road block Existing road block lengths may be se lected Once the length has been entered the route is replanned and new directions given on ly if driving guidance is activated Preferences See Navigation menu Settings on page 56...

Page 74: ...en dialled answered or rejected will be displayed in chronolog ical order Fast access mode is shown be low with example telephone numbers and names Configuration of fast access mode In fast access mode the Phone menu but ton for opening the telephone menu is displayed in the top line IIn addition provided that a telephone has already been connected the name of the network oper ator and the strengt...

Page 75: ...rrow The current list page and the total number of pages appear between the buttons Notes The last 50 numbers names are auto matically stored in the number list If the storage capacity of 50 numbers is reached the oldest number is automat ically deleted to make room for a new number However important num bers can be protected Entries in fast access mode always only apply to the time during which t...

Page 76: ...ne menu appears Option Description Show details The data for the entry is displayed number and name call time and call date if available Name this en try The entry can be re named Delete this entry The entry is deleted from the number list Protect this entry The entry is protected against automatic dele tion only available on unprotected devices Unprotect this entry Entry protection is disa bled o...

Page 77: ... entry the corresponding telephone number can be called In the telephone menu press the Phone book button If there are more than 30 entries in the tel ephone book an input menu appears If there are fewer than 30 entries a list of en tries is displayed directly Select the first letter of the desired entry in the input menu Press the OK button when the desired name is displayed in the top line Notes...

Page 78: ...ablishing a connection are described below Opening the device list In the telephone menu press the Con nect phone button The device list is displayed You can search for a mobile phone or con nect a mobile phone from the device list The device list displays line by line all de vices available for selection Each line of the device list is divided into two fields Each list field is in the form of a b...

Page 79: ...e mobile phone is switched on and in range and Bluetooth is activated Option Description Show details The device data is dis played Protect this entry The device is protected against automatic dele tion only available on unprotected devices Unprotect this entry Device protection is disa bled only available on protected devices Move this en try up The device is moved for ward by one position only a...

Page 80: ...is password is stipulated by the Traffic Assist Enter the displayed password on the mobile phone The connection is established If the con nection is successfully established the tel ephone fast access function is displayed Connecting from the device list You can initiate a connection to a mobile phone from the device list If a mobile phone is already connected that connec tion will be terminated a...

Page 81: ...t the telephone and ringtone volume In the telephone menu press the Pref erences button The telephone Bluetooth settings are dis played Switching Bluetooth on off Bluetooth must be switched on in order to enable automatic connection to a mobile phone after the Traffic Assist is switched on see Connecting automatically on page 79 Press the Bluetooth activated button in the telephone Bluetooth setti...

Page 82: ...ad Phonebook button in the telephone Bluetooth settings Setting the telephone volume You can set the volume of the telephone Press the Volume button in the tele phone Bluetooth settings Select the desired volume using the and buttons Confirm your settings by pressing the OK button Device name You can give your Traffic Assist a name This name will be displayed by other Bluetooth devices Press the C...

Page 83: ...s received The following display also ap pears If available the telephone number and name of the caller are displayed Notes The call can be returned to the mobile phone and the hands free function ter minated by pressing the Private mode button The connection with the mobile phone is automatically re established after the call is ended You can switch to the navigation dis play during an active cal...

Page 84: ...ed depends on whether route guidance is active or not When route guidance is active In the toolbar press the button End the call by pressing the End call button The call is ended and the map display is shown Without route guidance Press the End call button The call is terminated The last active dis play is shown 1 1 ...

Page 85: ...out active navigation The MP3 Player is called up and appears with its main screen If playback of a music track was stopped previously that last music track is dis played If this is no longer available the first track on the memory card is displayed If the memory card contains no tracks the No music available message ap pears The MP3 player The MP3 files saved on a memory card can be called up and...

Page 86: ...ay the pause icon Under the display of the current track you can see its length and below it the elapsed time in the form of a bar Pause Playback can be paused at any time and then continued Press the key featuring the pause icon Playback is interrupted The current track is still displayed in the track line The but ton display changes to the Playback icon Playback is continued by pressing again Ca...

Page 87: ... appears in the top line and underneath it the subfolders and then the tracks which it contains Press on a folder in order to display its contents Press on a track in order to play it Track repeat random play function It is possible to have a track continuously repeated or to have the tracks played in random order Press the button marked with the arrow repeatedly until the desired function is acti...

Page 88: ...ap display appears WARNING The use of headsets or ear phones at high volumes over an extended period can cause permanent hearing damage The use of headphones while driving is illegal in many states and could interfere with your ability to hear noises outside the vehicle Use headphones only when the vehicle is safely parked NOTICE It is forbidden to use headsets during driving in many states Please...

Page 89: ... longer available the next pic ture in the same folder is displayed If there are no pictures in the correspond ing folder no pictures are displayed If the memory card contains no pic tures the No pictures available mes sage appears The Picture Viewer Using the picture viewer the images stored on the memory card of the Traffic Assist can be called up and displayed The Picture Viewer is shown below ...

Page 90: ...en displayed If you wish to repeat the slide show press Yes If you wish to end the slide show press No The slide show will be repeated automati cally if no buttons are pressed Press the key to end the slide show Full screen In full screen mode the current picture is enlarged to fill the entire touchscreen Full screen mode can be started using the fol lowing keys Press the key featuring the full sc...

Page 91: ...containing image files are in cluded in the folder overview Scrolling You can use the keys to scroll through the list display in the direction in dicated by the arrow The current list page and the total number of its contents appear between the keys Selecting a picture You can load a picture from the list straight into the Picture Viewer Press the button of the picture you want Folder viewing mode...

Page 92: ...d on the Memory Card can be played using the video player The Traffic Assist supports the following video formats MPEG1 WMV The following is an example video player display with a video playing Operating the video player Opening and playing videos Press the folder button see arrow Note You can find out how to store videos on a Memory Card under Transmitting music tracks pictures and videos on page...

Page 93: ...s Press on a video in order to play it Showing the button bar while video is playing The button bar is in the lower and upper area of the video player display The but ton bar is automatically hidden after a cer tain video running time Press on any point on the display in or der to show the button bar again Pausing and resuming playback The following buttons are used for this purpose Show the butto...

Page 94: ...tended period can cause permanent hearing damage The use of headphones while driving is illegal in many states and could interfere with your ability to hear noises outside the vehicle Use headphones only when the vehicle is safely parked NOTICE It is forbidden to use headsets during driving in many states Please observe the applicable laws and regulations in this re gard Note The volume can also b...

Page 95: ...ious page of the settings by pressing the and buttons Closing the setting menu The setting menu is closed by pushing the key and the main menu then appears The individual menu points Energy Your Traffic Assist may be operated using an external power supply unit or using an integrated rechargeable battery The energy supply and its condition is vis ualized using the status display Displaying the ene...

Page 96: ...an change between the day and night screen displays Push the button Brightness The brightness of the screen display changes from day to night display or vice versa The icon for the active setting is highlight ed Left icon Day display Right icon Night display Calibration If the touch screen reacts incorrectly to the touching of the screen in specific ar eas calibration is required Starting calibrat...

Page 97: ...age turning in the direction shown by the ar row through the pages of the list The current page of the list and the total number of pages is shown between the buttons Selecting the language If you change the language the software restarts Push the contact area of the desired lan guage Canceling the language selection The language selection is closed by push ing the key and the setting menu then ap...

Page 98: ...after the ignition is switched off The relevant function can be switched on at the Traffic Assist Switching the function on off Press Automatic on off Depending on the previous setting the function will be switched on or off The current setting is indicated via display of the relevant icon in color Left icon The function is switched on the Traffic Assist does switch off auto matically Right icon T...

Page 99: ...s button The Traffic Assist is reset to the factory settings Car integration When using the optionally available cable for output of the audio signal connection of a microphone you must define wheth er announcements and music are to be output via the internal loudspeakers Press the Car Integration button Switch the internal loudspeaker on us ing the button or off using the button Confirm your sett...

Page 100: ...ngth and width In order to determine the position signals from at least three sat ellites are required and the fourth one al lows the height to be determined HDOP Horizontal Dilution Of Precision HDOP states the quality of the positional determination In theory values from 0 to 50 are possible whereby the following ap plies the smaller the value the more accu rate the positioning value 0 no deviat...

Page 101: ... consists basically of a plastic pointer with a softer plastic core The sleeve is hard and can be gripped and the softer core emerges at the tip and is de signed to touch the screen as softly as pos sible i e without the danger of scratching the screen The stylus is more accurate than operation using the fingers since only the thin tip touches the screen In addition dirty marks on the screen cause...

Page 102: ...9 40 scrolling 39 Dialling a number 77 Display 58 Display street names 59 Displaying current position 41 Displaying current street 59 Distance to destination 59 Drive profile 47 E Entering destinations 42 Entering address 43 ETA 59 F Fast access mode Icons 75 Fast route 47 57 Ferry 47 57 File 101 Folder viewing mode 91 Full screen 90 G GMT 100 GPS 100 H HDOP 100 I ID3 tag 86 ID3 Tag 100 Intended u...

Page 103: ... 52 Pause 86 Phonebook 77 Picture Viewer 89 shutting down 90 Picture viewer 92 Play 86 Points of interest 49 display on the map 59 nearby 49 R Rapid access 39 Icons 39 Reality view 62 Repeat current track 87 Restrictions Ferry 47 57 Route deleting 53 fast 47 57 renaming 53 scenic 47 57 short 47 57 Type of 57 Route planning 42 52 S Safety information 7 37 Scroll in image folder 92 Scrolling in list...

Page 104: ... Telephone book 77 Telephone fast access mode 75 Telephone menu 74 76 Telephone mode 74 The 85 Time format 58 Time of arrival 59 Time zone 61 TMC Settings 61 Toll road 47 57 Travel time 59 Travel time remaining 59 Type of route 57 Type of routing 57 U Units of measurement 58 USB 101 V Volume control 34 W Warnings Speed limit 60 ...

Page 105: ...t color depth 65536 Colours Low reflection values Storage 128 MB Flash Storage 64 MB SD RAM SD Card Reader Support up to 2 GB FAT 16 formatted USB Interface USB 1 1 USB Client 2 0 MINI USB Headphone output 3 5 mm Stereo Socket 1 Internal speakers 2 Watt max Power supply voltage 5 Volt DC via USB connection AC Adapter not included 100 240 Volt 0 2 Ampere 50 60 cps Output Voltage 5Volt ...

Page 106: ...nt EC guidelines any person may operate this unit This unit con forms to the current valid European or harmonised national standards This designation is your guarantee that the unit conforms to the applicable specifications regarding electromag netic compatibility This means that interference with other electrical electronic devices caused by the unit or interference with this unit caused by other...

Page 107: ...nd components This symbol on the product and or accompanying documents means that at the end of their life electrical and electronic products must be disposed of separately from domestic waste Please take these products to communal collecting points or recycling centres for processing and salvage of materials The units will be accepted there free of charge The proper disposal of this product helps...

Reviews: