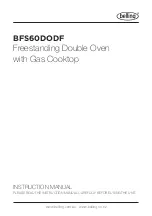
background image

BFS60DODF

Freestanding Double Oven  
with Gas Cooktop 

INSTRUCTION MANUAL

PLEASE READ THE INSTRUCTION MANUAL CAREFULLY BEFORE USING THE UNIT.

www.belling.com.au   www.belling.co.nz

Summary of Contents for BFS60DODF

Page 1: ...BFS60DODF Freestanding Double Oven with Gas Cooktop INSTRUCTION MANUAL PLEASE READ THE INSTRUCTION MANUAL CAREFULLY BEFORE USING THE UNIT www belling com au www belling co nz ...

Page 2: ...ter reading the manual please store it in a safe and accessible location for future reference Installation The installation of your new appliance must be carried out by a qualified installer technician in accordance to local regulations Please ensure all packaging materials are disposed of correctly Customer Care Our Customer Care centre is available should you wish to learn more about your applia...

Page 3: ... 3 Gas Connection 12 2 4 Gas Conversion if available 13 2 5 Electrical Connection and Safety if available 14 2 6 Safety Chain 15 2 7 Adjusting the feet 16 3 PRODUCT FEATURES 17 4 USE OF PRODUCT 18 4 1 Use of Gas Burners 18 4 2 Hob Controls 18 4 3 Accessories 23 5 CLEANING AND MAINTENANCE 24 5 1 Cleaning 24 5 2 Maintenance 27 5 3 Maintenance 27 6 TROUBLESHOOTING TRANSPORT 28 6 1 Troubleshooting 28 ...

Page 4: ...not play with the appliance Cleaning and user maintenance should not be made by children without supervision WARNING The appliance and its accessible parts become hot during use Care should be taken to avoid touching heating elements Keep children less than 8 years of age away unless they are continually supervised WARNING Unattended cooking on a hob with fat or oil can be dangerous and may result...

Page 5: ...g use Do not use harsh abrasive cleaners or scourers to clean oven surfaces They can scratch the surfaces which may result in shattering of the door glass or damage to surfaces Do not use steam cleaners to clean the appliance WARNING To avoid the possibility of electric shock make sure that the appliance is switched off before replacing the lamp CAUTION Accessible parts may be hot when cooking or ...

Page 6: ...vironment or for heating a room Do not use the oven door handles to lift or move the appliance This appliance is not connected to a ventilation device It should be installed and connected in accordance with current installation regulations Particular attention shall be given to the relevant requirements regarding ventilation If the burner has not lit after 15 seconds stop operating the device and ...

Page 7: ...g element and isolate the appliance from the power supply do not touch the appliance surface do not use the appliance Please keep children and animals away from this appliance 1 2 Installation Warnings Do not operate the appliance before it is fully installed The appliance must be installed by a licensed electrician The manufacturer is not responsible for any damage that might be caused by incorre...

Page 8: ...d is well ventilated Take care when opening the oven door during or after cooking The hot steam from the oven may cause burns Do not put flammable or combustible materials in or near the appliance when it is operating Always use oven gloves to remove and replace food in the oven Do not leave the cooker unattended when cooking with solid or liquid oils They may catch fire under extreme heating cond...

Page 9: ...xtractor hood Prolonged intensive use of the appliance may call for additional ventilation such as opening a window or for more effective ventilation for example by increasing the level of mechanical ventilation where present While using the grill burner keep the oven door open and always use the grill deflector shield supplied with the product Never use the grill burner with the oven door closed ...

Page 10: ...ur old machine This symbol on the product or on its packaging indicates that this product should not be treated as household waste Instead it should be handed over to the applicable collection point for the recycling of electrical and electronic equipment By ensuring this product is disposed of correctly you will help prevent potential negative consequences for the environment and human health whi...

Page 11: ...e appliance and its accessories ensure that the appliance is not damaged If you suspect any damage do not use it and contact an authorised service person or qualified technician immediately Make sure that there are no flammable or combustible materials in the close vicinity such as curtains oil cloth etc which may catch fire The worktop and furniture surrounding the appliance must be made of mater...

Page 12: ...uthorised service centre to make these adjustments Points that must be checked during flexible hose assembly If the gas connection is made by a flexible hose fixed onto the gas inlet of the hob it must be fixed on by a pipe collar Connect your appliance with a short and durable hose that is as close as possible to the gas source The permitted maximum length of the hose is 1 5 m The hose that suppl...

Page 13: ...o the gas supply in the country for which it has been produced The main country of destination is marked on the rear cover of the appliance If you need to use it in another country any of the connections in the figure below may be required In such a case contact local authorities to learn the correct gas connection Gas pipe Gas pipe Seal Seal Hose fitting Adapter Gas hose with collar Mechanical ga...

Page 14: ...gnite the burners and leave them on in the minimum position Remove the knobs because the screws are accessible only when the knobs are removed With the help of a small screwdriver fasten or loosen the bypass screw by around 90 degrees When the flame has a length of at least 4mm the gas is well distributed Make sure that the flame does not die out when passing from the maximum position to the minim...

Page 15: ...he authorized service personnel or qualified electrician Ensure all connections are adequately tightened Fix the supply cable in the cable clamp and then close the cover The terminal box connection is placed on the terminal box Green Yellow Earth wire to the terminal marked PE Brown Active wire to the terminal marked L Blue Neutral wire to the terminal marked N 2 6 Safety Chain The appliance can b...

Page 16: ...e the appliance is level prior to cooking To increase the height of the appliance turn the feet anti clockwise To decrease the height of the appliance turn the feet clockwise It is possible to raise the height of the appliance up to 30 mm by adjusting the feet The appliance is heavy and we recommend that a minimum of 2 people lift it Never drag the appliance ...

Page 17: ... the figures below List of Components 1 Cooktop 2 Control Panel 3 Top Oven Door Handle 4 Top Oven Door 5 Main Oven Door Handle 6 Main Oven Door 7 Adjustable Feet 1 2 3 4 5 6 7 Control Panel 8 Button Ignition 9 Timer 10 Main Oven Control Knob 11 Top Oven Control Knob 12 Main Oven Thermostat Knob 13 Hob Control Knob 11 10 12 9 13 13 13 7 8 ...

Page 18: ...urning it anti clockwise until the knob is in the maximum position While keeping the knob pressed in push the ignition button Make sure that you press the ignition button immediately as a delay could cause a build up of gas which may result in the flame spreading Continue pressing the ignition button until you see a stable flame on the burner Flame safety device Hob burners Hobs equipped with a fl...

Page 19: ...ns very hot for a prolonged period of time Do not touch it and do not place any object on top of it Never place knives forks spoons and lids on the hob as they will get hot and could cause serious burns Do not allow pan handles or any other cooking utensils to project over the edge of the cooker top Circular Saucepan Base Small Saucepan Diameter Saucepan base that has not settled Main Oven Functio...

Page 20: ...or fat It is recommended that you leave the grill to preheat for 10 minutes Warning When grilling the oven door must be closed and the oven temperature should be adjusted to 190 C Grill and Fan Function Switch on the GRILL AND FAN function using the main oven control knob The oven s thermostat and warning lights will switch on and the grill heating element and fan will start operating The temperat...

Page 21: ...erature setting will set to the highest level when this function is selected Use this function for wide area grilling When you have finished grilling switch the top oven off Keep children away from the oven during grilling and until the oven has fully cooled after use Warning The top oven door must be kept open during use of this function Use of the Digital Touch Timer Function Description Auto co...

Page 22: ...food for cooking and put it in the oven 1 Select the desired cooking function and the temperature using the control knobs 2 Press MODE until you see dur and symbol on the display screen The symbol A will flash 3 Select the desired cooking time period using the and keys 4 The current time will reappear on the screen and the symbols A and will remain illuminated When the timer reaches zero the oven ...

Page 23: ...inishing time using the and keys 7 Add the cooking period to the current time of day You can set a time of up to 23 hours and 59 minutes after this 8 The current time will reappear on the screen and the symbols A and will remain illuminated The operating time will be calculated and the oven will automatically start so that cooking will finish at the set finishing time When the timer reaches zero t...

Page 24: ...se on your appliance Use cream cleaners or liquid cleaners which do not contain particles Do not use caustic corrosive creams abrasive cleaning powders rough wire wool or hard tools as they may damage the cooker surfaces Do not use cleaners that contain particles as they may scratch the glass enamelled and or painted parts of your appliance Should any liquids overflow clean them immediately to avo...

Page 25: ...ve the screws holding each catalytic panel to the oven Cleaning the Gas Hob Clean the gas hob on a regular basis Take off the pan supports caps and crowns of the hob burners Wipe the hob surface with a soft cloth soaked in soapy water Then wipe the hob surface over again with a wet cloth and dry it Wash and rinse the hob burner caps Do not leave them wet Dry them immediately with a dry cloth Make ...

Page 26: ...m the location bracket x Pull the glass out in the direction of A x A B To replace the inner glass 1 Push the glass towards and under the location bracket y in the direction of B y B 3 Place the glass under the location bracket x in the direction of C x C If the oven door is a triple glass oven door the third glass layer can be removed the same way as the second glass layer Removal of the Oven Doo...

Page 27: ... 15 25 Watt Type E14 Replace the glass lens and your oven is ready for use The lamp is designed specifically for use in household cooking appliances It is not suitable for household room illumination 5 3 Maintenance WARNING The maintenance of this appliance should be carried out by an authorised service person or qualified technician only Other Controls Periodically check the gas connection pipe I...

Page 28: ...are not assembled correctly Different gas compositions Ensure the burner parts have been placed correctly Due to the design of the burner the flame can appear to be orange yellow in certain areas of the burner If you operate the appliance with natural gas city natural gas may have different compositions Do not operate the appliance for a couple of hours Burner is not igniting or only partially lig...

Page 29: ...aught between the timer buttons Touch model there is moisture on the control panel The key lock function is set Remove the foreign matter and try again Remove the moisture and try again Check whether the key lock function is set The oven fan if available is noisy Oven shelves are vibrating Check that the oven is level Check that the shelves and any bake ware are not vibrating or in contact with th...

Page 30: ... TECHNICAL SPECIFICATIONS 7 1 Injector Table INJECTOR ORIFICE NATURAL GAS MM UNIVERSAL LPG MM Low heat burner 0 90 0 50 Medium heat burner 1 18 0 65 High heat burner 1 55 0 85 Intense heat wok burner 1 75 0 98 ...

Page 31: ...liance operating check the outlet pressure When all burners of the appliance are operatingat maximum When the smallest burner of the appliance isoperating at minimum Under these conditions the outlet pressure should not vary from the nominal outlet pressure of 2 60kPa by more than 0 52kPa 8 If the regulator appears to not be performingsatisfactorily then check the following points If the outlet pr...

Page 32: ...EN 32 Top hat nut assembly fully screwed down A Configuration for Natural Gas C E G B Turn top hat nut anti clockwise and remove D F Configuration for LPG H ...

Page 33: ...EN 33 Flame siz e adjusted to maximum Bypass screw RepositionTop Control knob shaft Flame siz e adjusted to minimum ...

Page 34: ...ase contact the Customer Care Centre on 1300 556 816 AU 64 9 274 8265 NZ Glen Dimplex Australia Pty Ltd Glen Dimplex New Zealand Ltd 1340 Ferntree Gully Road 38 Harris Road East Tamaki Scoresby 3179 Victoria Auckland 2013 Australia New Zealand Ph 1300 556 816 Ph 09 274 8265 Fax 1800 058 900 Fax 09 274 8472 sales glendimplex com au sales glendimplex co nz ...

Reviews: