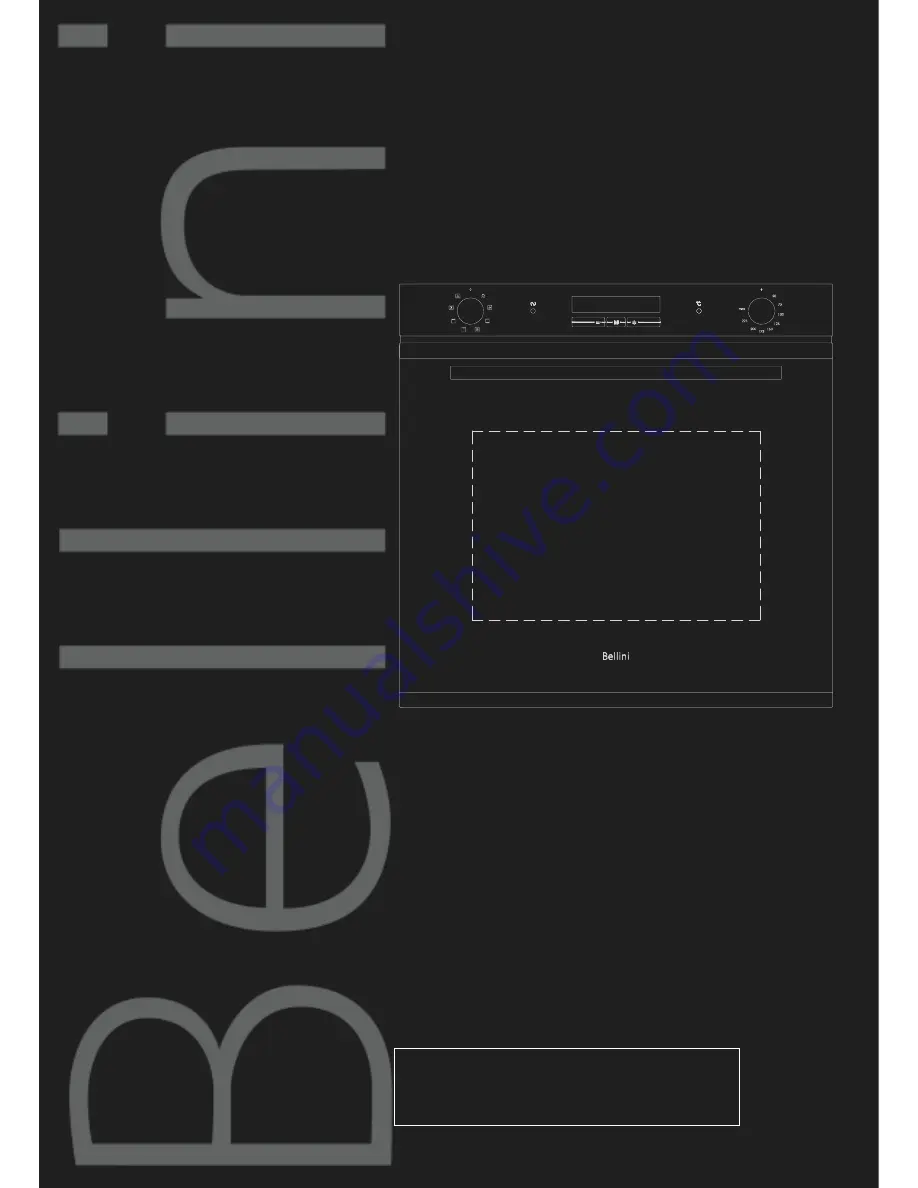
background image


60cm Built In   

Jumbo Oven 

Installation and User manual


Content 

Important Safety instructions-------------------- 2 
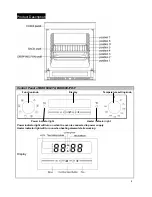
Product description--------------------------------- 4 
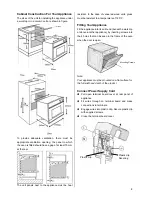
Installation-------------------------------------------- 7 
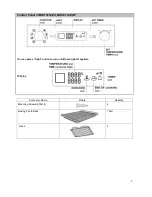
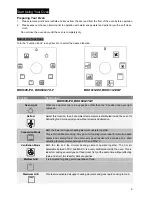
Start using your oven------------------------------- 9 
Maintenance and cleaning------------------------ 17 
Warranty----------------------------------------------- 21


BDO610JEX 
BDO610JEX-F 
BDO608JTX 
BDO608JTX-F 

20131007 issue0


For warranty service call 1300 373 199(Australia) 

or 0508 123108(New Zealand) to connect you to 

the nearest authorised service centre 

Summary of Contents for BDO608JTX

Page 1: ... 2 Product description 4 Installation 7 Start using your oven 9 Maintenance and cleaning 17 Warranty 21 BDO610JEX BDO610JEX F BDO608JTX BDO608JTX F 20131007 issue0 For warranty service call 1300 373 199 Australia or 0508 123108 New Zealand to connect you to the nearest authorised service centre ...

Page 2: ...al fault disconnect the power and report the fault to the service centre to be repaired The rules and provisions contained in this instruction manual should be strictly observed Do not allow anybody who is not familiar with the contents of this instruction manual to operate the appliance Child Safety This appliance is not intended for use by persons including children with reduced physical sensory...

Page 3: ...iance becomes hot Care should be taken to avoid touching the hot surfaces inside the oven Switch the appliance off before removing the oven light glass for globe replacement To avoid an accident ensure that oven shelves and fittings are always inserted into the appliance in accordance with the instructions Do not use the door as a shelf Do not push down when the oven door is open Grill Do not cove...

Page 4: ...8JTX F Function knob Display Temperature setting knob Power indicator light Heater indicator light Power indicator light will turn on when the oven is connected to power supply Heater indicator light will turn on when heating element starts working Display ...

Page 5: ...5 Control Panel of BDO610JEX BDO610JEX F You can press Light button to turn on off oven light at anytime Display Accessory Name Picture Quantity Mounting Screws ST4x35 4 Baking Pan Rack 1 Pair Rack 2 ...

Page 6: ...tal grill heating el 900 2300 Watt Shaded motor back 32 Watt Oven light 15Watt Circle heating el 2400Watt Shaded motor top 15Watt BDO610JEX BDO610JEX F product dimensions L x W x D mm electrical connection min fuse rating max power rating max current rating 595x595x540 220 240V 50Hz 15A 2970 3540W 14 75A Heating elements Motor Oven inside heating el 2300 Watt Synchromotor 4 Watt Oven upper heating...

Page 7: ...st be capable of withstanding 70 C Installation into low temperature tolerant cabinetry E g vinyl coated may result in deterioration of the low temperature coating by discoloring or bubbling The cabinet panels to the oven must be heat resistant With veneered wood units glues must be resistant to a temperature of 100 C If the appliance is to be installed adjacent to vinyl wrapped surfaces use an in...

Page 8: ...o a temperature of 120 C Fitting Your Appliance Fit the appliance into its surround beneath a work top or above another appliance by inserting screws into the 4 holes that can be seen in the frame of the oven when the door is open Note Your appliance must be mounted on a flat surface for the full width and depth of the product Connect Power Supply Cord Pull open terminal board cover at rear panel ...

Page 9: ...perature is distributed inside the oven for defrosting food more quickly and without proteins adulteration Convection Mode Both the lower and upper heating elements operate together This is for traditional cooking Very good for roasting joints ideal for biscuits baked apples and crisping food You obtain very good results when cooking on a shelf adjusting the temperature between 50 C and MAX C Vent...

Page 10: ...e The top heating element is activated By turning the SET TEMPERATURE knob the different power levels which may be set will appear on the display these range between 5 and 100 The high and direct temperature of the grill is recommended for food which requires a high surface temperature Always cook in this mode with the oven door closed Low temperature This type of cooking can be used for proving d...

Page 11: ...a large bowl ٛ Dilute the yeast in lukewarm water approximately 35 degrees ٛ Make a small well in the mound of flour Pour in the water and yeast mixture ٛ Knead the dough by stretching and folding it over itself with the palm of your hand for 10 minutes until it has a uniform consistency and is not too sticky ٛ Form the dough into a ball shape place it in a large bowl and cover it with transparent...

Page 12: ...features O clock time you can set current O clock time Timer you can set a countdown time that will beep when the set time has elapsed Minute minder you can choose when time is up only to hear a sound without or with stop heating Cooking duration you can set cooking duration A timer will count down the preset cooking time beep when the time has elapsed and turn the appliance off Cooking end time i...

Page 13: ...ess Minus Plus to set cooking end time Maximum setting is current O clock time plus 23 hours and 59 min 3 Wait for 5s no further operation then setting is confirmed Delayed Start Cooking Setting Combine Cooking duration setting and Cooking end time setting you can program your oven start working at a particular time and keep for a set duration 1 Set desired cooking duration according to above clau...

Page 14: ...apsed the buzzer will be activated Cooking Duration Setting 1 Press the button until the icon and the three digits on display begin to flash 2 Turn the TIMER KNOB towards and to adjust the duration 3 Press the button again to confirm When the set time has elapsed the text END appears on display and oven stop cooking a buzzer will sound Cooking End Time Setting A cooking duration must be set before...

Page 15: ...stries 1 2 3 2 or 3 2 1 5 4 6 Yes 200 30 40 35 45 40 50 Crème caramel bain marie 1 2 3 2 or 3 2 1 5 4 6 Yes 170 35 45 35 45 40 50 Panettone 1 1 or 2 Yes 160 45 60 Sponge cake made with yoghurt 1 2 2 or 3 1 4 or 5 Yes 160 60 75 60 75 Sponge cake 1 2 3 2 or 3 2 1 5 4 6 Yes 190 30 35 35 40 40 45 Multilevel Large cut of meat 1 1 2 Yes 160 90 240 Rotisserie 1 2 3 No 200 35 75 Gratin 1 3 or 4 No 190 40 ...

Page 16: ...cooking times listed above are intended as guidelines only and may be modified according to personal tastes Oven preheating times are set as standard and may not be modified manually The duration of the automatic cooking functions are set by default The values in the table refer to the minimum and maximum duration which may be modified by the user taking the default value as a starting point As st...

Page 17: ...dges they can be sharp The front frame around the oven can be cleaned with stainless steel cleaners if it becomes soiled or discoloured The stainless steel should only be cleaned with warm water and a mild detergent DO NOT use abrasive cleaners or harsh solvents NOTE Make sure you follow the polish or brushing lines in the stainless steel Glass Glass surfaces on doors and control panels are best c...

Page 18: ... the lamp cover Door Removal In order to obtain easier access to the oven chamber for cleaning it is possible to remove the door To do this tilt the safety catch part of the hinge upwards Close the door lightly lift and pull it out towards you In order to fit the door back on to the oven do the inverse When fitting ensure that the notch of the hinge is correctly placed on the protrusion of the hin...

Page 19: ...and place it on a protective surface e g on a table cloth to prevent it getting scratched The door handle should line up with the edge of the table Make sure the glass lies flat to avoid breakage of glass during cleaning 1 Undo the 2 screws on upper bracket 2 Take out upper bracket and first pane of glass 3 Loosen the 4 clips 4 Slide out middle pane of glass carefully Clean the glass panes and oth...

Page 20: ...onvection position Use lower side tins Lower the temperature Put the cake on a higher shelf The outside is overcooked and the inside is not cooked enough Temperature is too high Lower the temperature and increase the cooking time The outside is too dry even though it looks cooked Temperature is too low Increase the temperature and reduce the cooking time The appliance does not work Break in power ...

Page 21: ... a manufacturing defect is discovered in the Bellini product or it fails to perform to the Company s specifications as a result of some defect in materials components or workmanship Defect then the Company will at its option repair the Bellini product or supply a replacement Bellini product free of charge A replacement Bellini product may differ from the original product purchased by the Consumer ...

Page 22: ...he Company determines that it is defective through no fault of the Owner and is otherwise undamaged the Company will repair or replace the Bellini product in accordance with this warranty DO NOT SEND IN THIS WARRANTY Fill out the following details and file with your purchase invoice RETAIN FILE WITH YOUR RECEIPT Your Purchase Receipt Invoice is proof of date of purchase If you are unable to establ...

Reviews: