background image

1

Contents

Safety Instructions -------------------------------------------------------------------------------------------- 2

Getting Started ------------------------------------------------------------------------------------------------ 4

Desk Mounting ------------------------------------------------------------------------------------------------- 7

Wall Mounting ------------------------------------------------------------------------------------------------- 8

Basic Operation --------------------------------------------------------------------------------------------- 10

Receiving Calls ---------------------------------------------------------------------------------------------- 11

Placing Calls ------------------------------------------------------------------------------------------------- 12

Headset Feature --------------------------------------------------------------------------------------------- 12

Storing Numbers --------------------------------------------------------------------------------------------- 13

Recalling Stored Numbers ------------------------------------------------------------------------------- 14

Security System --------------------------------------------------------------------------------------------- 15

Recharging the Battery Pack ---------------------------------------------------------------------------- 16

Changing the Battery Pack ------------------------------------------------------------------------------ 17

Problem Solving -------------------------------------------------------------------------------------------- 18

Technical Information ------------------------------------------------------------------------------------- 19

FCC Requirements ------------------------------------------------------------------------------------------ 20

Warranty -------------------------------------------------------------------------------------------------------- 22

Wall Mounting Template --------------------------------------------------------------------------------- 26

Summary of Contents for GH9407

Page 1: ...ration 10 Receiving Calls 11 Placing Calls 12 Headset Feature 12 Storing Numbers 13 Recalling Stored Numbers 14 Security System 15 Recharging the Battery Pack 16 Changing the Battery Pack 17 Problem S...

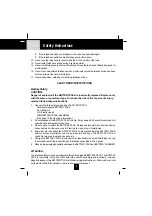
Page 2: ...ny 8 Do not place anything on the power cord Install the telephone where no one will step or trip on the cord 9 Do not overload wall outlets or extension cords as this can increase the risk of fire or...

Page 3: ...ACK ModelB655 See page 16 for ordering information 2 Do not dispose of the BATTERY PACK in a fire It may explode Check with local codes for possible special disposal instructions 3 Do not open or muti...

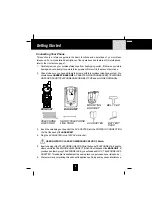
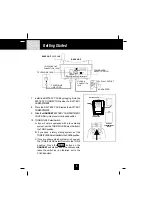
Page 4: ...g on the end of the AC ADAPTER into the POWER IN CONNECTION JACK at the back of the BASE UNIT 4 Plug the AC ADAPTER into a 120V AC wall outlet USE ONLY WITH CLASS 2 POWER SOURCE 9V DC 300mA 5 Inserton...

Page 5: ...unsure which system you have set the TONE PULSE Select Switch to the TONE position Press the TALK button on the HANDSET and make a call If the call connects leave the switch as is otherwise set to the...

Page 6: ...SET facing up insert one side of the BELT CLIP HOOK into the matching slot at the top side of the HANDSET Press down on the opposite side of the BELT CLIP until the other HOOK locks into the slot on t...

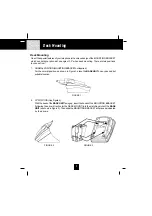
Page 7: ...otrequired For the normal position as shown in Figure 1 place the BASE UNIT on any desired but suitable location FIGURE 1 2 30o POSITION SeeFigure2 With the back of the BASE UNIT facing up insert the...

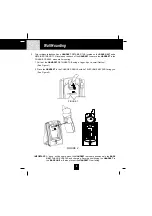
Page 8: ...on for the WALL MOUNT into the matching slots of the BASE UNIT as shown below Then slide the MOUNTING BRACKET into place as indicated by the arrows Plug the free end of the SHORTTELEPHONELINECORDintot...

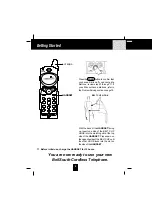
Page 9: ...tool See Figure 1 2 Place the HANDSET in the CHARGE CRADLE with its TELEPHONE KEYPAD facing you See Figure 2 IMPORTANT A beep will be heard when the HANDSET is properly positioned in the BASE UNIT CH...

Page 10: ...your cordless telephone you must charge the HANDSET for 12 hours Failure to do so will require more frequent charging of the BATTERY PACK See page 16 for more information on the BATTERY PACK NOTE Dep...

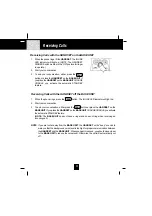
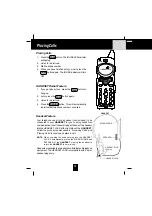
Page 11: ...ess the TALK button The IN USE LED indicator will light up 2 Start your conversation 3 To end your conversation either press the TALK button or place the HANDSET on the BASEUNIT IfyouplacetheHANDSETon...

Page 12: ...ANDSET for you to enjoy hands free communication Insert the small plug at the end of the headset into the HEADSET JACK at the right side of the HANDSET Follow the procedures discussed in Receiving Cal...

Page 13: ...ough 6 to store other telephone numbers EXAMPLE To store the number 115 1968 under the TELEPHONE KEYPAD 1 button 1 Press the MEMO button 4 PresstheTELEPHONEKEYPAD 1 button 2 Dial 115 1968 5 You have s...

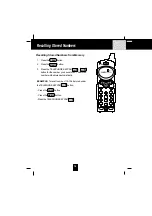
Page 14: ...ou have stored The stored number will be dialed automatically EXAMPLE To recall number 115 1968 stored under theTELEPHONEKEYPAD 1 button Press the TALK button Press the MEMO button PresstheTELEPHONEKE...

Page 15: ...dBASEUNITmaynotbepossibleinanyofthefollowing situations 1 After a power failure 2 After relocating the BASE UNIT by disconnecting the AC ADAPTER 3 After replacing the HANDSETBATTERYPACK To reset place...

Page 16: ...PACK needs to be recharged Charge the BATTERY PACK at least once every 90 days of non use to avoid battery failure When the BATTERY PACK can no longer be charged replacement of the BATTERY PACK will...

Page 17: ...nethatyouhavepurchasedcontainsarechargeableBATTERYPACK TheBATTERY PACK is recyclable At the end of its useful life under various state and local laws it may be illegal to dispose of this BATTERYPACK i...

Page 18: ...p from electrical products in the home or electrical storms Generally this noise is a minor annoyance and should not be interpreted as a defect in your system See Technical Information on page 19 2 Ch...

Page 19: ...est signaltotheHANDSET Interference Electronic circuits activate a relay to connect the cordless telephone to your telephone line These electronic circuits operate in the radio frequency spectrum Whil...

Page 20: ...he telephone company may make changes in its communication facilities equipment operations or procedures where such action is reasonably required in the operation of its business and is not inconsiste...

Page 21: ...his equipment does cause harmful interference to radio or television reception which can be determined by turning the equipment off and on the user is encouraged to try to correct the interference by...

Page 22: ...no responsibility for any special incidental or consequential damages This warranty gives you specific legal rights and you may have other rights which vary from state to state Some states do not all...

Page 23: ...de for BellSouth Products or which is not defective as determined by our test procedures will not be repaired and will be returned to you C O D freight collect To Obtain Warranty Service Provide proof...

Page 24: ...24 Notes...

Page 25: ...25 Notes...

Page 26: ...te for attachment of screws to the wall when mounting this telephone on the wall 1 Cut out this page 2 Use this template to determine the distance between screws when mounting this phone on the wall T...

Page 27: ...N button to change the operating channel IMPORTANT If you live in an area which gets frequent thunderstorms we strongly recommend plugging your AC ADAPTER into a surge protector IMPORTANT Placing your...

Page 28: ...REFERENCE OWNER S MANUAL INSTALLATION AND OPERATING INSTRUCTIONS For installation information please see Getting Started instructions on page 4 or your separate Quick Start Guide TALK MEMO PAUSE DEF...

Page 29: ...Make certain you receive the best performance from your telephone Read this manual first STOP Made in China CM Visit Us on the Web www uselectronics info...

Page 30: ...2 14 18 3 REDIAL BUTTON Pg 12 5 PAUSE BUTTON Pg 13 HI 6 VOLUME CONTROL MID LOW SWITCH 7 TONE BUTTON 12 SCAN BUTTON Pg 15 18 27 11 TELEPHONE KEYPAD Pg 13 14 9 MEMO BUTTON Pg 13 14 8 FLASH BUTTON 13 CHA...

Page 31: ...for Rotary Service users Press once before entering numbers to access an answering system or electronic backing services etc 8 FLASH FLASH Button Press to answer an incoming call if you have Call Wai...

Page 32: ...SELECT SWITCH Pg 5 2 POWER IN CONNECTION JACK Pg 4 3 TELEPHONE LINE CONNECTION JACK Pg 4 8 18 4 BASE UNIT ANTENNA 6 CHARGE TERMINALS 7 PAGE BUTTON 8 IN USE CHARGE LED INDICATOR 2 4GHz CHARGE PAGE IN...

Page 33: ...4 ANTENNA 5 HANDSET RETAINER TAB Secures the HANDSET in the CHARGE CRADLE when wall mounting 6 CHARGE TERMINALS For charging the HANDSET BATTERY PACK For best performance clean the CHARGE TERMINALS pe...

Page 34: ...e 16 Special Services Use the FLASH button to access special services such as Call Waiting supplied by your telephone company or company switchboard STANDBY Mode When in STANDBY mode ON HOOK the phone...

Reviews: