P r o f e s s i o n a l W i r e l e s s S o l u t i o n s
BENELEC.COM.AU
25.40
02452C Multi-Band Indoor Omni-Ceiling Antenna
Installation Instructions
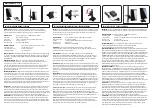
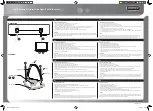
A) Feed the ground-plane
(2)
over the "N Type" connector
(6)
and sit it on the shoulder provided on the radiator
securing bolt
(5)
. The ground-plane must be insulated from
the the metal body of the antenna.
B) Feed the plastic ground-plane plastic locking nut
(3)
over
the connector ensuring that the undercut side of the nut is
towards the ground-plane. It is a tight fit and some pressure
may need to be applied to feed the nut over the connector.
Screw the nut onto the brass body of the antenna until it
locks tightly against the ground-plane.
C2451C011 Multi-Band
Ceiling Antenna Body
Assy
C2451C02 Ground-Plane
for 02451C
(3)
C2451C05 Ground Plane
Plastic Locking Nut
IMPORTANT:
Do not use any tools to tighten
parts for assembly. Parts must
only be assembled finger-tight.
Drill 25.4 mm hole in Plasterboard.
C) Select a location in the plasterboard such that a
clearance of 140mm radius is available around the
centre of the antenna - drill a 25.4mm hole in the
plasterboard.
D) Insert the antenna assembly into the
plasterboard from above until the ground-plane is
sitting on the upper side of the plasterboard. The
radiator securing bolt of the antenna body
assembly sits into the 25.4mm hole of the
plasterboard.
E) Fit the radome
(4)
over the antenna from below
the plasterboard and hand tighten until the hub of
the radome presses against the plasterboard.
F) Connect the antenna to the network.
Plasterboard
C2451C03 Multi-Band
Ceiling Antenna
Radome
(4)
(1)
(2)
(6)
04221S "N Type" Female
Connector
02451C09 Radiator
Securing Bolt
(6)


