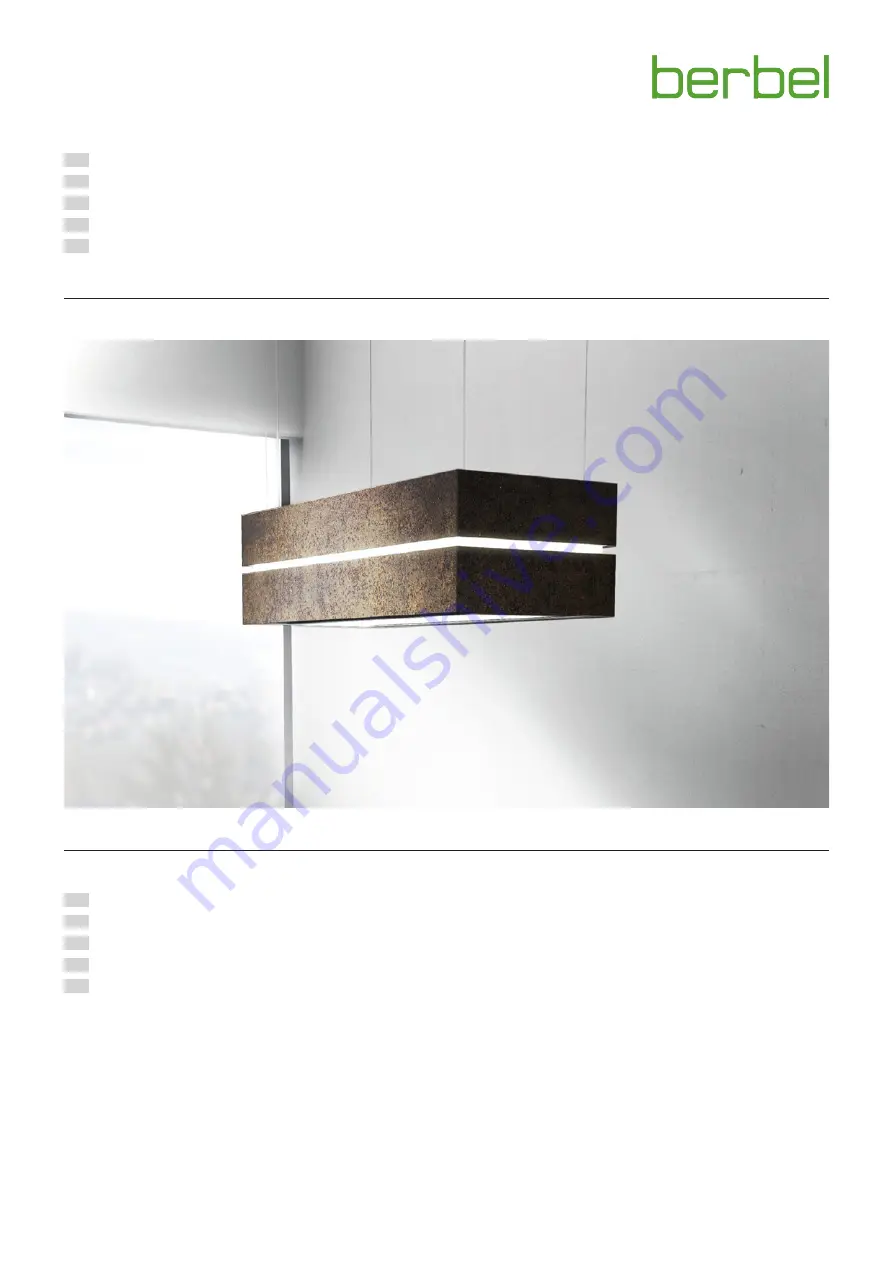
background image

DE


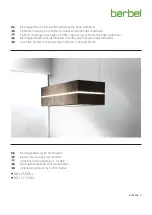
Montageprofile für Deckenlifthauben Skyline Edge Individual

FR


Profilé de montage pour hottes décoratives Skyline Edge Individual

IT


Profili di montaggio per cappe a soffitto sospese regolabili Skyline Edge Individual

NL


Montageprofielen voor plafondunits met liftsysteem Skyline Edge Individual

EN


Assembly profiles for Skyline Edge Individual ceiling lift hoods

DE


Montageanleitung für die Modelle

FR


Manuel de montage des modèles

IT


Istruzioni di montaggio per i modelli

NL


Montagehandleiding voor de modellen

EN


Installation instructions for the models


ƒ

BDL 95 SKE-I


ƒ

BDL 115 SKE-I

 6003594_0

Summary of Contents for Skyline Edge BDL 115 SKE-I

Page 1: ...Skyline Edge Individual NL Montageprofielen voor plafondunits met liftsysteem Skyline Edge Individual EN Assembly profiles for Skyline Edge Individual ceiling lift hoods DE Montageanleitung für die Modelle FR Manuel de montage des modèles IT Istruzioni di montaggio per i modelli NL Montagehandleiding voor de modellen EN Installation instructions for the models BDL 95 SKE I BDL 115 SKE I 6003594_0 ...

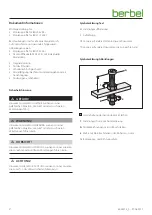
Page 2: ...n die zum Tod oder zu schweren Verletzungen führt D D WARNUNG Hinweise mit dem Wort WARNUNG warnen vor einer gefährlichen Situation die zum Tod oder zu schweren Verletzungen führen kann D D VORSICHT Hinweise mit dem Wort VORSICHT warnen vor einer Situation die zu leichten oder mittleren Verletzungen führen kann D D ACHTUNG Hinweise mit dem Wort ACHTUNG warnen vor einer Situation die zu Sach oder U...

Page 3: ...mationen 5 2 1 Produktübersicht 5 2 2 Lieferumfang 5 2 3 Technische Daten 5 3 Montage 6 3 1 Sicherheitshinweise zur Montage 6 3 2 Anforderungen an die Frontblenden 6 3 2 1 Gerät auspacken 6 3 2 2 Montage vorbereiten 6 3 2 3 Deckenlifthaube vorbereiten 7 3 2 4 Frontblenden anbringen 7 4 Reinigung 9 5 Demontage 10 6 Entsorgung 10 6 1 Verpackung entsorgen 10 6 2 Gerät entsorgen 11 7 Kontakt 11 ...

Page 4: ...n y y Kenntnis dieser Anleitung Reinigung durch Benutzer Anforderungen an die Benutzer y y Kenntnis dieser Anleitung Für folgende Benutzer gelten besondere Anforderungen y y Kindern ab 8 Jahren und darüber y y Personen mit verringerten physischen sensorischen oder mentalen Fähigkeiten y y Personen mit Mangel an Erfahrung und Wissen Diese Benutzer dürfen nur tätig werden bei Reinigung Besondere Anf...

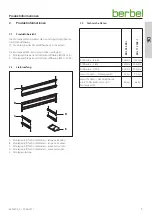
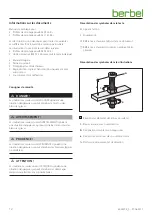
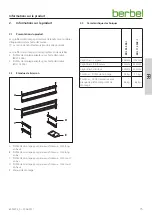
Page 5: ...assend für Deckenlifthaube BDL 115 SKE I 2 2 Lieferumfang E D A B C A Montageprofil für Frontblenden lange Seite oben B Montageprofil für Frontblenden lange Seite unten C Montageprofil für Frontblenden kurze Seite unten D Montageprofil für Frontblenden kurze Seite oben E Montageanleitung 2 3 Technische Daten BDL 95 SKE I BDL 115 SKE I Rohhaube Breite 938 mm 1144 mm Rohhaube Tiefe 454 mm 454 mm Roh...

Page 6: ...ulässig Ermitteln Sie das Gewicht der Frontblenden Geben Sie die Gewichtsangaben dem Hersteller der Deckenlifthaube 3 2 1 Gerät auspacken Packen Sie das Gerät und alle beigepackten Teile vorsichtig aus Stellen Sie das Gerät auf eine feste saubere und schützende Unterlage z B dicke Pappe Kontrollieren Sie das Gerät und alle enthaltenen Teile auf Beschädigungen Kontrollieren Sie den Lieferumfang auf...

Page 7: ...ewegen Sie die Bauteile langsam und vorsichtig Halten Sie Gegenstände fern die die Bauteile zerkratzen können z B Werkzeuge Gürtelschnallen Legen Sie keine Gegenstände auf der Deckenlifthaube ab Achten Sie bei allen Montageschritten auf die richtige Zuordnung der Montageprofile Die Position ist auf dem Montageprofil angegeben y y oben top für die oberen Frontblenden der Anschlagwinkel zeigt nach o...

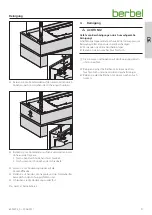
Page 8: ...n Sie dazu die Aussparung des Montageprofils auf die Schrauben an der Deckenlifthaube Richten Sie die Frontblenden auf den langen Seiten wie folgt aus y y Fixieren durch handfestes Verspannen nach links drehen der Schrauben auf den beiden kurzen Seiten y y Mittig ausrichten durch gleich mäßiges Verstellen der Schrauben auf den beiden kurzen Seiten Stellen Sie sicher dass die Frontblenden auf den l...

Page 9: ...e und das Netzkabel frei beweglich in den Führungsschlitzen sind Schrauben Sie die Abdeckung wieder fest Das Gerät ist betriebsbereit 4 Reinigung D D ACHTUNG Gefahr von Beschädigungen durch unsachgemäße Reinigung Scharfkantige Gegenstände Scheuermittel oder aggressive Reinigungsmittel können das Gerät beschädigen Verwenden Sie milde Haushaltsreiniger Benutzen Sie ein weiches feuchtes Tuch Die Hinw...

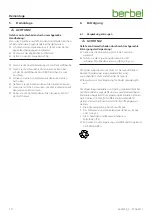
Page 10: ...eraus 6 Entsorgung 6 1 Verpackung entsorgen D D ACHTUNG Gefahr von Umweltschäden durch nicht sachgerechte Entsorgung der Verpackung Geben Sie die Verpackung nicht in den normalen Hausmüll Führen Sie die Verpackung der umwelt und sachgerechten Wiederverwertung Recycling zu Die Verpackung dient zum Schutz vor Transportschäden Nur die Originalverpackung gewährleistet einen ausreichenden Schutz währen...

Page 11: ...en des spannungslosen Netzkabels Entsorgen Sie das Gerät nach den gesetzlichen Bestimmungen über einen Entsorgungsfachbetrieb oder über Ihre kommunale Entsorgungseinrichtung 7 Kontakt Wenn Sie Anregungen oder Fragen haben wählen Sie aus folgenden Möglichkeiten Post berbel Ablufttechnik GmbH Sandkampstraße 100 D 48432 Rheine Telefon 49 0 5971 80 80 9 0 Mo bis Do 8 00 17 30 Uhr und Fr 8 00 16 30 Uhr...

Page 12: ...raîner la mort ou des blessures graves D D AVERTISSEMENT Les indications suivies du mot AVERTISSEMENT signalent une situation dangereuse qui peut entraîner la mort ou des blessures graves D D PRUDENCE Les indications suivies du mot PRUDENCE signalent une situation dangereuse qui peut entraîner des blessures légères ou modérées D D ATTENTION Les indications suivies du mot ATTENTION signalent une si...

Page 13: ...endue de livraison 15 2 3 Caractéristiques techniques 15 3 Montage 16 3 1 Consignes de sécurité relatives au montage 16 3 2 Exigences relatives aux panneaux frontaux 16 3 2 1 Déballage de l appareil 16 3 2 2 Préparation du montage 16 3 2 3 Préparation de la hotte décorative 17 3 2 4 Installation des panneaux frontaux 17 4 Nettoyage 19 5 Démontage 20 6 Élimination 20 6 1 Élimination de l emballage ...

Page 14: ...anuel Nettoyage par les utilisateurs Exigences relatives aux utilisateurs y y Connaissance de ce manuel Les exigences particulières s appliquent pour les utilisateurs suivants y y Enfants à partir de 8 ans et plus y y Personnes avec des capacités physiques sensorielles ou mentales réduites y y Personnes avec un manque d expérience et de savoir Ces utilisateurs doivent uniquement participer au nett...

Page 15: ...r hotte décorative BDL 115 SKE I 2 2 Étendue de livraison E D A B C A Profilé de montage pour panneaux frontaux côté long en haut B Profilé de montage pour panneaux frontaux côté long en bas C Profilé de montage pour panneaux frontaux côté court en bas D Profilé de montage pour panneaux frontaux côté court en haut E Manuel de montage 2 3 Caractéristiques techniques BDL 95 SKE I BDL 115 SKE I Capot...

Page 16: ...de sécurité Déterminer le poids des panneaux frontaux Donner les indications de poids au fabricant de la hotte décorative 3 2 1 Déballage de l appareil Déballer l appareil et toutes les pièces emballées avec prudence Poser l appareil sur une surface de protection solide et propre par ex carton épais Contrôler l appareil et toutes les pièces fournies en termes de dommages Contrôler l intégrité de l...

Page 17: ...ntage Déplacer les composants lentement et avec prudence Se tenir à distance des objets qui peuvent rayer les composants par ex outils boucles de ceinture Ne pas déposer d objet sur la hotte décorative Pour toutes les étapes de montage veiller à l affectation correct des profilés de montage La position est indiquée sur le profilé de montage y y haut top pour les panneaux frontaux supérieurs la cor...

Page 18: ... haut et en bas Pour cela placer l évidement du profilé de montage sur la vis de la hotte décorative Aligner les panneaux frontaux sur les côtés longs de la manière suivante y y Fixation par le serrage à fond rotation à droite des vis des deux côtés courts y y Alignement central en déplaçant régulièrement les vis des deux côtés courts S assurer que les panneaux frontaux sont fixés sur les côtés lo...

Page 19: ...bles d alimentation peuvent se déplacer librement dans les fentes de guidage Revisser le revêtement L appareil est prêt à fonctionner 4 Nettoyage D D ATTENTION Risque de dommages en cas de nettoyage incorrect Les objets tranchants produits abrasifs ou produits de nettoyage agressifs peuvent endommager l appareil Utiliser des produits de nettoyage doux Utiliser un chiffon doux et humide Les instruc...

Page 20: ...nation 6 1 Élimination de l emballage D D ATTENTION Risque d atteintes environnementales en cas d élimination incorrecte de l emballage Ne pas éliminer l emballage avec les ordures ménagères Retourner l emballage pour un recyclage approprié et écologique L emballage sert de protection contre les dommages causés pendant le transport Seul l emballage d origine garantit une protection suffisante pend...

Page 21: ... coupant le câble d alimentation hors tension Éliminer l appareil conformément aux dispositions légales par l intermédiaire d une entreprise spécialisée ou de votre service d évacuation des appareils usagés de votre commune 7 Contact En cas de doute ou de question nous contacter de la manière suivante Courrier berbel Ablufttechnik GmbH Sandkampstraße 100 D 48432 Rheine Téléphone 49 0 5971 80 80 9 ...

Page 22: ...o situazioni di pericolo che causano morte o lesioni fisiche gravi D D AVVERTENZA Indicazioni contrassegnate dalla parola AVVERTENZA indicano situazioni di pericolo che potrebbero causare morte o lesioni fisiche gravi D D ATTENZIONE Indicazioni contrassegnate dalla parola ATTENZIONE indicano situazioni che potrebbero causare lesioni di bassa o media entità D D NOTA BENE Indicazioni contrassegnate ...

Page 23: ...tura 25 2 3 Dati tecnici 25 3 Montaggio 26 3 1 Indicazioni di sicurezza per il montaggio 26 3 2 Requisiti per i pannelli frontali 26 3 2 1 Disimballaggio dell apparecchio 26 3 2 2 Preparazione per il montaggio 26 3 2 3 Preparazione della cappa a soffitto sospesa regolabile 27 3 2 4 Applicazione dei pannelli frontali 27 4 Pulizia 29 5 Smontaggio 30 6 Smaltimento 30 6 1 Smaltimento dell imballo 30 6...

Page 24: ...ia ad opera di un utilizzatore autorizzato Requisiti per gli utilizzatori y y Conoscenza delle presenti istruzioni Per i seguenti utilizzatori si applicano requisiti particolari y y Bambini dagli 8 anni in su y y Persone con ridotte capacità fisiche sensoriali o mentali y y Persone con carenza di esperienza e conoscenza Questi utilizzatori possono eseguire soltanto la pulizia Requisiti speciali y ...

Page 25: ...itto sospesa regolabile BDL 115 SKE I 2 2 Oggetto della fornitura E D A B C A Profilo di montaggio per pannelli frontali lato lungo in alto B Profilo di montaggio per pannelli frontali lato lungo in basso C Profilo di montaggio per pannelli frontali lato corto in basso D Profilo di montaggio per pannelli frontali lato corto in alto E Istruzioni di montaggio 2 3 Dati tecnici BDL 95 SKE I BDL 115 SK...

Page 26: ...erminare il peso dei pannelli frontali Comunicare le informazioni del peso al produttore della cappa a soffitto sospesa regolabile 3 2 1 Disimballaggio dell apparecchio Disimballare con attenzione l apparecchio e i pezzi imballati con esso Appoggiare l apparecchio su una superficie stabile pulita e protetta per es con cartone spesso Controllare che l apparecchio e tutti i pezzi contenuti non siano...

Page 27: ... Spostare lentamente e con cautela i componenti Tenere lontani gli oggetti che possono graffiare i componenti per es utensili fibbie di cinture Non appoggiare nulla sopra il cappa a soffitto sospesa regolabile Durante tutte le fasi di montaggio assicurarsi della corretta disposizione dei profili di montaggio La posizione è indicata sul profilo di montaggio y y in alto top per i pannelli frontali i...

Page 28: ...ilo di montaggio sulle viti presenti sulla cappa a soffitto sospesa regolabile Allineare i pannelli frontali sui lati lunghi come segue y y Fissare stringendo le viti saldamente a mano girare in senso antiorario su entrambi i lati corti y y Procedere al centraggio delle viti regolando uniformemente le viti su entrambi i lati corti Accertarsi che i pannelli frontali siano fissati sui lati lunghi st...

Page 29: ...ensione e il cavo di alimentazione si possano muovere liberamente all interno delle fessure di guida Fissare nuovamente la copertura con le viti L apparecchio è pronto all uso 4 Pulizia D D NOTA BENE Pericolo di danneggiamenti in caso di pulizia impropria Oggetti taglienti abrasivi o detersivi aggressivi possono danneggiare l apparecchio Utilizzare detersivi delicati Utilizzare un panno morbido e ...

Page 30: ...ettendoci molta forza 6 Smaltimento 6 1 Smaltimento dell imballo D D NOTA BENE Pericolo di danni all ambiente in caso di smaltimento improprio dell imballo Non smaltire l imballo come normale rifiuto domestico Fare in modo che l imballo venga riciclato recycling in modo opportuno e rispettoso dell ambiente L imballo serve a proteggere da danni durante il trasporto Soltanto l imballo originale gara...

Page 31: ...liando il cavo di alimentazione quando non è soggetto a tensione elettrica Smaltire l apparecchio in conformità con le disposizioni di legge incaricando un azienda specializzata per lo smaltimento oppure tramite il servizio di smaltimento rifiuti comunale 7 Contatti In caso di domande o commenti selezionare una delle seguenti opzioni Posta berbel Ablufttechnik GmbH Sandkampstraße 100 D 48432 Rhein...

Page 32: ...tsel tot gevolg zal hebben D D WAARSCHUWING Aanwijzingen met het woord WAARSCHUWING waarschuwen voor een gevaarlijke situatie die ernstig of dodelijk letsel tot gevolg kan hebben D D VOORZICHTIG Aanwijzingen met het woord VOORZICHTIG waarschuwen voor een situatie die licht of middelzwaar letsel tot gevolg kan hebben D D ATTENTIE Aanwijzingen met het woord ATTENTIE waarschuwen voor een situatie die...

Page 33: ...5 2 2 Leveringsomvang 35 2 3 Technische gegevens 35 3 Montage 36 3 1 Veiligheidsinstructies voor de montage 36 3 2 Eisen aan de voorschermen 36 3 2 1 Apparaat uitpakken 36 3 2 2 Montage voorbereiden 36 3 2 3 Plafondunit met liftsysteem voorbereiden 37 3 2 4 Voorschermen aanbrengen 37 4 Reiniging 39 5 Demontage 40 6 Verwerking van afvalstoffen 40 6 1 Verpakking afvoeren 40 6 2 Apparaat afvoeren 41 ...

Page 34: ...eze handleiding Reiniging door gebruikers Eisen aan de gebruikers y y Kennis van deze handleiding Voor de volgende gebruikers gelden bijzondere eisen y y Kinderen vanaf 8 jaar y y Personen met een verminderd fysiek sensorisch of mentaal vermogen y y Personen met gebrek aan ervaring en kennis Deze gebruikers mogen alleen actief zijn bij het reinigen Bijzondere eisen y y Er is toezicht op de gebruik...

Page 35: ...ofielen geschikt voor plafondunit met liftsysteem BDL 115 SKE I 2 2 Leveringsomvang E D A B C A Montageprofiel voor voorschermen lange zijde boven B Montageprofiel voor voorschermen lange zijde onder C Montageprofiel voor voorschermen korte zijde onder D Montageprofiel voor voorschermen korte zijde boven E Montagehandleiding 2 3 Technische gegevens BDL 95 SKE I BDL 115 SKE I Ruwe kap breedte 938 m...

Page 36: ...e fabrikant De veiligheidsuitschakeling mag niet achteraf worden bijgesteld Bepaal het gewicht van de voorschermen Geef de gewichtsgegevens door aan de fabrikant van de plafondunit met liftsysteem 3 2 1 Apparaat uitpakken Pak het apparaat en alle meegeleverde delen voorzichtig uit Zet het apparaat op een vaste schone en beschermende onderlaag b v dik karton Controleer het apparaat en alle aanwezig...

Page 37: ... beschadigd raken Beweeg de onderdelen langzaam en voorzichtig Houd voorwerpen uit de buurt die de onderdelen kunnen bekrassen b v werktuigen gespen Leg geen voorwerpen op de plafondunit met liftsysteem Let bij alle montagestappen op de juiste toewijzing van de montageprofielen De positie is aangegeven op het montageprofiel y y boven top voor de bovenste voorschermen de aanslaghoek wijst naar bove...

Page 38: ...van het montageprofiel op de schroeven aan de plafondunit met liftsysteem Lijn de voorschermen aan de lange zijden als volgt uit y y Fixeren door handmatig aandraaien naar links draaien van de schroeven aan de beide korte zijden y y Centraal uitlijnen door gelijkmatig verstellen van de schroeven aan de beide korte zijden Controleer of de voorschermen aan de lange zijden gefixeerd zijn door handmat...

Page 39: ...etkabel vrij in de geleidingssleuven kunnen bewegen Schroef de afdekking weer vast Het apparaat is bedrijfsklaar 4 Reiniging D D ATTENTIE Gevaar voor beschadigingen door ondeskundige reiniging Voorwerpen met scherpe randen schuurmiddelen of agressieve reinigingsmiddelen kunnen het apparaat beschadigen Gebruik milde huishoudreinigingsmiddelen Gebruik een zachte vochtige doek De aanwijzingen en gege...

Page 40: ...kracht eruit 6 Verwerking van afvalstoffen 6 1 Verpakking afvoeren D D ATTENTIE Gevaar voor milieuschade door niet vakkundig afvoeren van de verpakking Geef de verpakking niet met het normale huisvuil mee Voer de verpakking af voor een vakkundige milieuvriendelijke recycling De verpakking dient als bescherming voor transportschade Alleen de originele verpakking garandeert voldoende bescherming tij...

Page 41: ...oze netkabel eraf te knippen Het apparaat volgens de wettelijke bepalingen via een deskundig afvalverwerkingsbedrijf of uw lokale inzamelpunt recyclen 7 Contact Wanneer u suggesties of vragen heeft kiest u uit de volgende mogelijkheden Post berbel Ablufttechnik GmbH Sandkampstraße 100 D 48432 Rheine Telefoon 49 0 5971 80 80 9 0 Ma t m do 8 00 17 30 uur en vr 8 00 16 30 uur Fax 49 0 5971 80 80 9 10...

Page 42: ...t results in serious injuries or death D D WARNING Notes with the word WARNING warn of a hazardous situation that could result in serious injuries or death D D CAUTION Notes with the word CAUTION warn of a situation that could result in minor injuries D D ATTENTION Notes with the word ATTENTION warn of a situation that could result in damage to property or to the environment Symbol clarification t...

Page 43: ...erview 45 2 2 Scope of delivery 45 2 3 Technical data 45 3 Installation 46 3 1 Safety instructions for installation 46 3 2 Requirements for the front panels 46 3 2 1 Unpack the device 46 3 2 2 Preparation for installation 46 3 2 3 Prepare the ceiling lift hood 47 3 2 4 Fit front panels 47 4 Cleaning 49 5 Dismounting 50 6 Disposal 50 6 1 Dispose of packaging 50 6 2 Dispose of the device 51 7 Contac...

Page 44: ...nical drawings y y Knowledge of this manual Cleaning by users Requirements for the user y y Knowledge of this manual There are separate requirements for the following users y y Children from 8 years and older y y Persons with restricted physical sensory or mental capabilities y y Persons with a lack of experience and knowledge These users are only permitted to carry out cleaning Special requiremen...

Page 45: ...eiling lift hood 2 2 Scope of delivery E D A B C A Assembly profile for front panels long side at the top B Assembly profile for front panels long side at the bottom C Assembly profile for front panels short side at the bottom D Assembly profile for front panels short side at the top E Assembly instructions 2 3 Technical data BDL 95 SKE I BDL 115 SKE I Raw hood width 938 mm 1144 mm Raw hood depth ...

Page 46: ...ospective adjustment of the safety switch off is prohibited Determine the weight of the front panels Provide the weight information to the manufacturer of the ceiling lift hood 3 2 1 Unpack the device Unpack the device and all accompanying parts carefully Set the device down on a firm clean and protective surface e g thick cardboard Check the device and its constituent parts for damage Check the d...

Page 47: ...ove the components slowly and carefully Keep objects that could scratch the components far away from it e g tools belt buckles Do not place any objects on the ceiling lift hood During all assembly steps ensure the correct arrangement of the assembly profiles The position is shown on the assembly profile y y top for the top front panels the bracket points upwards y y bottom for the bottom front pan...

Page 48: ...o do so position the cut out of the assembly profile on the screws of the ceiling lift hood Align the front panels with the long sides as follows y y Tighten the screws on both short sides until hand tight turn to the left y y Align centrally by evenly adjusting the screws on both short sides Make sure that the front panels on the long sides are secure by tightening the screws on both short sides ...

Page 49: ...sure that the support cable and the mains cable are in the guide slots and are free to move Screw the cover tight again The device is ready for operation 4 Cleaning D D ATTENTION Danger of damage through improper cleaning Sharp edged objects abrasive or abrasive cleaning agents can damage the device Use mild household cleaner Use a soft damp cloth The instructions and information on the cleaning a...

Page 50: ...spose of packaging D D ATTENTION Risk of environmental damage due to improper disposal of the packaging Do not put the packaging into the normal household waste Take the packaging for environmentally friendly and proper recycling The packaging provides protection from transport damage Only the original packaging guarantees sufficient protection during transportation Store the packaging in a locati...

Page 51: ...e energised mains cable Dispose of the device in accordance with the legal provisions via a professional disposal centre or at your local disposal facility 7 Contact If you have any questions or suggestions please select from the following options Post berbel Ablufttechnik GmbH Sandkampstraße 100 D 48432 Rheine Telephone 49 0 5971 80 80 9 0 Mon to Thu 8 00 17 30 hrs and Fri 8 00 16 30 hrs Fax 49 0...

Page 52: ...6003594_0 29 06 2017 ...
Reviews: