background image

MANUAL

BergHOFF Customer Service. 2323 Merchant Avenue Odessa, Florida 33556  1.727.375.7523  cs@berghoff-usa.com

Summary of Contents for Tronic 1810003

Page 1: ...MANUAL BergHOFF Customer Service 2323 Merchant Avenue Odessa Florida 33556 1 727 375 7523 cs berghoff usa com ...

Page 2: ...1810027 2213735 1810003 2207123 ...

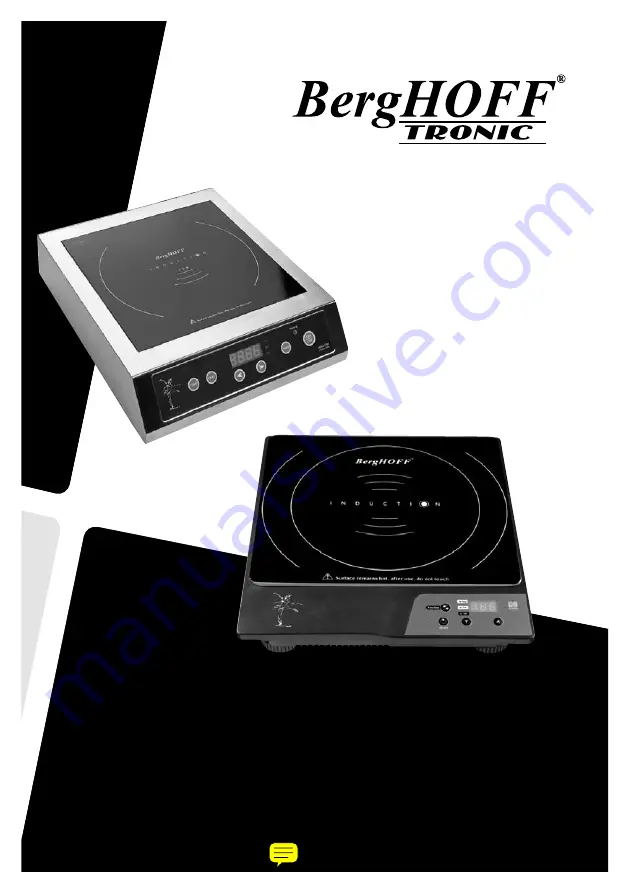
Page 3: ...e applicable of course 3 Power Cook 1 10 300W 1800W 2207123 4 Temp Cook 60ºC 200ºC 150 F 450 F 5 Timer 150 6 Arrow up raises TEMP or POWER increase TIME 7 Arrow down lowers TEMP or POWER decreases TIME 8 Cook surface glass or ceramic 9 Feet Images for reference only your model may be slightly different ...

Page 4: ...ction in the United States market and the European markets of Bel gium the Netherlands Germany France Spain Greece Russia Poland Hungary and many other countries The United States headquarters is located in Odessa Florida with distribution centers in both Florida and California BergHOFF also operates two research and development centers to bring our customers the edge they need to stay ahead of th...

Page 5: ...tallation requirements 5 Safety 5A General information 5B Commercial use and safety instructions of this appliance 5C Expected use 6 Installing and operating tips 6A The function mode and product advantages 6B General operation and important information 6C Induction and non induction cookware 6D Connection and installation 6E Operating the cooktop 7 Cleaning and safety procedures 7A Safety advice ...

Page 6: ...s manual 1B Symbols explained In this manual symbols are used to highlight important safety signs and instructions and any advice relating to the device The instructions should be followed very carefully to avoid any risk of accident personal injury or equipment damage WARNING A warning symbol highlights hazards and dangers which could lead to injury Please follow the instructions very carefully a...

Page 7: ...lting from not following the instructions for use The BergHOFF manual should be kept at hand and should be easily accessible for everyone who works with this appliance We reserve the right to make technical changes for purposes of devel oping and improving the appliance s performance 1D Copyright protection The manual texts drawings images or other illustrations are copyright protected No part of ...

Page 8: ... may be slightly different this is for model 2207123 F 1800W 120V Name PRO Induction Cooking Unit Induction Stove Induction Stove Item No 2207123 1810003 2213735 1810027 Model BHI_01SS BH_003 BHI_01S BHI_01B Cooking top SCHOTT CERAN GLASS Black Glass Ceramic glass Temperature range 60 C 232 C 60 C 200 C 60 C 200 C Power 300 W 1800 W 260 W 1600 W 260 W 1600W Connection 100 120V 60 Hz 100 120V 60 Hz...

Page 9: ... useful for storage purposes when moving or in case the device must be sent back for service Remove packing completely before installation or use NOTE If you would like to dispose the packing consider the regulations applied in your area Please recycle Please inspect the device to make sure no parts are missing Immediately contact our customer service center for claims concerning missing parts 3C ...

Page 10: ...se an extension cord or adapter with the induction cooktop Check your cooktop for a removable IEC Power Cord Before operating your unit make sure that this power cord is firmly attached before plugging into the receptacle Note Not applicable for all models 4B Electrical Installation Requirements Because every installation site is wired differently and your local codes may vary it is the owner s re...

Page 11: ...instructions of this appliance Regarding industrial safety the specifications are based on the regulations of the ETL NSF FCC applicable at the time of manufacturing the appliance If the appliance is used commercially the user is obliged to guarantee that the industrial safety measurements coincide with the rules and regulations applicable at that specific time for the entire period of use of the ...

Page 12: ... mode and product advantages While cooking with an induction cooktop an electric voltage is applied on a conductor spool be neath the glass This creates magnetic fields which directly heat up the bottom of the cookware resulting in the heating of your food This means excellent saving of time and energy since in contrast to common hobs the cookware is heated not the stoves heating element and the g...

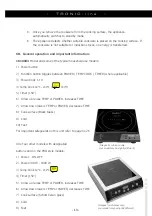
Page 13: ...r Cook 1 10 4 Temp Cook 60 C 200 C 150 F 450 F 5 Timer 150 6 Arrow up raises TEMP or POWER increases TIME 7 Arrow down lowers TEMP or POWER decreases TIME 8 Cook surface Black Glass 9 Cord 10 Feet For important safeguards on this unit refer to page no 26 All of our other models with designated buttons and on the PRO style models 1 Power ON OFF 2 Power 300 W 1800 W 3 Temp Cook 60 C 232 C 4 Timer 15...

Page 14: ...magnetic fields e g radios televisions cassette recorders etc Do not place the induction cooktop next to open flames heaters or other heat sources The hob s surface consists of temperature resistant glass In case of damage even only a small crack immediately disconnect the device from the power supply and contact customer service We recommend not placing any metal kitchen utensils cookware pan cov...

Page 15: ...er button Place cookware on the unit Select the TEMP button or choose with the function button TEMP Adjust the up and down Arrow Keys until the desired cooking temperature appears on the LED display Turn the unit off by pressing the Power button Note If the unit is left on and unattended without a pan for more than 8 seconds it will turn off The LED will display horizontal dashes which tells you i...

Page 16: ...table cloth carpet etc Do not block the ventilation slots of the cooktop This may overheat the cooktop Keep a minimum distance of 5 2 to 10 4 cm to walls or other items Make sure that the main connection cable is not damaged or compressed beneath the cooktop Make sure that the main connection cable does not get into contact with sharp edges or hot surfaces Do not use any flammable acid or alkaline...

Page 17: ...s up 132 C is the standard start temp when the unit is first turned on TEMP TIMER After selection of the operating mode power stage or temperature stage press the Timer key The number 0 appears in the display and the LED display TIMER min next to the display flashes up By using the arrow keys you will be able to select the operating time in intervals of 5 minute 5 up 1 down up to 150 minutes maxim...

Page 18: ...specification Once the cooking or warming process is finished disconnect the main plug from the outlet Do not place any empty cookware on the glass top Heating an empty pot or pan activates the overheating protection and the device turns off but this could occur after your cookware has been damaged Do not operate the device if it is damaged in any way or if it does not function properly The use of...

Page 19: ...cooktop is cleaned and dried properly for storage and further usage 7C Maintenance Check the main connection cable for damage from time to time Never operate the cooktop when the cable is damaged If the main connection cable shows defects have it replaced by a qualified electrician When you encounter damages or failures contact your specialized dealer or our customer service Only qualified experts...

Page 20: ...the authorized service agent the equipment has been modified misused misapplied improperly installed or damaged in transit or by fire flood or act of God Warranty will be considered void if the unit has been opened or modi fied in any way or service has been attempted by unauthorized personnel The prices charged by BergHOFF for its products are based upon the limitations in this warranty Seller s ...

Page 21: ... restart the unit E8 The cooking temperature is over 150 C If use the function mode Power to cook the max temperature is 150 C If the cooking temperature is over 150 C in this mode the unit would be appeared the error Please power off to eliminate the wrong record and let the unit cool down and then re plug the power cord and restart the unit If you would like the cooking temperature is over 150 C...

Page 22: ... 22 Induction cooktop Diagram 1 1 Feet 2 Motor 3 Base 4 Control Panel 5 Frame 6 Control panel 7 Glass 8 Thermostat Device 9 Coil 10 Electrical Board 11 Plug ...

Page 23: ... 23 Induction cooktop Diagram 2 1 Feet 2 Base 3 Motor 4 Electrical Board 5 Coil 6 Thermostat Device 7 Control Panel 8 Frame 9 Control panel contact 10 Glass 11 Plug ...

Page 24: ... 24 Induction cooktop Diagram 3 1 Black glass 2 Frame 3 Control Panel 4 Thermostat Device 5 Coil 6 Plug 7 Electrical Board 8 Motor 9 Base 10 Feet ...

Page 25: ...am 4 1 Feet 2 Base 3 Support for Electrical Board 4 Motor 5 Nut for Control Panel 6 Screw for Control Panel 7 Control Panel 8 Frame 9 Control panel contact 10 Glass 11 slot 12 Thermostat Device 13 Coil 14 Electrical Board 15 Plug ...

Page 26: ...se injuries 7 Do not use outdoors household use only 8 Do not let cord touch hot surfaces or hang over the edge of a table or counter 9 Do not place on or near a hot gas or electric burner or in a heated oven 10 To disconnect turn any control to off then remove the plug from wall outlet 11 Do not use the appliance for anything other than the intended use 12 Do not immerse in water 13 Do Not Cook o...

Page 27: ...e If an extension cords power supply cord is used 1 For 2207123 the extension cord should be a grounding type 3 wire cord the marked electrical rating of the extension cord should be at least as great as the electrical rating of the appliance and 2 The cord should be arranged so that it will not drape over the countertop or tab letop where it can be pulled on by children or tripped over unintentio...

Page 28: ...will completely shut off within 9 second if either a the wrong type of cook ware is applied or b no cookware is placed on the unit USABLE AND NON USABLE UTENSILS Compatible Pans Steel or cast iron enameled iron or 18 10 stainless steel all with flat bottoms and a with a diameter of 12 to 26 cm Non compatible Pans Heat resistant glass ceramic container copper aluminum pan pots Rounded bottom pan po...

Reviews: