
Quick Installation Guide
-
USB3.1 model
-
Quick Installation Guide
-
USB3.1 model
-
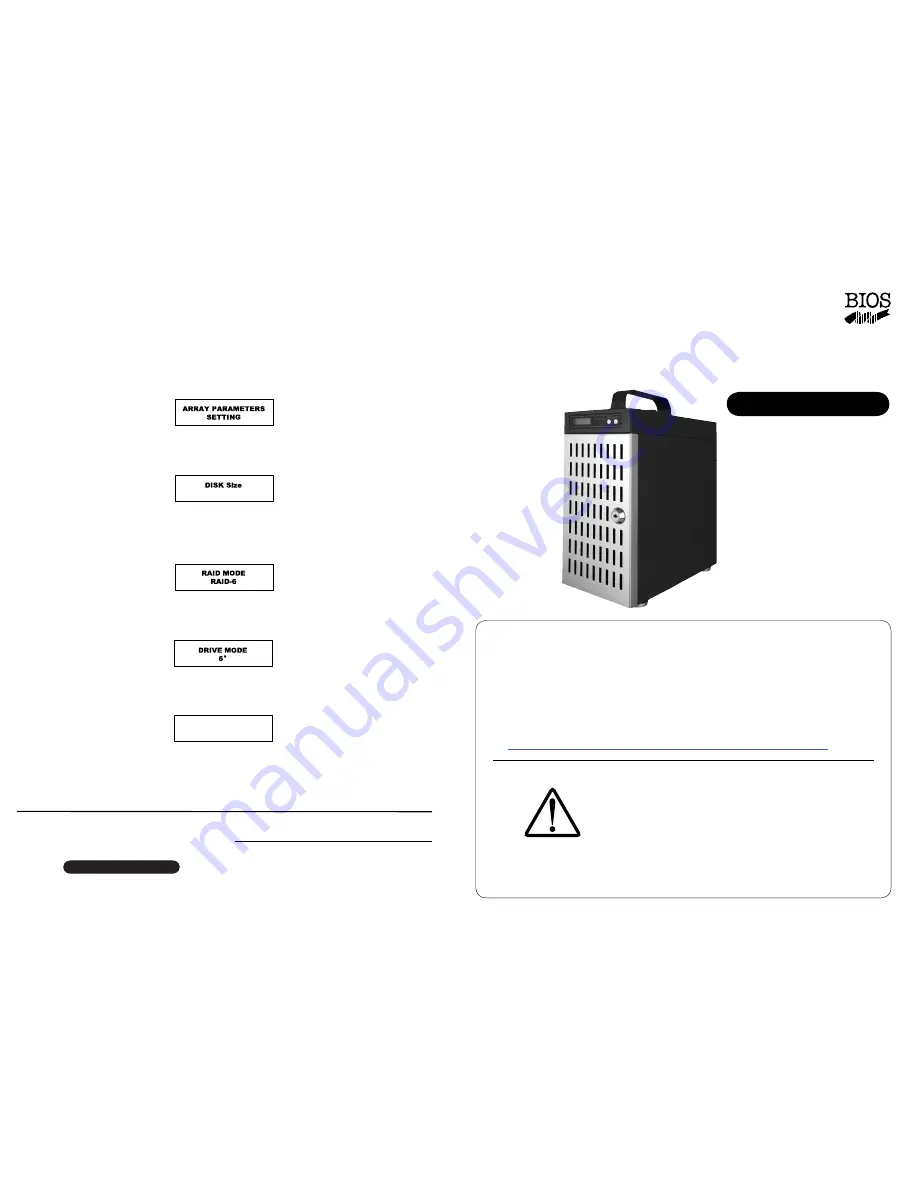
DVPro T06 - U3
DVPro T06 - U3
This Quick Installation Guide(QIG) describes the packing content and
installation guide line for DVPro T06-USB3.1 model.
It also explains the function of each connector, and button.
It is served as a quick startup for basic configuration, and the details
can be found on
User Manual
( downloadable from website ).
http://www.biosap.com.tw/images/Manuals/DVT06U3_MAN.pdf
BIOS and its resellers are not liable for any
data or information lost or possible software
error due to adoption of the product. We do not
take any responsibility of damage and/or system
malfunction due to our product / storage device
failure or for any of the problems caused as a
result It is recommended to always backup your
data.
◆
Introduction
Attention
World’s leading USB3.1 RAID 6 Storage
High Capacity, Quiet and High Performance
6 x 3.5” SATA Drive Support
DVPro T06 - U3 model
Oct
. 201
8
Printing No:0
3
Publisher BIOS AP Inc.
6F-6A., No. 5, Sec. 3, New Taipei Blvd., Xinzhuang Dist.,
New Taipei City 242, Taiwan
TEL: +886-2-8522-8393 FAX: +886-2-8522-8323
Email: partner@biosap.com.tw Website: www.biosap.com.tw
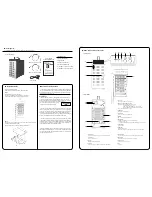
Quick Configuration Step by Step (Setup Disk Size, RAID Mode)
Hard disks can be installed before (Recommendation) or after configuration.
Install 6 hard disks into the enclosure with screws in accessories pack.
Step 1.
Push and hold “Mode” and “Select” button on front LCD panel while turning on power switch
(rear of enclosure).
LCD panel should display “Array Parameter Setting” as below, and you can release Mode and
Select buttons.
Step 2.
Push Mode Button and LCD should show “Disk Size 1TB”
Push “Select” button to choose disk size if wanted. Stop at the size of choice.
Push Mode button and LCD will show RAID Mode RAID n.
Step 3.
Push “Select” button to change RAID mode if wanted (Default is RAID 6).
Stop at any selected RAID mode RAID 6, RAID 5, RAID 0, RAID 10
Push Mode button and LCD will show Drive Mode 6.
Skip Step 4 if all 6 drives will be used.
Step 4.
Number of drives SHOULD be 6. Unless you know what to do, do NOT change this.
Same as above, you can push “Select” button to choose number of drives to be applied.
Stop at number of drives needed.
Step 5.
Push both “Mode” and “Select” buttons at the same time once to SAVE change. LCD should show
“Power Down Please!”, then power off the unit. Without this SAVE change operation, any change of
parameter will be discarded.
If drives were not inserted into enclosure yet, please insert them right now.
Push and hold “Mode” button at the same time while turning on power switch (rear of enclosure).
LCD will show “RAID n Normal”.
Congratulations! Enjoy the speed and reliability. Next time you just need to turn off or on the unit
by power switch.
xx
B
Power Down Please!


