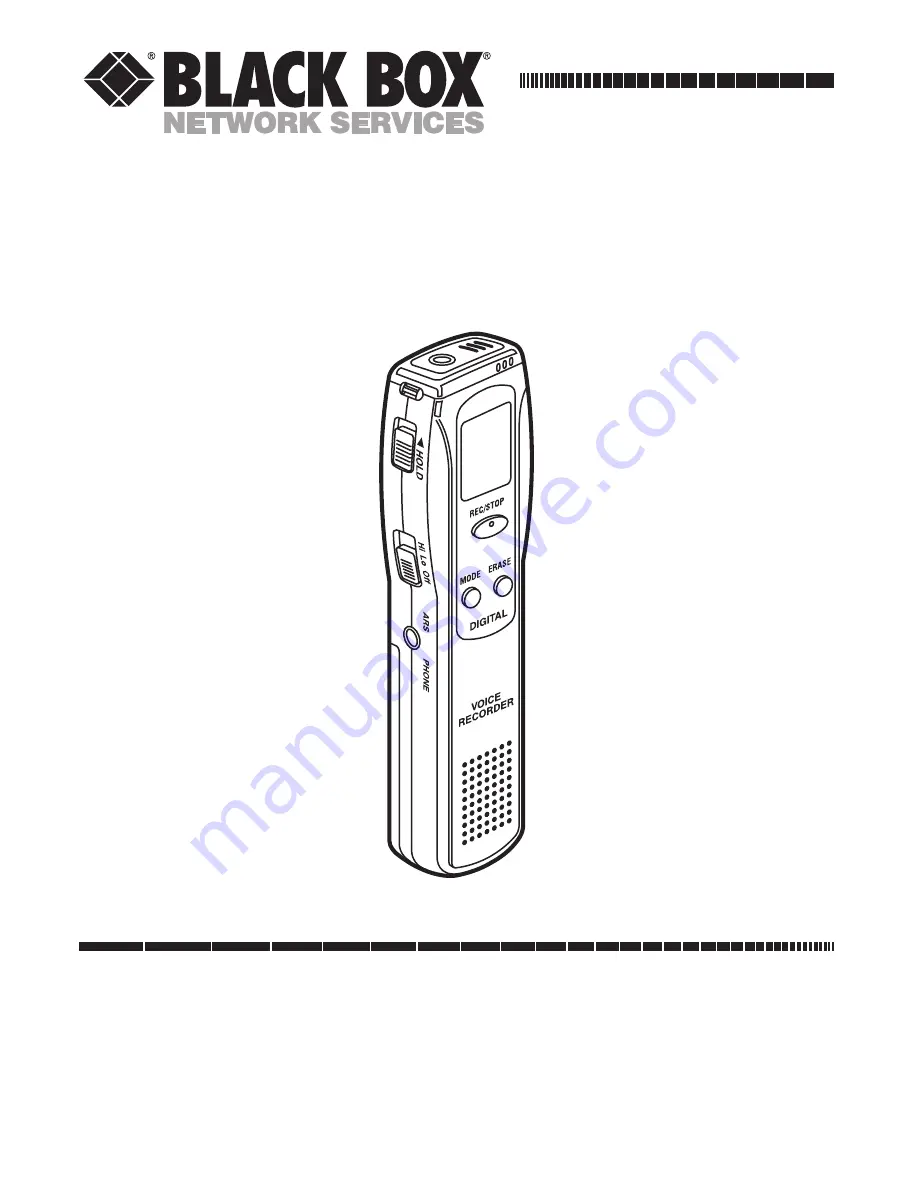
background image

SEPTEMBER 2001

TE110A

Digital Voice Recorder

CUSTOMER SUPPORT INFORMATION

Order 

toll-free

in the U.S.: Call 

877-877-BBOX

(outside U.S. call 

724-746-5500

)

FREE technical support 24 hours a day, 7 days a week: Call 

724-746-5500

or fax 

724-746-0746

Mailing address: 

Black Box Corporation

, 1000 Park Drive, Lawrence, PA 15055-1018

Web site: 

www.blackbox.com

•   E-mail: 

info@blackbox.com

Summary of Contents for TE110A

Page 1: ...ll free in the U S Call 877 877 BBOX outside U S call 724 746 5500 FREE technical support 24 hours a day 7 days a week Call 724 746 5500 or fax 724 746 0746 Mailing address Black Box Corporation 1000 Park Drive Lawrence PA 15055 1018 Web site www blackbox com E mail info blackbox com ...

Page 2: ...rmful interference to radio communications If this equipment does cause harmful interference to radio or telephone reception which can be determined by turning the equipment off and on the user is encouraged to try to correct the interference by one of the following measures Reorient or relocate the receiving antenna Increase the separation between the equipment and receiver Connect the equipment ...

Page 3: ...e publié par Industrie Canada EUROPEAN UNION DECLARATION OF CONFORMITY This equipment has been tested and found to comply with the requirements of the European EMC directive 89 336 EEC TRADEMARKS USED IN THIS MANUAL BLACK BOX and the logo are registered trademarks of Black Box Corporation Intel and Pentium are registered trademarks of Intel Corporation Microsoft and IntelliMouse are registered tra...

Page 4: ...abo sótano mojado o cerca de una alberca etc 6 El aparato eléctrico debe ser usado únicamente con carritos o pedestales que sean recomendados por el fabricante 7 El aparato eléctrico debe ser montado a la pared o al techo sólo como sea recomendado por el fabricante 8 Servicio El usuario no debe intentar dar servicio al equipo eléctrico más allá a lo descrito en las instrucciones de operación Todo ...

Page 5: ...los contactos y receptáculos donde salen del aparato 14 El equipo eléctrico debe ser limpiado únicamente de acuerdo a las recomendaciones del fabricante 15 En caso de existir una antena externa deberá ser localizada lejos de las lineas de energia 16 El cable de corriente deberá ser desconectado del cuando el equipo no sea usado por un largo periodo de tiempo 17 Cuidado debe ser tomado de tal maner...

Page 6: ...g the Recording Mode 24 4 3 Other Recording Functions 25 4 3 1 Pausing 25 4 3 2 Automatic Recording Using the ARS 26 4 3 3 Displaying the Remaining Recording Time 27 4 3 4 Monitoring the Recording 28 5 Playback 29 5 1 Basic Playback 29 5 2 Other Playback Functions 32 5 2 1 Fast Forwarding and Rewinding During Playback 33 5 2 2 Searching for a Numbered Message 33 5 2 3 Scan Playing 34 5 2 4 Scan Se...

Page 7: ...ng from a Telephone 41 7 2 Recording from an External Electronic Audio Source 44 7 3 Playing Back to an External Recorder 47 7 4 Using the Recorder with a PC 49 8 Preventing Unintended Changes in Operation 52 9 Troubleshooting 54 9 1 Things to Try 54 9 1 1 Basic Recorder Problems 54 9 1 2 Problems Using the Recorder with a PC 56 9 2 Calling Black Box 58 9 3 Shipping and Packaging 59 ...

Page 8: ...rom external microphone requires impedance below 3 kiloohms 3 5 mm mini mono audio output to earphones etc requires impedance above 8 ohms we recommend 32 ohms Maximum Power Output 5 mW to earphone 80 mW to speaker at speaker impedance of 8 ohms yields 10 total harmonic distortion Frequency Bandwidth 500 to 3200 Hz Memory Internal flash type Recording Time 4 hours and 18 minutes in SP slow play mo...

Page 9: ...System 3 Right side mounted PLAY STOP pushdial with FF and REWIND FILE button Volume dial Indicators Front mounted LCD 1 Recording LED on front mounted REC STOP button Connectors 2 3 5 mm mini mono audio jacks 1 Top mounted for input 1 Left side mounted for output Speaker Diameter 23 mm 0 9 Temperature Tolerance 32 to 104 F 0 to 40 C Humidity Tolerance Operating Up to 60 noncondensing Storage Up t...

Page 10: ...tteries Input 3 VDC Battery life Approx 10 hours of recording Approx 8 hours of earphone playback at volume 5 Approx 6 5 hours of speaker playback at volume 5 Size 4 2 H x 1 W x 0 6 D 10 7 x 2 5 x 1 5 cm Weight Without batteries 1 2 oz 34 g With batteries 1 9 oz 54 g ...

Page 11: ...has a wide range of other powerful features Sensitive built in omnidirectional microphone Can store up to 99 messages in each of four different files for a total storage capacity of 396 messages Automatic Recording System ARS that if enabled can automatically turn off the Recorder during periods of silence in order to make the most of your recording time HOLD switch prevents unintended operation Y...

Page 12: ...splays remaining charge To preserve the batteries it turns itself off if it s left on for a full minute without being operated You can search for individual messages Input and output jacks allow recording from and playback to external devices such as the included microphone and earphone Included Jet Voice Mail software for message handling on an IBM compatible PC Easily carried with included wrist...

Page 13: ...AAA batteries Earphone External microphone Telephone adapter Phone cable LINE IN LINE OUT audio cable Wrist strap Mini CD ROM with IBM PC and Microsoft Windows compatible Jet Voice Mail software This manual If anything is missing or damaged call Black Box Also notify the shipping carrier if any damage appears to have occurred during shipping ...

Page 14: ...e Recorder s connectors indicators and controls TOP Input jack for external microphone Built in microphone REC STOP button Built in speaker Connection point for wrist strap Output jack for earphone HOLD switch ARS switch MODE PAUSE button ERASE button FILE button Volume dial PLAY STOP pushdial with FF and REWIND LCD LEFT SIDE FRONT RIGHT SIDE ...

Page 15: ...ers and Non ventilated areas in direct sunlight including closed vehicles Do not place or use the Recorder in or near water or any location where relative humidity might rise above 60 including but not limited to bathrooms and swimming pools Do not place or use the Recorder in any dusty area including but not limited to construction and industrial sites Try not to drop the Recorder or expose it to...

Page 16: ...rry magnetically encoded information Do not use the Recorder in any location in which operating electronic devices or components is prohibited Never open disassemble or attempt to repair the Recorder The manufacturer and its authorized agents will not be liable for any damages caused by the misuse of this product nor for any claims by any third party The manufacturer and its authorized agents will...

Page 17: ...ing back anything when you do this Otherwise you could erase previously recorded messages and degrade the Recorder s performance To install the included AAA batteries in your Digital Voice Recorder or to replace them with new batteries when the original ones fail take these steps 1 Open the battery cover on the unit s rear panel OPEN ...

Page 18: ...batteries in the compartment matching the positive and negative terminals of the batteries to the Recorder s terminals as marked in the compartment Be sure to use alkaline batteries Do not use batteries of two different types together 3 Close the battery cover ...

Page 19: ...E RECORDER 4 Press the Recorder s PLAY STOP pushdial or its REC STOP button to check the remaining battery capacity The Recorder s LCD should show one of these indications Full charge Half charge Low charge No charge ...

Page 20: ...correct but the LCD still doesn t light the Recorder is probably broken or defective remove the batteries and call Black Box Technical Support Batteries should last for approximately 10 hours of total recording time or 8 hours of total earphone playback time at volume 5 or 6 5 hours of total speaker playback time at volume 5 To preserve the batteries take them out of the Recorder if you won t be u...

Page 21: ...e included external microphone plug it into the microphone jack on top of the Recorder If you want to record to or from some other external device see Chapter 7 for the additional instructions for attaching these devices and recording with them As you use this chapter refer to Figure 2 1 in Section 2 3 to see where the Recorder s controls connectors and indicators are ...

Page 22: ...h on the Recorder s left side to the OFF position down then press the REC STOP button on the front of the Recorder to turn the Recorder ON 2 Referring to the Recorder s LCD press the FILE button on the Recorder s right side as many times as necessary to select which of the Recorder s four files A B C or D you want to record the message in If while you are recording the Recorder indicates that the ...

Page 23: ... LP recording mode and the battery life gauge the pie slice operating symbol in the upper right will begin to rotate and the red LED on the REC STOP button will light The message number is assigned automatically it will always be 1 appearing as 01 for the first recorded message in a file or the number following that of the previously recorded message in the chosen file Two seconds into the recordi...

Page 24: ...e recording the BATT symbol on the LCD will begin blinking to warn you and then the Recorder will automatically shut itself OFF You can resume recording as soon as you replace the batteries Do not remove the Recorder s batteries while recording is in progress you could erase previously recorded messages and degrade the Recorder s performance Make sure the Recorder is set to STOP not recording or p...

Page 25: ...n press the MODE PAUSE button labeled MODE on the front of the Recorder to set it to LP long play mode in which it can record for up to 9 hours and 22 minutes Depending on this setting either SP or LP will appear in the Recorder s LCD You can only change the recording mode when the Recorder is set to STOP not actively recording or playing back anything Once recording starts it s not possible to ch...

Page 26: ... the front of the Recorder The word PAUSE will begin to flash in the Recorder s LCD to indicate that the recording is paused The red LED on the REC STOP button will also begin flashing To resume recording press MODE PAUSE again or press the REC STOP button If you press MODE PAUSE when the Recorder is not recording you will change the recording mode as described in Section 4 2 ...

Page 27: ...tem ARS by moving the switch labeled ARS on the left side of the Recorder from the bottom Off position to either the middle Lo position if you are in an area with a lot of background noise or the top Hi position if you are in a quiet area Move the ARS switch back to the Off position to turn ARS off When you record with ARS on recording will proceed while there is prominent sound to record V will a...

Page 28: ...ht side of the Digital Voice Recorder while the recording is in progress The letters RE and a readout of the remaining time in minutes and seconds will appear on the Recorder s LCD If you press the FILE button while recording is not in progress you will switch between the four files in which recordings are stored as described in Section 4 1 ...

Page 29: ... the left side of the Digital Voice Recorder The sound that you hear from the earphone will be what the recording will sound like when it s played back Unfortunately while it s possible to adjust the volume of what you hear in the earphone during the recording this will have no effect on the volume of the actual recording Recording volume can t be adjusted when the earphone is plugged in ...

Page 30: ...rder s controls connectors and indicators are 5 1 Basic Playback To play back messages you ve previously recorded with the Digital Voice Recorder take these steps 1 Move the HOLD switch to OFF down then press the PLAY STOP pushdial on the Recorder s right side to turn on the Recorder 2 Press the PLAY STOP pushdial again and the Recorder will begin to continuously play back messages displaying the ...

Page 31: ...in the upper right will begin to rotate Two seconds into the playback the word PLAY will be replaced by a display of the message s elapsed playing time in minutes and seconds To hear the playback place the Recorder s top mounted speaker near your ear or attach the included earphone and place the earphone in your ear if the location is noisy or you want privacy ...

Page 32: ...d on the LCD If no other buttons are pressed for one minute after you stop playback the Recorder will shut itself OFF automatically If your batteries ever become fully discharged while you are playing back messages the BATT symbol on the LCD will begin blinking to warn you and then the Recorder will automatically shut itself OFF You can resume playback as soon as you replace the batteries ...

Page 33: ...nctions involve the use of the Recorder s FAST FORWARD and REWIND positions of the PLAY STOP pushdial on the Recorder s right side These are labeled and respectively activate them by turning and holding the pushdial toward those directions The functions described in Sections 5 2 1 through 5 2 4 involve moving backward or forward in the message sequence contained in a single one of the Recorder s f...

Page 34: ...ge with FAST FORWARD or the start of the first message with REWIND the Recorder will wrap to the other end of the message file 5 2 2 SEARCHING FOR A NUMBERED MESSAGE To queue up a certain message before you begin playing any messages back repeatedly turn and release the pushdial toward FAST FORWARD or REWIND while the Recorder is stopped not recording or playing back anything This will cause the R...

Page 35: ...r more than 2 seconds the Recorder will start to scan play skip to the next message in numeric sequence play 10 seconds of it skip to the message after that play 10 seconds of it and so on The word SCAN will appear on the LCD It will continue doing this until a it stops automatically after playing the first 10 seconds of the last recorded message or b you stop it manually by pressing PLAY STOP aga...

Page 36: ... then 20 seconds and so on The message number displayed on the Recorder s LCD will increase or decrease as the search proceeds through the messages When you stop pressing FAST FORWARD or REWIND normal playback resumes from the point where the search stopped 5 2 5 PAUSING DURING PLAYBACK During playback press the Recorder s MODE PAUSE button labeled MODE to pause the playback The word PAUSE will be...

Page 37: ...back and hold it for at least 2 seconds to make the Recorder indefinitely repeat the playback of the current message The LCD will begin alternately displaying the message number and the letters RP Press FILE again or press the PLAY STOP pushdial to resume normal playback and move on to the next message ...

Page 38: ...sing a Message To erase a particular message in the Digital Voice Recorder s memory take these steps watching the LCD carefully and making sure to start with the Recorder turned off 1 Move the HOLD switch to OFF down then press the REC STOP button to turn the Recorder on 2 Press the FILE button as many times as necessary to select the message file containing the message you want to delete Turn and...

Page 39: ... right will begin to rotate and the first three seconds of the message will be played If you press ERASE again during this three second interval to confirm your choice that message will be deleted and all messages that follow it will move up one numbered slot For example if you delete message 14 message 15 will become message 14 16 will become 15 and so on If you press any other button while ERASE...

Page 40: ...ld both the ERASE button and the FILE button for more than one second The letter designation of the message file A B C or D and the words AL ERASE all erase will begin blinking on the LCD for three seconds If you press ERASE again during this three second interval to confirm your choice that message file and all messages in it will be deleted Subsequent messages recorded in that file will be numbe...

Page 41: ...40 DIGITAL VOICE RECORDER its messages will remain in the Recorder s memory ...

Page 42: ... Telephone To record to the Digital Voice Recorder from a telephone take these steps referring to Figure 7 1 at the end of this section also refer to the telephone s manual for information about how to operate it NOTE Recording phone conversations without the knowledge and consent of all of the participants is illegal in many areas Before recording a call with your Digital Voice Recorder be sure t...

Page 43: ...pter to the microphone jack on top of the Recorder 5 Plug the phone cable that you disconnected in step 2 into the telephone adapter s phone line jack 6 Dial the phone number As soon as the party you ve called answers press the REC STOP button on the Recorder to turn the Recorder ON then press REC STOP again to begin recording When you ve finished hang up and press REC STOP once more to stop recor...

Page 44: ...43 CHAPTER 7 Using the Recorder with External Equipment Figure 7 1 Connecting a telephone Existing phone cable Included phone adapter Included phone cord Included audio cable ...

Page 45: ... volume on the source device down to its lowest setting so that you don t get a distorted recording Depending on the source device you might be able to increase its volume level above this but you ll need to test to find the best level 2 Get an audio cable with a 3 5 mm mini mono audio plug on the Recorder end and an appropriate plug or adapter on the device end You can use the included audio cabl...

Page 46: ...rphone jack on the Recorder s left side put the earphone in your ear and prepare to adjust the Recorder s volume as necessary Changing the volume setting of the source device should not have any effect on the volume level of the recording 4 Press the REC STOP button on the front of the Recorder to turn on the Recorder Turn on the source device and begin playing the audio Press the Recorder s REC S...

Page 47: ...46 DIGITAL VOICE RECORDER Figure 7 2 Connecting an external audio source Included audio cable Audio source device ...

Page 48: ...1 Turn off both the Recorder and the external recording device 2 Get an audio cable with a 3 5 mm mini audio plug on the Recorder end and an appropriate plug or adapter on the external device end You can use the included audio cable if the source device also has a 3 5 mm jack Run this audio cable from the external device s auxiliary in or microphone in port to the earphone jack on the left side of...

Page 49: ...s you will need to press RECORD and PLAY buttons simultaneously As quickly as possible press the Recorder s PLAY STOP pushdial again to begin playing back the message to the external device When you re finished stop the external device then stop the Recorder by pressing its PLAY STOP pushdial once more Figure 7 3 Connecting an external audio recording device Included audio cable Audio recording de...

Page 50: ...h the Recorder the computer will need to meet these requirements Hardware platform IBM PC compatible with sound card and CD or DVD drive Processor Intel 80486DX2 or better RAM At least 8 MB we recommend 16 MB or more Operating system Windows 95 98 2000 Me or more recent Hard disk space At least 4 MB To connect the computer to the Recorder run the included audio cable from the audio input jack on t...

Page 51: ...these steps 1 Power up the computer and put the Jet Voice Mail CD ROM in the computer s CD or DVD drive 2 Double c lick the My Computer icon on your desktop 3 Double click the icon for the CD or DVD drive 4 Double click the icon for jvm20fe exe to run the launch the installation program for Jet Voice Mail Included audio cable ...

Page 52: ...will now appear on your screen Once Jet Voice Mail is installed you can double click on the Jet Voice Mail icon at any time to run the program It has a menu bar of icons for various functions recording playback voice mail etc and you can click on Help in the menu bar for more detailed information about any function If you have difficulty refer to the troubleshooting information in Section 9 1 2 ...

Page 53: ... do this move the HOLD switch on its left side from OFF down to ON up toward the arrowhead If you turn HOLD ON while the Recorder is OFF it will not be able to be turned ON or operated until HOLD is set back to OFF Pressing REC STOP or PLAY STOP will briefly cause the word HOLD and a display of the remaining battery charge to appear on the LCD but otherwise the LCD will remain blank and none of th...

Page 54: ...e file is played or HOLD is set back to OFF Similarly if you turn HOLD ON while the Recorder is recording the recording will not be able to be interrupted until the Recorder runs out of memory space or HOLD is set back to OFF Pressing any of the Recorder s buttons or moving its PLAY STOP pushdial will have no effect other than to briefly cause the word HOLD and a display of the remaining battery c...

Page 55: ...OBLEMS The Recorder should be on but its LCD is blank 1 The batteries might be dead Try replacing them 2 The polarity of the batteries might be wrong Make sure that the batteries are facing in the directions indicated in the battery compartment The Recorder won t record anything 1 The HOLD switch might be set to ON Move it to OFF 2 All of the selected file s 99 numbered message slots might be used...

Page 56: ...tteries might be dead Try replacing them There s no sound coming out of the Recorder s speaker 1 The volume might be set too low Turn it up 2 If you have an earphone connected to the Recorder s earphone jack unplug it There s no sound coming out of the earphone plugged into the Recorder s earphone jack 1 The volume might be set too low Turn it up 2 The earphone might not be plugged in correctly Re...

Page 57: ...and that the card is working properly There s no sound when recorded messages are played back 1 You must have an audio cable running from the Recorder s earphone jack to the microphone input port preferred or auxiliary input port of the sound card Make sure that this cable is securely seated at both ends 2 The volume of the recording might be too low Check what the volume setting of the Recorder i...

Page 58: ...card Check with its manufacturer Messages you play back are too soft too loud or have poor sound quality 1 Go into the Jet Voice Mail option menu You should see a sound quality control button Click it 2 If turning on sound quality control doesn t help experiment with the volume level of the appropriate input microphone in or auxiliary in in the Record area of sound card s control panel window Make...

Page 59: ...upport at 724 746 5500 Before you do make a record of the history of the problem We will be able to provide more efficient and accurate assistance if you have a complete description including the nature and duration of the problem when the problem occurs any external devices and cables involved in the problem anything that appears to create the problem or make it worse and the results of any testi...

Page 60: ...our Digital Voice Recorder Package it carefully We recommend that you use the original container Before you ship the unit back to Black Box for repair or return contact us to get a Return Authorization RA number If you return the Recorder make sure to include everything you received with it ...

Page 61: ...NOTES ...

Page 62: ...1000 Park Drive Lawrence PA 15055 1018 724 746 5500 Fax 724 746 0746 Copyright 2001 Black Box Corporation All rights reserved ...

Reviews: