background image

BRT51

2

8

 BRT5118

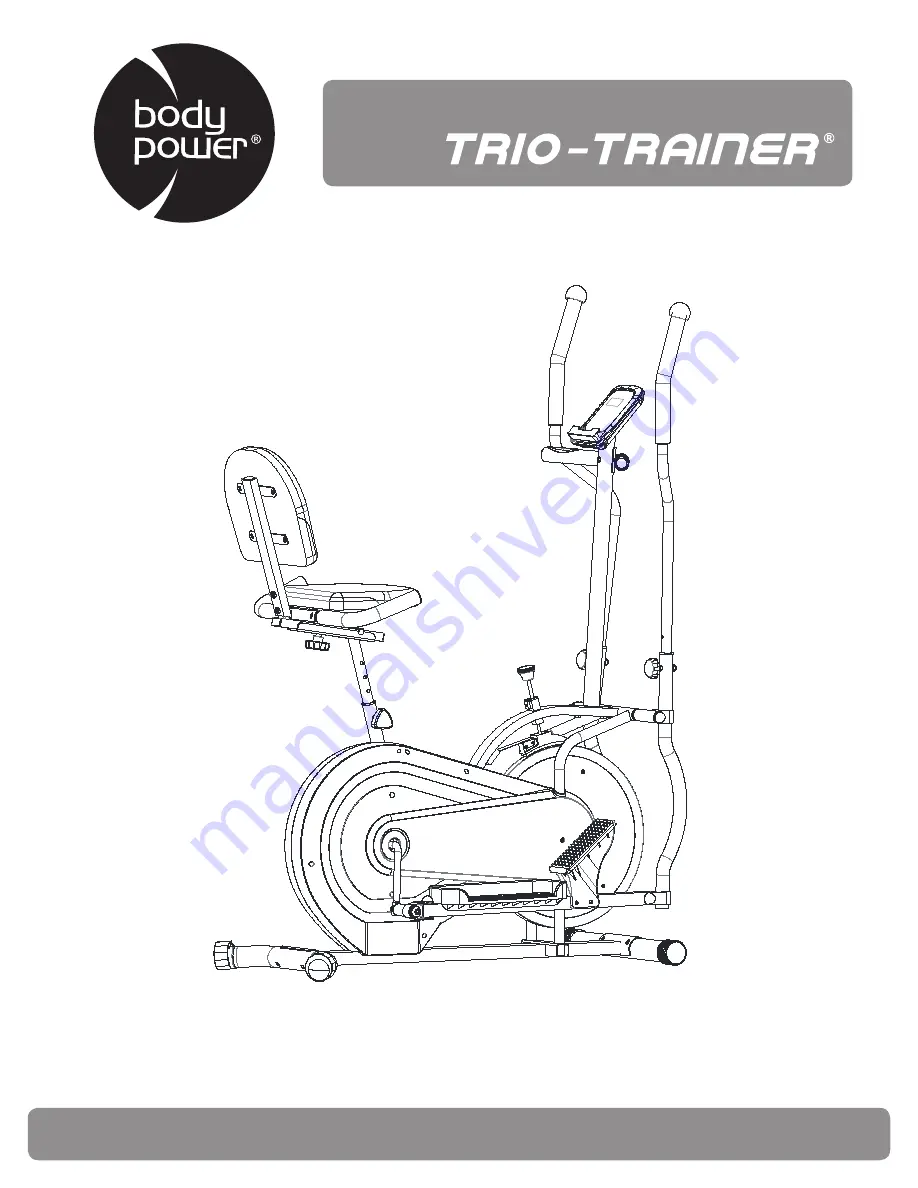
OWNER’S MANUAL

This product is intended for indoor, home use only and is not to be used in a commercial setting.

U.S. Patent US474925B1

Summary of Contents for Trio-Trainer BRT5118

Page 1: ...BRT5128 BRT5118 OWNER S MANUAL This product is intended for indoor home use only and is not to be used in a commercial setting U S Patent US474925B1 ...

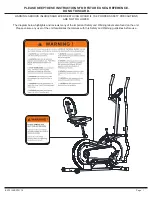
Page 2: ...US INJURIES AND EVEN DEATH CAN OCCUR IF THE PROPER SAFETY PRECAUTIONS ARE NOT FOLLOWED The diagram below highlights and reviews many of the important Safety and Warning labels also found on the unit Please ensure any user of the unit familiarizes themselves with this Safety and Warning guidelines before use ...

Page 3: ... on the proper operation of the equipment and to warn them of the potential hazards If at any time during exercise you feel faint dizzy or experience pain stop and consult your physician Your product is intended for use in clean dry conditions You should avoid storage in excessively cold or damp places as this may lead to corrosion and other related problems If you have any questions concerning th...

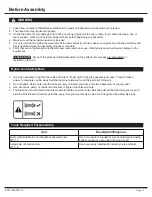
Page 4: ... the assembly process This will make it easier to complete certain steps by allowing more tolerance for all the parts to fit properly 2 Do not tighten all the nuts onto the bolts securely until after you have completed assembly of your product 3 Use wrenches pliers or ratchet and sockets to tighten the bolts and nuts 4 The Nylon Nut should thread onto the Hex Bolt until the end of the Hex Bolt has...

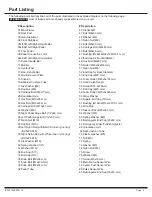
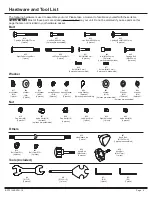
Page 5: ...h White inner nylon ring B0 5x20 S19 31 Arc Washer M10 32 Spring Washer 1 2 33 Washer M10 34 Bolt Cap S17 35 Bolt Cap S13 36 Knob Bolt M8x36 mm 37 Knob Bolt M12x30 mm 38 Knob Bolt M8x37 mm 39 Pedal Tube Description 40 Crankshaft 41 Bolt M8x50 mm 42 Washer M8 43 Nylon Nut M8 44 Bolt M8x30 mm 45 Carriage Bolt M8x45 mm 46 Bolt M8x16 mm 47 Bushing Φ28x4xΦ24x12xΦ16 1 mm 48 End Cap for Front Stabilizer ...

Page 6: ...eference guide for parts and hardware PLEASE NOTE 04 02 38 24 16 69 13 14 18 42 45 46 42 15 15 46 42 05R 05L 12 11 36 19 17 18 44 77 35 11a 79 09L 78 80 06L 22 27 06R 27 22 07 43 41 64 07 64 43 64 25 27 21 34 08 26 27 21 34 08 23 31 28 23 31 28 33 27 34 27 33 34 34 34 34 34 30 32 32 29 47 47 47 47 47 47 20 48 48 49 50 51 49 50 51 52 52 53 53 53 53 54 54 55 55 56 56 76 57 57 58 58 63 76 37 60 61 60...

Page 7: ...es pre assembled 42 Washer M8 12 pieces 22 Hex Bolt M10x45 mm 4 pieces 45 Carriage Bolt M8x45 mm 21 Hex Bolt M10x55 mm 2 pieces pre assembled 41 Bolt M8x50 mm 4 pieces 26 Left Pedal Hinge Bolt 1 piece 25 Right Pedal Hinge Bolt 1 piece 44 Bolt M8x30 mm Bolt Washer Nut Others Tools Included 46 Bolt M8x16 mm 8 pieces pre assembled 77 Screw M5x12 mm 2 pieces pre assembled 2 pieces pre assembled Hardwa...

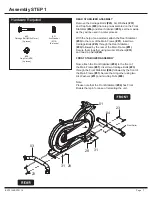
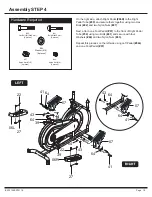
Page 8: ...Frame 01 Secure them together using two Arc Washers 31 and two Cap Nuts 28 FRONT STABILIZER ASSEMBLY Now attach the Front Stabilizer 04 to the front of the Main Frame 01 Insert two Carriage Bolts 23 through the Front Stabilizer 04 followed by the front of the Main Frame 01 Secure them together using two Arc Washers 31 and two Cap Nuts 28 Note Please note that the Front Stabilizer 04 has Front Roll...

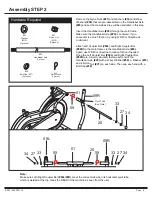
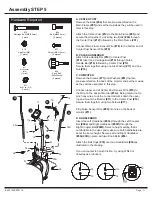
Page 9: ...gain use WD40 or Vaseline to reduce friction if needed Once the Left Coupler Bar 09L and Right Coupler Bar 09R are correctly situated fasten each end of the Handlebar Axle 20 with a Wavy Washer 59 a Washer 33 and a Nylon Nut 27 on each side Then cap each end with a Bolt Cap 34 Note Make sure Left Right Coupler Bar 09L 09R are at the correct side when its horizontal pivot tube which is welded at th...

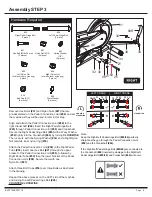
Page 10: ...Joint 08 Secure them with one Nylon Nut 27 Attach three Bolt Caps 34 over three Bolts as illustrated in the drawing Repeat the above process on the LEFT side of the machine and turning the Left Pedal Hinge Bolt 26 COUNTER CLOCKWISE Note Keep the Right Left Pedal Hinge Bolt 25 26 perfectly straight as they go through the Pedal Connection Joint 08 and the Crankshaft 40 If the Right Left Pedal Hinge ...

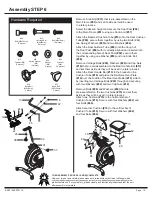
Page 11: ... to the front of Right Pedal Tube 39 using two Bolts 41 and secure with four Washers 64 and two Nylon Nuts 43 Repeat this process on the left side using Left Pedal 06L and one Foot Pedal 07 Hardware Required 27 Nylon Nut M10 4 pieces 43 Nylon Nut M8 4 pieces 22 Hex Bolt M10x45 mm 4 pieces 41 Bolt M8x50 mm 4 pieces 22 27 41 43 64 27 22 43 64 64 41 39 39 06L 06R 07 07 07 41 64 64 43 64 64 Washer M8 ...

Page 12: ...re on the back of Monitor 11a Being careful not to pinch any wires tuck the connected wires down the open ing and mount the Monitor 11 to the Center Post 12 Secure them together using two Screws 77 Plug Pulse Sensor Wire 80 into hole on the back of monitor 11 D HANDLEBARS Insert the Left Handlebar 05L through the Left Coupler Bar 09L and Right Handlebar 05R through the Right Coupler Bar 09R Select...

Page 13: ... 15 to the horizontal bar of Cushion Tube 16 Secure with four Washers 42 and four Bolts 46 Attach another Cushion 15 to the vertical bar of Cushion Tube 16 Secure with four Washers 42 and four Bolts 46 Hardware Required 38 Knob Bolt M8x37mm 1 piece 42 Washer M8 12 pieces 02 13 14 37 42 46 46 42 15 15 16 38 24 18 42 45 01 37 Knob Bolt M12x30mm 1 piece 18 Cap Nut M8 2 pieces 24 Washer M8 1 piece 46 ...

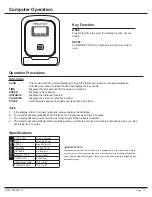
Page 14: ...and read your heart rate per minute 1 If the display is faint or shows no figures please replace the batteries 2 The monitor will automatically shut off if there is no signal received after 4 minutes 3 The monitor will auto power on when exercise and or motion input is detected 4 The monitor will automatically start calculating when you start to exercise and will stop calculating when you stop exe...

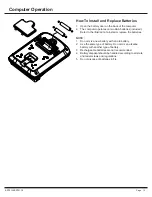
Page 15: ...ded Refer to the illustration to install or replace the batteries NOTE 1 Do not mix a new battery with an old battery 2 Use the same type of battery Do not mix an alkaline battery with another type of battery 3 Rechargeable batteries are not recommended 4 Battery disposal should be handled according to all state and federal laws and regulations 5 Do not dispose of batteries in fire ...

Page 16: ...safely dismount the unit NOTE To safely move transport and or store the unit please seek the help of capable assistants minimum of 2 people The unit has integrated Front Rollers purposely intended to help ease this process Position one person on each side at the front of the bike toward the handle Bar one person on the left and one on the right Have each person use both hands to grip the correspon...

Page 17: ...ns for the sensor wires in this manual If the computer display is blank not displaying any data or does not appear to power on please adjust the following 1 Check to ensure all sensor wires are all properly connected and are not damaged 2 Check to ensure the AC Adapter or Batteries are properly plugged in or fully charged 3 Check your product manual to determine if your model uses either AC Adapte...

Page 18: ...k in toward your body as you tuck your chin and arch your back upward 2 Return to the starting position slowly 1 Sit with your leg extended and bend your right knee as you cross your right leg over your left leg Your right foot of your extended leg foot should be flat on the floor alongside your left knee 2 Place your left arm on the outside of your right leg and pull against that leg while twisti...

Page 19: ...onto a support with your left hand 2 Flex your right leg behind you grasp your ankle or foot with your right hand and pull your foot toward your buttocks Keep your back straight and right knee pointed down Repeat on the other leg 1 Place both hands against a wall to aid your balance Press the ball of your left foot against the wall and keep the heel of the same foot rested on the floor make sure y...

Page 20: ...rmation below and keep this manual along with your sales receipt as proof of purchase Serial Number Date of Purchase Retailer Hupa International Inc 21717 Ferrero Parkway Walnut CA 91789 Phone 1 888 266 6789 Fax 1 909 598 6707 Email info hupa net Ver 08 07 2019 Printed in China ...

Reviews: