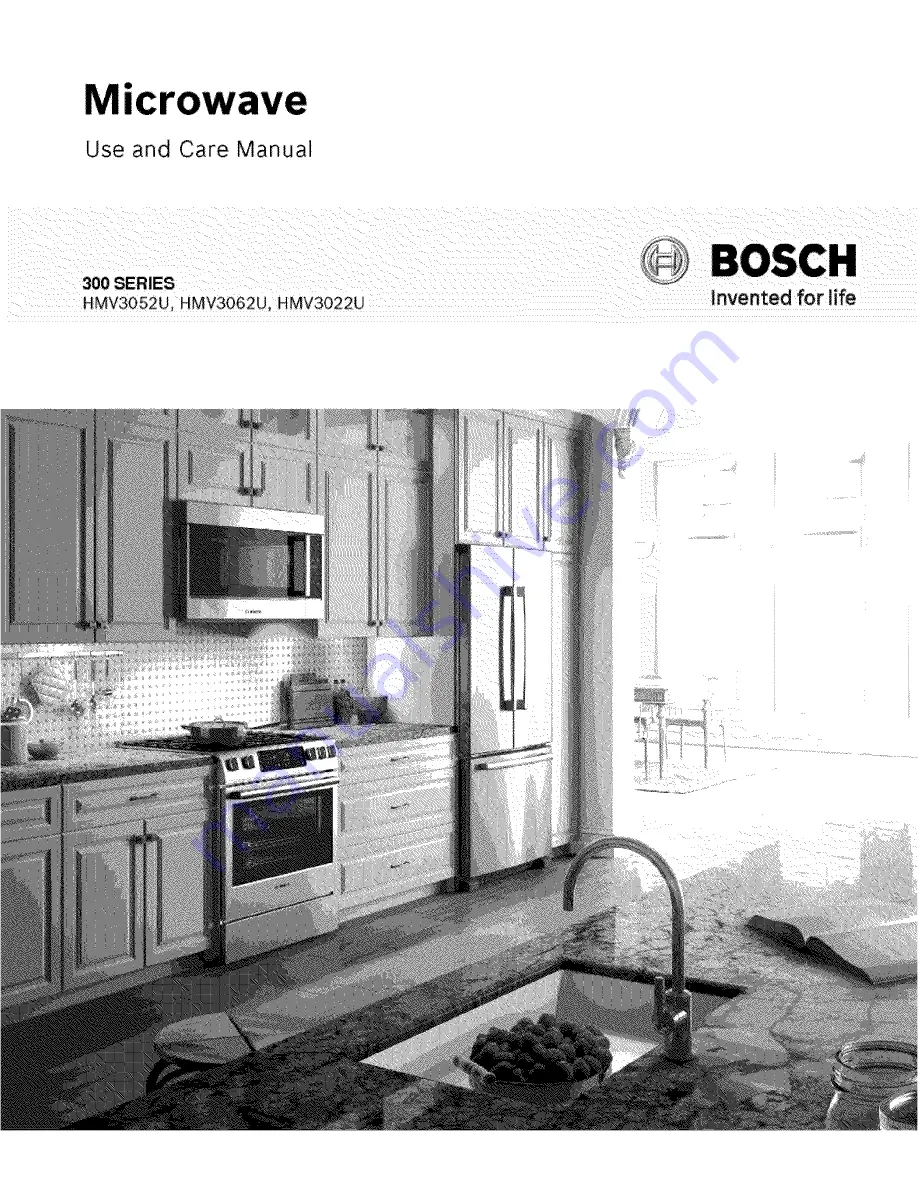
background image

Summary of Contents for 300 SERIESHMV3052U

Page 1: ...Use and Care Manual 300 SERIES HMV3052U HMV3062U HMV3022U invented for hfe ...

Page 2: ...ng the Ventilation Fan 11 Turning the Light on off 11 Operating the microwave 12 Adding cook time 30 Seconds 13 Defrost 13 Reheat 14 Convenience Operation 15 Beverage 15 Potato 15 Popcorn 15 Convenience cooking suggestions 15 Cooking Charts 16 Cooking meat in your microwave 16 Cooking poultry in your microwave 16 Cooking eggs in your microwave 16 Cooking vegetables in your microwave 16 Cooking sea...

Page 3: ...TO AVOID POSSIBLE EXPOSURE TO EXCESSIVE MICROWAVE ENERGY 1 Do not attempt to operate this oven with the door open since open door operation can result in harmful exposure to microwave evergy It is important not to defeat or tamper with the safety interlocks 2 Do not place any object between the oven front face and the door or allow soil or cleaner residue to accumulate on sealing surfaces 3 Do not...

Page 4: ...ord hang over edge of table or counter Do not operate this appliance if it has a damaged cord or plug if it is not working properly or if it has been damaged or dropped When cleaning surfaces of door and oven that come together on closing the door use only mild nonabrasive soaps or detergents applied with a sponge or soft cloth See door surface cleaning instructions in chapter Cleaning and Mainten...

Page 5: ...e legal responsibility of the parents or legal guardians to ensure that they are instructed in safe practices by qualified persons Do not allow anyone to climb stand lean sit or hang on any part of an appliance especially a door warming drawer or storage drawer This can damage the appliance and the unit may tip over potentially causing severe injury Save these instructions Cleaning Safety Clean ex...

Page 6: ... microwave oven corn popper Follow popcorn manufacturers directions and use a brand suitable for the wattage of your oven Do not continue to heat after popping has stopped Popcorn will scorch or burn Do not leave oven unattended CAUTION When using pre packaged microwave popcorn check package weight before using the popcorn function Set the oven for the weight of the popcorn package If these instru...

Page 7: ...ay Turntable Ring Do not operate the oven without the turntable roller rest and the glass tray in place Do not operate the oven without the glass tray in place Improper cooking or damage to the oven could result Verify that the glass tray is properly positioned and turning when the oven is in use Note The glass tray can turn in either direction Only use the glass tray designed for this oven Do not...

Page 8: ... soiled Adjoining furniture fronts may be damaged Always keep the door seal clean o Appliance door as a seat or storage surface do not stand sit or hang on the appliance door Do not place any cookware or accessories on the appliance door o Inserting accessories depending on the appliance type accessories can scratch the door pane when closing the appliance door Always slide accessories fully into ...

Page 9: ...e unit Warm air may be released from the vent before during and after cooking It is normal to see steam escaping from the vent and condensation may collect in this area This area may be warm when the oven is in use Do not block the vent since it is important for air circulation Touch keys You can activate a function by briefly touching the corresponding touch key Each time you touch a key a short ...

Page 10: ...oosely over the dish and press it to the sides Vent plastic wrap by turning back one edge slightly to allow excess steam to escape The dish should be deep enough so that the plastic wrap will not touch the food o Microwave safe plastics Use microwave safe plastic dishes cups semi rigid freezer containers and plastic bags for short cooking times Use these with care because the plastic may soften fr...

Page 11: ...Before using accessories for the first time thoroughly clean them with hot soapy water and a soft dish cloth Operation Setting the clock The clock can be set in 12 hour mode 1 Touch Clock once 2 Enter the time using the number keys Example To set the clock to 12 41 type in 1 2 4 1 3 Touch Clock to confirm The time of day is displayed Setting the Timer The Timer feature can be used as a kitchen tim...

Page 12: ...ust to the power output best suited for the food type you are preparing As with any food preparation in the microwave it is best to follow the microwave instructions that are printed on the food packaging The table below provides suggested power levels for various types of food that can be prepared in the microwave Power Microwave Use for level output ILa 100 High 90 80 3 i 70 S 60 S 50 h 40 30 2O...

Page 13: ...k time is displayed and begins to count down When defrosting has finished 4 beeps will sound The appliance turns off and the clock is displayed Note The entered weight must be within the allowed weight range for this feature to start Note A beep sounds during defrosting for all food programs to turn food over or separate pieces Setting Defrost by time You can set a time value up to 99 minutes and ...

Page 14: ...nter Reheat category 8 oz of food 16 oz of food 32 oz of food Notes Touch Reheat key Display once 8 oz twice 16 oz 3 times 32 oz Cover with vented plastic wrap or wax paper Reheat food on a microwaveable dinner plate Opening appliance door during operation Opening the appliance door during operation will interrupt the current mode Close the appliance door and then touch Start Enter to resume opera...

Page 15: ...ferent bag sizes of commercially packaged microwave popcorn Use the following table to determine the setting to use Bag size Touch Popcorn key 1 75 oz default setting once 3 0 oz twice 3 5 oz 3 times Example Pop a 3 5 oz bag of popcorn automatically 1 Touch Popcorn three times 2 Touch Start Enter When the microwave time has elapsed 4 beeps will indicate that the program is finished Convenience coo...

Page 16: ...a microwave safe roasting rack in a microwave safe dish Cover poultry with wax paper to prevent splattering Use narrow strips of aluminum foil to shield any bone tips or thin meat areas or areas that start to overcook After cooking check the temperature in several places before letting the meat stand the recommended time Meat Power level Cook time Directions Whole chicken medium high 7 180 F 7 10 ...

Page 17: ...l fish flakes easily with fork Let stand 2 3 mins Arrange shrimp in a baking dish without overlapping or layering Cover with wax paper Cook until firm and opaque stirring 2 or 3 times Let stand 5 mins Cleaning and Maintenance WARNING Be sure the entire appliance including the grease filters and light bulbs has cooled and grease has solidified before attempting to clean any part of the appliance WA...

Page 18: ...inside or outside the oven door wipe with a soft cloth Steam can accumulate when operating the oven in high humidity and in no way indicates microwave leakage Clean with hot soapy water or apply Fantastik or Formula 409 to a clean sponge or paper towel and wipe clean Avoid using abrasive cleaners like powder cleaning agents steel wool pads and oven cleaners Always wipe or rub in the direction of t...

Page 19: ...4 Remove the charcoal filter by pushing it inwards then turn and pull it away from the unit 5 Open light cover located behind filter mounting by carefully pulling up on the front edge 4 Replace bulb cover and mounting screw 5 Plug the microwave back into the power supply or turn the power back on at the main circuit breaker Oven light replacement 1 To replace light bulb first disconnect power to t...

Page 20: ...arcoal filter replacement The charcoal filter which was enclosed with your microwave oven is used for nonvented recirculated installation Room Venting The filter should be changed every 6 to 12 months depending on use 1 Disconnect power to the microwave oven at the circuit breaker panel or by unplugging 2 Remove the vent grill mounting screws 3 Pull the vent grill away from the unit t 4 Change the...

Page 21: ...w 00 00 o Reset the clock and any cooking instructions o Reset the household circuit breaker or replace any blown fuses o Press the Clear Off key twice and attempt to re enter cooking instructions o Plug a different appliance into the power outlet If the other appliance will not operate have a qualified electrician repair the outlet o Plug the microwave into a different power outlet Food is cookin...

Page 22: ...d below Model No FD No Date of Purchase Customer Service Keep your invoice or escrow papers for warranty validation if service is needed Service We realize that you have made a considerable investment in your kitchen We are dedicated to supporting you and your appliance so that you have many years of creative cooking Please don t hesitate to contact our Customer Support Department if you have any ...

Page 23: ...paired parts shall assume the identity of the original part for purposes of this warranty and this warranty shall not be extended with respect to such parts BSH s sole liability and responsibility hereunder is to repair manufacturer defective Product only using a BSH authorized service provider during normal business hours For safety and property damage concerns BSH highly recommends that you do n...

Page 24: ...s floors shelving etc andresetting of breakers orfuses TOTHEEXTENT ALLOWED BYLAW THISWARRANTY SETS OUTYOUREXCLUSIVE REMEDIES WITH RESPECT TOPRODUCT WHETHER THECLAIM ARISES INCONTRACT ORTORT INCLUDING STRICT LIABILITY ORNEGLIGENCE OROTHERWISE THISWARRANTY ISINLIEU OFALLOTHER WARRANTIES WHETHER EXPRESS ORIMPLIED ANYWARRANTY IMPLIED BY LAW WHETHER FORMERCHANTABILITY ORFITNESS FORA PARTICULAR PURPOSE ...

Page 25: ...or 35 Manejo del ventilador de ventilaci6n 36 Encendido Apagado de la luz 36 Programacion del microondas 36 A_adido de tiempo de coccion 30 Seconds 30 segundos 37 Defrost Descongelar 37 Reheat Recalentar 39 Funcionamiento practico 39 Beverage Bebida 39 Potato Papa 39 Popcorn Palomitas de mafz 40 Sugerencias para coccion pra ctica 40 Cuadros de coccion 40 Cocinar carne de res en su horno de microon...

Page 26: ...1 No intente manejar este homo con la puerta abierta ya que el funcionamiento con la puerta abierta puede tener como consecuencia una exposici6n nociva a la energfa de microondas Es importante no anular los enclavamientos de seguridad ni interferir en estos 2 No coloque ning0n objeto entre la parte delantera del horno y la puerta ni permita que se acumulen suciedad ni restos de limpiador en las su...

Page 27: ...a ni de la superficie de trabajo No haga funcionar este aparato si tiene un cable o un enchufe da_ados si no funciona adecuadamente ni si se ha da_ado o se ha cafdo AI limpiar las superficies de la puerta y del horno que se unen al cerrar la puerta aplique Onicamente jabones o detergentes suaves no abrasivos con una esponja o un paso suave Consulte las instrucciones de limpieza de la superficie de...

Page 28: ...deben que dar solos o sin vigilancia en el a rea donde se utilice el electrodomestico Nunca se les debe permitir jugar cerca del electrodomestico independientemente de que este en funcionamiento o no Cuando los ni_os tienen la edad adecuada para utilizar el electrodomestico es responsabilidad legal de los padres o tutores legales asegurarse de que reciban las instrucciones sobre pra cticas seguras...

Page 29: ...la puerta cerrada 2 Apague el electrodomestico 3 Desenchufe el electrodomestico o corte la alimentaci6n electrica desde el panel de fusibles o el disyuntor Conserve estas instrucciones Liquidos Los Ifquidos como el agua el cafe o el te podrfan calentarse excesivamente Pueden calentarse hasta pasar el punto de ebullicion sin que parezca que esta n hirviendo Por ejemplo no siempre se observan burbuj...

Page 30: ...acumule yes posible que explote el tarro Adema s el homo no puede mantener los alimentos a la temperatura adecuada del enlatado Los alimentos mal enlatados se pueden echar a perder y consumirlos puede ser peligroso Las peque_as cantidades de alimentos o los alimentos con bajo contenido de humedad pueden secarse quemarse o incendiarse No deshidrate carnes hierbas frutas ni verduras en su horno Una ...

Page 31: ...n suministro de aire fresco suficiente que sera necesario para la combustion en el quemador Advertencias en virtud de la Proposicion 65 del estado de California ADVERTENCIA Este producto contiene una o ma s sustancias qufmicas que el estado de California sabe que provocan ca ncer defectos congenitos u otro da_o reproductivo Funcionamiento del motor del ventilador Luego de usar el horno el motor de...

Page 32: ...el equipo Los frentes de los muebles cercanos pueden da_arse Mantenga siempre limpio el sello de la puerta La puerta del equipo como asiento o superficie de almacenamiento no pararse sentarse o colgarse en la puerta del equipo No coloque ningOn recipiente o accesorios sobre la puerta Insercion de accesorios dependiendo del tipo de equipo los accesorios pueden rayar el panel de la puerta al cerrarl...

Page 33: ...on antes durante y despues de la coccion Es normal que salga vapor de la abertura de ventilacion y que se acumule condensacion en esta Area Esta Area puede estar tibia cuando el horno esta en uso No bloquee la ventilacion dado que es importante para que circule el aire Especificaciones del horno Alimentacion elec 120 V CA 60 Hz trica Potencia de coccion 1000 W Frecuencia 2450 MHz Volumen de la cav...

Page 34: ...imento de coccion 2 Enclavar la bandeja giratoria ben el accionamiento c del centro de la base del compartimento de coccion a c Nota Utilizar el aparato solo cuando la bandeja giratoria este colocada Asegurarse de que queda correctamente enclavada y se gira libremente cuando el aparato esta funcionando Guia de utensilios para microondas Utensilios para homo adecuados o Cristal vitroceramica resist...

Page 35: ... en su interior Con excepcion de la prueba de la vajilla siguiente Si no esta seguro de si su recipiente es adecuado para el microondas efectOe la siguiente prueba 1 Introducir el recipiente vacfo en el aparato durante 1 2 a 1 minuto a la potencia maxima 2 Comprobar la temperatura de vez en cuando El recipiente deberfa estar fifo 0 templado Si se calienta 0 se generan chispas no es adecuado para e...

Page 36: ...el de potencia deseado utilizando las teclas numericas Titilan _ L y el nivel de potencia seleccionado y START Comenzar en el display 4 Pulse la tecla Start Enter para iniciar el funcionamiento del microondas Comenzara la cuenta atra s del temporizador del microondas El temporizador del microondas puede modificarse durante el funcionamiento pulsando la tecla 30 Seconds 30 segundos El nivel de pote...

Page 37: ...ion de los alimentos Coloque las Areas delicadas de los alimentos como puntas de espa rragos hacia el centro de la bandeja del plato giratorio o Disposicion de los alimentos Disponga alimentos de formas desparejas como trozos de polio o salm6n con las partes ma s gruesas o carnosas hacia afuera de la bandeja del plato giratorio o Dejar reposar los alimentos Despues de retirar los alimentos del mic...

Page 38: ... cuando los alimentos que sera n descongelados tienen una temperatura mfnima de 0 F sacados directamente de un congelador Si los alimentos se guardaron en un refrigerador congelador que no mantiene una temperatura de 5 F o menos programe siempre un peso de alimentos ma s bajo o un tiempo de coccion ma s bajo para evitar que los alimentos se cocinen o Si los alimentos congelados se dejan fuera del ...

Page 39: ... tico ventilada o un papel ence rado enganchados debajo del plato Si el alimento no queda Io suficientemente caliente des pues de calentarlo con la funcion Reheat Recalentar continOe calentando con la programacion manual de tiempo y nivel de potencia Contenido o de 3 a 4 oz de carne de res ave o pescado hasta 6 oz con hueso o 1 2 taza de alimentos con almid6n papas pasta arroz etc o 1 2 taza de ve...

Page 40: ...isa solo para microondas de palomitas de mafz por vez Tenga cuidado al retirar del horno la bolsa de palomitas de mafz caliente y al abrirla Deje enfriar el horno microondas durante al menos 5 minutos antes de vol ver a usarlo Pinche cada papa varias veces con un tenedor Col6quelas en el plato giratorio en forma de rayos Despues de cocinar deje reposar entre 3 y 5 minutos Deje enfriar el horno dur...

Page 41: ...ues de cocinar mida la temperatura en varios lugares antes de dejar reposar la carne el tiempo recomendado Carne Polio entero hasta 4 Ib Trozos de polio hasta 4 Ib Nivel de potencia Tiempo de coc Instrucciones cion media alta 7 180 F 7 10 min Ib 82 C carne oscura 170 F 76 C came oscura media alta 7 180 F 82 C came oscura 170 F 76 C came oscura 7 10 min Ib Coloque el polio con el lado de la pechuga...

Page 42: ...b media alta 7 media alta 7 de 7 a 11 min Ib de 7 a 11 min Ib Disponga el pescado sobre un rack para asar con las partes ma s carnosas hacia afuera del rack Cubra con papel encerado De vuelta y reacomode el pescado a la mitad del tiempo de cocci6n Codnelo hasta que el pes cado se pueda desmenuzar fa cilmente con un tenedor Deje reposar de 3 a 5 min Disponga los filetes en una fuente para hornear y...

Page 43: ...rno con un aroma fresco en una fuente apta para microondas de 4 tazas en un nivel de potencia alta durante 5 minu tos o hasta que hierva Deje reposar en la cavidad del horno durante 1 o 2 minutos La velo con agua jabonosa Enjuague bien y sequelo o frotelo suavemente con esponjillas con polvo de limpieza o jabon segOn las indicaciones Retire la bandeja para el plato giratorio de cristal del horno a...

Page 44: ...a aparatos 2 Remoje los filtros de ventilaci6n en agua caliente con un detergente suave Enju_ guelos bien y sacOdalos para que se sequen No use amoniaco ni los lave en un lavavajillas El aluminio del filtro se corroe y oscurece 3 Para volver a instalar el filtro de ventilaci6n deslicelo en la ranura lateral luego haga presion hacia arriba y en direccion al horno para que quede trabado Vuelva a ins...

Page 45: ...ra la tapa de la luz que se ubica detra s del montaje del filtro tirando con cuidado hacia arriba en el borde frontal 4 Retire el filtro de carbon activo haciendo presion hacia adentro luego gfrelo y sa quelo de la unidad 6 Retire el foco de luz usado y reempla celo solo con un foco de 30 vatios equivalente disponible a traves de su distribuidor de piezas Los focos tambien esta n disponibles en la...

Page 46: ...luego vuelva a enchufar el microondas o Restablezca el disyuntor del hogar o reemplace cualquier fusible quemado o Enchufe un aparato diferente en la toma de corriente Si el otro aparato no fun ciona solicite a un electricista calificado que repare la toma de corriente o Enchufe el microondas en una toma de corriente diferente El display del homo funciona o Aseg0rese de que la puerta del horno est...

Page 47: ... Si utiliza film de aluminio utilice solo tiras angostas y deje por Io menos una pulgada entre el film y las paredes interiores del horno o Limpie el plato giratorio el aro rodante y la parte inferior de la cavidad del horno o Aseg0rese de que el plato giratorio y el aro rodante esten posicionados correc tamente Esta es similar a la interferencia provocada por otros pequer_os aparatos como los sec...

Page 48: ... para que BSH le notifique en el caso poco probable de que se emita un aviso de seguridad o se retire del mercado un producto Duracion de la garantia BSH garantiza que el Producto estara libre de defectos en los materiales yen la mano de obra por un perfodo de trescientos sesenta y cinqo 365 dfas a partir de la fecha de compra El perfodo precedente comienza a regir a partir de la fecha de compra y...

Page 49: ... o de condado incluida la omisi6n de instalar el producto cumpliendo estrictamente con los codigos y reglamentaciones locales de construccion y proteccion contra incendios o Desgaste habitual derrames de alimentos liquidos acumulaciones de grasa u otras sustancias que se acumulen sobre dentro o alrededor del Producto o Y cualquier fuerza y factor externo elemental y o ambiental incluidos entre otr...

Page 50: ...NingOn intentodealterar modificar o enmendar la presente garanfia entrara envigencia amenosquefuera autorizado porescritoporunejecutivo de BSH 50 ...

Page 51: ...IIIIIIIIIIIIIII IIIIIIIIII 9000927804 940505 BOSCH Invented for life 1901 Main Street Suite 600 Irvine CA 92614 800 944 2904 www bosch home com c 2012 BSH Home Appliances ...

Reviews: