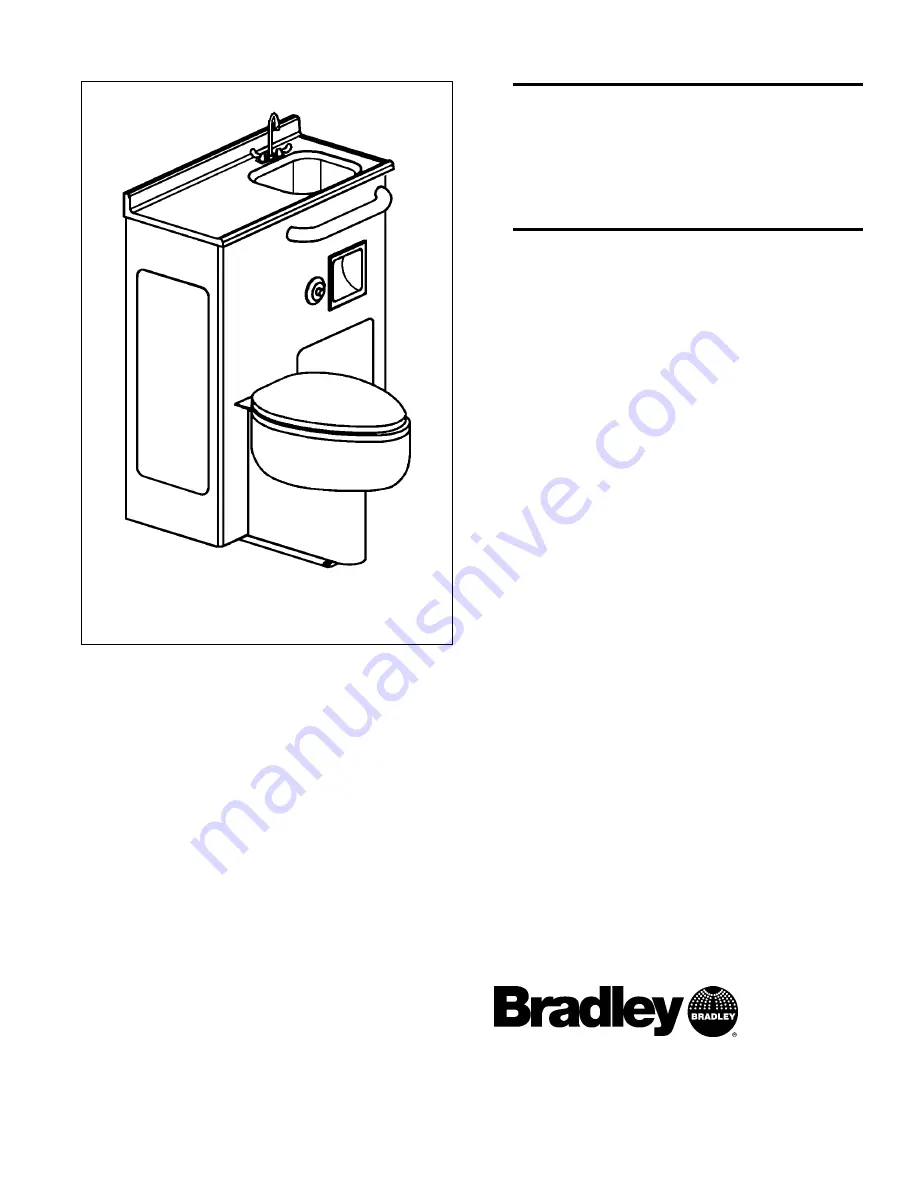
background image

Bradley’s 

LavCare™ 500

Series Patient

Care Module

Models LC500 L/F

and L/W)

Installation and 

Maintenance

Instructions

215-857 Rev. B; EN 97-1016

Page 1 of 11

Table of Contents

Pre-Installation Information  . . . . . . . . . . . . . . .2

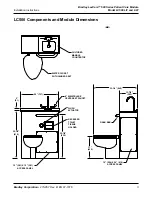
LC500 Components and Dimensions  . . . . . . . .3

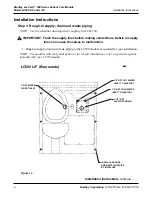
LC500 L/F Rough-Ins  . . . . . . . . . . . . . . . . . . .4

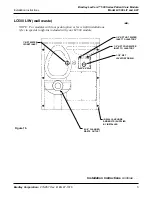
LC500 L/W Rough-Ins . . . . . . . . . . . . . . . . . . .5

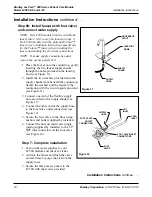
Installation Instructions  . . . . . . . . . . . . . . . .6-10

Cleaning and Maintenance  . . . . . . . . . . . . . . .11

P.O. Box 309, Menomonee Falls, WI  53052-0309

Phone (262) 251-6000  Fax (262) 251-5817

http://www.bradleycorp.com

Summary of Contents for LavCare LC500 L/F

Page 1: ...57 Rev B EN 97 1016 Page 1 of 11 Table of Contents Pre Installation Information 2 LC500 Components and Dimensions 3 LC500 L F Rough Ins 4 LC500 L W Rough Ins 5 Installation Instructions 6 10 Cleaning...

Page 2: ...g or repairing at our option transportation charges prepaid by the purchaser any Bradley unit or part thereof which our inspection shall show to have been defective within the limitations of this warr...

Page 3: ...57 Rev B EN 97 1016 LC500 Components and Module Dimensions 4 WRISTBLADE CENTERSET FAUCET FLUSH ACTUATOR RECESSED TOILET TISSUE HOLDER 15 381 X 15 381 ACCESS PANEL 2 51 MM 36 1 8 918 29 737 32 7 8 835...

Page 4: ...ions Debris in supply lines can cause the valves to malfunction 1 Rough in supply drain and waste piping to the LC500 module as required for your installation NOTE For modules with foot pedal option o...

Page 5: ...continue Figure 1b LC500 L W wall waste 1 2 NPT HOT WATER INLET TO LAVATORY 1 2 NPT COLD WATER INLET TO LAVATORY 1 1 2 NPT LAVATORY DRAIN 1 NPT WATER CLOSET INLET 5 1 2 FLANGED WASTE OUTLET 6 WALL AN...

Page 6: ...odule aside and install six wall anchors supplied by installer at the locations marked in 2 above 4 Using a 5 8 concrete drill bit drill two 2 1 8 deep holes into the water closet anchoring locations...

Page 7: ...ing holes should be placed over the threaded studs installed in Step 2 on page 6 see Figure 5a 5b 2 Secure the cabinet to the back wall using six bolts supplied by installer 3 Bolt the water closet to...

Page 8: ...may be used the connector is available as an option from your Bradley representative see Figure 7 1 Connect the flush valve water supply piping to the flush valve s 1 NPT inlet piping supplied by inst...

Page 9: ...ra faucet when installing the faucet and making the electrical connections NOTE To make supply connections easier remove the access panels first 1 Place the faucet onto the countertop gently inserting...

Page 10: ...neath the countertop Secure the washers and the faucet to the countertop with the two wingnuts provided see Figure 11 3 Connect one end of the flexible supply hose provided to the supply shank see Fig...

Page 11: ...your LC500 give the Brad glazed fixture a thorough cleaning with a non abrasive liquid tub and tile cleaner to remove soil and maintain the glossy finish You may safely use the following cleaners For...

Reviews: