background image


PROFESSIONAL INSTALLATION IS HIGHLY RECOMMENDED 


Manufactured by 

Breckwell Hearth Products 

Arlington, TX 

Eugene, Oregon 

www.breckwell.com


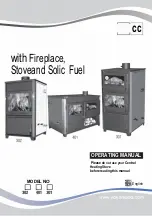
OWNER’S MANUAL

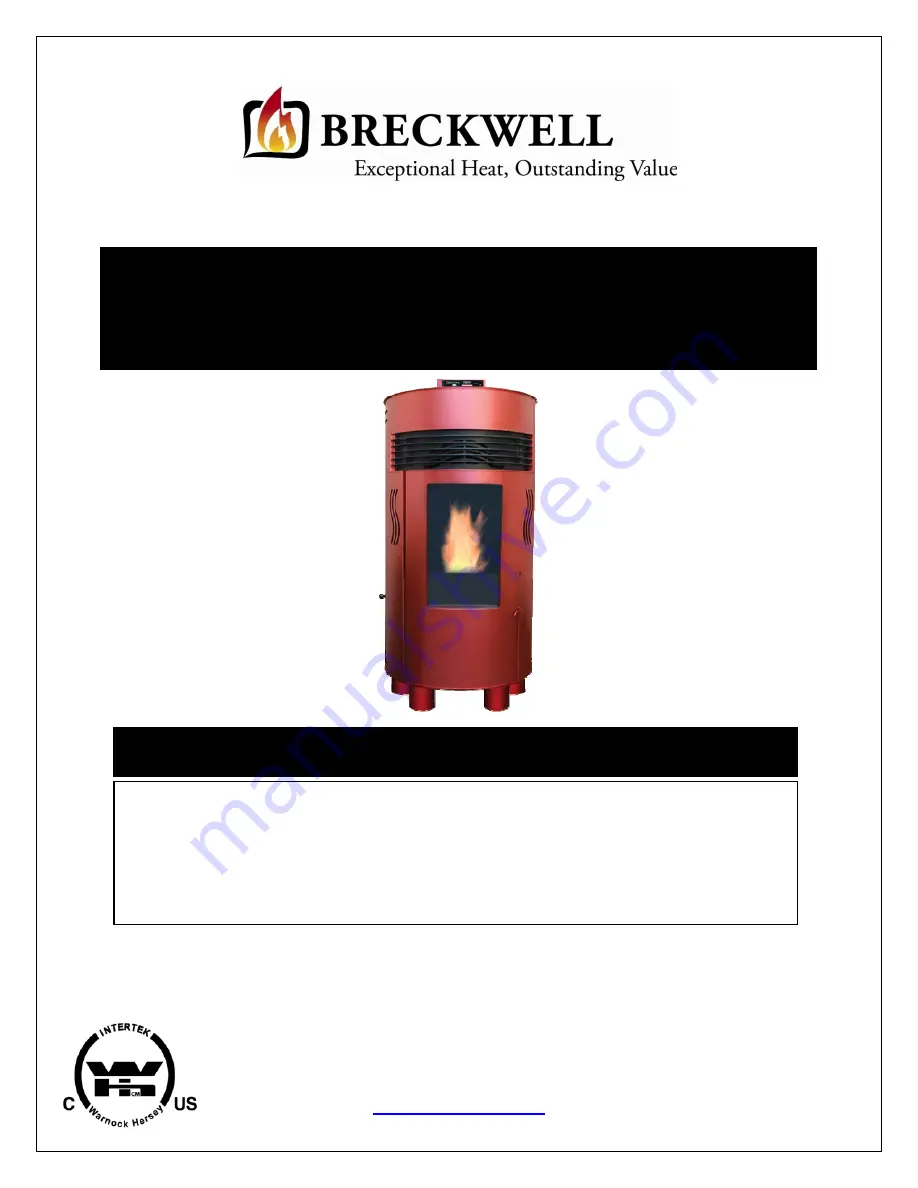
The Solstice 

BRECKWELL HEARTH PRODUCTS 

07/09 


WARNING: If your appliance is not properly installed a house fire may result. For your safety, 
follow the installation directions.


Contact local building or fire officials about restrictions and installation inspection requirements 
in your area.  Local regulations and requirements can supersede those specified in this manual if 
more stringent.


PLEASE read this entire manual before installation and use of this pellet fuel-burning room heater. 
Failure to follow these instructions could result in property damage, bodily injury, or even death.


Save these instructions.


Summary of Contents for The Solstice

Page 1: ...our safety follow the installation directions Contact local building or fire officials about restrictions and installation inspection requirements in your area Local regulations and requirements can supersede those specified in this manual if more stringent PLEASE read this entire manual before installation and use of this pellet fuel burning room heater Failure to follow these instructions could ...

Page 2: ...installation according to current national and local building codes as a freestanding room heater It is also approved as a mobile home heater which is designed for connection to an outside combustion air source The stove will not operate using natural draft or without a power source for the blower systems and fuel feed system and must not be burned with any type of fuel except wood pellets see PRO...

Page 3: ... can shine on the unit it is possible this can cause the temperature of the stove to rise to operational levels one of the sensors could then make the stove start on its own It is recommended that the stove be unplugged when not in use for extended amounts of time i e during the summer months Do not unplug the stove if you suspect a malfunction Turn the stove off periodically inspect it and call y...

Page 4: ...ing Door 12 Room Air Fan 13 Re Starting a Warm Stove 13 If Stove Runs Out Of Pellets 13 Refueling 13 Breckwell Maintenance Tool 13 Shutdown Procedure 13 Safety Features 13 Optional Thermostat 14 Thermostat Installation 14 Please Read This Operating Safety Precautions 15 MAINTENANCE 16 Ash Removal 16 Ash Disposal 16 Vacuum Use 16 Cleaning 17 Blowers 17 Chimney Cleaning 18 Recommended Maintenance Sc...

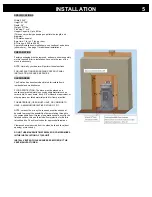
Page 5: ...stallation in residential and mobile homes FLOOR PROTECTION The stove must be placed on a continuous grouted joints noncombustible material such as ceramic tile cement board brick 3 8 millboard or equivalent or other approved or listed material suited for floor protection THE MATERIAL S USED MUST HAVE OR COMBINE TO HAVE A MINIMUM INSULATIVE RATING OF R1 NOTE ceramic tile or any tile requires a con...

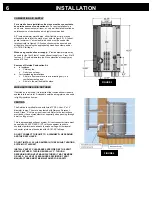
Page 6: ...awl space A hole in the wall behind the stove WHEN OUTSIDE AIR IS NOT USED If outside air is not used it is important that combustion air is easily available to the air inlet A closeable outside air register can be used in tightly insulated homes VENTING The Solstice is certified for use with listed TYPE L Vent 3 or 4 diameter in size The stove was tested with Simpson Duravent brand Class A chimne...

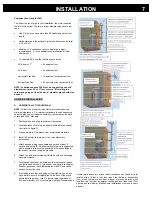
Page 7: ...ances 2 Locate position of hole in wall directly behind stove exhaust vent refer to figure 3 3 Always maintain 3 clearance from combustible materials 4 Install L Vent wall thimble per L Vent manufacturer s instructions 5 Attach enough piping to penetrate and extend at least 6 beyond exterior walls An 8 foot vertical pipe run is suggested where possible to reduce the possibility of smoke spillage i...

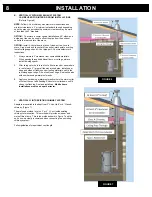
Page 8: ...all fire stop spacer 2 After lining up for hole in roof cut either a round or square hole in roof always 3 larger all the way around pipe Install upper edge and sides of flashing under roofing materials nail to the roof along upper edge Do not nail lower edge Seal nail heads with non hardening waterproof mastic 3 Apply non hardening waterproof mastic where the storm collar will meet the vent and f...

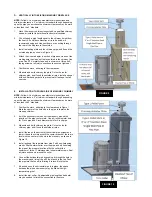
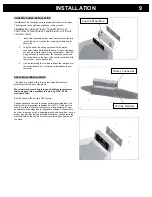
Page 9: ...rances 3 minimum is standard though depending upon the pipe you purchase the minimum clearance may be more or less than the 3 standard 1 Position the stove adhering to the clearances in Figure 1 Mark the center of the hole where the pipe is to pierce the masonry chimney 2 It will be necessary to break out the masonry around the location of the pipe center mark Use a 4 inch diameter hole for 3 inch...

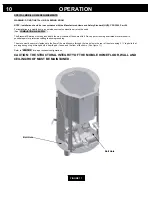
Page 10: ...crews to attach the rear panel of the control panel box Control panel installation is now complete ELECTRICAL INSTALLATION This stove is provided with a 6 foot grounded electrical cord extending from the rear of the stove We recommend connecting to a good quality surge protector that is plugged into a standard three prong 120V 60 Hz electrical outlet Do NOT connect the unit to a GFCI socket Voltag...

Page 11: ... of the home with 8 Ga copper wire using a serrated or star washer to penetrate paint or protective coating to ensure grounding The stove must be securely fastened to the floor of the mobile home through the two holes in the rear of the stove using 2 lag bolts that are long enough to go through both a hearth pad if used and the floor of the home See figure 11 Refer to VENTING for proper exhaust co...

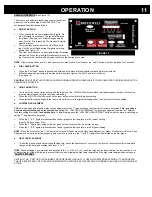
Page 12: ... setting based on the Heat Level Advance setting d LOW FEED ADJUSTMENT Different size and quality pellet fuel may require adjustment of the 1 feed setting on the Heat Level Advance bar graph This is usually a one time adjustment based on the fuel you are using The LOW FEED ADJUSTMENT button when adjusted will allow for 3 different feed rate settings for the 1 feed setting only To adjust simply pus...

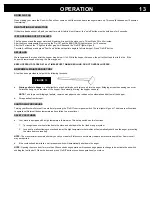
Page 13: ...2 DO NOT open the damper more than 3 DO NOT add pellets to the burnpot by hand 4 DO NOT use the Fuel Feed button unless you are priming the auger after running out of pellets A dangerous condition could result NOTE During the first few fires your stove will emit an odor as the high temperature paint cures or becomes seasoned to the metal Maintaining smaller fires will minimize this Avoid placing i...

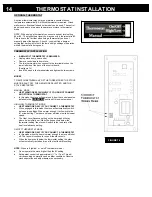
Page 14: ...ot drain evenly into the auger Bridging across the opening can occur Pellets can hang up on the sides of the hopper Occasionally stirring the hopper can help NOTE To help prevent bridging of pellets common wax paper can be rubbed on the sidewalls and bottom of the hopper b Scrape ashes from burnpot SHUTDOWN PROCEDURE Turning your Breckwell stove off is a matter of pressing the On Off control panel...

Page 15: ...MODE USE THIS MODE EXCLUSIVELY IF YOU DO NOT CONNECT AN OPTIONAL THERMOSTAT In this mode the stove will operate only from the control panel as detailed in the OPERATION section of this owner s manual HIGH LOW THERMOSTAT MODE USE THIS MODE ONLY IF YOU CONNECT A THERMOSTAT When engaged in this mode the stove will automatically switch between two settings When warm enough it will switch to the 1 or l...

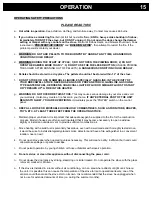
Page 16: ...NAL PART OF THE UNIT BEGINS TO GLOW YOU ARE OVERFIRING Immediately press the POWER switch on the control panel h KEEP ALL LOOSE OR MOVEABLE HOUSEHOLD COMBUSTIBLES SUCH AS FURNITURE DRAPES TOYS ETC AT LEAST THREE FEET FROM THE OPERATING STOVE i Maintain proper ventilation It is important that adequate oxygen be supplied to the fire for the combustion process Modern houses are often so well insulate...

Page 17: ...c Empty ashes from the inner section and scrape with cleaning tool make sure holes are not plugged d Vacuum to remove ashes from the burn chamber interior and the burnpot shell WARNING Make sure ashes are cool to the touch before using a vacuum See VACUUM USE e Dispose of ashes properly See ASH REMOVAL above g Replace inner section into burnpot make sure it is level and pushed all the way back dow...

Page 18: ...above the access doors BLOWERS DANGER RISK OF ELECTRIC SHOCK DISCONNECT POWER BEFORE SERVICING UNIT Cleaning Over a period of time ashes or dust may collect on the blades of both the combustion blower and convection blower Periodically the blowers should be vacuumed clean as these ashes can impede performance Creosote can also accumulate in the combustion blower This needs to be brushed clean The ...

Page 19: ...nnection and at the chimney top Cooler surfaces tend to build creosote deposits quicker so it is important to check the chimney from the top as well as from the bottom The creosote should be removed with a brush specifically designed for the type of chimney in use A qualified chimney sweep can perform this service It is also recommended that before each heating season the entire system be professi...

Page 20: ...s a latch make sure the ash door is properly latched and the gasket is sealing good If the stove has just a small hole for the ashes to fall through under the burnpot make sure the slider plate is in place to seal off the firebox floor 4 Vent pipe is incorrectly installed Check to make sure vent pipe installation meets criteria in owner s manual 5 The airflow switch wire connections are bad Check ...

Page 21: ...up towards you until you can lift the shaft out of the stove After you have removed the shaft inspect it for bent flights burrs or broken welds Remove any foreign material that might have caused the jam Also check the auger tube for signs of damage such as burrs rough spots or grooves cut into the metal that could have caused a jam 8 The auger motor has failed Remove the auger motor from the auger...

Page 22: ...er Check the voltage going to the igniter during startup It should be a full current If the voltage is lower than full current check the wiring If the wiring checks out good the board is bad SMOKE SMELL COMING BACK INTO THE HOME Possible Causes Possible Remedies 1 There is a leak in the vent pipe system Inspect all vent pipe connections Make sure they are sealed with RTV silicone that has a temper...

Page 23: ...move the auger shaft inspection plate in the hopper so that you can see the auger shaft Gently lift the auger shaft straight up so that the end of the auger shaft comes up out of the bottom auger bushing Next remove the two nuts that hold the top auger biscuit in Then rotate the bottom end of the auger shaft up towards you until you can lift the shaft out of the stove After you have removed the sh...

Page 24: ...ight at each setting after the stove has completed the startup cycle Make sure the times match the auger timing chart If the auger motor runs constantly the board is bad 8 Combustion blower is not spinning fast enough Test the RPM on the blower after the blades have been cleaned The RPM should be approximately 3000 RPM 9 Bad Pellets Applies to GLASS SOOT S UP AT A VERY FAST RATE Only The brand of ...

Page 25: ...e signs of other types of fuel being used stop using them immediately 4 Power surge or brown out situation A power surge spike or voltage drop could cause the high limit switch to trip Check to see if a surge protector is being used on the stove If not recommend one to the consumer 5 High limit switch is malfunctioning If the other items check out ok replace the high limit switch DIGITAL CIRCUIT B...

Page 26: ...FIGURE 21 ELECTRICAL DIAGRAM 25 ...

Page 27: ...VENT TERMINATION REQUIREMENTS 26 ...

Page 28: ...TOOL 96 Burnpot A S BURNPOT Circuit Board Control Panel C E 401 Combustion Blower A E 027 Convection Blower A E 033 Door Gasket C G 050 Door Glass PB Version C D 11000 Exhaust Adapter 3 C M 050 Exhaust Adapter 4 A 4 VA Gasket Door C G 055 Gasket Combustion Blower Housing to Stove C G 101 Gasket Combustion Blower Motor to Housing C G 105 Hot Rod Igniter C E IGN Thermodisk Proof of Fire C E 090 22C ...

Page 29: ...idual basis c If the dealer must examine the stove at the consumer s residence a reasonable service call charge may be incurred and is the sole responsibility of the consumer d If the unit must be transported those charges will be the consumer s responsibility 2 If within a reasonable amount of time you have not received satisfactory service from the dealer you should contact Breckwell s Technical...

Reviews: