background image

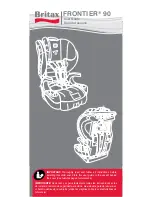
FRONTIER

®

 90

User Guide
Guía del usuario

IMPORTANT: Thoroughly read and follow all instructions before 
installing this child seat. Store this user guide in the pocket behind 
the cover (See features pages for reference).


IMPORTANTE: Debe leer y seguir atentamente todas las instrucciones antes 
de instalar el asiento de seguridad para niños. Guarde esta guía del usuario en 
el bolsillo detrás de la cubierta (utilice las páginas sobre las características de 
referencia).

Summary of Contents for FRONTIER 90

Page 1: ...Store this user guide in the pocket behind the cover See features pages for reference IMPORTANTE Debe leer y seguir atentamente todas las instrucciones antes de instalar el asiento de seguridad para niños Guarde esta guía del usuario en el bolsillo detrás de la cubierta utilice las páginas sobre las características de referencia ...

Page 2: ...ss to Booster Mode Storing the Harness and Buckle 29 Booster to Harness Mode Restoring the Harness and Buckle 31 Harness to Booster Mode Removing the Harness and Buckle 32 Booster to Harness Mode Replacing the Harness and Buckle 34 Vehicle Compatibility 36 Compatible Vehicle Seat Belts 36 Incompatible Vehicle Seat Belts 38 Care and Maintenance 40 Tips and Troubleshooting 46 Warranty 47 BRITAX CLIC...

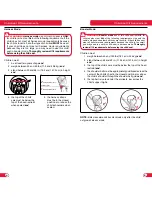
Page 3: ...tax Their use could cause this child seat to fail Federal Motor Vehicle Safety Standards or not perform as intended in a crash Always check the back seat upon leaving your vehicle to prevent leaving a child restrained in a child seat alone in the vehicle Important Notes Verify that the child seat is securely installed and the harness is properly adjusted around the child each time the child seat i...

Page 4: ...the child s shoulders when seated WARNING Booster mode use of this child seat is ONLY for children who meet ALL of the following requirements Use only the vehicle s lap and shoulder belt to secure the child If the child does not meet all booster mode requirements because the child is too small you may need to use this child seat in harness mode Thoroughly review all fit requirements before using t...

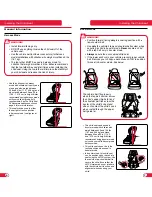
Page 5: ...does not interfere with the vehicle belt function and alignment when securing your child WARNING Position forward facing only in a seating position with a lap shoulder belt Use only the vehicle s lap and shoulder belt system when securing a child in booster mode Never secure a child with a lap belt only in booster mode Always secure the unoccupied child seat If the lower anchors in your vehicle pr...

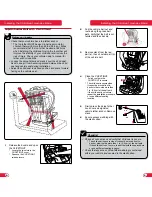
Page 6: ...5 cm at the belt path If the child seat is not secure repeat the installation procedure or use a different seating location 9 9 Check that any excess Versa Tether webbing is contained within your vehicle and secured in the elastic strap 3b 3a 1 Release the buckle and open the CLICKTIGHT Locate the two slots in the CLICKTIGHT cover Squeeze the CLICKTIGHT release levers 2 Pull the vehicle belt out a...

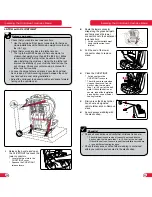
Page 7: ...r side to side more than 1 in 2 5 cm at the belt path If the child seat is not secure repeat the installation procedure or use a different seating location 9 9 Check that any excess Versa Tether webbing is contained within your vehicle and secured in the elastic strap 1 Release the buckle and open the CLICKTIGHT to access the lower connectors Locate the two slots in the CLICKTIGHT cover Squeeze th...

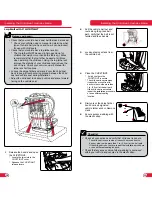
Page 8: ...seat is secure The child seat is secure when it cannot be moved front to back or side to side more than 1 in 2 5 cm at the belt path If the child seat is not secure repeat the installation procedure or use a different seating location 9 9 Check that any excess Versa Tether webbing is contained within your vehicle and secured in the elastic strap 1 Release the buckle and open the CLICKTIGHT Locate ...

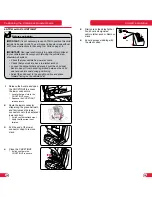
Page 9: ...ehicle has a top tether anchor Loosen the Versa Tether and place it over the child seat back to keep it from becoming pinned between the child seat and vehicle seat during positioning Adjust the child seat to the upright position and place forward facing on the vehicle seat OR OR 2 Route the lower connector strap along the green belt path and firmly press the lower connectors onto their adjacent l...

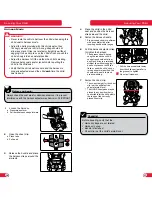
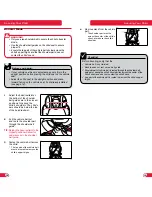
Page 10: ...he 9 9 Harness straps are not twisted 9 9 Harness is snug 9 9 Buckle is fastened 9 9 Chest clip is at the child s armpit level WARNING Never route the vehicle belt over the child when using this child seat in harness mode Adjust the belts provided with this child seat so they fit snugly around your child A snug strap should not allow any slack It lies in a relatively straight line without sagging ...

Page 11: ... restraint to the highest position will allow for easier access to the shoulder belt guide Checklist Before traveling verify that the 9 9 Vehicle belt is not twisted 9 9 Buckle does not rest on red belt guide 9 9 Shoulder part of vehicle belt is routed through the shoulder belt guide at or above the child s shoulder lies across the center of the child s chest and does not contact the child s neck ...

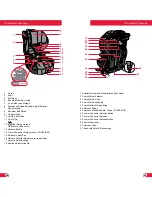
Page 12: ...ever under flap 17 Harness Adjuster Strap 18 Recline Adjuster Handle 6 7 8 13 15 17 16 18 3 2 1 4 9 10 11 5 FEATU R I N G 14 19 Serial Number and Manufactured Date Label 20 Versa Tether Adjuster 21 Versa Tether Hook 22 Versa Tether Webbing 23 Versa Tether Storage Strap 24 Harness Straps 25 Harness Mode Belt Path Green CLICKTIGHT 26 Lower Connector Adjuster Button 27 Lower Connector Adjuster 28 Low...

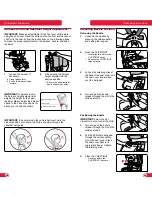
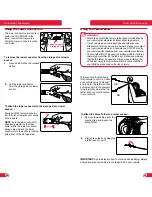
Page 13: ...l IMPORTANT In booster mode the vehicle belt must be in the closest position at or above the child s shoulder through the shoulder belt guide Adjusting Buckle Position Removing the Buckle 1 Unbuckle the harness by pressing the release button and pulling the tongues 2 Open the CLICKTIGHT Locate the two slots in the CLICKTIGHT cover Squeeze the CLICKTIGHT release levers 4 Turn and pull the buckle re...

Page 14: ...alling in the vehicle Ensure the top of the child seat does not rest against the top of the vehicle seat back while reclining Pay attention while adjusting the recline to keep hands clear of any pinch point 2 Upright Position 3 Recline Position Using Lower Anchors and Tethers for Children LATCH LATCH SYSTEM ANCHOR LOCATIONS Tether Anchor Lower Anchors The figure above shows typical locations for l...

Page 15: ...entify where the top tether anchor point is located in your vehicle OR OR 2 Firmly press the hook over the a tether anchor point To attach the Versa Tether to a tether anchor 1 Remove the webbing from the elastic strap and loosen the Versa Tether IMPORTANT Use the elastic strap to contain extra webbing Always ensure any excess webbing is contained within your vehicle OR OR Using the Versa Tether W...

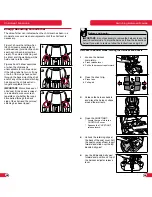
Page 16: ...ss of whether the loops have pulled through the back side of the shell and the colored stitching has been ripped 1 2 3 2 Open the chest clip a Press tabs b Pull apart 4 Open the CLICKTIGHT Locate the two slots in the CLICKTIGHT cover Squeeze the CLICKTIGHT release levers 5 Unhook the retaining clips at the back of the seat cover Pull the seat cover and foam insert forward and slide over the EZ Buc...

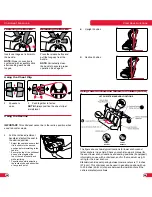
Page 17: ...s Mode Restoring the Harness and Buckle 1 Open the CLICKTIGHT Locate the two slots in the CLICKTIGHT cover Squeeze the CLICKTIGHT release levers 2 Unhook the retaining clips at the back of the seat cover Pull the seat cover and foam insert forward 5 Close the CLICKTIGHT A click confirms the CLICKTIGHT is secure 6 Remove the harness straps from behind the side wing covers 3 Pull the EZ Buckle belly...

Page 18: ...e yoke Store the yoke in a secure place in the base 3 Pull the harness straps out of the slots 7 Turn and pull the buckle retainer through the slot in the child seat shell 6 Unhook the retaining clips at the back of the seat cover Pull the seat cover forward and over the belly pad 8 Fasten the harness buckle 7 Fasten the chest clip Push together until a click is heard 9 Pull the adjuster strap to ...

Page 19: ...ICKTIGHT A click confirms the CLICKTIGHT is secure Booster to Harness Mode Replacing the Harness and Buckle 1 Open the CLICKTIGHT Locate the two slots in the CLICKTIGHT cover Squeeze the CLICKTIGHT release levers 5 Hook the harness straps to the CLICKTIGHT hip anchors Ensure that the harness is attached to the top of the hip anchor 5 Insert the harness straps through the slots in the cover and she...

Page 20: ...pulling on the belt webbing Compatible Vehicle Seat Belts Vehicle seats and seat belts differ from vehicle to vehicle Refer to your vehicle owner s manual for specific information about your vehicle belts and their use with child seats NOTE The information in this section only applies to installation with vehicle belts Lap Shoulder 3 Point Belt 1 ALR Automatic Locking Retractor with Sliding Latch ...

Page 21: ...the vehicle door 2 Motorized automatic vehicle seat belts 3 Lap shoulder belts that have a separate retractor each for the lap section and shoulder section 4 Inflatable lap shoulder belts 5 Lap belts forward of the vehicle seat bight 6 Lap belts with a sewn in latch plate that have a retractor that locks only in case of a sudden stop DO NOT place a child seat in the front seat of a vehicle with a ...

Page 22: ... not to damage the energy absorbing foam 6 Unhook the elastic bands then remove the side wing covers from each side of the child seat shell Be careful not to damage the energy absorbing foam 7 Open the CLICKTIGHT Locate the two slots in the CLICKTIGHT cover Squeeze the CLICKTIGHT release levers 9 Unhook the clips at the back of the seat cover from the child seat shell then pull the seat cover forw...

Page 23: ...in the seat cover Hook the clips at the back of the seat cover to the child seat shell 2 Hook the clips at the front of the seat cover to the bottom of the child seat shell 4 Fit the cover over the CLICKTIGHT and pull the elastic band over the hook on the bottom of the CLICKTIGHT 7 Pull the bottom elastic bands over the hooks at the bottom of each side of the head restraint 5 Close the CLICKTIGHT ...

Page 24: ...ver the buckle retainer to remove Buckle Replacement IMPORTANT Select the slot closest to but not under the child To Clean THOROUGHLY RINSE the buckle using warm water TEST THE BUCKLE by fastening and unfastening until a positive click is heard after inserting each buckle tongue If clicks are not heard repeat the cleaning procedure TOWEL DRY DO NOT Soak Lubricate Use solvents Use soap or household...

Page 25: ...rovide repair or replacement components for this product BRITAX reserves the right to discontinue or change fabrics parts models or products or to make substitutions To make a claim under this warranty you must contact BRITAX Consumer Services at 1 888 427 4829 or 1 704 409 1700 or write to us using the address on the back cover of this booklet PLEASE COMPLETE AND MAIL THE OWNER REGISTRATION CARD ...

Page 26: ... del modo de arnés al modo regulable Almacenamiento del arnés y la hebilla 77 Cómo pasar del modo de modo regulable al modo de arnés Restauración del arnés y la hebilla 79 Cómo pasar del modo de arnés al modo regulable Extracción del arnés y la hebilla 80 Cómo pasar del modo de modo regulable al modo de arnés Sustitución de arnés y la hebilla 82 Compatibilidad con el vehículo 84 Cinturones de segu...

Page 27: ...estar asegurado podría en caso de accidente lastimar a los demás ocupantes del vehículo Nunca debe emplearse la correa de ajuste ni el arnés para levantar o transportar el asiento de seguridad para niños ya que podría dañar el regulador del arnés e incluso el propio arnés Sostenga siempre el asiento de seguridad para niños por el exterior o por las correas de retención ADVERTENCIA Esto podría caus...

Page 28: ...r por llamar al teléfono 1 888 427 4829 o 1 704 409 1700 o registrarse en línea en www BritaxUSA com registration Para obtener información sobre la retirada de asientos del mercado llame a la línea gratuita de seguridad automotriz de EE UU al 1 888 327 4236 teléfono para sordomudos 1 800 424 9153 o visite http www NHTSA gov Número y nombre de modelo___________________________ Número de serie _____...

Page 29: ...ritax recomienda utilizar el modo regulable solo cuando el niño sea demasiado grande para utilizar el modo de arnés El asiento de seguridad del niño solo puede estar en posición vertical cuando esta en modo regulable En modo regulable este asiento de seguridad para niños puede colocarse en el asiento del vehículo utilizando el sistema LATCH Utilice el cinturón de banda horizontal y transversal del...

Page 30: ...ad para niños está bien sujeto El asiento de seguridad para niños estará bien sujeto cuando no puede moverse lateral o longitudinalmente más de 2 5 cm 1 pulgada con respecto al arco del cinturón del vehículo Si el asiento de seguridad para niños no está bien seguro vuelva a instalarlo de nuevo o colóquelo en otro asiento del vehículo 9 9 Comprobar que toda la correa sobrante del Versa Tether está ...

Page 31: ... que todos los componentes están debidamente acoplados y que el asiento de seguridad para niños está bien sujeto El asiento de seguridad para niños estará bien sujeto cuando no puede moverse lateral o longitudinalmente más de 2 5 cm 1 pulgada con respecto al arco del cinturón del vehículo Si el asiento de seguridad para niños no está bien seguro vuelva a instalarlo de nuevo o colóquelo en otro asi...

Page 32: ...ICKTIGHT para abrirlo 2 O BIEN O BIEN Lista de verificación 9 9 Comprobar que todos los componentes están debidamente acoplados y que el asiento de seguridad para niños está bien sujeto El asiento de seguridad para niños estará bien sujeto cuando no puede moverse lateral o longitudinalmente más de 2 5 cm 1 pulgada con respecto al arco del cinturón del vehículo Si el asiento de seguridad para niños...

Page 33: ...anche de transporte y colóquelo sobre el respaldo del asiento de seguridad para niños a fin de evitar que quede atrapado entre el asiento infantil y el del vehículo durante el proceso de posición Ajuste el asiento de seguridad para niños en la posición vertical y colóquelo orientado hacia delante en el asiento del vehículo 2 Pase la tira del conector inferior a lo largo del arco del cinturón verde...

Page 34: ...piezas 3 Suelte la hebilla y coloque las correas del arnés alrededor de los apoyabrazos 4 Siente a su hijo en el asiento de seguridad para niños y ajuste las correas del arnés alrededor del niño 5 Abroche la hebilla del arnes Las lenguestas estan bien enganchadas si escucha clic cuando las inserta 7 Ajuste el broche pectoral El broche pectoral debe quedar en la mitad del pecho a la altura de las a...

Page 35: ... de la reposacabeza en permitirá un acceso más fácil a la guía del cinturón transversal Modo regulable ADVERTENCIA Solo debe usarse el cinturón de banda horizontal y transversal cuando se esté sujetando al niño utilizando el modo regulable Utilice las guías del cinturón de banda transversal del asiento de seguridad para niños a fin de garantizar un ajuste correcto Asegúrese de que la banda horizon...

Page 36: ...de ajuste del arnés 18 Palanca de ajuste de la reclinación 6 7 8 13 15 17 16 18 3 2 1 4 9 10 11 5 FEATU R I N G SISTEMA DE INSTALACIÓN PARA UN AJUSTE RÁPIDO Y SEGURO 14 12 19 Etiqueta con la fecha de fabricación y de el numero de serie 20 Dispositivo de ajuste del Versa Tether 21 Gancho del Versa Tether 22 Versa Tether correa de anclaje superior 23 Correa sobre del Versa Tether 24 Correa del arnés...

Page 37: ...locado en la posición más cercana a la altura de los hombros del niño o por encima Ajuste de la posición de la hebilla Extracción de la hebilla 1 Desabroche el arnés presionando el botón de desbloqueo y tirando de las lengüetas 2 Abra el CLICKTIGHT Localice las dos ranuras en la cubierta del CLICKTIGHT Presione las palancas de desbloqueo del CLICKTIGHT 4 Gire el dispositivo de retención de la hebi...

Page 38: ...ículo una vez instalado 2 Posición vertical 3 Posición reclinada Anclajes inferiores y ranuras de retención para niños sistema LATCH UBICACIONES DE LOS ANCLAJES DEL SISTEMA LATCH Anclaje de retención Anclajes inferiores Anclajes inferiores Reposacabezas del asiento del vehículo Anclajes de retención con orientación delantera Sistema retráctil del cinturón de seguridad del vehículo Cinturón de segu...

Page 39: ...nto de anclaje de las correas de retención superiores en su vehículo O BIEN O BIEN 2 Presione con fuerza el gancho situado encima del punto del anclaje de retención Para acoplar el Versa Tether a un anclaje de retención 1 Quite la correa de la cinta elástica y afloje el Versa Tether IMPORTANTE Utilice la cinta elástica para sujetar la correa sobrante Asegúrese siempre de que cualquier correa sobra...

Page 40: ...nte de si las lazadas han salido por la parte posterior del asiento y de si las puntadas de color están rotas 1 2 3 2 Abra el broche pectoral a Presione las lengüetas b Separe las dos piezas 4 Abra el CLICKTIGHT Localice las dos ranuras en la cubierta del CLICKTIGHT Presione las palancas de desbloqueo del CLICKTIGHT 5 Desacople los enganches de retención que se encuentran en la parte posterior de ...

Page 41: ... del CLICKTIGHT Presione las palancas de desbloqueo del CLICKTIGHT para abrirlo 6 Coloque la almohadilla abdominal para el sistema de abrochado hacia delante y póngala encima de la palanca de ajuste de la correa del arnés 2 Desacople los enganches de retención que se encuentran en la parte posterior de la cubierta del asiento Tire de la cubierta del asiento y de la pieza de espuma hacia delante 5 ...

Page 42: ...eas del arnés para extraerlas de las ranuras 9 Tire de la correa de ajuste para tensar el arnés Tense la correa de ajuste del arnés tirando de ella hacia fuera del asiento de seguridad para niños de manera paralela al suelo 7 Gire el dispositivo de retención de la hebilla y páselo por la ranura del exterior del asiento de seguridad para niños 6 Suelte los enganches que se encuentran en la parte po...

Page 43: ...nganche la correa del arnés al anclaje CLICKTIGHT de cadera Asegúrese de que el arnés está acoplado a la parte superior del anclaje de cadera 6 Pase las correas del arnés por las ranuras de la cubierta y del exterior del asiento y por encima del placa de ajuste del arnés hacia la parte posterior del asiento de seguridad para niños Como pasar de modo regulable al modo de arnés Sustitición del arnés...

Page 44: ...y que tirar del cinturón Hebilla Hebilla 2 Sistema retráctil de bloqueo en caso de emergencia con hebilla de cierreractor a Dispone de una hebilla de cierre que impide que la banda horizontal quede holgada una vez ajustada b Tiene un sistema retráctil que se bloquea solo en caso de emergencia es decir en caso de parada repentina o de choque Cinturones de seguridad de vehículo compatibles Los asien...

Page 45: ...ehículo Si no consigue colocar la hebilla en la posición correcta DEBERÁ usar otro asiento del vehículo ADVERTENCIA La posición de la hebilla del cinturón del vehículo puede perjudicar la estabilidad del asiento de seguridad para niños Cinturones de seguridad de vehículo incompatibles ADVERTENCIA Los siguientes tipos de cinturones de seguridad de vehículos NO son compatibles con este asiento de se...

Page 46: ...cuentran en la parte delantera de la cubierta del asiento del exterior del asiento de seguridad para niños 8 Desenganche la cinta elástica de la parte inferior del CLICKTIGHT y quítele la cubierta a este Cuidado y mantenimiento 1 Afloje el arnés a Presione la palanca de desbloqueo b Tire de ambas correas del arnés hacia delante 2 Desabroche el arnés y a continuación coloque el regulador del arnés ...

Page 47: ...iento Limpieza de la cubierta LAVAR A MANO con agua fría y jabón suave COLGAR PARA SECAR a fin de evitar que encoja NO DEBE Utilizar lejía Lavar a máquina Secar a máquina Planchar Limpieza del arnés LIMPIAR CON ESPONJA utilizando agua templada y jabón suave SECAR CON TOALLA NO DEBE Desmontar el arnés Utilizar lejía Lavar a máquina Secar a máquina Planchar Limpieza del exterior del asiento LIMPIAR ...

Page 48: ...plado Cuidado y mantenimiento Extracción de la hebilla 1 Abra el CLICKTIGHT Localice las dos ranuras en la cubierta del CLICKTIGHT Presione las palancas de desbloqueo del CLICKTIGHT Limpieza de la hebilla Si el niño come y bebe en el asiento usted deberá revisar la hebilla periódicamente y limpiar los restos que pueda haber de comida o líquido solidificado 2 Desacople los enganches que se encuentr...

Page 49: ... adecuación para un propósito determinado estará limitada a la duración y a los términos expresados por escrito en esta garantía Algunos estados no admiten limitaciones en cuanto a la duración de una garantía implícita o a la exclusión o limitación de los daños y perjuicios directos o indirectos por lo tanto es posible que las limitaciones estipuladas anteriormente no se apliquen en su caso Esta g...

Page 50: ...96 Notas ...
Page 51: ...Britax Child Safety Inc 4140 Pleasant Road Fort Mill SC 29708 USA A Britax Childcare Group Limited company Tel 1 888 427 4829 1 704 409 1700 www Britax com ...

Reviews: