background image

MODELS BHFLED80 • BHF80


Page 1

HEATER / FAN / LIGHT

READ AND SAVE THESE INSTRUCTIONS

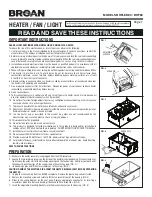
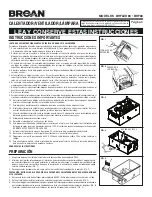
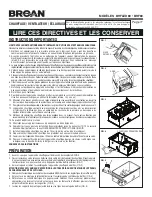
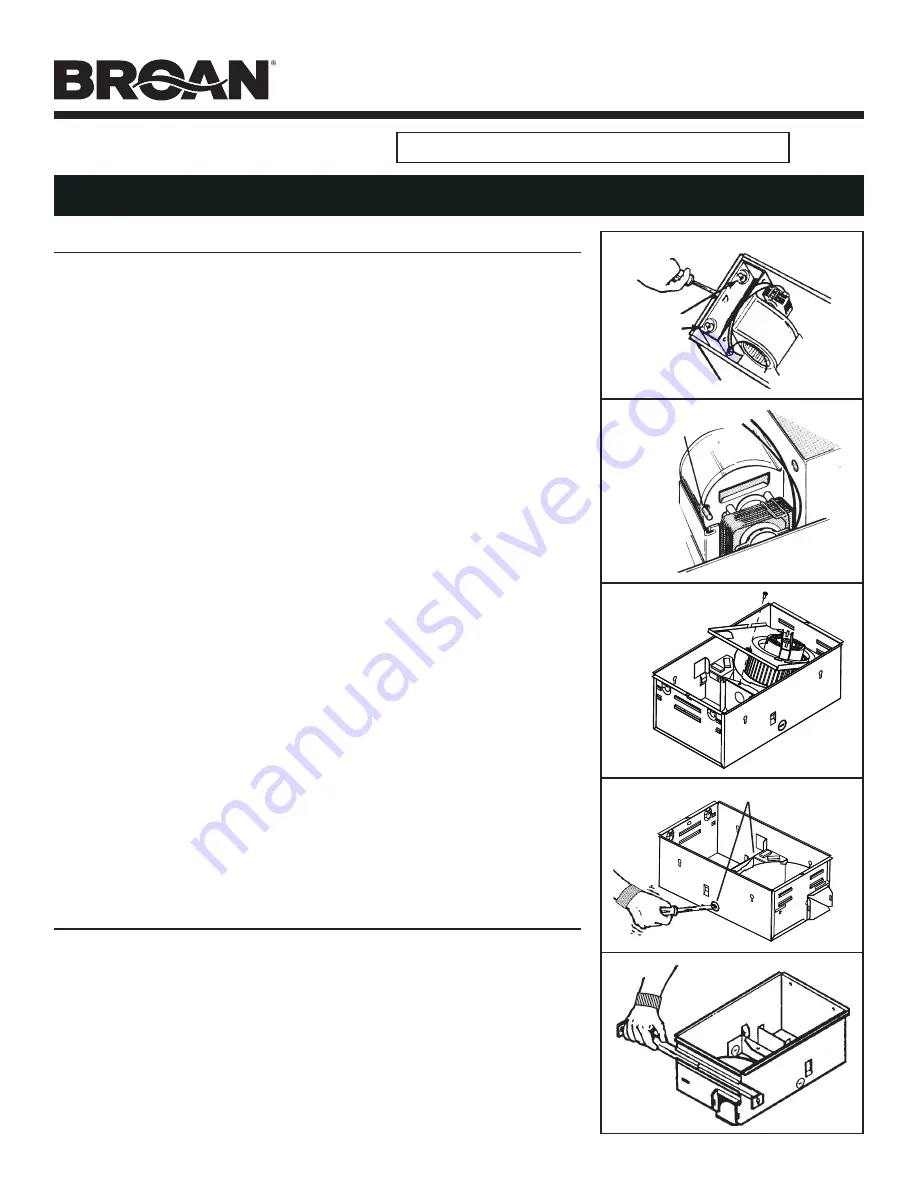
FIG. 1

FIG. 2

FIG. 3

FIG. 4

FIG. 5

RETAINING 
SCREWS

HINGE PIN

IMPORTANT INSTRUCTIONS

READ ALL INSTRUCTIONS BEFORE INSTALLING OR USING THIS  HEATER.

To reduce the risk of fire, electric shock, or injury to persons, observe the following:

1. Use this unit only in the manner intended by the manufacturer. If you have questions, contact the 

manufacturer at the address or telephone number listed in the warranty.

2.  Before servicing or cleaning unit, switch power off at service panel and lock the service disconnecting 

means to prevent power from being switched on accidentally. When the service disconnecting means 
cannot be locked, securely fasten a prominent warning device, such as a tag, to the service panel.

3.  Installation work and electrical wiring must be done by a qualified person(s) in accordance with all 

applicable codes and standards, including fire-rated construction codes and standards.

4.  When cutting or drilling into wall or ceiling, do not damage electrical wiring and other hidden utilities.

5. This heater is hot when in use. To avoid burns, do not let bare skin touch hot surfaces. Keep 

combustible materials, such as furniture, pillows, bedding, papers, clothing, curtains, etc. at least
3 feet (0.9 m) from the front of the heater.

6.  Extreme caution is necessary when any heater is used by or near children or invalids and whenever 

the heater is left operating and unattended.

7.  Do not operate any heater after it malfunctions. Disconnect power at service panel and have heater 

inspected by a reputable electrician before reusing.

8.  Do not use outdoors.

9. To disconnect heater, turn controls to off, and turn off power to heater circuit at main disconnect 

panel (or operate internal disconnect switch, if provided).

10.  Do not insert or allow foreign objects to enter any ventilation or exhaust opening, as this may cause 

an electric shock or fire, or damage the heater.

11.  To prevent a possible fire, do not block air intakes or exhaust in any manner.

12.  A heater has hot and arcing or sparking parts inside. Do not use it in areas where gasoline, paint, or 

flammable vapors or liquids are used or stored.

13. Use this heater only as described in this manual. Any other use not recommended by the 

manufacturer may cause fire, electric shock, or injury to persons.

14. This product must be grounded.

15.  Do not install heater in a tub or shower enclosure.

16.  This product is designed for ceiling installation only. This product is designed for installation in 

ceilings up to a12/12 pitch. Ductwork must point up. DO NOT MOUNT THIS PRODUCT IN A WALL.

17.  Install heater at least 6 inches from floor or any adjacent wall.

18.  Do not connect heater to dimmer switch or speed control.

19.  Provide a separate 20 AMP circuit. Use 12 GA. power cable of type which meets code. 

20.  For greatest efficiency, install heater so heat is directed toward tub or shower area.  Avoid directing 

toward walls or windows.

SAVE THESE INSTRUCTIONS

PREPARATION

1.  Make sure the heater assembly is unplugged from the RED receptacle.
2.  Loosen the two retaining screws on the inside of the heater discharge opening. Place a screwdriver 

tip between the outer wall of the discharge opening and the fan housing.  Gently pry outward until 
the exhaust discharge slips off the support lip on the outer housing. (FIG. 1)

3.  Unhook hinge pins and lift heater assembly out of housing. (FIG. 2)

CAUTION: REMOVE THE SHIPPING RING FROM THE HEATER BLOWER INLET BEFORE OPERATING 
THE HEATER.

4.  Unplug the fan assembly from the BLACK receptacle.  Remove the plastic bag and set it aside.
5.  Remove the mounting screw and carefully lift the fan assembly out of the housing. (FIG. 3)
6.  Refer to the wiring diagram on the next page. Remove appropriate knockout(s) by inserting a 

screwdriver blade into slots and bending it back and forth to break tabs. (FIG. 4)

7.  Insert the adjustable mounting brackets into the bracket channels on the housing. (FIG. 5)

For Warranty Statement, Service Parts, Technical Support, or to Register your product, 
please visit our website www.broan-nutone.com or call 800-558-1711.

KNOCKOUTS

Summary of Contents for BHF80

Page 1: ...prevent a possible fire do not block air intakes or exhaust in any manner 12 A heater has hot and arcing or sparking parts inside Do not use it in areas where gasoline paint or flammable vapors or liquids are used or stored 13 Use this heater only as described in this manual Any other use not recommended by the manufacturer may cause fire electric shock or injury to persons 14 This product must be...

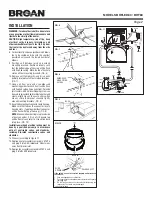
Page 2: ...n be used to join extended brackets together and create a rigid mount To ensure a noise free mount crimp the bracket channels tightly around mounting brackets FIG 8 12 Snapthedamper ductconnectorontohousing Make sure that tabs on the connector lock in housing slots Top of damper duct connector will be flush with top of housing FIG 9 NOTE Make sure damper flap is in place inside of duct connector I...

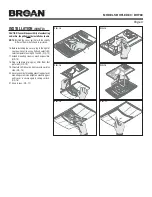
Page 3: ...IG 12 17 Extend mounting screw as much as possible FIG 13 18 Plug in light plug plug may differ from that pictured FIG 14 19 Orientate LED driver on light cover toward fan side FIG 15 20 Secure cover by threading mounting post over mounting screw Hand tighten mounting post until cover is secure against ceiling surface FIG 16 21 Snap in lens FIG 17 FIG 12 FIG 13 FIG 14 FIG 15 FIG 16 FIG 17 NOTE BHF...

Page 4: ...MODELS BHFLED80 BHF80 Page 4 OPERATION Before using heater make sure heater has been properly installed according to installation steps beginning with the PREPARATION section on page 1 ...

Page 5: ...mer service department at 800 558 1711 LUBRICATION The heater is permanently lubricated and never needs oiling or disassembly CLEANING Clean heater once a month as follows 1 Turn off power at service panel 2 Make sure heating element is cool 3 Use a soft brush attachment to gently vacuum grille openings or wipe grille clean with a soft cloth 4 Restore power CAUTION METAL AND ELECTRICAL PARTS SHOUL...

Page 6: ...incendio no bloquee la entrada o salida del aire de ninguna manera 12 El calentador tiene piezas calientes y que pueden generar arcos eléctricos o chispas en el interior No lo use en áreas donde se use o almacene gasolina pintura o vapores o líquidos flamables 13 Use este calentador solamente como se describe en este manual Cualquier otro uso no recomendado por el fabricante puede ocasionar un inc...

Page 7: ... silencioso dobleloscanalesdelsoporteajustadamente alrededor de los soportes de montaje FIG 8 12 Conecte a presión el conector del regulador de tiro conducto en la cubierta Asegúrese de que las lengüetas del conector queden fijas en las ranuras de la cubierta La parte superior del conector del regulador de tiro conducto quedará al ras con la parte superior de la cubierta FIG 9 NOTA Asegúrese de qu...

Page 8: ...a en cualquiera salida y seleccionar la temperatura de color LED con el interruptor CCT FIG 12 17 Extender el tornillo de montaje lo más posible FIG 13 18 Conectar el enchufe de la luz el enchufe puede diferir de lo mostrado FIG 14 19 Orientar el controlador LED de la cubierta de la luz hacia el lado del ventilador FIG 15 20 Sujetar la cubierta colocando la varilla roscada sobre el tornillo de mon...

Page 9: ...S BHFLED80 BHF80 FUNCIONAMIENTO Antes de usar el calentador asegúrese de que el calentador se haya instalado adecuadamente de acuerdo con los pasos de instalación que comienzan en la sección PREPARACIÓN en la página 5 ...

Page 10: ... calentador está permanentemente lubricado y nunca necesitará ponerle aceite ni desarmarlo LIMPIEZA Limpie el calentador una vez al mes tal como sigue 1 Apague la energía eléctrica en el panel de servicio 2 Asegúrese de que el elemento de calefacción esté frío 3 Use un aditamento con un cepillo suave para aspirar suavemente las aberturas de la rejilla o limpie la rejilla con un paño suave 4 Restau...

Page 11: ... n obstruezpaslesprisesd airetlessortiesdequelquemanièrequecesoit 12 L appareil de chauffage contient des pièces brûlantes et qui produisent des arcs ou des étincelles à l intérieur Ne l utilisez pas dans un endroit où de l essence de la peinture ou des vapeurs ou liquides inflammables sont utilisés ou entreposés 13 N utilisez cet appareil de chauffage que tel qu expliqué dans ce manuel Toute autr...

Page 12: ... pincez fermement les bords du guide sur les supports de montage FIG 8 12 Fixez le clapet raccord de conduit sur le boîtier Assurez vous que les pattes sur le raccord de conduit s emboîtent dans les fentes du boîtier La partie supérieure du clapet raccord de conduit sera à ras avec la partie supérieure du boîtier FIG 9 NOTE Assurez vous que le volet du clapet soit en place à l intérieur du raccord...

Page 13: ...Déployez la vis de montage autant que possible FIG 13 18 Branchez la prise d éclairage la prise peut différer de celle illustrée FIG 14 19 Orientez le pilote à DEL sur le couvercle de la lumière vers le ventilateur FIG 15 20 Sécurisez le couvercle en vissant la tige de montage sur la vis de montage Serrez la tige de montage à la main jusqu à ce que le couvercle soit bien fixé contre la surface du ...

Page 14: ... 14 MODÈLES BHFLED80 BHF80 FONCTIONNEMENT Avant d utiliser l appareil de chauffage assurez vous qu il est correctement installé selon les directives indiquées à partir de la section PRÉPARATION à la page 11 ...

Page 15: ...auffage est lubrifié en permanence et n a pas besoin d être huilé ni démonté NETTOYAGE Nettoyez l appareil de chauffage une fois par mois comme suit 1 Coupez le courant au panneau de service 2 Assurez vous que l élément de chauffage est frais 3 Enlevez la poussière des ouvertures de la grille à l aide d un aspirateur muni d une brosse à poils doux ou nettoyez les à l aide d un chiffon 4 Rétablisse...

Reviews: