background image

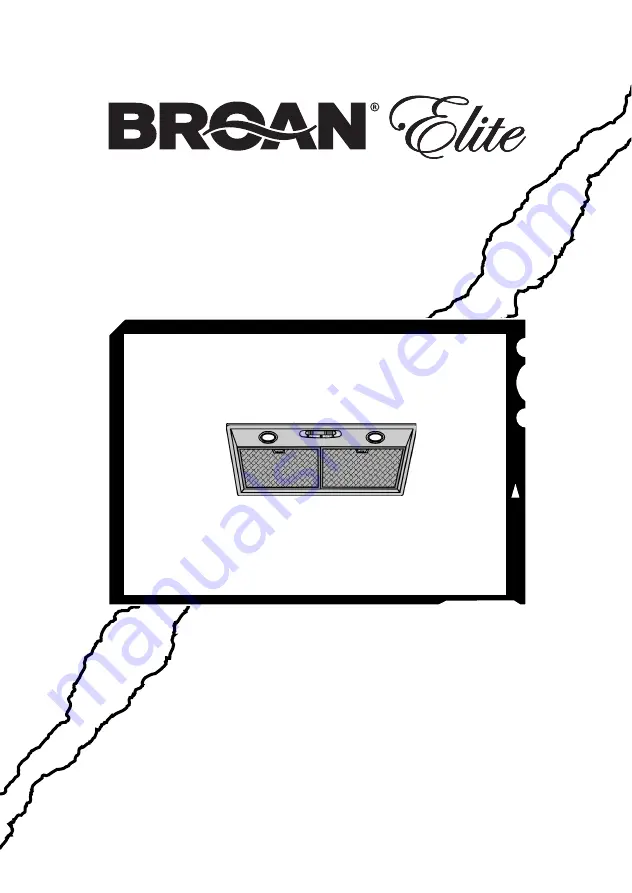
ENGLISH....................................2
FRANÇAIS...............................11
ESPAÑOL.................................20

RMP1 Series

In USA - BROAN Hartford, Wisconsin
In CANADA - BROAN Drummondville, QC, Canada

REGISTER YOUR PRODUCT ONLINE AT : www.Broan.com/register

For additional Information visit www.Broan.com

Summary of Contents for RMP1 Series

Page 1: ...2 FRANÇAIS 11 ESPAÑOL 20 RMP1 Series In USA BROAN Hartford Wisconsin In CANADA BROAN Drummondville QC Canada REGISTER YOUR PRODUCT ONLINE AT www Broan com register For additional Information visit www Broan com ...

Page 2: ...lways be vented to the outdoors 7 Do not use this unit with any separate solid state speed control device 8 To reduce the risk of fire use only metal ductwork 9 This unit must be grounded TO REDUCE THE RISK OF A RANGE TOP GREASE FIRE A Never leave surface units unattended at high settings Boilovers cause smoking and greasy spillovers that may ignite Heat oils slowly on low or medium settings B Alw...

Page 3: ...it 7 Your hood motor has a thermal overload which will automatically shut off the motor if it becomes overheated The motor will restart when it cools down If the motor continues to shut off and restart have the hood serviced 8 For best capture of cooking impurities the bottom of the hood should be a minimum of 24 and a maximum of 30 above the cooking surface 9 Two installers are recommended becaus...

Page 4: ...HOOD Unpack hood and check contents You should receive 1 Hood 1 Discharge Collar 1 Parts Bag B080810168 containing 4 Mounting Screws 3 2 x 13mm 1 Installation Instructions 4 MOUNTING SCREWS 3 2 x 13mm DISCHARGE COLLAR ...

Page 5: ...CT HOOD WALL CAP 6 ROUND ELBOW 24 TO 30 ABOVE COOKING SURFACE INSTALL THE HOOD 1 Remove the grease filters by pushing filter towards the back of hood and rotating filter downward 2 Remove the metal grille by turning the 2 knobs counterclockwise 3 Cut a hole in the bottom of the cabinet using the dimensions shown 4 Adjust the position of the clasping side spring by means of the proper screw accordi...

Page 6: ...metal duct to the discharge opening so that the air is sent outside the cabinet and sent back into the room 2 Use duct tape to make all joints secure and air tight DISCHARGE COLLAR 6 ROUND METAL DUCT NON DUCTEDRECIRCULATION FILTER INSTALLATION 1 Position the filters over the blower 2 Rotate to lock filters in place 3 Purchase replacement filter packs contains 2 from your dealer Part No B03300487 N...

Page 7: ...re with a grounding plug The plug must be plugged into an outlet that is properly installed and grounded WARNING Improper grounding can result in a risk of electric shock Consult a qualified electrician if the grounding instructions are not completely understood or if doubt exists as to whether the appliance is properly grounded Do not use an extension cord If the power supply cord is too short ha...

Page 8: ...rks For discolorations or deposits that persist use a non scratching household cleanser or stainless steel polishing powder with a little water and a soft cloth For stubborn cases use a plastic scouring pad or soft bristle brush together with cleanser and water Rub lightly in direction of polishing lines or grain of the stainless finish Avoid using too much pressure which may mar the surface DO NO...

Page 9: ...lower will return to its original setting WARNING The HEAT SENTRY thermostat can start the blower even if the hood is turned OFF When this occurs it is impossible to turn the blower OFF with its switch If you must stop the blower do it from the main electrical panel LIGHT SWITCH PILOT LAMP BLOWER SWITCH HALOGEN BULBS This range hood requires two halogen bulbs Type GU10 MR16 shielded 120V 50W ALWAY...

Page 10: ...y implied warranty is limited to the one year period as specified for the express warranty Some states do not allow limitation on how long an implied warranty lasts so the above limitation may not apply to you BROAN NUTONE S OBLIGATION TO REPAIR OR REPLACE AT BROAN NUTONE S OPTION SHALL BE THE PURCHASER S SOLE AND EXCLUSIVE REMEDY UNDER THIS WARRANTY BROAN NUTONE SHALL NOT BE LIABLE FOR INCIDENTAL...

Page 11: ...ez pas cet appareil avec un appareil contrôlant la vitesse à état solide 8 Afindediminuertoutrisqued incendien utilisezquedesconduitsenmétal 9 Votre appareil doit être relié à la terre ATTENTION POUR REDUIRE LES RISQUES D INCENDIE DES MATIERES GRASSES QUI SONT EN TRAIN DE CUIRE A Ne laissez jamais ni vos éléments chauffants ni vos casseroles ou poêles sur le feu sans les contrôler si vous réglez l...

Page 12: ... dangereuses ou qui peuvent exploser 6 Pour éviter de causer des dommages au moteur et de rendre les rotors bruyants et ou non équilibrés évitez que les sprays pour murs secs la poussière de construction entrent en contact avec la partie électrique 7 Le moteur de votre hotte a un thermostat qui éteindra automatiquement le moteur s il est surchauffé Le moteur se remettra en marche lorsqu il se sera...

Page 13: ...otte dans l emballage et controller le contenu Vous devez recevoir 1 Hotte 1 Collier d évacuation 1 Sachet B080810168 avec 4 Vis d assemblage 3 2 x 13 1 Instructions pour l installation COLLIER D EVACUATION 4 VIS D ASSEMBLAGE 3 2 x 13mm ...

Page 14: ...AN DE CUISSON COUVERCLE DU TOIT TUYAU ROND COU VERCLE DU MUR COUDE ROND DE 6 FILTRES ANTI GRAISSE GRILLE METALLIQUE 10 1 4 FAITES LE TROU DANS LE PLACARD MURAL min 7 16 max 13 16 RESSORT LATERAL VIS D ASSEMBLAGE 3 2x13mm INSTALLATION DE LA HOTTE 1 Enlevez les filtres anti graisse en les poussant vers l arrière de votre hotte et en les faisant tourner vers le bas 2 Enlevez la grille métallique en t...

Page 15: ...évacuation de l air à un tuyau rond en métal de 6 15cm de sorte que l air soit convoyé en dehors du placard murale et renvoyé dans la pièce 2 Utilisez un ruban pour tuyauterie afin de rendre toutes les jonctions sures et étanches COLLIER D EVACUATION TUYAUROND EN METAL DE 6 FILTRES A CHARBON ASSEMBLAGE DES FILTRES A CHARBON MODELE RECYCLANT L AIR 1 Placez les filtres au dessus du ventilateur 2 Grâ...

Page 16: ...erre La fiche doit être branchée dans une prise de courant correctement installée et mise à la terre ATTENTION Une mise à la terre incorrecte peut entraîner un risque de décharge électrique Consulter un électricien spécialisé si les instructions de mise à la terre ne sont pas tout à fait compréhensibles ou en cas de doute sur le fait de savoir si l appareil est correctement relié à la terre Ne pas...

Page 17: ...ter les taches d eau O Si des décolorations ou des dépôts persistent utilisez un nettoyant domestique non abrasif ou de la poudre pour l acier inoxydable et un peu d eau et un chiffon doux O Dans les cas difficiles utilisez une éponge en plastique ou une brosse douce avec du nettoyant et de l eau Frottez légèrement en suivant la direction du polissage ou du grain de l acier inoxydable Evitez de fr...

Page 18: ... vitesse du ventilateur s il détecte une chaleur excessive au dessus de la surface de cuisson 1 Si le ventilateur n est pas en marche il actionnera le ventilateur en haute vitesse 2 Si le ventilateur fonctionne en basse vitesse le ventilateur tournera en haute vitesse Lorsque la température revient à la normale le ventilateur retourne à sa vitesse d origine AVERTISSEMENT Le thermostat HEAT SENTRYM...

Page 19: ...pas a les frais d entretien ou de service normaux ni b tout produit ou toute pièce soumis à une utilisation inadéquate une négligence un accident un entretien ou une réparation inadéquats autres que ceux effectués par Broan NuTone une mauvaise installation ou une installation contraire aux instructions recommandées Laduréedetoutegarantietaciteestlimitéeàlapériodedeunanstipuléepourlagarantieexpress...

Page 20: ...ad a estado sólido 8 Para evitar el riesgo de incendio use solamente conductos de metal 9 Esta unidad tiene que ser conectada a tierra PARA EVITAR EL RIESGO DE FUEGO POR ALTO NIVEL DE GRASA A Nunca abandone los quemadores con el fuego alto La cocción causa humo y restos de grasa que pueden arder Caliente el aceite a fuego medio o bajo B Encienda siempre la campana cuando cocine a fuego alto o cuan...

Page 21: ...ne un nivel de sobrecarga térmica que apaga automáticamente el motor cuando se ha recalentado excesivamente El motor se pone de nuevo en fincionamento cuando la temperatura baja Si el motor comienza a encenderse y a apagarse deberá hacer una revisión de éste 8 Para limpiar mejor las impurezas al cocinar la distancia entre la parte inferior de la campana y la zona de cocción debe ser mínimo 24 maxi...

Page 22: ...Sacar la campana de l embalaje y controlar el contenido Recivireis 1 Campana 1 Casquillo 1 Bolsita B080810168 con 4 Tornillos de montaje 3 2 x 13mm 1 Instrucciones para instalación 4 TORNILLOS DE MONTAJE 3 2 x 13mm CASQUILLO ...

Page 23: ... UBIERTA DEL TEJADO TUBO CAMPANA TAPA PARED MANGUITO DE 6 FILTROS ANTIGRASA REJILLA METÁLICA 10 1 4 HACER EN LA BASE DEL ARMARIO LA ABERTURA min 7 16 max 13 16 ENGANCHE LATERAL TORNILLOS DE MONTAJE 3 2x13mm 7 16 11mm 13 16 21mm 10 1 4 261mm INSTALACIONDELACAMPANA 1 Extraiga los filtros antigrasa tirando de ello hacia atrás de la campana y girándolos hacia abajo 2 Quitar la rejilla metálica girando...

Page 24: ... metal de 6 15cm de diámetro a la boca de la salida de aire de la campana de manera que el aire sea transportado fuera del armario y devuelto al ambiente 2 Use cinta para ajustar todas las junturas y que quede hermético CASQUILLO TUBO DE METAL DE 6 FILTROS AL CARBÓN INSTALACION FILTROS AL CARBÓN CONFIGURACION SIN TUBO 1 Instale los filtros sobre el aspirador 2 Gire los filtros para ajustarlos en s...

Page 25: ...posee un hilo de toma de tierra con una clavija de tierra La clavija se debe conectar a un enchufe instalado correctamente y conectado a tierra ADVERTENCIA una conexión a tierra incorrecta puede provocar riesgos de electrocución Consulte a un electricista calificado si no se entienden o si existe alguna duda sobre la correcta conexión a tierra No utilice un cable de prolongación Si el cable propor...

Page 26: ...o suave y limpio para evitar las huellas que deja el agua O Para las manchas o restos de grasa que persistan use un producto químico doméstico que no raye ó un limpiador para acero inoxidable con poca agua y un paño suave O Si las manchas persisten use un estropajo y un cepillo de cerdas suaves con un producto limpiador y agua Frote suavemente en el sentido del pulido o de las vetas del remate del...

Page 27: ...e encenderáo aceleratáel ventilador si se detecta un calor excesivo encima de la cocina 1 Si el ventilador esta apagando el se prenderá a una velocidad máxima 2 Si el ventilador esta encendido a una velocidad minima el se prenderá a una velocidad máxima Cuando la temperatura disminuye a un nivel normal el ventilador vuelve a la función de origen AVERTENCIA El HEAT SENTRYmr termostato puede comenza...

Page 28: ... partes de éstos que hayan sido usados de forma incorrecta con negligencia rotos accidentalmente o por una incorrecta manutención ó reparación distinta da la realizada por Broan NuTone montaje incorrecto ó instalación que no se ajuste a las instrucciones de montaje indicadas Le duración de la garantía se limita al periodo de un año como está especificado en la garantía explicita Algunos paises no ...

Page 29: ... DICHARGE COLLAR 145 B032920170 FEEDER CABLE CONNECTION BOX 146 B032920180 FEEDER CABLE CONNECTION BOX COVER 147 BR2300132 TERMINAL BLOCK 151 B032920200 WIRE CLAMP 152 B03292200 WIRE CLAMP 165 B03294780 CONTROL BOX 165 B03295008 CONDENSER BOX 166 B08086668 BOARD 195 BE3349127 LAMP SUPPORT 202 B03294779 RUNNER WIRES 222 B03295080 CONTROL COVER 223 B03295082 MOTOR BOTTON 228 B08086285 CONTROLS BOARD...

Page 30: ...MENTATION 86 B08088378 COLLIER D EVACUATION 145 B032920170 BOITE CABLE ALIMENTATION 146 B032920180 COUVERCLE BOITE CABLE ALIMENTATION 147 BR2300132 BORNE 151 B032920200 SERRE CABLE 152 B03292200 SERRE CABLE 165 B03294780 BOITE COMMANDES 165 B03295008 BOITE CONDENSATEUR 166 B08086668 CIRCUIT IMPRIME 195 BE3349127 SUPPORT LAMPE 202 B03294779 SERRE CABLE 222 B03295080 COUVERCLE COMMANDES 223 B0329508...

Page 31: ...LA ANTIVIBRAZIONES 60 B02300249 CABOS 86 B08088378 CASQUILLO 145 B032920170 CAJA CABOS ALIMENTACIÓN 146 B032920180 TAPA DE LA CAJA CABOS ALIMENTACIÓN 147 BR2300132 CUADRO ELÉCTRICO 151 B032920200 SUJETA CABOS 152 B03292200 SUJETA CABOS 165 B03294780 CAJA DE MANDOS 165 B03295008 CAJA CONDENSADOR 166 B08086668 BASE 195 BE3349127 SOPORTE LÁMPARA 202 B03294779 SUJETA CABOS 222 B03295080 TAPA MANDOS 22...

Page 32: ...SERVICE PARTS LISTE PIECES DE RECHANGE LISTA DE PIEZAS DE RECAMBIO MODEL RMP1 04307766 4 ...

Reviews: