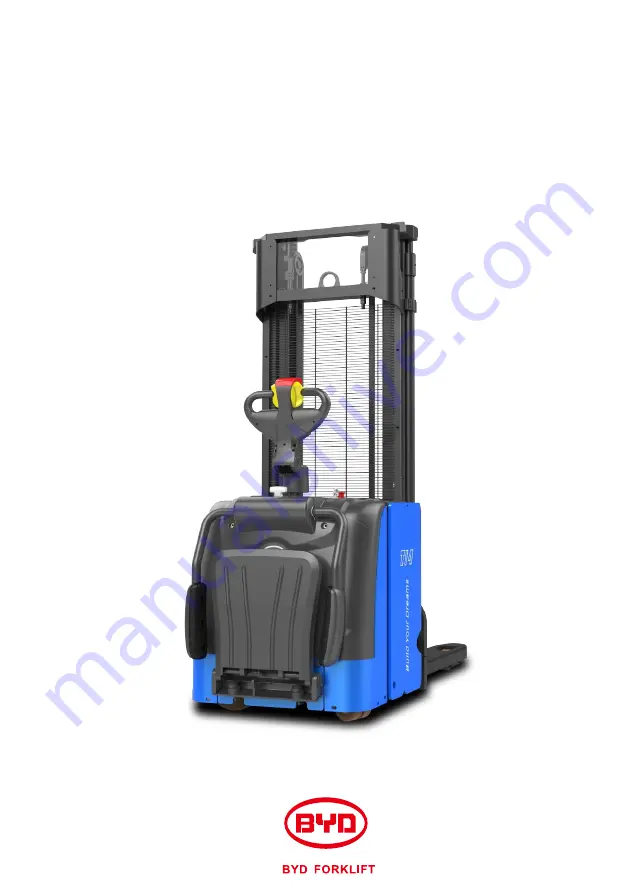
background image


EPS14Pi

USER MANUAL

<


OM-

EPS14Pi

2019001-

E

N


>

Summary of Contents for EPS14Pi

Page 1: ...EPS14Pi USER MANUAL OM EPS14Pi2019001 EN ...

Page 2: ...EPS14Pi USER MANUAL OM EPS14Pi2019001 EN ...

Page 3: ...ATTERY LOAD DIAGRAM OTHER SIGNS 20 OPERATION START AND CONTROL IGNITION SWITCH 22 22 22 23 24 25 26 26 27 27 EMERGENCY STOP SWITCH PEDAL CONTROL HANDLE DRIVING STEERING AND BARKING LOW SPEED SWITCH LOWER AND LIFT THE PALLET FORK LIFT AND LOWER DOWN THE REAR FORKLIFT BODY PERFORM SYNCHRONOUS OPERATION OF STACKING AND TRANSPORTING HORN ANTI COLLISION SWITCH 28 29 LOADING 31 DRIVING 32 UNLOAD 32 LEAV...

Page 4: ...GEAR OIL 52 MAINTAIN MAST 53 55 55 ADJUST CHAIN LUBRICATE CHAIN CLEAN MAST ADJUST MAST CLEARANCE 56 MAINTAIN HYDRAULIC DEVICE 58 ADD HYDRAULIC OIL REPLACE HYDRAULIC OIL 59 MAINTAIN ELECTRIC DEVICE 60 60 60 CHECK TORQUE OF KEY FASTENERS 61 62 SCHEMATIC DIAGRAMS 63 HYDRAULIC SCHEMATIC DIAGRAM ELECTRICAL SCHEMATIC DIAGRAM 64 TABLE OF FAULT CODES TABLE OF FAULT CODES 65 OTHER INFORMATION CONTACT INFOR...

Page 5: ...he normal operation of the forklift you shall inspect and accept carefully and shall be obliged to re inspect the following items when handing over the forklift 1 Check tightness of the wheel nuts 2 Check the level of hydraulic oil 3 Check braking function 4 Check driving function 5 Check steering function 6 Check mast and operating function of accessories 7 Check whether high voltage connection t...

Page 6: ...ate the in dustrial forklift under the law The user or other entrusting party must confirm the driving license of the operator first and authorize the operator to operate after the corresponding driving test 2 The company responsible for operating shall ensure that the driver can identify the nameplate and load diagram of the forklift as well as safety warning signs attached on the forklift learn ...

Page 7: ...of gravity centered so as to avoid slipping 4 Do not make any private changes If necessary please contact dealers or after sale personnel of BYD 5 Do not overload Please confirm the rated load and the load center on the weight table before operating Please obey marking weight on the load nameplate of appliance when installing other appliances 6 Do not operate the forklift after drinking Otherwise ...

Page 8: ... SWITCH 14 GUARDRAIL 3 FORK 9 INSTRUMENT 15 PEDAL 4 MAST 10 IGNITION SWITCH 16 FRONT FORKLIFT BODY 5 GRID GUARD 11 GUARD PLATE 17 REAR FORKLIFT BODY 6 UPPER COVER PLATE 12 BALANCE WHEEL TECHNICAL PARAMETERS DIMENSION FIGURE OF THE ENTIRE FORKLIFT SHAPE TECHNICAL PARAMETERS AND OPERATING ENVIRONMENT SHAPE OF THE ENTIRE FORKLIFT NO PART NAME NO PART NAME OM EPS14Pi2019001 EN ...

Page 9: ...E CENTER m2 mm 27 AISLE WIDTH 1000 1200 Ast mm 2628 AISLE WIDTH 800 1200 Ast mm 2515 LH RH Wa mm 1802 PERFOR MANCE DRIVING SPEED FULL LOAD EMPTY km h 8 9 LIFTING SPEED FULL LOAD EMPTY mm s 160 230 RATE OF DESCENT FULL LOAD EMPTY mm s 370 230 GRADEABILITY FULL LOAD EMPTY 9 16 DRIVE MOTOR RIVE MOTOR POWER kw 1 3 LIFT MOTOR POWER kw 3 BATTERY VOLTAGE CAPACITY V Ah 24 270 OPERATING AND STORAGE ENVIRON...

Page 10: ...Please check and confirm NAMEPLATE OF THE BATTERY Opera ng Condi ons Iron Phosphate Battery Ambient Temperature Rela ve Humidity Cell Model Nominal Capacity Nominal Voltage Opera ng Voltage Rated Opera ng Current Made in China Weight Basic Performance Caution Before operation you must be familiar with specific requirement for output configuration by referring to the instruction manual Serial No Mo...

Page 11: ...ift and the intensity of the associated parts OTHER SIGNS Please pay attention to checking notes or warning signs posted around the track OPERATION This chapter will describe how to operate BYD electric forklifts LOAD DIAGRAM When the forklift increases its lift height its load capacity decreases instead According to the load diagram the lift height corresponds to the rated lift capacity It is sup...

Page 12: ...gency stop button The power supply will restart when turning up the emergency stop button Guardrail and pedal Guardrail Before operating the forklift open the guardrail to protect the operator when turning PEDAL Open the pedal downwards and then use it Note If the guardrails and pedals are not opened the running speed of a forklift will be limited When the pedal safety switch and guardrail safety ...

Page 13: ... handle is placed in areas A1and A3 Release the acceleration button B and then the brake will be applied When the speed of the forklift is 0 the forklift will brake immediately A1 A2 A3 B LOW SPEED SWITCH Press the button below the control handle to start the low speed mode 1 DRIVING Place the control handle in area A2 Turn the driving button forward or backward to realize driving forward or backw...

Page 14: ...he oil pump function PERFORM SYNCHRONOUS OPERATION OF STACKING AND TRANSPORTING According to the synchronous operation schematic diagram of stacking and transportation the rated load Q Unit Kg of the forklift is defined A Stacking Unload or fork cargo When lifting forward leg pay attention to the rated load depending on the lifting height B Transportation When the forward leg is lifted the mast is...

Page 15: ...CON WILL APPEAR WHEN THE FORKLIFT STARTS NORMALLY 5 INFORMATION ON TIME AND FAULT CODE WHEN THE FORKLIFT STARTS NORMALLY THE TIME WORKED WILL BE INDICATED IF A FAULT APPEARS AFTER THE FORKLIFT STARTS THE FAULT CODE WILL BE INDICATED 6 BATTERY STATE THE BATTERY LEVEL IS DISPLAYED AS 10 BARS AND EACH BAR REPRESENTS 10 OF THE BATTERY LEVEL THE NUMBER OF BARS DISPLAYED BY THE BATTERY LEVEL VARIES WITH...

Page 16: ... Put the fork on the ground 3 Insert the fork exactly into the bottom of the goods 4 Lift the fork 5 Pay attention to the road condition and pedestrians when driving and keep an ap propriate forklift speed Send goods to an assigned place 2 ELEVATED GOOD 1 Move the forklift towards the goods storing position carefully and start braking 2 Keep mast vertical and lift the fork to the bottom of goods 3...

Page 17: ...proach to it by braking and slowing down 2 Lift the fork to an appropriate height 3 Remove the fork from the bottom of the goods carefully and slowly 4 Keep mast vertical and lower the fork to an appropriate position slowly so that goods can be separate from the fork completely 5 Remove the fork from the bottom of the goods carefully and slowly 6 leave and continue the next operation LEAVE 1 Unloa...

Page 18: ...RKLIFTS LIFT FORKLIFTS 1 Lift the fork to the highest position 2 Lift by hooking the lifting port of the upper mast Ensure no one stays around the working area of the crane when lifting Use Lift equipment with sufficient load capacity when lifting forklifts SELF LOADING Drive the forklifts onto the transport truck at a low speed Warning Danger OM EPS14Pi2019001 EN ...

Page 19: ... If any please repair first 2 Carry out complete lifting and lowering operation for several times 3 Lower down the fork 4 Apply a thin coat or grease to all unpainted parts 5 Check the level of hydraulic oil If necessary add it 6 Lubricate all components completely 7 Pull out the key and ensure the electrical appliances in a rest state Press the emergency stop switch and make sure the battery powe...

Page 20: ...ng hours are more than 8 hours per day the forklift shall be inspected every 8 hours The list of items to be checked are as follows 1 2 3 4 5 6 7 8 9 ELECTRICAL CONNECTION TERMINAL AND FUSE 10 CLEAN 11 Inspect before each operation Review the last failure before routine inspection NO ITEMS 1 DAY 1 WEEK 8HOURS 40 HOURS SHAPE WHEELS MASK HYDRAULIC DEVICE INSTRUMENT WARNING APPARATUS BRAKE DRIVING ST...

Page 21: ...and whether clamp devices such as bolts are loose or fall off 1 Check whether the battery voltage and power on the instrument are displayed normally 2 Check whether a fault indicating lamp appears on the instrument 6 WARNING DEVICE 4 HYDRAULIC OIL Check the device through the level of hydraulic oil 5 INSTRUMENT 1 Press horn button and check whether the horn can honk 2 Check whether other warning d...

Page 22: ... conditions are relatively poor the maintenance period should be shortened and negotiated with the after sale personnel DESCRIPTION 1 CHASSIS Check level of gear oil If necessary add it 2 MAST 1 Check tightness of the chain If necessary adjust it 2 Lubricate the chain 3 Clean the mast 3 HYDRAUMATIC 1 Replace hydraulic oil regularly 2 Replace oil filling filter with air filter regularly 4 ELECTRIC ...

Page 23: ... APPROPRIATE AMOUNT 20 IN WINTER 40 IN OTHER SEASONS REPLACE HYDRAULIC OIL HYDRAULIC OIL BEFORE MAINTENANCE BEFORE MAINTENANCE The forklift shall be placed on firm ground before maintenance Put the handle lever in place and then stop the forklift Press the emergency stop switch and fix it with wedge EMERGENCY DESCENT The fork cannot be lowered after the forklift broke down At this point Release th...

Page 24: ...plate is removed the balance of the entire forklift should be adjusted through screws Before adjustment place the forklift on the solid level ground and then unscrew fixed bolts of the balance wheel assembly 1 When the right front part or left rear part of the forklift shakes the limit assembly of the balance wheel should be screwed up 2 When the left front part or right rear part of the forklift ...

Page 25: ...checked and adjusted CODE PART NAME QTY CODE PART NAME QTY OTHER INFORMATION OTHER INFORMATION REPLACE BALANCE WHEELS 1 Jack up the rear of the forklift and pad with solid wood Unscrew the nut and remove the balance wheel 2 Unscrew nuts and bolts and then replace balance wheels 15 HEXAGON HEADED BOLT M16 160 1 20 BALANCE WHEEL 2 16 NUT M16 1 110 N m 21 HEXAGON HEADED BOLT M12 45 1 90 N m 17 SLEEVE...

Page 26: ... OIL 1 Clean the surrounding area of the oil fill plug and unscrew it 2 Check the level of gear oil Determine whether the oil level is just below the lower edge of the nozzle If not enough add gear oil 3 After check Install the oil fill plug and its seals and tighten it 11 12 11 OIL FILL PLUG 1 30 N m 12 SEAL RING 1 1 Pay attention to your surroundings when refueling and keep dust and moisture out...

Page 27: ...ground 4 The oil level should be at the lower edge of the nozzle MAINTAIN MAST ADJUST CHAIN The main lifting chain should be adjusted in the standard mast while free lift chain is for free mast Stop on the flat ground and lower down the fork fully Close the vehicle unplug the key and press the emergency stop button Then adjust chain 1 ADJUST CHAIN OF STD MAST Unscrew upper and lower nuts on the ma...

Page 28: ...MATION CODE PART NAME QTY 2 ADJUST CHAIN OF FULLY FREE MAST 1 11 NUT UPPER 1 110 N m 13 NUT LOWER 1 110 N m 12 NUT MIDDLE 1 110 N m CODE PART NAME QTY OTHER INFORMATION OTHER INFORMATION CODE PART NAME QTY Unscrew upper and lower nuts on the main lift chain Adjust chain length by adjusting the middle nut After adjustment keep the left and right chains with same tightness and tighten the nut Unscre...

Page 29: ... DUST PROOF PIECE OF COMPOUND ROLLER 12 86 RETAINING RINGS FOR SHAFT 12 1 2 CODE PART NAME QTY OTHER INFORMATION CODE PART NAME QTY OTHER INFORMATION 2 COMMON METHOD FOR ADJUSTING CLEARANCE BETWEEN FORK CARRIAGE AND MAST 1 Lift mast and show where the adjusting screws are 2 Bend the anti loosing piece and show adjusting screws 3 Use adjusting screws to adjust mast clearance 4 After adjustment bend...

Page 30: ...AULIC POWER UNIT 1 1 Pay attention to surroundings when refueling and keep dust and moisture out of the tank 2 Don t mix hydraulic oil 3 Waste oil must be disposed of away from people and can t be dumped in waterways or on the ground 4 Using unauthorized hydraulic oil can damage the hydraulic system and thereby Only authorized hydraulic oil can be used If you need hydraulic oil of other specificat...

Page 31: ...ER INFORMATION MAINTAIN ELECTRIC DEVICE Disconnect power before the electric check CHECK CIRCUIT 1 Check whether connection terminals of the electric device are loose If any tighten it 2 Check whether the wiring connection is normal for example whether it is burnt 3 Check whether the connection sheath is loose If any tighten it CHECK THE MAIN CONTROLLER 1 Check whether connection terminals of the ...

Page 32: ...ENERS TORQUE OF THE MAST 11 11 11 11 12 12 11 BOLTS FOR FIXING MAST WITH FORKLIFT BODY 100 N m 12 SCREW FOR CONNECTINGMAST WITH THE FORKLIFT BODY 2 30 N m SCHEMATIC DIAGRAMS HYDRAULIC SCHEMATIC DIAGRAM CODE PART NAME QTY OTHER INFORMATION 4 OM EPS14Pi2019001 EN ...

Page 33: ...n state has been seen in the watchdog hardware circuit or the microcontroller output part If both of the above two are irrelevant with outer parts replace the controller 02A10 WRONG RAM Find faults when performing tests for main ram the registration address is DIRTY The fault will limit the operability of forklifts Fault analysis Close the key switch and open again If the fault still exists replac...

Page 34: ...er 02A53 STBY I HIGH The signal output from the current sensor detected by the microcontroller exceeds what is allowed by the inactive current Since the fault is irrelevant with peripheral components just replace the controller WRONG ZERO When it starts the feedback value on the high end voltage of VMN is not around 2 5V The circuit of the controller is broken Fault analysis recommend to check the...

Page 35: ...d the coil itself is good coil shorted Check whether a short circuit appears in the coils of the master contactor and oil pump contactor 02A77 CONTACTOR OPEN 1 The coil of the master contactor disconnects 2 The master contactor is broken end teach ko Not included in BYD system 02A78 VACC NOT OK Detecting time the standby state The alarm displays that the voltage of the accelerator is at least 1V h...

Page 36: ...sition proximity switch is correct WAITING FOR TRAC 1 Check if CAN BUS communication cable is connected well 2 Check if the interlock switch cable is correct 3 If the interlock switch is controlled by the handle TILLER SEITCH should be set to HANDLE KEYOFF 1 Check whether the key switch voltage receives a low voltage pulse when the external load is turned on 2 Check if B B are connected to the con...

Page 37: ...pper motor detected by the main contactor is wrong and inconsistent with the direction of the stepper motor detected from the slave contactor 3 The main contactor did not detect the steering limit but the slave contactor did 06A25 ENCODER ERROR The controller detected a significant difference in the two consecutive speed readings of the encoder since the internal encoder cannot change the speed ve...

Page 38: ...Production Address No 1 BYD Road Zhenjiang Industrial Zone Shaoguan Guangdong Zip Code 512040 Tel 86 751 810 8888 After sales address 2nd floor A4 BYD Industrial Park 1 Yan an Road Kwai Chung Street Dapeng New District Shenzhen Zip Code 518119 Tel 86 755 2386 0828 Wbesite www bydforklift com ...

Page 39: ...Build YourDreams ...

Reviews: