


cadetheat.com Tel: 855.CADET.US PO Box 1675 Vancouver, WA 98668-1675
Benefits You Can Depend On
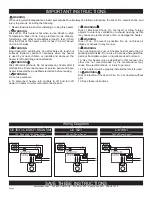
SAVE THESE INSTRUCTIONS
Energy Plus Heater
Owner’s Guide
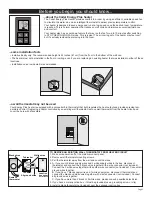
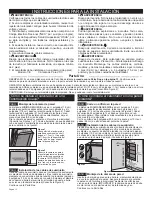
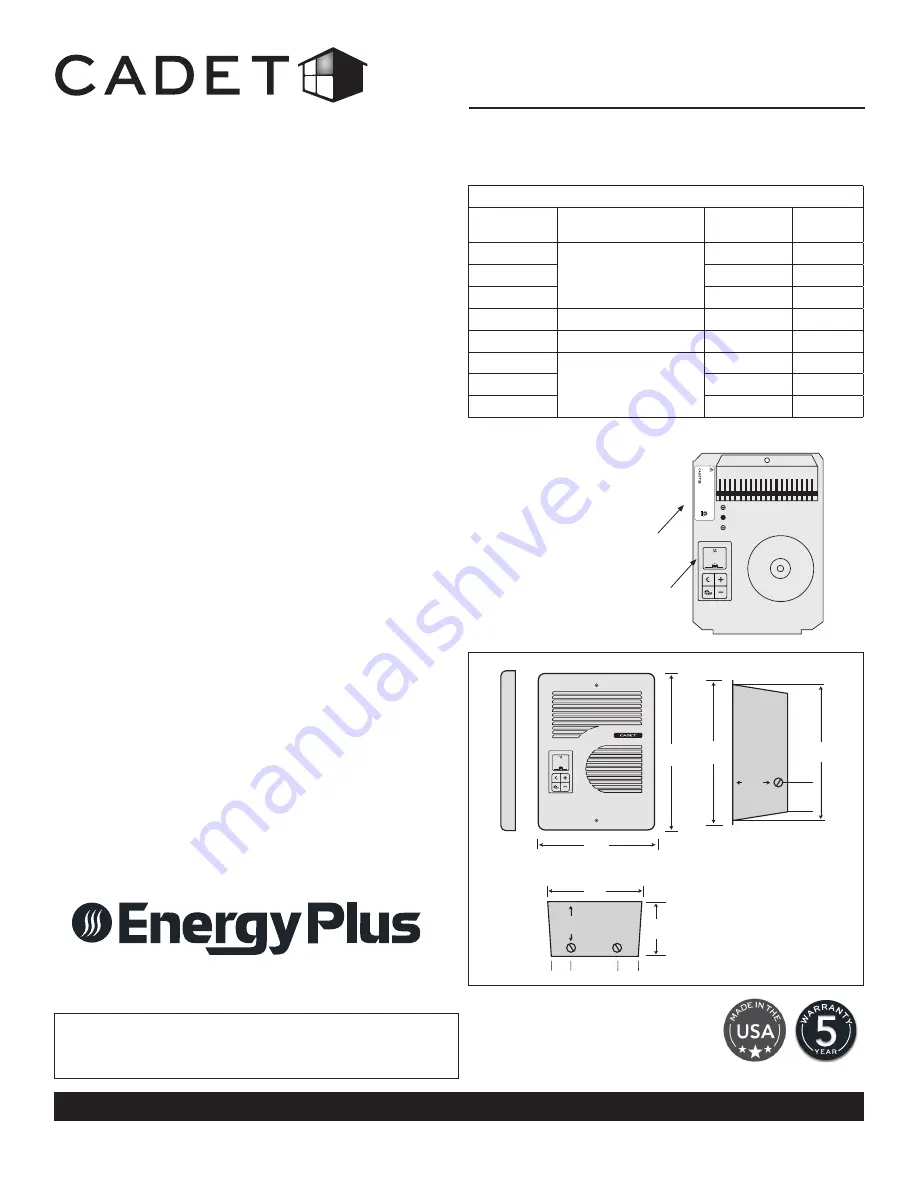
5
/
8
"
1.6cm
9"
22.9cm
Side
Grill Front
Wall Can Side
Wall Can Bottom
12"
30.5cm
10"
25.4cm
11
1
/
8
"
28.3cm
3¼"
8.3cm
1¼"
3.2cm
1¾"
4.5cm
1¼"
3.2cm
3"
7.6cm
4"
10.2cm
7
7
/
8
"
20cm
73
Model
:
Vo
lts:
Wa
tts:
WA
RNING! T
O
AVOID ELECTRICA
L
SHOC
K
Disconnect power at circuit breaker before servicing.
Do not operate without
grill
.
cadetheat.com
Va
ncouver
, W
A
Mfg Date:
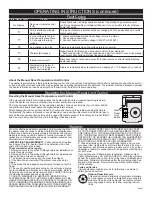
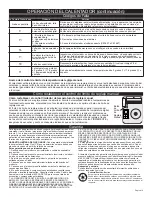
Before pushing
RESET
button see
Owner
’s
Guid
e
for display fault
codes and othe
r
troubleshooting
information.
3108579
conform
s
to UL
STD
2021
072xxx
73
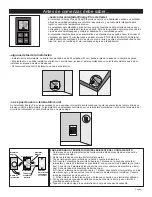
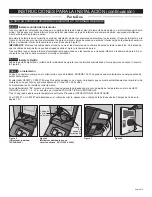
TOOLS REQUIRED:
• Phillips Screwdriver
• Straight Screwdriver
• Wire Strippers
• Utility Knife
• (4) 1½" Wood Screws
• (2) Insulated Wire Connectors
• (1) Strain Relief Connector
•
Energy efficient: use up to 30% less energy
• Brings you only the heat you need, when you need
it, and adjusts automatically to save you money
•
You define your comfort—maintains your room
temperature within one degree
• Our most thoughtful design features:
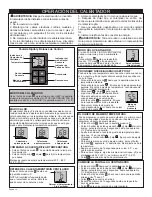
Large digital display shows your room temperature
and heating mode
Easy, intuitive one-touch controls
Night/Away and Max/Min options for extra savings
and safety
Improve air circulation and add comfort in off-sea-
son with three fan-only speeds
Easily replaces many Com-Pak Series heaters:
C, CB, CM, CS or X
• Eliminate guesswork with smart power supply
sensor that self adjusts to your voltage
• Automatic high temperature safety shutoff
• Your Energy Plus heater has been thoroughly tested
and is guaranteed with a
limited
5-year warranty
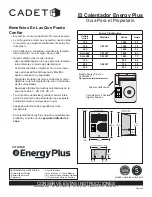
Energy Plus Models
Line
Voltage
Models
Watts
Amps
120
CE163T
1000
8.3
208
1500
7.2
240
1600
6.7
240 only
CE162T
1600
6.7
208 only
CE168T
1600
7.7
120
CE083T
500
4.2
208
750
3.6
240
800
3.3
tested to UL standards
Page 1
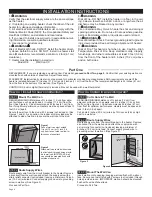
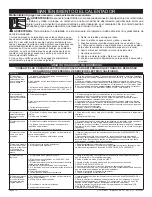
Energy Plus Model With Built-In
Controller
Wall Thermostat Not Required
Controller with Digital Display
and Push Buttons
Rating Label
COM-PAK


