background image

CANDY HOOVER GROUP S.R.L. • Via Privata Eden Fumagalli • 20047 Brugherio Milano Italy

OVENS

USER INSTRUCTIONS

GB

FORNI

I

STRUZIONI PER L’USO

IT

HORNOS EMPOTRABLES

INSTRUCCIONES DE USO

ES

EINBAUBACKKÖFEN

BEDIENUNGSANLEITUNG

DE

OVEN

GEBRUIKSAANWIJZING

NL

FOURS ENCASTRABLES

NOTICE D’EMPLOI ET D’INSTALLATION

FR

FORNOS

MANUAL DE INSTRUÇÕES DE UTILIZAÇÃO

PT

Духовые шкафы

Инстукции для пользователей

RU

PIEKARNIKI DO ZABUDOWY

INSTRUKJA OBS

Ł

UGI

PL

TROUBY

NÁVOD K OBSLUZE

CZ

Summary of Contents for FPE6096X

Page 1: ... USO IT HORNOS EMPOTRABLES INSTRUCCIONES DE USO ES EINBAUBACKKÖFEN BEDIENUNGSANLEITUNG DE OVEN GEBRUIKSAANWIJZING NL FOURS ENCASTRABLES NOTICE D EMPLOI ET D INSTALLATION FR FORNOS MANUAL DE INSTRUÇÕES DE UTILIZAÇÃO PT Духовые шкафы Инстукции для пользователей RU PIEKARNIKI DO ZABUDOWY INSTRUKJA OBSŁUGI PL TROUBY NÁVOD K OBSLUZE CZ ...

Page 2: ...6 26 26 26 26 26 27 27 28 29 30 31 INHOUDSOPGAVE VEILIGHEIDSVOORSCHRIFTEN 2 7 Aquactivafunctie 1 Algemene Aanwijzingen 1 4 Inbouw Van De Oven 1 7 Uitrustıng Van De Oven Afhankelijk Van Het Model 2 Nuttige Tips 2 1 Veiligheidssysteem Voor De Roosters 2 2 Grilleren 2 3 De U cook Modellen 2 4 Afhankelijk Van Model u see 2 5 Kooktijden 2 6 Zelfreinigende Ovenwanden 2 8 Schoonmaken En Onderhoud 2 9 Ser...

Page 3: ...ЕЗОПАСНОСТИ ПОЛОК 2 полезные советы 2 3 2 4 2 5 2 8 2 9 3 ТАЙМЕР 3 1 2 7 ФУНКЦИЯAQUACTIVA 3 2 3 3 ТАЙМЕР С СЕНСОРНЫМ УПРАВЛЕНИЕМ 3 4 УСТАНОВКА ТЕКУЩЕГО ВРЕМЕНИ 3 6 3 7 4 5 3 5 2 6 SPIS TREŚCI INSTRUKCJE BEZPIECZEŃSTWA PL 78 79 79 79 79 79 79 80 80 80 80 80 80 80 81 81 81 81 82 82 82 82 82 83 83 84 85 86 87 1 1 1 3 1 4 1 5 2 3 2 4 2 5 2 6 2 7 FUNKCJA AQUACTIVA 2 9 3 REGULATOR CZASOWY 3 1 3 3 ZEGAR ...

Page 4: ...zione e dopo la pulizia rimontarlo secondo le istruzioni Usare solo la sonda termica raccomandata per questo forno Non utilizzare un pulitore a vapore ATTENZIONE Assicurarsi che l apparecchio sia spento prima di sostituire la lampada per evitare la possibilità di scosse elettriche Il mezzo di disconnessione deve essere incorporato nel cablaggio fisso in accordo con le leggi di cablaggio Le istruzi...

Page 5: ...omporta l osservanza di alcune regole fondamentali In particolare non tirare il cavo di alimentazione per staccare la spina dalla presa di corrente non toccare l apparecchio con mani o piedi bagnati o umidi non usare l apparecchio a piedi nudi in generale è sconsigliabile l uso di adattatori prese multiple e prolunghe In caso di guasto e o di cattivo funzionamento dell apparecchio spegnerlo e non ...

Page 6: ...lto Si consiglia inoltre di utilizzare pentole a bordi alti nel caso di cotture di vivande particolarmente grasse arrosti ecc e di usare la leccarda quando si esegue la cottura al grill Qualora per particolari condizioni di sporco non fosse sufficiente l azione precedente si consiglia di intervenire asportando i grassi con un panno morbido od una spugna inumiditi con acqua calda La porosità dello ...

Page 7: ...a racchiude sostituendo la lampada non funzionante con una analoga resistente alle alte temperature poiché si presume che i difetti di conformità che si manifestano entro sei mesi dalla consegna del bene esistessero già a tale data a meno che tale ipotesi sia incompatibile con la natura del bene o con la natura del difetto di conformità il Servizio diAssistenza Tecnica Autorizzato Gias verificato ...

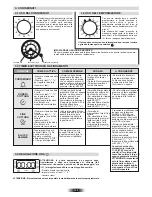
Page 8: ...e di impostare la durata della cottura del cibo inserito nel forno Per visualizzare il tempo rimanente premere il tasto SELECT Per modificare il tempo rimanente premere il tasto SELECT Per interrompere il segnale premere un tasto qualsiasi Premere il tasto centrale per tornare alla funzione orologio Premere i tasti per regolare l ora di fine cottura Lasciare i tasti Selezionare la funzione di cott...

Page 9: ...a luce dell indicatore della durata lampeggerà e il fonro si spegnerà automaticamente Verrà emesso un segnale sonoro di fine cottura Per farlo smettere premere il bottone SET Premere una seconda volta se si desidera far ricominciare la cottura se necessario Impostare su stop le manopole di controllo E possibile durante il funzionamento del forno cancellare o modificare la durata della cottura Perm...

Page 10: ...alizzazione dell ora attuale Per visualizzare l ora selezionata posizionare il selettore delle funzioni di sinistra su Durata di cottura Una volta che il tempo è trascorso il forno viene automaticamente disattivato Per fermare la cottura prima si deve impostare la manopola delle funzioni su OFF o regolare il tempo di cottura su 00 00 posizionando la manopola sulla Durata della cottura e utilizzand...

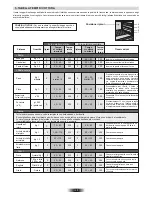
Page 11: ...do CENELEC EN 50304 Programma di prova secondo CENELEC EN 50304 utilizzato per la definizione della classe energetica Manopola commutatore Temperatura proposta e regolazione Type A Manopola termostato FUNZIONE Livello 4 1 4 Livello 4 1 4 Sprinter Questa posizione permette un preriscaldamento rapido del forno Una volta impostata questa funzione consente un immediato riscaldamento del forno ad es 8 ...

Page 12: ...iente per almeno 2 ore Disporre la carne in una teglia Pirex a bordo alto con sale pepe Voltare a metà cottura Cuocere come sopra Cuocere come sopra Cuocere come sopra Cuocere le trote coperte con olio sale e cipolle in teglia Pirex Cuocere il salmone non coperto in teglia Pirex con sale pepe e olio Cuocete la sogliola con sale e un cucchiaio d olio Cuocere in recipiente coperto le orate con olio ...

Page 13: ...rle sulla griglia con la parte interna verso l alto Ametà cottura capovolgere le salsiccie fino a cottura ultimata Avvertenza ogni tanto controllate visivamente l uniformità di cottura Nel caso di disuniformità intercambiare quelle cotte con quelle meno cotte Disporre le fette bene sotto l azione del grill e voltarle due volte Condite con aromi naturali e voltatele ogni tanto La cottura con il gri...

Page 14: ...nt CAUTION In order to avoid a hazard due to inadvertent resetting of the thermal cutout this appliance must not be supplied through an external switching device such as a timer or connected to a circuit that is regularly switched on and off by the utility CAUTION Accessible parts may be hot when the grill is in use Young children must be kept away Excess spillage must be removed before cleaning D...

Page 15: ...centre for repairs and ensure that only original parts are used If the above instructions are not adhered to the manufacturers cannot guarantee the safety of the oven Do not line the oven walls with aluminium foil or single use protection available from stores Aluminium foil or any other protection in direct contact with the hot enamel risks melting and deteriorating the enamel of the insides 1 3 ...

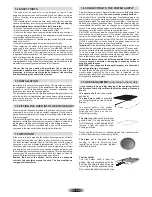
Page 16: ...thout any shadows on all the shelves For recommended cooking times and temperatures the first time you use the oven refer to the tables on pages 7 8 You may then wish to vary these times and settings in the light of your own experience 2 5 COOKING TIME 2 6 SELF CLEANING OVEN WITH CATALYTIC Special self cleaning panels covered in a micro porous coating are available as optional extras for all model...

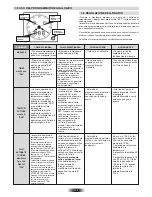
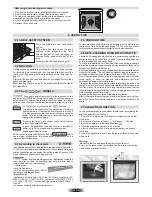
Page 17: ...utton 1 times Press the buttons to set the required time Release all the buttons When the set time as elapsed an audible alarm is activated this alarm will stop on its own however it can be stopped immediately by pressing the button SELECT Sounds an alarm at the end of the set time During the process the display shows the remaining time Allows to use the oven as alarm clock could be activated eith...

Page 18: ...ven cuts off automatically The buzzer emits the end of cook signal To silence it press the setting button Press a second time if you want to restart the cooking if necessary Turn back to stop position the control knobs It is possible during the functionning of the oven to cancel or to modify the cooking duration It allows you to preset the cooking time required for the recipe chosen At the end of ...

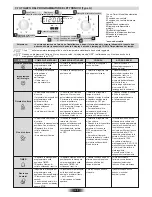
Page 19: ...ector to a cooking function Rotate the left function selector to the position End of cooking Set the end time of cooking by using buttons and Lighting Auto appears It allows to preset the end of cooking time you want When the cooking time is set turn the function selector to OFF to go back to actual time To view the cooking time selected turn the left function selector to End of cooking Time When ...

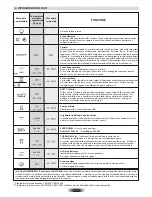
Page 20: ...20 GB Tested in accordance with the CENELEC EN 50304 Tested in accordance with the CENELEC EN 50304 used for definition of energy class 4 OPERATING INSTRUCTIONS ...

Page 21: ...e them to rise at room temperature for at least 2 hours before put ting them in the oven Put the meat into a deep Pyrex dish and season with salt and pepper turn the meat half way through cooking Cook the meat in a covered Pyrex dish with herbs spice oil and butter Cook as indicated above Cook as indicated above Cover the trout with salt oil and onions and cook in a Pyrex dish Cook the salmon in a...

Page 22: ...he infra red grill Warning When the grill is on it takes on a bright red colour Place the tray underneath the grill to collect juices and fat from the food being grilled Shelf Guinea fowl Chicken Rabbit pieces Kg 1 1 3 Kg 1 5 1 7 Kg 1 1 2 2 2 60 70 2 2 100 110 2 2 50 60 60 80 110 120 55 65 220 220 220 200 200 200 Coconut cake baked in a tin 1 1 1 1 1 50 55 180 160 Cakes Sponge cake Carrot cake bak...

Page 23: ...able de alimentación está dañado se debe sustituir por un cable o conjunto especial suministrado por el fabricante o el servicio técnico PRECAUCIÓN Con el fin de evitar peligros derivados de alteraciones en el suministro energético este aparato no debe ser suministrado a través de un dispositivo de conmutación externo como un temporizador o conectado a un circuito que sea encendido y apagado frecu...

Page 24: ...s de línea En caso de que el aparato precise ser reparado diríjase únicamente a un centro de asistencia técnica autorizado y exija piezas de recambio originales No observar todo lo mencionado puede comprometer la seguridad del aparato No forrar las paredes del horno con aluminio u otras protecciones disponibles en tiendas El aluminio o los protectores en contacto directo con el esmalte caliente pu...

Page 25: ...o catalítico de oxidación y son transformados en productos gasos Salpicaduras excesivas de grasa pueden obstruir los poros y por consiguiente impedir la autolimpieza tal característica puedé ser restablecidá mediante un calentamiento de unos 10 20 minutos del horno vacío programándo el horno a la máxima temperatura No usar productos abrasivos barillas metálicas objetos de punta paños rugosos produ...

Page 26: ...fectuada cuando las superficies estén frias Eventuales roturas debidas a la no observación de esta regla elemental no están cubiertos por la garantia La bombilla del horno puede ser sustituida desconectando eléctricamente el aparato y destornillando la ampolla que la encierta sustituyendo la bombilla por una análoga resistente a altas temperaturas Se aconseja además utilizar fuentes con bordes alt...

Page 27: ...ndos en stop El ciclo de cocción se puede moficiar o cancelar durante el funcionamiento del horno Permite preseleccionar el tiempo de cocción necesario según la receta elegida Al final del período de cocción configurado el horno se desconecta de forma automática y emite una señal sonora COCINADO AUTOMÁTICO Tiempo de Parada Máx 24 H MUESTRA PAU Antes de nada seleccionar la función de cocción y la t...

Page 28: ...sando los botones y Aparece la Luz Auto Permite programar el fin de cocción deseado Cuando se fija la duración de la cocción gire el mando izquierdo para volver a la hora real Para ver el tiempo de cocción que se ha seleccionado gire el mando izquierdo hasta la opción de fin de cocción Cuando finaliza el tiempo de cocción el horno se apaga automáticamente Para desconectar la función de cocción gir...

Page 29: ...nes de volumen grueso piezas enteras como cerdo asado las aves etc Coloque el plato que quiera cocer directamente en la rejilla en el centro del horno a un nivel medio Coloque la grasera debajo de la rejilla para que las grasas caigan dentro Asegúrese de que la comida no quede demasiado cerca del grill En la mitad de la cocción gire la pieza que esté cociendo Grill asador rotativo Resistencia gril...

Page 30: ...Situar la carne en una bandeja Pirex de borde alto con sal y pimienta Dele la vuelta a mitad cocción Cocer la carne en bandeja Pirex cubierta con sal pimienta aromas naturales aceite y mantequilla Cocer como arriba Cocer como arriba Cocer las truchas cubiertas aceite sal y cebollas en bandejas de Pirex Cocer el salmón no tapado en bandeja Pirex con sal pimienta y aceite Cocer el lenguado con sal y...

Page 31: ...cionamiento el grill está al rojo vivo La grasera debe ser colocada bajo la rejilla para recoger las salsas Pintada Pollo Conejo troceado Kg 1 1 3 Kg 1 5 1 7 Kg 1 1 2 2 2 60 70 2 2 100 110 2 2 50 60 60 80 110 120 55 65 220 220 220 200 200 200 Pastel cacao en bote Scatola Scatola Scatola 1 1 1 1 1 50 55 180 160 Dulces Pasteles Pastel Margarita en bote Pastel de zanahorias en bote Torta crostata alb...

Page 32: ...een speciaal snoer verkrijgbaar bij de fabrikant of service center LET OP Om een gevaar als gevolg van onbedoeld resetten van de thermische beveiliging te voorkomen moet dit apparaat niet worden gevoed via een externe schakelaar zoals een timer of aangesloten worden op een circuit dat regelmatig wordt in en uitgeschakeld LET OP Toegankelijke onderdelen kunnen heet zijn wanneer de grill in gebruik ...

Page 33: ...h uitsluitend tot een officiële technische service te wenden alwaar u originele onderdelen kunt bestellen Indien al hetgeen hierboven niet in acht wordt genomen kan de veiligheid van het apparaat niet gegarandeerd worden Bedek de wanden van de oven nooit met aluminiumfolie of met wegwerpproducten om de oven schoon te houden Aluminiumfolie en andere producten kunnen smelten als ze in aanraking kome...

Page 34: ... De wanden moet poreus gehouden worden voor een doelmatige reiniging N B Alle zelfreinigende ovenwanden die momenteel verkrijgbaar zijn hebben een levensduur van ongeveer 300 uur U dient deze dus na ongeveer 300 uur te vervangen Op pagina 32 en 33 vindt u de aanbevolen kooktijden en temperaturen Houdt u deze gegevens aan als u de eerste keer een gerecht gaat bereiden in uw oven U kunt deze tijden ...

Page 35: ...e De glazen oppervlakken dient u schoon te maken wanneer deze koud zijn Schade aan de glazen delen vallen niet onder de garantie indien u het bovenstaande niet in acht neemt Om het binnenlichtje te vervangen dient u de stekker uit het stopcontact te halen of de elektriciteit af te sluiten en de oude lamp te vervangen door een soortgelijke nieuwe lamp FUNCTIE HOE TE ACTIVEREN WEKKER BAKTIJD EINDE B...

Page 36: ...ogrammator End laten zien het duurlampje gaat knipperen en de oven wordt automatisch stopgezet Een beltoon klinkt om u te waarschuwen Om deze te stoppen drukt u op de instelknop Druk een tweede keer om het kookproces terug op te starten als dat nodig zou zijn Zet de functiewijzers op stop De duurtijd van het koken selecteren Wanneer de kooktijd afgelopen is wordt de oven automatisch stopgezet en h...

Page 37: ...raai de linkerknop op Kooktijd einde Stel de tijd in dmv de en de het lampje auto gaat branden Mogelijkheid tot instellen van de eindtijd van een programma Om de kooktijd te bekijken draaid u de knop naar Kooktijd einde Als de ingestelde tijd verstreken is gaat de oven automatisch uit Om het programma vroegtijdig te stoppen draaid u de knop naar UIT Deze functie is bedoeld om vooruit te plannen Bi...

Page 38: ...komen welke anders door onjuiste verwijdering zou kunnen worden veroorzaakt Het symbool op het product duidt aan dat dit product niet behandeld zal woorden als huishuidelijk afval In plaats daarvan zal het apparaat naar het verzamelpunt voor de recycling moet in overennstemming met plaatselijke milieuvoorschriften voor afvalverwerking uitgevoerd dit product neemt u contact op met uw gemeenlijke re...

Page 39: ... 75 75 Kalkoen Parelhoen Eend Kip Pikante kip 1 5 kg 1 kg 2 kg 1 kg 1 kg 180 200 1 Niveau 1 Niveau 45 25 Brasem Gegratineerde zeetong Vis 1 5 kg 1 kg Diversen 200 200 200 175 175 175 180 2 Niveau 2 Niveau 1 2 Niveau 1 Niveau 2 Niveau 1 Niveau 1 Niveau 40 40 45 45 20 35 60 Lasagne Cannelloni Pizza Pudding Beignet Soufflé Appelbollen Rundvlees 35 NL 1 kg BAKTIJDEN EN TEMPERATUREN VOOR STATISCHE OVEN...

Page 40: ...els das genutzt werden soll in Abhängigkeit von der Maximal Temperatur des Geräts fest Ist das Gerätekabel beschädigt muss es durch ein spezielles Kabel ersetzt werden welches beim Kundendienst Hersteller erhältlich ist ACHTUNG Um elektrische Schläge durch unbeabsichtigtes Zurückstellen des Wärmerelais zu vermeiden sollte das Gerät nicht über eine externe Schalteinrichtung versorgt werden wie beis...

Page 41: ...den Eventuell an den Hersteller herangetragene Ansprüche die auf einen falschen Einbau zurückgehen sind von jeder Garantieleistung ausgeschlossen Der Einbaumuß entsprechend der Anleitung und durch qualifiziertes Fachpersonal erfolgen Durch einen falschen Einbau können Schäden an Personen Tieren oder Sachen verursacht werden für die der Hersteller nicht verantwortlich gemacht werden kann Damit eine...

Page 42: ...ne begrenzte Leistungsdauer Nach ca 300 Betriebsstunden des Backofens sollte Ihr Reinigungsset ausgetauscht werden 2 6 KATALYTISCHES SELBSTREINIGUNGSSET 42 DE Alle Modelle verfügen über die Funktion Softcook Diese ermöglicht ein optimales Verhältnis zwischen Temperatur und Feuchtigkeit Der Feuchtigkeitsverlust wird um 50 reduziert so dass die Speisen zarter und saftiger gelingen Diese sanfte Art z...

Page 43: ...ition O Es ermöglicht die Einstellung der Backendzeit Um die voreingestellte Zeit zu überprüfen Um die voreingestellte Zeit zu ändern drücken Sie den Knopf SELECT und die Knöpfe gleichzeitig Drücken Sie den mittleren Knopf dreimal Diese Funktion wird zusammen mit der Backdauer benutzt Z B Soll Ihre Speise 45 Minuten backen und um 12 30 fertig sein Wählen Sie zuerst die Backfunktion dann Backzeitda...

Page 44: ...Anzeige PAU Zuerst wählen Sie die gewünschte Garfunktion und temperatur Drücken Sie den Knopf um die Gardauer einzustellen Folgen Sie der obigen Anleitung Zeitvoreinstellung Dur Drücken Sie den Knopf ein zweites Mal so dass auf der Anzeige PAU erscheint Nach der Anzeige leuchtet die Startanzeige Stellen Sie die Pausierzeit ein bevor Sie den Ofen sich wieder anstellen soll Während dieser Pause heiz...

Page 45: ...möglicht die Einstellung des Backzeitendes nach Wunsch Nach erfolgter Einstellung drehen sie den Funktionsschalter auf OFF um zur aktuellen Uhrzeit zurückzukehren Um die eingestell te Backzeit anzuzeigen drehen Sie den linken Funktionsschalter auf das Symbol Backzeitende Wenn die Backzeit zu Ende ist schaltet sich der Backofen automatisch aus und der Summer ertönt einige Sekunden lang Um den Backo...

Page 46: ...4 BEDIENUNGSANLEITUNG 46 DE ...

Page 47: ...er braten Einmal wenden Bratform abdecken s Oben s Oben Abgedeckt backen Nicht abdecken Abgedeckt backen Stellung der Schienen 4 3 2 1 Kein Vorheizen Lasagne Cannelloni Nudelauflauf Teigwaren Brot Pizza Blätterteig Rührteig Marmorkuchen Mürbeteig Obstkuchen Fleisch Fleisch können Sie sowohl in hohen Brätern als auch in niedrigen Bratpfannen braten Niedrige Bräter sollten abgedeckt werden damit kei...

Page 48: ...ur C Gltter rost Garzeit Min Tempera tur C Anmerkungen Dieses Elektrohaushaltsgerät ist entsprechend der EU Richtlinie 2002 96 CE über Elektro und Elektronik Altgeräte WEEE gekennzeichnet Bitte sorgen Sie dafür dass das Gerät ordnungsgemäß entsorgt wird damit mögliche negativeAuswirkungen auf Umwelt und Gesundheit vermieden werden die bei einer unsachgemäßen Entsorgung des Altgerätes entstehen kön...

Page 49: ... spécial disponible auprès du fabricant ou de stations de dépannage agrées ATTENTION Pour éviter tout danger dû à une réinitialisation accidentelle cet appareil ne doit pas être alimenté par un dispositif de commutation externe comme une minuterie ou connecté à un circuit qui est régulièrement allumé et éteint par l utilitaire ATTENTION Les parties accessibles peuvent être chaudes lorsque le barbe...

Page 50: ... associer avec des plaques de cuisson il est indispensable de respecter les instructions contenues dans la brochure jointe à l appareil à associer Brancher la fiche dans une prise de courant équipée d un troisième contact correspondant à la prise de terre Montez sur le fil une prise normaliséé capable de supporter la charge indiquée sur la plaquette Le fil conducteur de masse à la terre est identi...

Page 51: ...nt rapide du four 2 3 Selon modèle Le PACK 2 4 Selon modèle 2 5 TEMPS DE CUISSON 2 6 FOUR AUTONETTOYANT PAR CATALYSE Dans les pages 48 49 un tableau récapitulatif indique les temps de cuisson et les températures selon les préparations Les panneaux autonettoyants à émail microporeux disponibles en option évite le nettoyage manuel du four Pendant la cuisson les projections de graisse sont l absorbée...

Page 52: ...uissons que l on peut programmer à l avance Par exemple votre plat doit cuire 45 mn et être prêt à 12 30 réglez alors simplement la durée sur 45 mn et l heure de fin de cuisson sur 12 30 Quand le temps de cuisson est écoulé la cuisson s arrête automati quemen et l alarme sonne quelques secondes La cuisson commencera auto matiquement à 11 45 12 30 moins 45 mn et continuera jusqu à ce que l heure de...

Page 53: ...nnement du four Une fois le temps écoulé le programmateur affiche End le voyant durée clignote et le four est automatiquement stoppé Une sonnerie retentit pour vous avertir Pour la couper appuyer sur le bouton de réglage Appuyer une seconde fois pour relancer la cuisson si nécessaire Ramener les manettes de fonction sur arrêt Sélectionner la durée de cuisson des aliments Quand le temps de cuisson ...

Page 54: ...54 FR 3 7 ...

Page 55: ...55 FR 4 INSTRUCTIONS POUR L UTILISATION ...

Page 56: ...5 TEMPS DE CUISSON 56 FR ...

Page 57: ...57 FR 5 TEMPS DE CUISSON ...

Page 58: ...cáveis à instalação e ligação eléctrica As instruções têm de indicar o tipo de cabo a ser utilizado tendo em consideração a temperatura registada na superfície traseira do aparelho Se o cabo de alimentação estiver danificado tem de ser substituído por um cabo ou conjunto especial que pode ser obtido junto do fabricante ou do seu serviço de assistência técnica CUIDADO Com vista a evitar perigos res...

Page 59: ...gurar a segurança do forno Nunca forre as paredes do forno com papel de alumínio ou com o material descartável de protecção como o que se encontra à venda no mercado O papel de alumínio bem como qualquer outro tipo de protecção quando colocado em contacto directo com o esmalte quente corre o risco de se derreter e de deteriorar o esmalte do interior do forno 1 3 INSTALAÇÃO Compete ao cliente proce...

Page 60: ...o limpar manualmente o interior do forno A gordura que salta para as paredes laterais do forno quando são assados ou grelhados alimentos é eliminada pela camada micro porosa que decompõe a gordura por meio de catálise e a transforma em gás No entanto um excesso de salpicos de gordura poderá entupir os poros e por isso impedir a auto limpeza Para repor a capacidade auto limpante basta ligar o forno...

Page 61: ...tente com o serviço de eliminação de lixos e resíduos ou com o estabelecimento comercial onde adquiriu o produto 61 PT 2 9 ASSISTÊNCIA TÉCNICA Antes de telefonar para a assistência técnica Se o forno não estiver a trabalhar recomendamos que verifique se o forno está devidamente ligado à corrente ficha correctamente introduzida na tomada Se lhe for impossível detectar a causa da avaria desligue o f...

Page 62: ...r para definir a duração de cozedura pretendida Deixe de pressionar os botões Seleccione a função de cozedura com o selector Quando o tempo acaba o forno desliga automaticamente Se desejar parar a cozedura antes do tempo programdo rode o botão selector para ou coloque o relógio a 0 00 seleccione com as teclas e Permite programar o tempo de cozedura desejado Para verificar quanto tempo falta pressi...

Page 63: ...o desliga se automáticamente Um sinal sonoro é emitido para o desligar pressione o botão de programação Caso deseje reniciar a cozedura volte a pressionar o botão de programação Rode o selector do forno para a posição stop É possível cancelar ou modificar a duração da cozedura durante a operação do forno Permite pre definir o tempo de cozedura para a receita seleccionada No final do tempo seleccio...

Page 64: ...da rode o selector de funções esquerdo para a posição duração do tempo de cozedura Quando a duração do tempo de cozedura termina o forno desl iga se automáticamente e um alarme sonoro soará durante alguns segundos Para desligar a duração do tempo de cozedura antes do programado rode o selector de funções para a posição OFF ou programe o relógio para 00 00 rodando o selector de funções esquerdo par...

Page 65: ...4 INSTRUÇÕES DE OPERAÇÃO 65 PT ...

Page 66: ...as antes de as colocar no forno Coloque a carne num pirex de bordo alto com sal e pimenta Vire a carne a meio da cozedura Tempere a carne com sal pimenta óleo manteiga e temperos naturais e leve a ao forno num pirex tapado Idem Idem Cozinhe as trutas num pirex coberto com óleo sal e cebolas Cozinhe o salmão num pirex sem tampa com sal pimenta e óleo Cozinhe a solha temperada com sal e 1 colher de ...

Page 67: ...zedura Atenção convém controlar visualmente a uniformidade da cozedura Se esta não se apresentar uniforme troque a posição das salsichas mais passadas com as menos passadas Certifique se de que o entrecosto está exposto aos efeitos totais do grelhador principal Tempere com condimentos naturais e volte de vez em quando Galinha Frango Coelho aos pedaços Kg 1 1 3 Kg 1 5 1 7 Kg 1 1 2 2 2 60 70 2 2 100...

Page 68: ... стекла Перед снятием ограждения печь должна быть выключена После выполнения чистки ограждение должно быть установлено на место как написано в инструкции Используйте только такой датчик температуры который рекомендован для этой печи Не пользуйтесь для чистки парогенератором ПРЕДУПРЕЖДЕНИЕ Чтобы избежать поражения электрическим током перед заменой лампы проверьте что бытовой электроприбор выключен ...

Page 69: ...ть размещена на лицевой части прибора в месте продажи потребителям Не покрывайте внутренние поверхности духовки алюминиевой фольгой и другими одноразовыми упаковочными материалами которые продаются в хозяйственных магазинах Алюминиевая фольга или другой упаковочный материал при контакте с горячей эмалированной поверхностью духовки может расплавиться и повредить внутреннюю эмалированную поверхность...

Page 70: ...нимите металлические направляющие потянув их на себя 3 Произведите очистку металлических направляющих помыв их в посудомоечной машине или очистив при помощи влажной губки Просушите металлические направляющие после очистки 4 После очистки установите металлические направляющие в духовой шкаф повторив пункты 1 и 2 в обратном порядке 5 Зафиксируйте винты A 2 полезные советы ...

Page 71: ...ечении 30 минут выключите программу и дайте остыть духовому шкафу 6 Когда духовой шкаф остынет произведите очистку внутренних поверхностей камеры приготовления тряпочкой из мягкой ткани ПРЕДУПРЕЖДЕНИЕ Убедитесь что прибор остыл прежде чем прикасаться к нему Необходимо соблюдать осторожность со всеми горячими поверхностями так как существует риск получения ожогов Используйте только дистиллированную...

Page 72: ...ажатием кнопки Select SELECT В ходе процесса на дисплее отражается оставшееся время SELECT SELECT Нажмите центральную кнопку 3 раза Для прекращения сигнала нажмите любую кнопку Нажмите центральную кнопку чтобы вернуться к функции часов Защита от детей Для отключения функции Детский замок снова нажмите и удержите клавишу Set не менее 5 секунд После этого все функции вновь становятся доступными Функ...

Page 73: ...сти и печь автоматически выключается Подается звуковой сигнал окончания приготовления пищи Чтобы выключить его нажмите кнопку установки Если вы хотите снова начать приготовления пищи нажмите кнопку установки еще раз Верните ручки регулировки в положение стоп Вы можете отменить или изменить время приготовления пищи во время работы печи Позволяет вам задать время приготовления пищи необходимое для в...

Page 74: ...74 RU 3 7 ...

Page 75: ...75 RU 4 ...

Page 76: ...76 RU 5 ...

Page 77: ...77 RU 10 минут кг 10 минут кг 5 ...

Page 78: ...ie Wyłaczyć piekarnik przed usunięciem ekranu po wyczyszczeniu zamontować ekran zgodnie z instrukcją Używać wyłacznie sondy cieplnej przeznaczonej do tego piekarnika Nie stosować do czyszczenia urządzeń parowych UWAGA należy upewnić się czy urządzenie jest wyłączone przed przystąpieniem do wymiany żarówki aby uniknąć niebezpieczeństwa porażenia Wyłącznik musi być podłączony do okablowania zgodnie ...

Page 79: ...wą lub jednorazowymi materiałami ochronnymi dostępnymi w sklepach Użyta folia aluminiowa lub inne materiały ochronne w zetknięciu z gorącą emalią mogą spowodować nadtopienie się i pogorszenie jakości emaliowanych ścianek wnętrza piekarnika 1 1 1 1 2 1 3 1 4 1 5 ...

Page 80: ... przekręcając ją w kierunku przeciwnym do ruchu wskazówek zegara 2 Zdjąć drabinki pociągając w kierunku do siebie 3 Umyć drabinki w zmywarce lub ręcznie wilgotną gąbką Po umyciu wysuszyć 4 Po umyciu i wysuszeniu zamontować drabinki odwrotnie do sposobu montażu 5 Przykręcić nakrętki A ...

Page 81: ...lub dolna grzałka 3 Ustawić temperaturę na symboluAquactiva 4 Uruchomić program na 30 min 5 Po upływie 30 min wyłączyć piekarnik i zostawić do ostygnięcia 6 Kiedy urządzenie jest zimne wyczyścić wnętrze piekarnika miękką ściereczką Ostrzeżenie Przed dotknięciem urządzenia upewnić się że jest ono zimne Należy zachować ostrożność w przypadku wszystkich gorących powierzchni ponieważ istnieje ryzyko p...

Page 82: ...yłączy się po chwili Aby wyłączyć natychmiast sygnał dźwiękowy należy wcisnąć przycisk SELECT Po zakończeniu ustawionego czasu piekarnik sam się wyłączy Jeśli trzeba wyłączyć piekarnik wcześniej należy obrócić pokrętło wyboru funkcji na pozycję 0 lub ustawić czas pieczenia na 0 00 przyciskami SELECT O ustawionej godzinie piekarnik sam się wyłączy Jeśli trzeba go wyłączyć wcześniej należy ustawić p...

Page 83: ...Aby wyłączyć sygnał dźwiękowy należy nacisnąć przycisk ustawień W razie potrzeby nacisnąć po raz drugi przycisk ustawień w celu ponownego uruchomienia piekarnika Ustawić pokrętła sterujące w położeniu początkowym Podczas pracy piekarnika istnieje możliwość zmodyfikowania lub anulowania czasu pieczenia Umożliwia ustawienie czasu pieczenia wymaganego dla potrawy przyrządzanej według wybranego przepi...

Page 84: ...e pokretlo do pozycji Koniec pieczenia Ustaw za pomoca i Miga Auto D Umozliwia ustawienie czasu pieczenia Po ustawieniu czasu obroc programator na OFF a pokaze sie godzina la sprawdzenia ustawionego czasu obroc pokretlo na czas konca pieczenia Po zakonczeniu pieczenia piekarnik wylacza sie automatycznie W celu wczesniejszego zakonczenia pieczenia obroc pokretlo na OFF o Funkcja przydatna do progra...

Page 85: ...85 PL 4 ...

Page 86: ...86 PL 5 ...

Page 87: ...87 PL 5 ...

Page 88: ...aďte ochranu v souladu s pokyny Používejte pouze tepelní sondu doporučenou pro tuto troubu K čištění nepoužívejte vysokotlaké parní čističe UPOZORNĚNÍ Ujistěte se zda je spotřebič vypnutý před výměnou žárovky abyste zabránili možnému úrazu elektrickým proudem Odpojovací zařízení musí být včleněno do napájení v souladu s platnými předpisy Pokyny uvádějí typ kabelu s ohledem na teplotu zadní strany ...

Page 89: ...zda není žádným způsobem poškozená Pokud máte nějaké pochybnosti nepoužívejte ji Kontaktujte kvalifikovaného servisního technika Uložte obalové materiály jako jsou plastové sáčky a polystyrén mimo dosah dětí neboť představují možné riziko Výrobce neodpovídá za nedodržení pokynů v návodu k použití Poznámka Právo na změnu funkcí vlastností a příslušenství trouby se může měnit v závislosti od modelu ...

Page 90: ...bližně 10 20 minut při maximální teplotě Nepoužívejte drsné prostředky kovovou čistící houbu ostré předměty drsné látky nebo chemické produkty které můžou trvale poškodit katalytický povrch Na pečení tukových jídel je vhodné použít hluboké plechy a vložit nádobku pod gril pro zachycení přebytečného tuku Pokud jsou stěny trouby pokryté hrubou vrstvou tuku která znemožňuje práci katalytického čištěn...

Page 91: ...d jídlo musí být vařené po dobu 45 minut a musí být připravena do 12 30 vyberte požadovanou funkci nastavte dobu vaření na 45 minut a do konce doby vaření až 12 30 Na konci doby vaření nastavené bude trouba automaticky vypne a zvukový alarm bude zvonit DĚTSKÁ POJISTKA Dětský zámek Funkce se aktivuje dotykem Set po dobu minimálně 5 sekund Od tohoto okamžiku se u všech ostatních funkcích uzamknou a ...

Page 92: ...se zobrazí END kontrolka trvání bliká a trouba se vypne automaticky Zní akustický signál K ztlumení stiskněte tlačítko nastavení Stiskněte opět pokud chcete restartovat přírpavu Nastavte knoflíky do vypnuté pozice Během provozu trouby lze upravit trvání přípravy Umožňuje vám nastavit čas přípravy potřebný pro zvolený recept Na konci nastaveného času přípravy se trouba vypne automaticky a zazní zvu...

Page 93: ...o uplynutí doby přípravy se trouba vypne automaticky K zastavení pečení otočte volič funkcí do pozice OFF Tato funkce slouží k nastavení odloženého startu Příklad příprava receptu trvá 45 min a musí být hotov ve 12 30 odpoledne nastavte dobu přípravy 45 min a konec přípravy na 12 30 odpoledne Příprava se spustí automaticky v 11 45 12 30 mínus 45 min a pokračuje do konce doby přípravy pak se trouba...

Page 94: ...ří ideální podmínky pro pečení pokrmů které by měly zůstat elastické během pečení např koláče chléb sušenky bez poškození povrchu Ventilátor plus spodní topné těleso Tato funkce je ideální pro jemné pokrmy koláče suflé GRIL gril používejte se zavřenými dvířky Používá se samostatné horní topné těleso můžete nastavit teplotu K zahřátí topných těles je potřeba pět minut předhřevu Používá se ke grilov...

Page 95: ...ožením do trouby Vložte maso do hluboké skleněné mísy a ochuťte solí a kořením otočte v polovině přípravy Pečte maso v zakryté skleněné míse s bylinkami kořením olejem a máslem Připravujte podle postupu uvedeného výše Připravujte podle postupu uvedeného výše Ochuťte rybu solí olejem a cibulí a pečte v skleněné míse Pečte lososa v otevřené skleněné míse se solí kořením a olejem Pečte soleu se solí ...

Page 96: ...je gril zapnut získá jasnou červenou barvu Vložte mísu pod gril pro zachycení šťávy a tuku z grilované potraviny Rošt Perlička Kg 1 Kuře Králičí kousky Kg 1 1 3 Kg 1 5 1 7 Kg 1 1 2 2 2 60 70 2 2 100 110 2 2 50 60 60 80 110 120 55 65 220 220 220 200 200 200 Kokosový koláč v plechu 1 1 1 1 1 50 55 180 160 Koláče Piškot Mrkvový koláč v plechu Meruňkový koláč 700 gr 55 65 40 175 180 200 1 1 2 40 45 50...

Page 97: ...ventuelles Inexacltudes Imputables à des erreurs d impression ou de transcription contenue dans cette notice Le constructeur se réserve le droit de modifier les produits en cas de nécessité même dans l intérêt de l utilisation sans causer de préjudices aux caractéristiques de fonctionnement de sécurité des appareils FR O fabricante declina toda e qualquer responsabilidade por gralhas erros tipográ...

Reviews: