background image


PCL Driver Guide

Please read this guide before operating this equipment.
After you finish reading this guide, store it in a safe place for future reference.

Summary of Contents for All in One Printer

Page 1: ...PCL Driver Guide Please read this guide before operating this equipment After you finish reading this guide store it in a safe place for future reference ...

Page 2: ... purpose or use or against infringement of any patent Canon Inc shall not be liable for any direct incidental or consequential damages of any nature or loss of expenses resulting from the use of this material This document contains proprietary information which is protected by copyright All rights are reserved No part of this document may be photocopied reproduced or translated into another langua...

Page 3: ...and Windows NT are registered trademarks of Microsoft Corporation in the United States and or other countries NetWare and Novell are registered trademarks of Novell Inc US 1996 Novell Inc all rights reserved Other brands and product names are trademarks and or registered trademarks of their respective companies ...

Page 4: ... Started Provides instructions for installing the PCL5e or PCL 6 printer drivers setting the system configuration and printing a document Chapter 3 Using the Print Options Provides instructions for specifying the various settings for printing a document Chapter 4 Using the Fax Options Provides instructions for installing the fax driver faxing a document and specifying the various settings for faxi...

Page 5: ...RTANT Indicates important items or prohibited actions that should always be observed when using the printer drivers and fax driver Always read these to avoid improper operation NOTE Indicates items for reference or supplementary information that users should note ...

Page 6: ... Dialog Box 2 9 For Windows 95 98 2 9 For Windows NT4 0 2000 2 10 Setting Up the Printer Configuration 2 11 Printing a Document 2 13 Chapter 3 Using the Print Options Using Profiles for Printing 3 2 What is a Profile 3 2 Selecting a Profile for Printing 3 2 Adding or Editing Profiles 3 2 Adding or Editing Profiles in the Profile Sheet for Windows NT4 0 2000 3 3 Scaling a Document 3 5 Scaling a Doc...

Page 7: ...Specifying the ID and Password for Job Accounting 3 29 Printing under Job Accounting for Windows 95 98 3 30 Printing under Job Accounting for Windows NT4 0 2000 3 31 Specifying the Grayscale Settings 3 32 About the Grayscale Settings 3 32 Using the Grayscale Settings 3 32 Chapter 4 Using the Fax Options Installing the Fax Driver 4 2 Specifying the Installed Fax Memory 4 6 Faxing a Document 4 7 Spe...

Page 8: ...on of system environments required for using the PCL5e and PCL 6 printer drivers and Fax driver and also explains how to find help and information regarding the installing and use of these drivers Introduction 1 2 System Requirements 1 3 Where to Find Help 1 4 1 C H A P T E R ...

Page 9: ...fax device In Windows 95 98 NT4 0 2000 environments you can use both printer drivers The PCL 6 printer driver is recommended for printing image data The PCL5e printer driver is recommended for printing text data IMPORTANT The PCL5e printer driver is available for imageRUNNER 6000 5000 iR3250 imageRUNNER 600 550 60 imageRUNNER 400 330 imageRUNNER 210 GP225 GP200 GP215 GP200 and GP55 GP30 The PCL 6 ...

Page 10: ...ows 95 98 NT4 0 2000 can be used in the following sys tem environments Software Microsoft Windows 95 Microsoft Windows 98 Microsoft Windows NT4 0 or Microsoft Windows 2000 Computer Any computer on which Microsoft Windows 95 Microsoft Windows 98 Microsoft Windows NT4 0 or Microsoft Windows 2000 runs properly ...

Page 11: ...ith the driver Online Help You can locate additional help for questions you may have regarding your printer in the online Help file provided with the driver software In the Properties dialog box you can click the Help button to display additional information about every feature and option in the PCL5e or PCL 6 printer driver and fax driver You can also click the button in the upper right corner of...

Page 12: ...iguration and printing a document Installing the Software 2 2 Installing the Printer Driver 2 2 Installing Canon NetSpot Suite Service 2 6 Uninstalling the Printer Driver 2 8 Accessing the Properties Dialog Box 2 9 For Windows 95 98 2 9 For Windows NT4 0 2000 2 10 Setting Up the Printer Configuration 2 11 Printing a Document 2 13 2 C H A P T E R ...

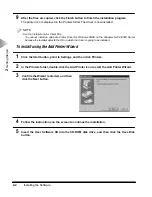
Page 13: ...he driver imageRUNNER 400 330 System Version 2 0 or later is supported only by the PCL5e Printer Driver Ver sion 4 2 or later To install using the Installer 1 Insert the User Software CD into the CD ROM disk drive 2 Double click the My Computer icon and then double click the CD ROM disk drive icon 3 Double click the PCL Drivers USEng and Setup folder icons and then double click the Setup icon to s...

Page 14: ...er Wizard dialog box when selecting which item to install this message will not display 5 In the Printer Wizard dialog box click the check box of the driver you want to install Then click the Next button NOTE If the printer driver of the device which supports NetSpot Suite Service is already installed in your computer a dialog box for selecting which item to install displays after the Welcome dial...

Page 15: ... Windows NT4 0 2000 Server because the Installer detects the OS on which the driver is going to be installed To install using the Add Printer Wizard 1 Click the Start button point to Settings and then click Printers 2 In the Printers folder double click the Add Printer icon to start the Add Printer Wizard 4 Follow the instructions on the screen to continue the installation 5 Insert the User Softwa...

Page 16: ...t the folder of the driver you want to install and then click the OK button PCL5e Windows 95 98 PCL Drivers USEng Printer PCL5e WIN9X Windows NT4 0 PCL Drivers USEng Printer PCL5e WINNT40 Windows 2000 PCL Drivers USEng Printer PCL5e WIN2000 PCL 6 Windows 95 98 PCL Drivers USEng Printer PCL6 WIN9X Windows NT4 0 PCL Drivers USEng Printer PCL6 WINNT40 Windows 2000 PCL Drivers USEng Printer PCL6 WIN20...

Page 17: ... using the Add Printer Wizard or install only the printer driver when using the installer install Canon NetSpot Suite Service with the following proce dure 1 Insert the User Software CD into the CD ROM disk drive 2 Double click the My Computer icon and then double click the CD ROM disk drive icon 3 Double click the PCL Drivers USEng and Setup folder icons and then double click the Setup icon to st...

Page 18: ...2 Getting Started 7 After the files are copied click the Finish button to finish the installation program 6 A message asking if you want to install NetSpot Suite Service is displayed Click the Yes button to start copying the files ...

Page 19: ...click the My computer icon and then double click the CD ROM disk drive icon 3 Double click the PCL Drivers USEng and Setup folder icons 4 In the Setup folder double click the P5uninst exe icon to start the uninstallation pro cess 6 Click the DELETE button 8 Click the END button in the Delete Printer dialog box 5 In the Delete Printer dialog box select the printer name you want to delete from the l...

Page 20: ...on the specified settings are available for the current print job 1 Select the Print command to display the Print dialog box 2 Select your printer name from the drop down list box and then click the Properties button To access the Properties dialog box from the Printers folder If you access the Properties dialog box from the Printers folder you can setup the printer configura tion or specify the d...

Page 21: ...ialog box from the Printers folder If you access the Document Properties dialog box from the Printers folder you can specify the default printer driver settings for every print job 1 Click the Start button point to Settings and then click Printers 2 In the Printers folder right click the printer icon for your printer and then click Document Defaults NOTE To access the Document Properties dialog bo...

Page 22: ... 2 In the Printers folder right click the icon of your printer and then click Properties 5 Select the protocol used for your network under Protocol 3 In the Properties dialog box click the Configuration tab Windows 95 98 or Device Settings tab Windows NT4 0 2000 to display the Configuration sheet Windows 95 98 or Device Set tings sheet Windows NT4 0 2000 4 Click the Select Device button to open th...

Page 23: ...o set up the printer configuration automatically please note the following points For imageRUNNER 6000 5000 and iR3250 it is necessary to install Canon NetSpot Suite Service See P2 6 for installing Canon NetSpot Suite Service For imageRUNNER 600 550 60 imageRUNNER 400 330 imageRUNNER 210 and GP225 GP200 one of the following environments is required Novell NetWare IPX SPX Client Software needs to b...

Page 24: ...o display the Properties dialog box 3 Specify the various print settings in the Properties dialog box or select a Profile To switch between sheets click the tabs for the Page Setup Finishing Paper Source and Quality sheet For more information on using the print options see Chapter 3 4 After all the print settings are specified click the OK button in the Properties dialog box 5 Click the OK button ...

Page 25: ...Printing a Document 2 14 2 Getting Started ...

Page 26: ...ifying the Finishing Options 3 9 Selecting a Finishing Option 3 9 Using Booklet Printing 3 12 Specifying the Paper Source 3 15 Using Overlay Printing 3 20 What is Overlay Printing 3 20 Creating a Form File 3 20 Printing with an Overlay 3 22 Specifying the Print Quality 3 24 What is an Objective 3 24 Selecting and Editing an Objective 3 24 Sending Document Data to the Image Server 3 26 Secured Prin...

Page 27: ...lay either the Page Setup Finishing Paper Source or Quality sheets 2 Select the Profile you want from the Profile drop down list box 3 Click the OK button NOTE For Windows NT4 0 2000 you can select a Profile only when the Allow Profile Selection check box is selected in the Profile sheet in the Properties dialog box Adding or Editing Profiles 1 Specify the printer driver settings for the Profile i...

Page 28: ...for Windows NT4 0 2000 Profiles specified in the Printer Properties dialog box can be accessed and used by all the clients connected to the server 1 Click the Start button point to Settings and then click Printers 2 In the Printers folder right click the icon of your printer and then click Properties 3 In the Printer Properties dialog box click the Profile tab to display the Pro file sheet 4 Click...

Page 29: ...g 3 4 3 Using the Print Options 5 Specify the settings for the Profile in the Page Setup Finishing Paper Source and Quality sheets 6 Display the Attribution sheet 7 Specify the Name Icon and Comment and then click the OK button ...

Page 30: ...cessible from the application click the File menu and then click Printer Settings or Page Settings depending on the application to specify the page size 3 Select the actual paper size to be printed on from the Output Size drop down list box 4 Click the OK button The scaling is set automatically according to the sizes specified for Page Size and Output Size NOTE If the value is less than 25 or more...

Page 31: ...from the application click the File menu and then click Printer Settings or Page Settings depending on the application to specify the page size 3 Select the actual paper size to be printed on from the Output Size drop down list box 4 Click the Manual Scaling check box and then specify the desired scaling value from 25 to 400 5 Click the OK button 1 Display the Page Setup sheet ...

Page 32: ...et of paper The number of document pages which can be printed on one sheet of paper is 2 4 6 8 9 and 16 To print multiple pages on one sheet 2 Select the required page layout from the Page Layout drop down list box 4 Click the OK button 1 Display the Page Setup sheet 3 Select the required page order layout from the Page Order drop down list box ...

Page 33: ...ng edge for the paper printout from the Binding Location drop down list box When the Binding Location option is selected the document and margins are positioned correctly on the pages for 2 Sided Printing 5 Click the OK button in the Finishing sheet 1 Display the Finishing sheet 4 If you want to set the gutter width click the Gutter button to open the Gutter Settings dialog box enter the value in ...

Page 34: ...vailable output options are Off Outputs the document without sorting Available only for imageRUNNER 600 550 60 Collate Outputs sorted copies of the document into the output tray or bins Group Outputs document pages in groups into the output tray or bins Staple Outputs stapled copies of the document into the output tray or bins To select the output option 1 Specify the number of copies to print in ...

Page 35: ...opy Available for imageRUNNER 6000 5000 imageRUNNER 600 550 60 and imageRUNNER 400 330 6 Click the OK button in the Finishing sheet NOTE The available Finishing options vary depending on the output options attached to the printer 4 If you selected Staple click the Staple Position button Specify the position to staple in the Staple Position dialog box and then click the OK button Not available for ...

Page 36: ...200 GP55 GP30 3 Select Collate Group or Staple under Finishing 1 Specify the number of copies to print in Copies in the Page Setup sheet 2 Display the Finishing sheet 4 Click the Output Details button Spec ify the output tray or bin where copies of the document will be output in the Output Settings dialog box and then click the OK button ...

Page 37: ...nd GP55 GP30 Booklet Printing is not available when You are using Windows NT4 0 Disabled is selected for Spooling at Host in the Configuration sheet for Windows 95 98 or in the Device Settings sheet for Windows 2000 To use Booklet Printing 2 Select Booklet Printing under Print Style 3 Click the Saddle Stitch check box if you want the booklet to be saddle stitched NOTE Saddle stitch printing is ava...

Page 38: ... are using Windows 95 98 2000 you can use different paper for the cover page of the booklet Select Different for Cover and Others under Paper Selection in the Paper Source sheet and specify the paper source for the cover page and body pages of the document See P3 18 4 If you are using Windows 95 98 2000 click the Details button to open the Detailed Settings for Booklet dialog box ...

Page 39: ...urce or to print the pages from different paper sources NOTE For imageRUNNER 6000 5000 and iR3250 you can also specify whether the paper loading method is according to paper source or paper type To specify the paper loading method select Paper Source or Paper Type for Select by in the Paper Source sheet To print all the pages from the same paper source 1 Display the Paper Source sheet 3 Select the...

Page 40: ...d last pages from different paper sources 1 Display the Paper Source sheet 3 Select the paper sources required for the first other and last pages from each of the corresponding drop down list boxes 4 Click the OK button 2 Select Different for First Others and Last under Paper Selection ...

Page 41: ...st pages from different paper sources 1 Display the Paper Source sheet 3 Select the paper sources required for the first second other and last pages from each of the corresponding drop down list boxes 4 Click the OK button 2 Select Different for First Second Oth ers and Last under Paper Selection ...

Page 42: ... for Windows 95 98 2000 3 Select the paper sources required for the cover and body pages from each of the corresponding drop down list boxes 4 Click the OK button 1 Display the Finishing sheet and select Booklet Printing under Print Style 2 Display the Paper Source sheet and select Different for Cover and Others under Paper Selection ...

Page 43: ...e sheet 3 Select the paper source required for the interleaf sheets from the Interleaf Sheet drop down list box 4 Click the Print on Interleaf Sheets check box if you want to print the same data on the interleaving and transparency sheets 5 Click the OK button 2 Select Transparency Interleaving under Paper Selection ...

Page 44: ...lication as a form file you can print a text data document overlaid with the form file to create a perfectly formatted document Creating a Form File Before using Overlay Printing a form file must be created in an application To create a form file 1 Prepare a document in an application 2 In the application select the Print command and then click the Properties button in the Print dialog box 3 Displ...

Page 45: ...K button in the Page Setup sheet 9 Click the OK button in the Print dialog box The document is registered as a form file The document is not printed out when creating a form file 10 Select None under Printing Method in the Overlay sheet after preparing a form file 4 Click the Page Options button to open the Page Options dialog box 5 Display the Overlay sheet and then select Create an Overlay under...

Page 46: ...rint Options Printing with an Overlay 1 In the application select the Print command and then click the Properties button in the Print dialog box 2 Display the Page Setup sheet 3 Click the Page Options button to open the Page Options dialog box ...

Page 47: ... the OK button in the Page Options dialog box 7 Click the OK button in the Page Setup sheet 8 Click the OK button in the Print dialog box The document is printed with the selected form file overlaid 9 Select None under Printing Method in the Overlay sheet after printing with an overlay 4 Display the Overlay sheet and then select Print with an Overlay under Printing Method ...

Page 48: ...Text Table Publications Graphics Photo Image Toner Saver Available for imageRUNNER 6000 5000 iR3250 imageRUNNER 600 550 60 and imageRUNNER 400 330 Drawings Selecting and Editing an Objective Select the Objective most suitable for your type of print job You can also edit the settings of an Objective To select an Objective 2 Click the required Objective in the Objective list box NOTE An explanation ...

Page 49: ...tings for an Objective 2 Select the Objective whose settings you want to change 4 Specify the new settings and then click the OK button 5 Click the OK button in the Quality sheet 1 Display the Quality sheet 3 Click the Details button to open the Detailed Settings for Objective dialog box ...

Page 50: ...Box NOTE For imageRUNNER 6000 5000 and imageRUNNER 600 550 60 clicking the Proof Print check box prints a copy of the document at the same time as sending the document to the Mail Box 4 Click the OK button NOTE For imageRUNNER 400 330 the Mail Box option is available only when the extended memory is installed in the printer For imageRUNNER 400 330 you must first select the Enable Mail Box check bo...

Page 51: ...Source or Quality sheet 3 Specify the name of the data to register as an image form and then select Image Form Memory under Store Destination 4 Click the OK button NOTE Only the first page of the document is registered as an image form This option is available only for imageRUNNER 600 550 60 2 Click the Yes button in the message box or click the Store Destination icon button to open the Store Dest...

Page 52: ...k the OK button in the Secured Print Settings dialog box 5 Click the OK button to close the Properties dialog box and then click the OK button in the Print dialog box The Confirm Password dialog box is displayed 7 On the printer control panel or using Remote UI select the print job you want to print and enter the password The print job is output only when the correct password is specified 3 Click ...

Page 53: ... OK button in the message box to switch to the Edit and Preview mode 3 Click the OK button to close the Properties dialog box and then click the OK button in the Print dialog box 4 Repeat step 1 to 3 for the other documents If the Edit and Preview mode is selected when printing a document Canon PageComposer starts For details about using Canon PageComposer refer to the Canon PageComposer Help NOTE...

Page 54: ... Job Accounting In order to print documents using the Job Accounting feature follow the procedure below to specify the ID and password IMPORTANT It is necessary to install Canon NetSpot Suite Service for using the Job Accounting feature See P2 6 for installing Canon NetSpot Suite Service 3 Click the Verify button to confirm that the specified ID and password are valid 1 Display the Configuration s...

Page 55: ...the Print dialog box 2 Specify the various settings in the Properties dialog box 3 Click the OK button to close the Properties dialog box and then click the OK button in the Print dialog box 5 Click the OK button If the entered password is verified as valid the document is printed NOTE The Confirm ID Password dialog box opens only if the Confirm ID Password when Printing check box is checked in th...

Page 56: ... dialog box 3 Click the OK button to close the Properties dialog box and then click the OK button in the Print dialog box The document is printed under the specified ID and password When the Allow Password Setting check box is not selected The password for Job Accounting cannot be specified in the ID Password Settings dialog box 1 In the application select the Print command and then click the Prop...

Page 57: ...et allows you to specify the brightness and contrast settings affecting a printed document Adjust the brightness and contrast using the nine image sample thumbnails A default original image and an adjusted preview image are displayed at the upper left Use them to check the result of the adjustment The Matching sheet allows you to specify the method of color matching or gamma correction when a colo...

Page 58: ...he image type to adjust from the Sample Picture drop down list box and then adjust the brightness and contrast For detailed information about the Adjustment sheet refer to the online help 3 Click the Grayscale Settings button to open the Edit Color Grayscale Settings dialog box 6 Display the Matching sheet ...

Page 59: ...le Matching check box and then specify the method of color matching Or deselect the Enable Matching check box and then specify the gamma value For detailed information about the Matching sheet refer to the online help 8 Click the OK button 9 Click the OK button in the Quality sheet ...

Page 60: ... settings for faxing a document IMPORTANT If a fax board is not installed in your printer the fax options are not available Installing the Fax Driver 4 2 Specifying the Installed Fax Memory 4 6 Faxing a Document 4 7 Specifying the Fax Recipients 4 10 Defining the Address Book Entries 4 12 Defining an Individual 4 12 Defining a Group 4 15 Attaching a Cover Sheet to a Fax 4 18 ...

Page 61: ...e Installer 1 Insert the User Software CD into the CD ROM disk drive 2 Double click the My Computer icon and then double click the CD ROM disk drive icon 3 Double click the PCL Drivers USEng and Setup folder icons and then double click the Setup icon to start the installation process 4 In the Welcome dialog box click the Next button and follow the instruction on the screen 5 In the Printer Wizard ...

Page 62: ...re 9 After the files are copied click the Finish button to finish the installation program The printer icon is displayed in the Printers folder The driver is now installed NOTE Use the Installer only for Client PCs You cannot install an alternate Fax Driver for Windows 95 98 on the Windows NT4 0 2000 Server because the Installer detects the OS on which the driver is going to be installed 6 Select ...

Page 63: ...low the instructions on the screen to continue the installation 5 Insert the User Software CD into the CD ROM disk drive and then click the Have Disk button 3 Confirm the Wizard is started and then click the Next button 6 Click the Browse button to select the folder of the driver you want to install and then click the OK button Windows 95 98 PCL Drivers USEng Fax WIN9X Windows NT4 0 PCL Drivers US...

Page 64: ...ollow the instructions on the screen to continue and then click the Finish button to start copying the files The printer icon is displayed in the Printers folder The driver is now installed 7 Select your fax model from the list and then click the Next button ...

Page 65: ...lick the Start button point to Settings and then click Printers 2 In the Printers folder right click the icon of your fax and then click Properties 4 Select the amount of memory from the FAX Memory drop down list box 5 Click the OK button The installed memory size is specified NOTE For iR3250 and GP55 GP30 specifying the fax memory is not available 3 In the Properties dialog box click the Configur...

Page 66: ... box and then click the OK button 4 Repeat step 3 if you want to send the fax to multiple recipients 5 Specify the various settings in each sheet To switch between sheets click the tab for each sheet 6 After all the fax settings are specified click the OK button in the Properties dialog box The fax is sent to the specified recipients 3 In the Send FAX sheet specify the name and fax number of the f...

Page 67: ...tion is available only for iR3250 1 In the Windows application with the document open click the command to print your document 2 In the Print dialog box select your fax name from the Name drop down list box and then click the OK button 4 Click the Use Subaddress check box 6 Specify the subaddress and password of the memory box of the recipient s fax and then click the OK button 3 In the Send FAX s...

Page 68: ...ple recipients 9 Specify the various settings in each sheet To switch between sheets click the tab for each sheet 10 After all the fax settings are specified click the OK button in the Properties dialog box The document is sent and stored in the memory box of the recipient s fax The data can be output only when the correct password is specified ...

Page 69: ...can add recipients by Typing a new name and fax number in the Recipient Name and FAX Number boxes Selecting a recipient in the Select from Address Book dialog box To add a new name and fax number as a recipient 2 Enter the name and fax number you want to add in the Recipient Name and FAX Number text boxes 3 Click the Add to Recipient List button The new recipient is displayed in the Recipient List...

Page 70: ...ox and then click the Add to Recipient List button 4 Click the OK button in the Select Recipient from Address Book dialog box The new recipient is displayed in the Recipient List list box in the Send FAX sheet 1 Display the Send FAX sheet 2 Click the Select from Address Book button to open the Select Recipient from Address Book dialog box ...

Page 71: ...fining a new individual You see the same dialog box under the title Edit Individual if you click the Edit button in the Address Book sheet when an individual entry is selected in the Entries list box The Edit Individual dialog box allows you to change information on an existing individual entry To add a new Individual 1 Display the Address Book sheet 2 Click the New Individual button to open the A...

Page 72: ...t to the memory box of the recipient s fax click the Use Subaddress check box NOTE The Subaddress option is available only for iR3250 8 Enter the subaddress and the password of the recipient s fax and then click the OK but ton 9 Enter any additional information about the individual in the Notes text box 10 Click the OK button to create the new individual entry NOTE When you specify two fax numbers...

Page 73: ... individual entry To delete an Individual 1 Select the entry you want to delete in the Entries list box and then click the Delete button 1 Display the Address Book sheet and then click the Individuals check box to display all the individuals in the Entries list box 2 Select an individual to edit and then click the Edit button to open the Edit Individual dialog box ...

Page 74: ...in the Address Book sheet when a group entry is selected in the Entries list box The Edit Group dialog box allows you to change information on an existing group entry To add a new Group 3 Enter the new group name 4 Select individuals or groups as members of the new group from the Available Recipients list box then click the Add button To remove an entry from the Current Group Members list box sele...

Page 75: ...able Recipients list box and then click the Add button To remove a member of the selected group select the individual or group you want to remove from the Current Group Members list box and then click the Remove button 5 Click the OK button to modify the selected group entry 1 Display the Address Book sheet and then click the Groups check box to dis play all the groups in the Entries list box 2 Se...

Page 76: ...Defining the Address Book Entries 4 17 4 Using the Fax Options To delete a Group 1 Select the entry you want to delete in the Entries list box and then click the Delete button ...

Page 77: ...e following check boxes to include that information about the sender or recipient on the cover sheet Sender Name FAX Number Company Dept Div Logo Signature and Remark 1 Display the Cover Sheet sheet 5 If Sender is selected click the Edit Sender button to open the Edit Sender dialog box and then click the following check boxes to include that informa tion about the sender on the cover sheet Name FA...

Page 78: ...ication and position of the selected logo or signature and then click the OK button in the Edit Logo Signature dialog box 10 If Remark is selected select a remark from the drop down list box or enter a remark 11 Enter the information to be included on the cover sheet in the Comment displayed on Cover Sheet text box The specified Cover Sheet is attached to the fax when the fax is sent 7 If Logo and...

Page 79: ...Attaching a Cover Sheet to a Fax 4 20 4 Using the Fax Options ...

Page 80: ...dix 5 C H A P T E R Appendix This chapter provides information about additional software used with the PCL5e or PCL 6 printer drivers Additional Software 5 2 Canon Port Setting Tool 5 2 Device Status Extension 5 2 ...

Page 81: ...Spot Suite Service For more information about using Canon Port Setting Tool see the Online Help To display the Online Help start Canon Port Setting Tool and then click the Help button Device Status Extension When you use a shared printer on Windows 2000 you can browse information on the shared printer and manage print jobs through a web browser Installing Device Status Extension on Windows 2000 en...

Page 82: ...delete a Group 4 17 To edit a Group 4 16 Defining an Individual 4 12 To add a new Individual 4 12 To delete an Individual 4 14 To edit an Individual 4 14 E Editing an Objective 3 23 Editing Profiles 3 2 3 3 Editing Some Print Documents Together 3 28 F Faxing a Document 4 7 To send a document as a Fax 4 7 To send a document to the memory box of the recipient s fax 4 8 Finishing Options 3 9 Selectin...

Page 83: ...3 29 O Objective 3 23 Overlay Printing 3 19 3 21 P Paper Source 3 14 Different for Cover and Others 3 17 Different for First Others and Last 3 15 Different for First Second Others and Last 3 16 Same Paper for All Pages 3 14 Transparency Interleaving 3 18 Print Quality 3 23 Printing a Document 2 13 Printing Multiple Pages on One Sheet 3 7 Printing with an Overlay 3 21 S Scaling 3 5 Scaling a Docume...

Page 84: ...t as an Image Form 3 26 To send a document to the Mail Box 3 25 Setting Up the Printer Configuration 2 11 Specifying the Fax Recipients 4 10 To add a new name and fax number as a recipient 4 10 To add a recipient from the Address Book 4 11 Specifying the Installed Fax Memory 4 6 U Uninstalling the Printer Driver 2 8 Using Booklet Printing 3 12 ...

Page 85: ...Index A 4 ...

Page 86: ...Surrey RH2 8BF United Kingdom CANON DEUTSCHLAND GmbH Europark Fichtenhain A10 47807 Krefeld Germany CANON ITALIA S p A Palazzo L Strada 6 20089 Milanofiori Rozzano MI Italy CANON LATIN AMERICA INC 6505 Blue Lagoon Drive Suite 325 Miami Florida 33126 U S A CANON AUSTRALIA PTY LTD 1 Thomas Holt Drive North Ryde Sydney N S W 2113 Australia CANON SINGAPORE PTE LTD 79 Anson Road 09 01 06 Singapore 0799...

Reviews: