background image

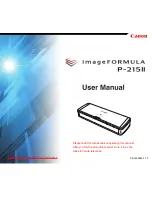
Please read this manual before operating this scanner.

After you finish reading this manual, store it in a safe 

place for future reference.

CE-IM-0942-1.10

Downloaded from ManualsPrinter.com Manuals

Summary of Contents for imageFORMULA P-215II

Page 1: ...Please read this manual before operating this scanner After you finish reading this manual store it in a safe place for future reference CE IM 0942 1 10 Downloaded from ManualsPrinter com Manuals ...

Page 2: ...CaptureOnTouch 46 Starting and Exiting CaptureOnTouch 47 Screen Descriptions 49 Standard Scanning 50 Scanning Shortcut 52 Scanning with Start Button 56 Operations for the scanned image edit window 56 Select document settings 60 Setting the output 62 Scanning Shortcut setting 63 About file formats 64 Environmental Settings 65 Chapter 8 Setting the Scanner Driver 69 Configuration and Functions of th...

Page 3: ...to save a scanner driver setting 94 Chapter 10 Regular Maintenance 96 Cleaning the Scanner 96 Cleaning the Scanning Glass and the Rollers 97 Chapter 11 Detaching and attaching the feed roller and separation pad 98 Replacing Consumable Parts 98 Detaching and attaching the Feed Roller 100 Detaching and attaching the separation pad 101 Resetting the Counters 102 Chapter 12 Uninstalling the Software 1...

Page 4: ... Documentation for this scanner consists of the following manuals Before Use Make sure to read this information before setting up the scanner Setup Guide This manual describes the procedures for setting up the scanner for use Please follow the procedures in the Setup Guide to set up the scanner This manual is stored on the supplied Setup Disc as an electric manual User Manual this manual This manu...

Page 5: ...95 mm D 11 22 x 1 57 x 3 74 when the document feed tray is closed Bus Powered Supporting USB 3 0 bus power the scanner is capable of scanning at a speed of 15 black and white grayscale pages per minute and 10 24 bit color pages per minute using bus power via a single USB cable 200 dpi simplex scanning of A4 documents is assumed in both examples When using a USB 2 0 interface high speed scanning is...

Page 6: ...ons such as the color mode and page size are set automatically based on the document being scanned Auto Resolution Detection When enabled in the CaptureOnTouch Lite CaptureOnTouch or scanner driver settings this function detects the content of documents and determines the scanning resolution automatically Document Size Auto Detection This feature enables automatic detection of the page size of a s...

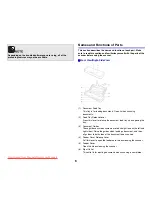
Page 7: ... when opening the tray 3 Document Guides These guides ensure documents are fed straight one on the left and right sides Raise the guides when loading a document and then align them to both sides of the document to be scanned 4 Feeder Cover Release Lever Pull this lever to open the feeder cover when cleaning the scanner 5 Feeder Cover Open this when cleaning the scanner 6 Eject Outlet This outlet i...

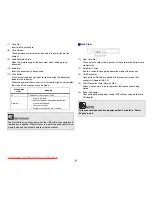
Page 8: ...on mode of the scanner 3 USB Connector Connect the USB cable supplied with the scanner or one that supports Hi Speed USB 2 0 4 Theft Prevention Hole Security Slot Attach a key chain etc here to prevent the scanner from being stolen 5 Power Connector Connect the supplied power supply USB cable or a separately sold AC adapter Start button status Meaning Lit The power of the scanner is ON Flashing Pa...

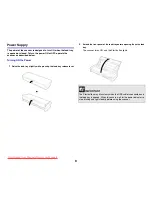
Page 9: ...htly while pressing the feed tray release lever 2 Extend the front panel of the feed tray before opening the entire feed tray The scanner turns ON and the Start button lights The Start button may blink slowly when the USB cable is connected and the feed tray is opened When this occurs wait for the power indicator to stop blinking and light steadily before using the scanner Downloaded from ManualsP...

Page 10: ...us powered scanning can be performed with a single USB cable However scanning can be performed at a higher speed if you use the power supply USB cable or an AC adapter sold separately Connect the power supply USB cable or AC adapter sold separately to the power connector at the rear of the scanner When not using the scanner close the scanner s Document Feed Tray or disconnect the USB cable When tr...

Page 11: ...t has been tested and found to comply with the limits for a Class B digital device pursuant to Part 15 of the FCC Rules These limits are designed to provide reasonable protection against harmful interference in a residential installation This equipment generates uses and can radiate radio frequency energy and if not installed and used in accordance with the instructions may cause harmful interfere...

Page 12: ...orrect disposal of this product will contribute to the effective usage of natural resources For more information about where you can drop off your waste equipment for recycling please contact your local city office waste authority approved WEEE scheme or your household waste disposal service For more information regarding return and recycling of WEEE products please visit www canon europe com envi...

Page 13: ...rporation in the United States Google and Google Drive are trademarks of Google Inc Dropbox is a trademark or registered trademark of Dropbox Inc in the United States SugarSync is a registered trademark of SugarSync Inc in the United States Evernote is a registered trademark or trademark of Evernote Corporation Wi Fi is a registered trademark of the Wi Fi Alliance Other product and company names h...

Page 14: ...ng the machine in direct sunlight Avoid locations where a considerable amount of dust accumulates Avoid warm or humid locations such as in the vicinity of a water faucet water heater or humidifier Avoid locations where ammonia gas is emitted Avoid locations near volatile or flammable materials such as alcohol or paint thinner Avoid locations that are subject to vibration Avoid exposing the scanner...

Page 15: ... or modify the USB cable or power supply USB cable Do not place heavy objects on the cable and do not pull or excessively bend the cable Never connect the USB cable or power supply USB cable when your hands are wet Do not knot or coil the USB cable or power supply USB cable as this may result in a fire or electric shock When connecting the cable make sure that the power plug is securely and comple...

Page 16: ...canner in a humid or dusty location Doing so may result in a fire or electric shock Do not place objects on top of the scanner Such objects may tip or fall over resulting in personal injury When disconnecting the USB cable grasp it firmly by its connector Do not pull directly on the USB cable as this may damage or expose the cable s internal wiring resulting in a fire or electric shock Leave suffi...

Page 17: ...ou the scanner When sending the scanner for repairs When a request is made for repairs the scanner needs to be sent to the specified address When sending the scanner use the packing box in which it came Firmly secure the scanner with packaging material when you place it in the packing box Downloaded from ManualsPrinter com Manuals ...

Page 18: ...ws Vista Service Pack 2 or later 32 bit and 64 bit editions Microsoft Windows 7 Service Pack 1 or later 32 bit and 64 bit editions Microsoft Windows 8 32 bit and 64 bit editions Microsoft Windows 8 1 32 bit and 64 bit editions OS X 10 7 5 10 8 5 10 9 1 Other requirement An ISIS compatible application or a TWAIN compatible application that is compatible with the above operating systems NET Framewor...

Page 19: ...ils on installing these applications refer to the Readme txt file Presto BizCard Business card management software from NewSoft Technology Corp Presto BizCard is a registered trademark of NewSoft Technology Corp PaperPort Windows only File management application from Nuance Communications Inc that makes it easy to store organize and retrieve digital documents In order to receive support of this pr...

Page 20: ...functions You will be asked to agree to terms of service when obtaining an account For details refer to the website of your cloud service provider Simple installation of the above software does not require an account Software Cloud service used CaptureOnTouch plug in for Google Drive Google Drive Evernote Evernote CaptureOnTouch plug in for Evernote Evernote CaptureOnTouch plug in for Dropbox Drop...

Page 21: ...rol screen appears click Yes or Allow 2 The setup menu starts up About Read Me First Click Read Me First to display Setup Guide This manual describes the procedures for setting up the scanner for use Please follow the procedures in the Setup Guide to set up the scanner Install the software before connecting the scanner to the computer Log on to Windows as an Administrator Close all other applicati...

Page 22: ...tallation If you choose Evernote the Web browser will start and display a webpage for downloading the software during the installation Download and install the software following the instructions on the webpage To install Evernote you need a connection to the Internet If you want to reinstall only specific software that you have previously uninstalled select Custom Installation and specify the sof...

Page 23: ...e Setup Disc into the disc drive of the computer Installation of EMC Cloud Capture Function EMC Captiva Cloud Runtime provides a component that enables the use of web based applications The applications need to support this function when enabling this function Be sure to install it only when you are using a supported application Install the software before connecting the scanner to the computer Cl...

Page 24: ...tion 3 Follow the instructions on the screen to complete installation 4 When the installation is complete click Log Out If you choose Evernote the Web browser will start and display a webpage for downloading the software during the installation Download and install the software following the instructions on the webpage To install Evernote you need a connection to the Internet Downloaded from Manua...

Page 25: ...g The USB connector to which the scanner is connected on your computer must be one capable of supplying 500 mA 5 V of power Do not connect the scanner to the computer before installing the software Using a USB Hub The scanner cannot be used when it is connected to a computer via a bus powered USB hub A self powered USB hub can be used but operation is not guaranteed When connected to a USB port th...

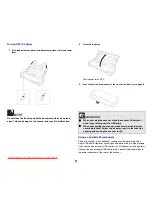
Page 26: ... may not be able to start Turning the Power ON 1 Raise the feed tray slightly while pressing the feed tray release lever Opening the scanner document feed tray switches on the power supply automatically 2 Extend the front panel of the feed tray before opening the entire feed tray The scanner turns ON and the Start button lights Switch Position Scanner Operation ON The scanner is recognized as a st...

Page 27: ...er recognition will end and the scanner will become ready to use When the scanner is properly connected to the computer the CaptureOnTouch icon appears on the taskbar as follows If the taskbar icon appears as or the scanner is not properly connected to the computer Check the status of the power and USB cable Downloaded from ManualsPrinter com Manuals ...

Page 28: ... can scan documents ranging in size from business cards and checks to LTR A4 LGL The document sizes that this scanner can scan are shown below Plain Paper Length of up to 1 000 mm 39 4 is supported in the Long Document mode Size Width 50 8 mm to 216 mm 2 to 8 5 Length 70 mm to 356mm 2 756 to 14 Paper weight 52 to 128 g m2 0 06 to 0 15mm 0 0024 to 0 0059 Downloaded from ManualsPrinter com Manuals ...

Page 29: ...an lead to smudges on the scanned image and transfer the dirt to subsequent documents Always clean the internal parts of the scanner after scanning such documents When scanning a two sided document that is printed on thin paper the image on the opposite side of each page may show through In this case adjust the scanning intensity in the application software before scanning the document It is recom...

Page 30: ...inting down 4 Align the document guides with both edges of the loaded document Press the document beneath the tabs of the document guides Up to 20 pages of plain paper can be loaded at the same time Make sure that the document does not exceed the loading limit marks on the document guides When loading a multi page document place the pages of the document with their edges slightly askew If the docu...

Page 31: ... roller will stop when it has caught the edge of the card allowing you to let go of the card and start scanning from an application The card will be fed when you start scanning with an application program After the card has been fed completely the rollers will turn in the opposite direction and scanning of the card will start The scanned card will be ejected from the front card slot The card slot ...

Page 32: ...ing area and be damaged Be careful to place the document so that it is not skewed When scanning with the Long Document mode paper jam detection may react slowly resulting in damage to the document Be careful to avoid paper jams When scanning long documents make sure to scan the documents one at a time When scanning large sized documents with the Long Document mode scanning may be slower Errors may...

Page 33: ...t settings on page 60 2 Click to display the Scanner Information dialog box The Scanner Information dialog box appears 3 Click Maintenance The Maintenance dialog box appears 4 Select Long Document mode 1 000 mm 5 Click to close the dialog box Downloaded from ManualsPrinter com Manuals ...

Page 34: ...nTouch Lite CaptureOnTouch Lite is a scanning application that comes pre installed in the scanner It can be used on a computer that does not have the scanner driver installed Click the Select document and Output panels and then click the Scan button to scan the document You can select the scan method according to the document type and purpose of use before scanning Scanning Procedure 1 Set the Aut...

Page 35: ...erating environments In such cases open the ONTOUCHLITE drive in Windows Explorer for example and start the application directly by double clicking ONTOUCHL exe Depending on your operating system the drive name may not be ONTOUCHLITE Open the drive on which ONTOUCHL exe is located and start the application directly Depending on your operating system CaptureOnTouch Lite may appear in the AutoPlay s...

Page 36: ...ut 5 Click the SCAN button The document is scanned While scanning is in progress the number of pages scanned is displayed in addition to the scanner settings When the scan is finished the Scanned image preview screen opens If you configure scanning conditions that consume a large amount of the computer s memory scanning may stop because of insufficient memory If an error message appears due to ins...

Page 37: ...ttings Setting the output Click the Cancel button to discard the scanned image and return to the main window 7 When the output has finished a popup window will be displayed If saving the scanned image a link to open the save destination folder will be displayed If you specify an output method other than Print or E mail attachment the Open storage folder button appears This button opens the folder ...

Page 38: ...ureOnTouch icon in the menu bar and then click Launch CaptureOnTouch from the menu which appears to start CaptureOnTouch and display the main window To close the CaptureOnTouch Lite window click at the top of the window This closes the window but CaptureOnTouch Lite will continue to reside in the system To quit the residence of the CaptureOnTouch application 1 Click CaptureOnTouch Lite icon in the...

Page 39: ...ndow When scanning has finished a preview window of the scanned image will be displayed To display the edit window in the preview window click on the tool bar Scanned image preview screen 1 Toolbar This tool bar enables operations to thumbnails and preview images Tools Description Switches the image selection for the thumbnail area These buttons mean All pages Odd pages and Even pages from the lef...

Page 40: ...on to toggle between the typical settings and manual settings displays Click a thumbnail in typical color adjustment to select the most suitable preview image that is displayed 9 thumbnail patterns are displayed for the relevant image in color and 6 patterns in grayscale When adjustment is finished click the OK button To cancel the adjustment click the Back button Indicates the page of the image d...

Page 41: ...finished click the OK button To cancel the adjustment click the Back button Image alignment Click Image alignment to display The preview image or the slider can be used for the straightening and the trimming In the preview image drag the Move grip the Straighten grip and or the trimming frame directly To change the extent of the trimmed image drag the Move grip on the preview When adjustment is fi...

Page 42: ...completed the screen will return to the top screen Select document settings By default CaptureOnTouch Lite enables the Full auto scan setting so shortcut scans saved to the folder are implemented using the scan conditions that match the document To specify the document size color mode and other settings set the desired scan condition by editing the scan mode panel Creating new Select document pane...

Page 43: ...er than the basic items Enable Use advanced settings dialog box to implement advanced scanner settings other than the basic items using the advanced settings dialog box scanner driver To open the scanner driver enable this item and then click the Settings button Which settings are used during scanning differs as follows depending on the setting of the Use advanced settings dialog box check box For...

Page 44: ...the settings to converts the scanned images to PDF file and save to a folder To specify the output method and save location edit the output panel and set the desired output Create new Output panel Click the New output button to add a New output panel Click to display the list of panel types The selected type of the panel is created Edit Output panel The Edit output screen opens when you click the ...

Page 45: ...Environmental settings dialog box you can configure settings related to CaptureOnTouch Lite operations and perform scanner maintenance Maintenance View the total number of pages scanned with the scanner and view counters for the roller and separation pad When you replace the roller and separation pad you can reset the counters here Initialize Return all settings to their default condition Open the...

Page 46: ...tureOnTouch Lite menu The Environmental settings dialog box appears You can configure the following in this dialog box Maintenance Tab Initialize Return all settings to their default condition Downloaded from ManualsPrinter com Manuals ...

Page 47: ...tton 56 Operations for the scanned image edit window 56 Select document settings 60 Setting the output 62 Scanning Shortcut setting 63 About file formats 64 Environmental Settings 65 What is CaptureOnTouch CaptureOnTouch is a scanning application that enables you to scan a document with a simple operation merely by selecting the screen panel CaptureOnTouch is provided with multiple scanning method...

Page 48: ...ance Set the document and press the Start button to start the scan You can also allocate your own shortcuts to the start button Scanning with Start Button Starting and Exiting CaptureOnTouch By default CaptureOnTouch becomes resident in the system when you start your computer Double click CaptureOnTouch icon in the taskbar to start CaptureOnTouch and display the main window You can also start Capt...

Page 49: ...omes no longer resident in the system and the icon disappears from the taskbar To close the CaptureOnTouch window click at the top of the window This closes the window but CaptureOnTouch will continue to reside in the system click CaptureOnTouch icon in the menu bar and select Exit from the menu Restarting CaptureOnTouch To use CaptureOnTouch after it has been made not resident in the system use o...

Page 50: ...X 10 9 CaptureOnTouch will not start when the Start button is pressed Open GO Applications folder from the Finder and double click CaptureOnTouch P xxx Screen Descriptions There are two areas in the CaptureOnTouch main screen Scanning Shortcut and Standard Scanning Use the at the top right of the main window to move between sections Various panels have been prepared according to the scan types and...

Page 51: ...document to be scanned from 1 Select document The selected Select document panel will be displayed in orange To edit scan images see Select document settings 3 Click the output panel for the scan image application from 2 Output The selected Output panel will be displayed in orange To edit the Output panel see Setting the output 4 Click the SCAN button Downloaded from ManualsPrinter com Manuals ...

Page 52: ...anel If you configure scanning conditions that consume a large amount of the computer s memory scanning may stop because of insufficient memory If an error message appears due to insufficient memory while scanning is in progress stop scanning change the scanning conditions and then try scanning again A multiple page scan cannot be saved when it reaches the file size of 2 GB Change the save setting...

Page 53: ...used document selections and outputs you can scan just by clicking the Scanning Shortcut panel Registering and editing scanning shortcuts Multiple scanning shortcuts can be allocated to CaptureOnTouch 1 Either click the New shortcut button in Scanning shortcut or select the document scan and output in Standard Scanning and click the Save to Shortcut button A scanning shortcut panel will be created...

Page 54: ...Option tab to set the options Edit after scanning Check it on to enable modifying the scanned images in Scan Editing screen When unchecked the Edit window is not displayed in Scan Editing screen Operations for the scanned image edit window Enable additional scan You can also create a new Destination panel by clicking on the New button and in the menu that appears selecting the type of Scanning Sho...

Page 55: ... the document in the scanner Chapter 5 Placing Documents 2 Click the scanning shortcut panel The document is scanned While scanning is in progress the number of pages scanned is displayed in addition to the scanner settings When the scan is finished the Scanned image preview screen opens If you configure scanning conditions that consume a large amount of the computer s memory scanning may stop bec...

Page 56: ...hen the output has finished a popup window will be displayed This completes the shortcut scans If scanning continuously set the next document and click the Scan more pages button to start the document scan If Enable additional scan is disabled in the scanning shortcut settings the Scan more pages button will not be displayed If Edit after scanning is disabled in the scanning shortcut settings the ...

Page 57: ...hich the saved scanned images were saved opens Depending on the output settings the Open storage folder button may not be displayed If the Do not display the main screen when the scan is started with the scanner button checkbox is enabled in the Environmental settings the main CaptureOnTouch window will not be displayed when a scan is started from the start button Only dialog boxes error messages ...

Page 58: ...n to discard the edit results and return to the previous scan image Tools Description Switches the image selection for the thumbnail area These buttons mean All pages Odd pages and Even pages from the left Indicates the page of the image displayed on the preview Click to change the page to be displayed Changes the display magnification Move the slider to plus or minus to enlarge or reduce the prev...

Page 59: ...patterns in grayscale When adjustment is finished click the OK button To cancel the adjustment click the Back button Color adjustment Manual settings Move the slider to the left or right to adjust the brightness and contrast of the image checking the preview image Click the Grayscale button to render the image in grayscale Click the Black and White button to render the image using 2 values black a...

Page 60: ...the left or the right The rotation can be adjusted according to the preview image 5 Information Display Area The information regarding the Select document and Select output is displayed Click the button and the Output Settings dialog will appear Click the Scan more pages button to continue the scanning Clicking the Cancel button will destroy the scanned images and return to the top screen When cli...

Page 61: ...t panel Click the Select document tab in the shortcuts editing window Scan settings Makes the scan settings Color mode Select the color mode for scanning from below Page Size Select the paper size of the document to be scanned If you specify Match original size the page size of the scanned document is detected and the images are saved at the detected size Detect automatically Automatically determi...

Page 62: ...t advanced scanner settings other than the basic items using the advanced settings dialog box scanner driver To open the scanner driver enable this item and then click the Settings button Which settings are used during scanning differs as follows depending on the setting of the Use advanced settings dialog box check box For the advanced settings other than the basic items see the help in the drive...

Page 63: ...w output panel Click to display the list of panel types The selected type of the panel is created Edit Output panel The Edit output screen opens when you click the button in the Output panel Click the Output tab in the shortcuts editing window Select output method File formats and save locations that can be selected depend on the output method selected Save to folder Saves the scanned image to the...

Page 64: ...ns of document selection and outputs you can edit the scanning shortcut panel to set the desired scanning shortcut Creating new Scanning Shortcut panels There are two ways as described below to create a new Scanning Shortcut panel Click the Save to Shortcut button in 3 actions in Standard Scanning to register the selected output and document scan to one of the scanning shortcut panels Click the Ne...

Page 65: ...e different from the one selected in the Select document panel PDF setting In Multi pdf settings specify whether to save the scanned images as a multi page file Save all pages as one file or single page files Create a file for each specified number of pages For Create file that complies with PDF A select ON For Compression mode select either Standard or high compression If you click the Compressio...

Page 66: ... items of each tab displayed in the Environmental settings dialog box Basic settings Tab On the Basic settings tab configure the following settings Launch method setting By default CaptureOnTouch becomes resident in the system when you start your computer Clear the Make CaptureOnTouch resident check box to not make CaptureOnTouch resident in the system Display Select the CaptureOnTouch appears whe...

Page 67: ...iguration file settings registered jobs etc of CaptureOnTouch and restore the settings from the backup data Back Up button Back up the settings of CaptureOnTouch to a backup file cot You can store the initial settings of CaptureOnTouch by performing a backup before you first use CaptureOnTouch Restore button Restore the settings from the backup file When using multiple computers you can back up th...

Page 68: ... slows down if you select Full for Log file type Initialize A confirmation dialog box appears when you click the Initialize button All CaptureOnTouch data are deleted and returned to the default settings Click Preferences from the CaptureOnTouch P xxx menu while the main screen of CaptureOnTouch is displayed The following describes the setting items of each tab displayed in the Environmental Setti...

Page 69: ...reOnTouch and restore the settings from the backup data Back Up button Back up the settings of CaptureOnTouch to a backup file plist You can store the initial settings of CaptureOnTouch by performing a backup before you first use CaptureOnTouch Restore button Restore the settings from the backup file When using multiple computers you can back up the environmental settings of one computer and then ...

Page 70: ...ation and Functions of the Scanner Driver 69 Driver Dialog Box 69 Scan Panel 72 Setting Basic Scanning Conditions 73 Function Restrictions Depending on Mode Setting 76 Configuration and Functions of the Scanner Driver Driver Dialog Box The scanner driver consists of the following tabs Basic Tab For details on the setting screen see the Help of the scanner driver Click the Help button of the driver...

Page 71: ...ned images Depending on the ISIS compatible application the application may have its own screen for setting scanning conditions If the scanner driver is opened in such an application setting items related to the functions provided by the scanner driver other than scanning conditions will be displayed on the Basic tab Gamma correction is set when the color tone of the scanned image is different fro...

Page 72: ...to document feeding Others Tab Configure settings for specialized scanning and image processing When the scanner driver is opened from CaptureOnTouch the following settings screen of the scanner driver appears Downloaded from ManualsPrinter com Manuals ...

Page 73: ...ugh by clicking the STOP button of Scan Panel If you click More in the settings screen of the scanner driver and then set Feeding Option to Panel Feeding or Automatic Feeding in the dialog box which appears Scan Panel appears when the scanner starts When scanning of the first document finishes Scan Panel appears and the scanner enters the wait state If you place the next document and then click Co...

Page 74: ...sting the contrast on the Brightness tab Detect automatically detects whether the document is in color grayscale or black and white You can configure advanced settings related to the detection method by clicking Setting For details see the Help Page Size Select the page size that matches the document to be scanned If Match original size is selected the edges of the document are detected and images...

Page 75: ...ically detects whether a document is color grayscale or black and white based on its content When this is selected you can configure detailed settings for the detection method Refer to the Help for details Dots per inch Select the scanning resolution Higher resolutions provide clearer images but result in larger file sizes and slower scanning When Detect automatically is specified the resolution i...

Page 76: ...d only when Detect automatically is selected Scanning Side Select which of the sides of the document to scan If the scanning side is set to Skip blank page the images of blank pages are deleted when images are saved Downloaded from ManualsPrinter com Manuals ...

Page 77: ... when Detection Mode is set to Color or Gray in the Auto Image Type Detection Settings dialog box Setting value Contrast Detect automatically O Black and White O Advanced Text Enhancement II O Error Diffusion O 256 level Gray O 24 bit Color O Setting value Prescan Detect automatically Black and White O Error Diffusion O Advanced Text Enhancement II O 256 level Gray O 24 bit Color O Setting value E...

Page 78: ... Diffusion O Advanced Text Enhancement II O 256 level Gray O 24 bit Color O Setting value Enable Back Side Brightness Enable Back Side Contrast Detect automatically O O Black and White O O Error Diffusion O O Advanced Text Enhancement II 256 level Gray O O 24 bit Color O O Setting value Edge emphasis Background smoothing Prevent Bleed Through Remove Background Detect automatically O O Black and Wh...

Page 79: ...ocuments and images 87 When you want to detect multiple pages fed at the same time88 When you want to match the orientation of images to the text when scanning a mixture of pages with different text orientations 89 When you want to rotate the images of a document placed horizontally to correct the orientation 90 How to scan both sides of a card as an image on one sheet of paper 91 When you want to...

Page 80: ...Add Delete for Page Size to display the Add Delete Page Size dialog box Name and register the unregistered page size in Page Size Practical Examples When you want to specify the scan area Specify the area of the document to be scanned in the Scan Area dialog box which is opened from the Area button on the Basic tab Downloaded from ManualsPrinter com Manuals ...

Page 81: ...ing scanned image is displayed in the preview window Practical Examples When you want to delete the images of the blank pages in two sided documents Set the scanning side setting to Skip Blank Page on the Basic tab to delete the images of the blank pages in the document If Skip Blank Page is selected the Setting button is enabled and you can adjust the level for judging whether pages are blank Dow...

Page 82: ...can adjust the level for judging whether pages are blank Practical Examples When you do not want to scan colored lines and text Specify the color red blue green or Color Elimination to be ignored dropped out in the color drop out settings on the Image processing tab and that color will not be scanned Downloaded from ManualsPrinter com Manuals ...

Page 83: ...pped out in the dialog box which appears and that color will not be scanned Practical Examples When you want to enhance the color red Specify Red Enhance for Color drop out on the Image processing tab to enhance the color red in the document Downloaded from ManualsPrinter com Manuals ...

Page 84: ...r Color dropout in the dialog box that appears to enhance the color red in the document Practical Examples When you want to enhance contours in images Adjust the edge emphasis setting on the Image processing tab Downloaded from ManualsPrinter com Manuals ...

Page 85: ...ich appears Practical Examples When you want to make lines or characters in the scanned images thicker Drag the slider for Character Emphasis on the Image processing tab to make the lines and characters that appear in the scanned image thicker Downloaded from ManualsPrinter com Manuals ...

Page 86: ...x that appears adjust letter and line thickness settings Practical Examples How to produce a picture quality scan In the Image processing tab click Apply corrections suitable for photographs checkbox to ON Downloaded from ManualsPrinter com Manuals ...

Page 87: ...ground If the background is non uniform such as a pattern the background may not be able to be completely removed and the text may become difficult to read If necessary you can make the text in scanned images easier to read by adjusting the contrast on the Brightness tab Apply corrections suitable for photographs is suited to finer outputs than black and white shading Disabling the checkbox will o...

Page 88: ... that the text is emphasized for better readability Practical Examples To correct tilted documents and images Place a check in Automatically straightens skewed under the Basic tab and then click Setting to display the Deskew Settings screen Select a correction method and click OK Downloaded from ManualsPrinter com Manuals ...

Page 89: ...fed documents or Straightens with angle contents of fed documents Practical Examples When you want to detect multiple pages fed at the same time Select the Double Feed Detection check box on the Feeding tab You can enable the Detect by Length Downloaded from ManualsPrinter com Manuals ...

Page 90: ... text when scanning a mixture of pages with different text orientations Select Text orientation recognition in Document Orientation on the Others tab The text orientation on each page is detected and the scanned image is rotated in 90 degree increments to correct the orientation Downloaded from ManualsPrinter com Manuals ...

Page 91: ...nts to correct the orientation Practical Examples When you want to rotate the images of a document placed horizontally to correct the orientation Specify the rotation angle in Document Orientation on the Others tab When the Text Orientation Recognition check box is selected Document Orientation is unavailable Downloaded from ManualsPrinter com Manuals ...

Page 92: ...t to scan the front and back of a card in a single scan in the Feeding tab click the Combine Front Back Card Images check box to ON For directions on how to feed a card into the scanner refer to Loading cards on p 30 Brightness contrast and other settings can be individually set for each side of a card but mode and resolution cannot be set individually for each side Downloaded from ManualsPrinter ...

Page 93: ... in User Preference to scan with scanning conditions that match the document For a landscape card the image is oriented so that the lettering on both sides is in the same direction For a portrait card the lettering on each side is oriented in opposite directions Downloaded from ManualsPrinter com Manuals ...

Page 94: ...ttings can only be used in Windows Depending on the application program these settings may not appear When you want to use the multistream settings for scanning select the Use MultiStream checkbox on the Others tab to display the setting items related to multistream and then configure the setting items in the following order When Full Automatic Mode is selected Color mode Page Size and Dots per in...

Page 95: ...ions for each of Back 1st to Back 3rd The following shows the setting conditions that can be set in the multistream settings Practical Examples When you want to save a scanner driver setting When you finish configuring a setting click the Save button of User Preference to save the setting The saved setting is registered to the list You can delete a setting from the list with the Delete button and ...

Page 96: ... to save the setting Clicking the Add button registers the current setting to Favorite Setting List Use the Delete button to delete a setting from the list The preregistered Full Automatic Mode cannot be deleted from Favorite Setting List Downloaded from ManualsPrinter com Manuals ...

Page 97: ...the exterior of the scanner or create a risk of fire or electrical shock Cleaning the Scanner To clean the exterior of the scanner dampen a cloth with water or a mild detergent wring the cloth out thoroughly and then wipe the dirt away Then use a dry soft cloth to wipe away any moisture Do not use a coarse cloth or dirty cloth because it may result in scratches Cleaning the Inside of the Scanner D...

Page 98: ...o wipe off any dirt on the scanning glass Wipe off any dirt on the rollers with a cloth that has been dampened with water and then wipe the rollers with a clean soft dry cloth Remove the feed rollers before cleaning them For details on removal see see Detaching and attaching the Feed Roller Do not spray water or neutral detergent directly on the scanner Precision mechanisms such as the light sourc...

Page 99: ...canner are consumable parts and will wear with scanning If either the feed roller or the separation pad or both are worn documents may not feed correctly and paper jams may occur When the total number of pages of documents fed in the scanner exceeds the following quantity a message appears when the scanner is connected to the computer In such cases you must replace the part indicated in the messag...

Page 100: ...er of pages fed also needs to be reset when you replace the rollers This message only serves as a rough guide for when to replace the feed roller and separation pad They may wear out sooner if for example a lot of pages with rough surfaces are scanned Downloaded from ManualsPrinter com Manuals ...

Page 101: ...e Feed Roller 1 Open the feed tray 2 Open the feeder cover 3 Open the roller cover 4 Slide the feed rollers to left 5 Remove the feed rollers Attaching the Feed Roller Use the following procedure to replace the feed roller 1 Attach the new feed rollers Align the notch on the roller with the shaft on the main unit side Downloaded from ManualsPrinter com Manuals ...

Page 102: ...ecurely close the feed cover will cause document feed problems 4 Close the feeder cover Detaching and attaching the separation pad When replacing the separation pad perform the following steps to detach it from and attach it to the unit Detaching the separation pad 1 Open the feed tray 2 Open the feeder cover 3 Remove the separation pad Downloaded from ManualsPrinter com Manuals ...

Page 103: ...e ON position when you only use CaptureOnTouch Lite and have not installed CaptureOnTouch and the scanner driver on your computer you cannot reset the counter using this procedure In this case you can reset the counter from CaptureOnTouch Lite 1 Log on to Windows as an Administrator 2 Click the Start button and then click All Programs Canon P xxx and Canon imageFORMULA Utility imageFORMULA Utility...

Page 104: ... 1 Opens the scanner driver s Detail Settings screen See Select document settings 2 Click to display the Scanner Information dialog box The Scanner Information dialog box appears 3 Click Maintenance The Maintenance dialog box appears 4 Reset the counters If you replaced the feed rollers click Reset for Current Rollers Count If you replaced the separation pad click Reset for Current Pad Count 5 Cli...

Page 105: ... a program Add or Remove Programs for Windows XP The Uninstall or change a program dialog box appears 3 From the Programs list select the software you want to remove and then click Uninstall The delete confirmation screen appears 4 Click Yes Uninstallation of the software is now complete No uninstaller is provided for OS X drivers To uninstall use Finder to delete the following files Library Image...

Page 106: ...tips 109 Clearing a Paper Jam When paper jams occur during scanning use the following procedure to clear them Be careful when removing jammed paper It is possible to cut your hand on the edge of a sheet of paper 1 Remove any documents remaining in the feed tray 2 Open the feeder cover Downloaded from ManualsPrinter com Manuals ...

Page 107: ...rd and may damage it Carefully pull out the document without using excessive force If the jammed paper tears make sure that you remove any remaining pieces Make sure the document does not get caught in the card guides as well When a paper jam or other problem occurs while Rapid recovery system is enabled in the scanner driver the image of the last document that was scanned properly is saved before...

Page 108: ...mber of pages that you load into the scanner at one time and then scan again 2 Align the document guides to fit the documents as closely as possible and load the documents so that they feed straightly 3 Enable Automatically straightens skewed or Deskew in the scanner driver settings 4 If many pages have been scanned since the last roller cleaning clean the rollers and separation pad When cleaning ...

Page 109: ...file TIFF PDF You can save multiple pages to a single file by clicking and selecting in the displayed dialog box For the setting method see About file formats Q11 All of the placed documents have been scanned but the scanned image does not appear on the application A11 When Panel Feeding or Automatic Feeding is selected as the document feeding method on the scanner driver s setting screen scanning...

Page 110: ...ith programs that are not compatible with CaptureOnTouch In this case select None as the image file compression format before scanning CaptureOnTouch plug in or Captiva Cloud cannot be used Install NET framework if it is not yet installed Useful tips Here are some useful tips for scanning documents Where are scanned images saved Can the save destination be changed Images are saved to the following...

Page 111: ...How to produce a picture quality scan on p 85 Scanned image edges are lost when scanning while setting Page Size to Match original size Windows or Detect automatically OS X in the settings screen of the scanner driver How can I scan correctly without any loss of edges Set the check box of Trimming in the Image processing tab to OFF Windows Set the check box of the Trimming dialog box displayed whe...

Page 112: ...talled by selecting its checkbox when installing CaptureOnTouch How do I use the automatic document color detection function The scanner driver for this scanner includes a function that automatically detects the color mode from the contents of a document The color modes that can be detected automatically by this function depend on the application and scanner driver settings you are using as follow...

Page 113: ...59 to 0 0118 Business card Width 49 to 55 mm 1 93 to 2 17 Length 85 to 91 mm 3 35 to 3 58 Thickness density 128 to 225 g m2 34 to 60 lb bond Thickness 0 15 to 0 3 mm 0 0059 to 0 0118 Card ISO IEC compliant Width 86 mm 3 39 Length 54 mm 2 13 Thickness 0 76 mm 0 03 or less Up to 1 4 mm 0 055 for embossed cards Document Feeding Method Automatic Scanning Sensor Contact image sensor Light source LED Sc...

Page 114: ... When scanning in duplex mode using only USB 2 0 bus power power consumption on the scanner may fluctuate depending on the type of document being scanned and the processing load on the scanner In such cases the scanning speed may vary When using USB 3 0 USB 2 0 bus power in combination with the power supply USB cable Grayscale Simplex 200 200dpi 15pages min 300 300dpi 15pages min Duplex 200 200dpi...

Page 115: ...g environment is compatible with Wi Fi Unit WU10 system requirements In order to use this accessory it is necessary to install the scanner wireless utility External Dimensions Downloaded from ManualsPrinter com Manuals ...

Reviews: