background image

PUB. DIE-0349-000B

Digital Video Camcorder

Instruction Manual

Summary of Contents for LEGRIA FS307

Page 1: ...PUB DIE 0349 000B Digital Video Camcorder Instruction Manual ...

Page 2: ...is located on the bottom Using any device other than the Compact Power Adapter CA 570 may damage the camcorder European Union and EEA only These symbols indicate that this product is not to be disposed of with your household waste according to the WEEE Directive 2002 96 EC the Battery Directive 2006 66 EC and or your national laws implementing those Directives This product should be handed over to...

Page 3: ... that can enrich your shooting experience Dual Shot 21 With Dual Shot mode recording is as simple as pressing a single button and using the zoom lever The camcorder will take care of the rest Image Stabilization 79 Dynamic IS compensates for camcorder shake when shooting video while walking This gives you more freedom and mobility when recording movies Special Scene recording programs 40 When reco...

Page 4: ...ring the Accessories 19 Adjusting the Position and Brightness of the LCD Screen 21 Basic Operation of the Camcorder 21 Operating Modes 22 Joystick and Joystick Guide 23 Using the Menus 25 First Time Settings 25 Setting the Date and Time 25 Changing the Language 26 Changing the Time Zone 27 Using a Memory Card 27 Memory Cards Compatible for Use with the Camcorder 27 Inserting and Removing a Memory ...

Page 5: ... Timeline 38 Pre selecting Recordings from the Index Screen 39 Deleting Scenes 40 Advanced Functions 40 Special Scene Recording Programs 41 Controlling Shutter Speed and Other Functions while Shooting 43 Mini Video Light 43 Video Snapshot 45 Pre recording Function 46 Self Timer 46 Automatic Backlight Correction and Manual Exposure Adjustment 47 Manual Focus Adjustment 48 White Balance 49 Image Eff...

Page 6: ...ting Photos 62 Copying Photos 63 Other Functions You Can Use When Taking Photos 63 Printing Photos 63 Printing Photos 64 Selecting the Print Settings 66 Print Orders External Connections _______________________ 69 Terminals on the Camcorder 69 Connection Diagrams 70 Playback on a TV Screen 71 Saving Your Recordings 71 Saving Your Recordings on a Computer 71 Authoring DVD Discs and Photo DVDs 74 Tr...

Page 7: ...Lists 77 FUNC Menu 79 Setup Menus 85 Trouble 85 Troubleshooting 89 List of Messages 97 Do s and Don ts 97 Handling Precautions 100 Maintenance Others 100 Using the Camcorder Abroad 101 Music Files 102 General Information 102 System Diagram 103 Optional Accessories 105 Specifications 108 Index ...

Page 8: ...rence page number in this manual Text that applies only to the model shown in the icon The following terms are used in this manual When not specified as memory card or built in memory the term memory by itself refers to both only Scene refers to one movie unit from the point you press the button to start recording until you press again to pause the recording The photos included in this manual are ...

Page 9: ... Special Scene recording program For details about the available options refer to the following sidebar Brackets are used to refer to menu options as they are displayed on screen In tables in this manual the default value is shown in boldface For example ON OFF In this manual the arrow is used to abbreviate menu selections For a detailed explanation refer to Using the Menus 23 Names of buttons and...

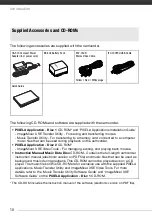
Page 10: ...ransfer Utility For transferring to a memory card connected to a computer music files that can be used during playback on the camcorder PIXELA Application Disc 2 CD ROM ImageMixer 3 SE Video Tools For managing editing and playing back movies Instruction Manual Music Data Disc CD ROM Contains the full length camcorder instruction manual electronic version on PDF file and music files that can be use...

Page 11: ... VIDEO SNAP Video Snapshot button 43 print share button 64 DISP on screen display button 50 61 BATT INFO button 15 USB terminal 69 AV OUT terminal 69 Speaker 34 Strap mount 18 ACCESS memory access indicator 30 55 Grip belt DC IN terminal 16 Mini video light 43 Stereo microphone ...

Page 12: ...tton 31 stop button 34 Zoom out W wide angle button 31 play pause button 34 START STOP button 30 FUNC button 23 77 Joystick 22 PHOTO button 55 Zoom lever 31 POWER button Tripod socket 97 Battery release latch 17 Memory card slot 27 Battery compartment 16 Battery compartment cover Memory card slot cover Serial number The serial number label is located on the top surface of the battery compartment c...

Page 13: ...re recording function 45 Memory operation 15 Number of scenes recorded record pause Time code hours minutes seconds while recording Remaining recording time On the memory card In the built in memory Remaining battery time 15 Wind screen off 79 Backlight correction 46 Joystick guide 22 Mini video light 43 Level marker 81 Audio level indicator 81 Time code Playback time hours minutes seconds Scene n...

Page 14: ...ery time 15 Number of photos available 15 On the memory card In the built in memory Self timer 46 AF frame 80 Joystick guide 22 Mini video light 43 Focus and exposure lock 55 Camcorder shake warning 80 Photo number 15 84 Current photo Total number of photos Histogram 61 Date and time of recording Photo protection mark 61 Manual exposure 46 Photo size 55 File size Aperture value Shutter speed 41 ...

Page 15: ...he remaining recording time will be displayed accurately Depending on the conditions under which the camcorder and the battery pack are used the actual battery charge may not be indicated accurately When the camcorder is off press to display the charge status of a battery pack The Intelligent System will display the charge status as a percentage and the remaining recording time in minutes for 5 se...

Page 16: ...ging times and recording playback times with a full battery pack refer to the tables on pages 103 104 1 Connect the power cord to the compact power adapter 2 Plug the power cord into a power outlet 3 Connect the compact power adapter to the camcorder s DC IN terminal 4 Slide the battery compartment cover away from the lens and open it 5 Insert the battery pack all the way into the compartment and ...

Page 17: ...il you hear a click IMPORTANT Turn off the camcorder before connecting or disconnecting the compact power adapter After turning off the camcorder important data is updated in the memory Be sure to wait until the ON OFF CHG indicator turns off We recommend charging the battery pack in temperatures between 10 C and 30 C Outside the temperature range of 0 C to 40 C the charging will not start Do not ...

Page 18: ...before to ensure a full charge We recommend that you prepare battery packs to last 2 to 3 times longer than you think you might need Preparing the Accessories Fasten the grip belt Adjust the grip belt so that you can reach the zoom lever with your index finger and the button with your thumb 1 Lift the padded handgrip s flap and detach the strap from the Velcro pad 2 Pull the strap to remove it fir...

Page 19: ... strap to the Velcro pad on the handgrip and close the flap Adjusting the Position and Brightness of the LCD Screen Rotating the LCD Panel Open the LCD panel 90 degrees You can rotate the panel 90 degrees downward You can rotate the panel 180 degrees toward the lens Rotating the LCD panel 180 degrees can be useful when you wish to include yourself in the picture when recording with the self timer ...

Page 20: ...f LCD DIMMER perform the following procedure While the camcorder is on hold pressed down for more than 2 seconds Repeat the operation to switch between normal and bright NOTES This setting does not affect the brightness of the recording Using the bright setting will shorten the effective usage time of the battery pack When the compact power adapter is connected while the brightness of the screen i...

Page 21: ...s settings to your preference Turn the camera mode dial to to set the camcorder to mode You do not need to worry about any settings and can shoot video using just or take photos using just You can also use the zoom lever Quick Start 33 and Video Snapshot 43 To set the camcorder to flexible recording mode turn the camera mode dial to for movies or for photos You can access the menus and change Basi...

Page 22: ...n change the following settings in advance before setting the camcorder to mode Recording mode of movies Size quality of photos Widescreen Auto slow shutter All settings in the SYSTEM SETUP menu LCD screen dimmer Demo mode Image stabilizer If you select DYNAMIC in advance IMG STAB will be set to DYNAMIC if you select STANDARD or OFF in advance IMG STAB will be set to STANDARD Joystick and Joystick...

Page 23: ...cept for a few exceptions most menu settings will return to their default values For details about the available menu options and settings refer to the appendix Menu Options Lists 77 Selecting a FUNC Menu Option in Recording Mode 1 Press 2 Select the icon of the function you want to change from the left side column Menu items not available will appear grayed out 3 Select the desired setting from t...

Page 24: ...lumn and press The title of the selected menu appears on top of the screen and under it the list of settings 4 Select the setting you want to change and press The orange selection bar indicates the menu setting currently selected Items not available appear in black Push the joystick to return to the menu selection screen step 3 5 Select the desired option and press to save the setting 6 Press You ...

Page 25: ... rechargeable lithium battery may discharge completely and the date and time setting may be lost In such case recharge the built in lithium battery 99 and set the time zone date and time again The date appears in a year month day format only in the first setup screen In subsequent screen displays the date and time will appear as day month year for example 1 JAN 2010 12 00 AM You can change the dat...

Page 26: ...corder and will not change regardless of the language selected Changing the Time Zone Change the time zone to match your location The default setting is Paris MENU DATE TIME SETUP T ZONE DST Your local time zone MENU DATE TIME SETUP T ZONE DST Local time at your destination To adjust for daylight saving time select the area name marked with a 21 TO SET THE HOME TIME ZONE FUNC FUNC WHEN YOU TRAVEL ...

Page 27: ... memory cards When you buy a new memory card look for the Speed Class logo on the package Inserting and Removing a Memory Card Make sure to initialize all memory cards before using them with this camcorder 28 1 Turn off the camcorder Make sure that the ON OFF CHG power charge indicator is off 2 Slide the memory card slot cover away from the lens and open it 3 Insert the memory card straight with t...

Page 28: ...rdings You can select to record your movies and photos in the built in memory or on the memory card The built in memory is the default media for recording both MENU MEMORY OPER MEDIA MOVIES or MEDIA PHOTOS The memory you want to use Press For each media you can check the total used and approximate available space The approximate available space will depend on the recording mode for movies or size ...

Page 29: ...ndows users Use the supplied software Music Transfer Utility to transfer the music files on the supplied Instruction Manual Music Data Disc CD ROM to a memory card connected to a computer For details refer to the software s instruction manual PDF file Mac OS users Use the Finder to transfer the music files on the supplied Instruction Manual Music Data Disc CD ROM to a memory card connected to a co...

Page 30: ...g Failing to do so may result in permanent data loss or damage to the memory Do not open the memory card slot cover Do not disconnect the power source or turn off the camcorder Do not change the operating mode NOTES About the Power Save mode To save power when the camcorder is powered by a battery pack the camcorder will automatically shut off if left without any operations for 5 minutes 83 Press ...

Page 31: ... you set the camcorder to mode Zooming Optical Advanced and Digital Zoom The camcorder offers three types of zoom optical 37x advanced 41x and digital 2000x 2300x 1800x In mode all three types are available In mode the advanced zoom and 21 FUNC FUNC Approximate recording times for movies Default value When a recording exceeds 4 GB it will be divided and saved as scenes smaller than 4 GB Recording ...

Page 32: ... than when actually recording 21 About the Zoom Types Optical The zoom range is limited to the optical magnification ratio of the lens Advanced In addition to the optical zoom range the camcorder processes the image digitally to obtain a larger zoom range without any deterioration in image quality In mode advanced zoom is used except when IMG STAB is set to DYNAMIC or when WIDESCREEN is set to OFF...

Page 33: ...nge to orange to indicate the camcorder entered the standby mode 2 When you wish to resume recording open the LCD panel The ON OFF CHG indicator will return to green and the camcorder will be ready to record IMPORTANT Do not disconnect the power source during standby mode while the ON OFF CHG indicator is lit in orange NOTES The camcorder will not enter standby mode if the LCD panel is closed whil...

Page 34: ...in to pause the playback Press to stop the playback and return to the index screen 1 Push the joystick to display the joystick guide 2 Push the joystick to select the top row 3 Adjust the volume To turn off the volume keep the joystick pressed toward until the volume bars disappear IMPORTANT Observe the following precautions while the ACCESS indicator is on or flashing Failing to do so may result ...

Page 35: ... Display the joystick guide Select the middle row Push the joystick toward or Skipping scenes To skip to the next scene Display the joystick guide Select the bottom row Push the joystick toward To return to the beginning of the current scene or skip to the previous scene Display the joystick guide Select the bottom row Push the joystick toward Repeat to skip to the beginning of the previous scene ...

Page 36: ...creen From this index screen you can also press to open the index screen for Video Snapshot scenes You can select the scenes in the built in memory or on the memory card 35 2 Open the list of recordings SCENE SEARCH SELECT DATE The list of recordings displays all dates in which recordings were made An orange selection frame appears on the day The thumbnail shows a photo from the first scene record...

Page 37: ...time for the same day You can select the year or month field and change the year or month to move faster between calendar months 4 Press to return to the index screen The orange selection frame will appear on the first scene recorded on the selected date NOTES You can change on what day to start the week for the calendar display 82 You can press to return to the index screen at any time Selecting ...

Page 38: ...s or mark all of them with print orders 66 or transfer orders 74 1 Select the movies or the photo index screen From the movies index screen you can also press to open the index screen for Video Snapshot scenes You can select the recordings in the built in memory or on the memory card 35 2 Open the selection screen SELECT INDIVIDUAL SCENES or INDIVIDUAL PHOTOS The selection screen appears 3 Move be...

Page 39: ... delete This step is not necessary to delete all scenes or previously selected scenes 2 Delete the scene s DELETE Desired option YES OK If you selected any option other than ONE SCENE you can press to interrupt the operation while it is in progress Some scenes will be deleted nevertheless IMPORTANT Be careful when deleting original recordings Once deleted an original scene cannot be recovered Save...

Page 40: ...a computer Special Scene Recording Programs Recording in a very bright ski resort or capturing the full colors of a sunset or a fireworks display becomes as easy as selecting a Special Scene recording program For details about the available options refer to the following sidebar PROGRAM AE PORTRAIT Press to display the Special Scene SCN recording programs Desired recording program NOTES NIGHT Movi...

Page 41: ...record subjects moving quickly use slower shutter speeds to add motion blur emphasizing the feel of movement 21 PORTRAIT The camcorder uses a large aperture achieving a focus on the subject while blurring other distracting details BEACH Use this mode to record on a sunny beach It prevents the subject from being underexposed SPORTS Use this mode to record sports scenes such as tennis or golf SUNSET...

Page 42: ...a slow shutter speed in dark places you can obtain a brighter image but image quality may be lower and autofocus may not work well The image may flicker when recording with fast shutter speeds PROGRAM AE The camcorder automatically adjusts the aperture and shutter speed to obtain the optimal exposure for the subject SHUTTER PRIO AE Set the shutter speed value The camcorder automatically sets the a...

Page 43: ...r scenes an entirely new feel You can also add to the playlist 51 just the scenes you want to watch and change their order Recording Scenes 1 Press The button s light illuminates A blue border appears on the screen 2 Press The camcorder records for about 4 seconds and then automatically switches to record pause mode The blue border changes to black and roughly indicates how much time has passed Wh...

Page 44: ...he selected background music will play instead of the scene s original audio Playing Back the Scenes Select a scene from which to start playback and press There is no sound during fast playback 1 In the track selection screen select a track to delete 2 Select and press 3 Select YES and press Press twice to return to the index screen IMPORTANT Music files transferred to the memory may not be used w...

Page 45: ...g 3 seconds before you press ensuring you do not miss important shooting opportunities This is especially useful when it is difficult to predict when to start recording 1 Push the joystick to display the joystick guide 2 Select Pre REC and press appears Press again to turn pre recording off 3 Press to begin recording The recording will include the 3 seconds before was pressed NOTES While pre recor...

Page 46: ...once the countdown has begun Turning off the camcorder Changing the operating mode Setting the camcorder to standby mode Automatic Backlight Correction and Manual Exposure Adjustment At times backlit subjects may appear too dark underexposed or subjects under very strong lights may appear too bright or glaring overexposed To correct this you can manually adjust the exposure or use the automatic ba...

Page 47: ...ell on the following subjects In such case focus manually Reflective surfaces Subjects with low contrast or without vertical lines Fast moving subjects Through wet windows Night scenes POINTS TO CHECK Adjust the zoom before you start the procedure 1 Push the joystick to display the joystick guide 2 Select FOCUS and press MF appears on the screen 3 Adjust the focus as necessary The focus will be lo...

Page 48: ...e menu NOTES When you select the custom white balance Set the custom white balance in a sufficiently illuminated place Set D ZOOM to OFF Reset the white balance when the lighting conditions change Depending on the light source may keep flashing The result will still be better than with AUTO Custom white balance may provide better results in the following cases Changing lighting conditions Close up...

Page 49: ... enhancing effects VIVID Emphasizes the contrast and color saturation NEUTRAL Tones down the contrast and color saturation SOFT SKIN DETAIL Softens the details in the skin tone area for a more complimentary appearance To obtain the best effect use this setting when recording a person in close up Note that areas similar to the skin color may lack in detail FUNC FUNC 21 D EFFECT OFF Select this sett...

Page 50: ...sound will fade in or out When you apply an effect the sound will be recorded normally The camcorder retains the last setting used even if you turn off the digital effects or change the recording program On Screen Displays and Data Code With every scene or photo recorded the camcorder keeps a data code that includes the date time and information about the camera setup at the time of recording Whil...

Page 51: ...out the best parts and later cut out the rest 1 Open the original movies index screen You can select the movies in the built in memory or on the memory card 35 2 Select the scene you want to divide 3 Open the scene division screen DIVIDE The scene selected will start playing back 4 Select the icon and press where you want to divide the scene You can use the following icons to bring the scene to a ...

Page 52: ... a playlist to play back only the scenes you prefer and in the order of your choice and even set them to music in the same way you can set Video Snapshot scenes to music 43 You can also create a playlist that contains only Video Snapshot scenes 43 Moving or deleting scenes in the playlist will not affect the original recordings Adding Scenes to the Playlist Options 1 Open the original movies index...

Page 53: ... the original movies index screen press 2 Select the scene you want to delete This step is not necessary to delete all scenes 3 Delete the scene s DELETE Desired option YES OK Moving Scenes in the Playlist Move the scenes in the playlist to play them back in the order of your choice 1 Open the playlist index screen In the original movies index screen press 2 Select the scene you want to move 3 Ope...

Page 54: ...OK Press to interrupt the operation while it is in progress IMPORTANT Observe the following precautions while the ACCESS indicator is on or flashing Failing to do so may result in permanent data loss Do not open the memory card slot cover Do not disconnect the power source or turn off the camcorder Do not change the operating mode NOTES If the memory card does not have enough free space you will n...

Page 55: ... following precautions while the ACCESS indicator is on or flashing Failing to do so may result in permanent data loss Do not open the memory card slot cover Do not disconnect the power source or turn off the camcorder Do not change the operating mode NOTES If the subject is not suitable for autofocus turns yellow Adjust the focus manually 47 Selecting Photo Size and Quality Photos are recorded as...

Page 56: ...r immediately after recording it if REVIEW is set to OFF While reviewing the photo immediately after recording 1 Push the joystick to display the joystick guide 2 Press 3 Select YES and press Photo size Recommended use L 1024x768 To print photos up to L size 9 x 13 cm or postcard size 10 x 14 8 cm S 640x480 To send photos as e mail attachments or to post on the Web FUNC FUNC Approximate number of ...

Page 57: ...rn to the index screen 5 Select a photo Move the orange selection frame to the photo you want to view Push the joystick to extend the selection frame and browse through whole index pages Push the joystick to return to the index screen 6 Press The index screen closes and the selected photo is displayed 7 Push the joystick to move between images Push the joystick and hold it down to run quickly thro...

Page 58: ...o is displayed Slideshow You can play a slideshow of all the photos and even set it to music 1 Select the first photo of the slideshow 2 Press to play back the photos one after another Press to stop the slideshow POINTS TO CHECK Windows users Use the supplied software Music Transfer Utility to transfer the music files on the supplied Instruction Manual Music Data Disc CD ROM to a memory card conne...

Page 59: ...slideshow with music make sure the photos and music files are on the memory card The background music may not be played back correctly when playing back a slideshow from a memory card with slow transfer rates Magnifying Photos during Playback During playback photos can be magnified up to 5 times 1 Move the zoom lever toward T The photo is magnified by 2 times and a frame appears indicating the pos...

Page 60: ...te This step is not necessary to delete all photos or previously selected photos 3 Delete the photo s DELETE Desired option YES OK If you selected an option other than ONE PHOTO you can press to interrupt the operation while it is in progress Some photos will be deleted nevertheless IMPORTANT Be careful when deleting photos Deleted photos cannot be recovered NOTES Protected photos cannot be delete...

Page 61: ...rotect photos from accidental erasure Protecting Single Photos 1 Open the photo selection screen PROTECT PROTECT appears on the screen 2 Select the photo you want to protect 3 Press to protect the photo appears on the bottom bar and the photo cannot be deleted Press again to remove the protection 4 Repeat steps 2 3 to protect additional photos or press twice to close the menu Protecting Photos fro...

Page 62: ... option YES OK If you selected SELECTED PHOTOS or ALL PHOTOS you can press to interrupt the operation while it is in progress This step is not required when copying a single photo IMPORTANT Observe the following precautions while the ACCESS indicator is on or flashing Failing to do so may result in permanent data loss Do not open the memory card slot cover Do not disconnect the power source or tur...

Page 63: ...pplied USB cable Connection Refer to Connection Diagrams 69 If the device selection screen appears select PC PRINTER and press Select in advance the memory from which you want to print the photos 35 If the photo index screen is displayed move the zoom lever toward T to display a photo appears and changes to You can also use the following functions The following functions and features of the camcor...

Page 64: ...o the printer s instruction manual If you have no intention to use the optional DW 100 DVD Burner you can set USB SETTING to PC PRINTER 83 so the device selection screen does not appear every time you connect the camcorder to a printer Connection to a PictBridge compatible printer will not work when the memory card contains 1 800 photos or more For best performance we recommend keeping the number ...

Page 65: ...om the camcorder and printer and turn off the camcorder PAPER PAPER SIZE Available paper sizes vary depending on the printer model PAPER TYPE Select PHOTO FAST PHOTO PLAIN or DEFAULT PAGE LAYOUT Select DEFAULT BORDERED or one of the following page layouts BORDERLESS The photo is enlarged and may be slightly cropped at the edges to fit the paper 2 UP 4 UP 8 UP 9 UP 16 UP Refer to the sidebar on pag...

Page 66: ...at were recorded created edited or changed with any device other than this camcorder If BUSY does not disappear disconnect the USB cable and restore the connection after a short while Print Orders You can mark in advance the photos you want to print and set the desired number of copies as a print order Later you can easily print out the print orders by connecting the camcorder to a PictBridge comp...

Page 67: ...e Index Screen Options PRINT ORDER Desired option YES OK Printing the Photos Marked with Print Orders 1 Connect the camcorder to the printer using the supplied USB cable Connection Refer to Connection Diagrams 69 2 Open the print settings menu MENU PRINT The print settings menu appears If there are no photos marked with print orders SET PRINT ORDER appears 3 Select PRINT and press FUNC FUNC INDIVI...

Page 68: ...fer to page 65 Restarting Printing Open the print settings menu as explained in step 2 In the print settings menu select RESUME and press The remaining photos will be printed Printing cannot be restarted when the print order settings have been changed or if you deleted a photo with print order settings In case the print order was interrupted after the first photo this menu option will appear as PR...

Page 69: ...the built in speaker will be muted while the STV 250N Stereo Video Cable is connected to the camcorder USB Terminal Access Open the LCD panel Connection Type Analog Output only Connect to a TV or VCR with audio video input terminals If the TV cannot automatically detect and change the aspect ratio 83 change TV TYPE according to the TV set widescreen or 4 3 VIDEO AUDIO R L STV 250N Stereo Video Cab...

Page 70: ...V 250N Stereo Video Cable is connected to the camcorder Adjust the volume using the TV When you play back your 16 9 movies on standard TV sets with a 4 3 aspect ratio the TV set will switch automatically to widescreen mode if it is compatible with the WSS system Otherwise change the aspect ratio of the TV manually Connection In all respects exactly the same connection as connection above Connect t...

Page 71: ...n Guide Saving your Recordings without a Computer If you prefer to save your recordings without having to use a computer you can use the optional DW 100 DVD Burner to create DVD discs of your movies and Photo DVDs of your photos 71 You can also connect the camcorder to an external recording device DVD or HDD recorder VCR etc to save copies of your movies 74 IMPORTANT When the camcorder is connecte...

Page 72: ...ms 69 and Connections If the device selection screen appears select DVD BURNER and press When the connection is completed NO DISC will be displayed 3 Insert a brand new disc into the DVD burner Use the OPEN CLOSE button on the DVD burner to open and close the disc tray After the disc is recognized an information screen will display the type of DVD you are creating the estimated time and number of ...

Page 73: ... external device and make sure it is compatible IMPORTANT While the camcorder is connected to the DVD burner do not open the memory card slot cover and do not remove the memory card Observe the following precautions while the ACCESS indicator on the camcorder is on or flashing Failing to do so may result in permanent data loss Do not open the memory card slot cover Do not disconnect the USB cable ...

Page 74: ...mark with a transfer order 3 Press to set the transfer order A checkmark appears in the box next to the transfer order icon Press again to cancel the transfer order 4 Repeat steps 2 3 to mark additional photos with transfer orders or press twice to close the menu Setting Transfer Orders from the Index Screen Options TRANSFER ORDER Desired option YES OK Copying your Recordings to an External Video ...

Page 75: ...amcorder to a computer using the supplied USB cable to transfer photos in the memory The procedure varies depending on your computer s operating system 1 Set the camcorder to mode Select in advance the memory from which you want to transfer photos 35 2 Connect the camcorder to the computer using the USB cable Connection Refer to Connection Diagrams 69 If the device selection screen appears select ...

Page 76: ...e image files on your computer make copies of them first Use the copied files retaining the originals During the following operations even if you connect the camcorder to the computer it will not be recognized Erasing all photos Erasing all transfer orders Erasing all print orders NOTES We recommend powering the camcorder using the compact power adapter Refer also to the computer s instruction man...

Page 77: ...explained below the tables FUNC Menu FUNC Menu Recording Modes Appendix Menu Options Lists Menu item Setting options Recording programs PROGRAM AE SHUTTER PRIO AE z z 41 PORTRAIT SPORTS NIGHT SNOW BEACH SUNSET SPOTLIGHT FIREWORKS z z 40 White balance AUTO DAYLIGHT TUNGSTEN SET z z 48 Image effects IMAGE EFFECT OFF VIVID NEUTRAL SOFT SKIN DETAIL z z 49 Digital effects D EFFECT OFF FADE T WIPE BLK W...

Page 78: ...ingle photo view NO YES z 62 From the index screen ALL PHOTOS ONE PHOTO SELECTED PHOTOS CANCEL z 62 ADD TO PLAYLIST ALL SCENES THIS DATE ONE SCENE SELECTED SCENES CANCEL z2 51 DIVIDE z4 51 MOVE z3 53 PROTECT From single photo view From the index screen INDIVIDUAL PHOTOS SELECTED PHOTOS REMOVE ALL SELECTIONS CANCEL z 61 PRINT ORDER From single photo view 0 99 copies From the index screen INDIVIDUAL...

Page 79: ...ore effective as the zoom approaches full wide angle STANDARD This setting compensates for a lower degree for camcorder shake such as when shooting while remaining stationary and is suitable for shooting natural looking scenes The picture angle will be wider at full wide angle DELETE ALL SCENES ALL SCENES THIS DATE ONE SCENE SELECTED SCENES CANCEL z2 39 ALL SCENES ONE SCENE CANCEL z3 53 From singl...

Page 80: ...an also select which AF frames to use ON AiAF One or more AF frames out of the nine frames available are automatically selected and the focus is fixed on them ON CENTER A single focusing frame appears in the center of the screen and the focus is automatically fixed on it OFF No AF frame will appear and the photo will be recorded immediately after you press When the recording program is set to FIRE...

Page 81: ...ngs currently in use The total space for the built in memory may be less than the capacity listed in Specifications 105 In the CARD INFO screen you can also verify the Speed Class of the memory card The maximum number of remaining photos displayed on the screen is 99999 Display Setup LCD Brightness Language etc DISPLAY SETUP Menu item Setting options MEMORY INFO z z z z CARD INFO z z z z MEDIA MOV...

Page 82: ...ator on the LCD screen so you can check the audio recording level while recording TV SCREEN When set to ON the camcorder s on screen displays will appear also on the screen of a TV or monitor connected using the STV 250N Stereo Video Cable DATA CODE Displays the date and or time when the scene was recorded CAMERA DATA Displays the aperture f stop and shutter speed used when recording MARKERS You c...

Page 83: ... shut off if left without any operation for 5 minutes Approximately 30 seconds before the camcorder shuts off AUTO POWER OFF will appear In standby mode the camcorder will shut off after the time selected for the QUICK START setting The Power Save mode cannot be set while the compact power adapter is connected to the camcorder QUICK START Select whether to activate the Quick Start function 33 when...

Page 84: ...ct the photo numbering method to be used on a new memory card Photos are automatically assigned consecutive photo numbers from 0101 to 9900 and stored in folders containing up to 100 photos Folders are numbered from 101 to 998 RESET Photo numbers will restart from 101 0101 every time you insert a new memory card CONTINUOUS Photo numbers will continue from the number following that of the last phot...

Page 85: ...ry pack is too hot let it cool down until its temperature is below 40 C Charge the battery pack in temperatures between 0 C and 40 C The battery pack is damaged Use a different battery pack The camcorder cannot communicate with the battery pack attached Such battery packs cannot be charged using this camcorder A noise can be heard from the compact power adapter A faint sound can be heard while the...

Page 86: ...ll not focus Autofocus does not work on the subject Focus manually 47 Lens is dirty Clean the lens with a soft lens cleaning cloth 100 Never use tissue paper to clean the lens When a subject flits across in front of the lens the image appears slightly bent This is a phenomenon typical of CMOS image sensors When a subject crosses very quickly in front of the camcorder the image may seem slightly wa...

Page 87: ...out 5 times more than the size of the music files Make sure there is enough space and then transfer the music files again When playing a slideshow it takes longer than usual for the photos to advance or there are brief stops in the audio This may occur when using a memory card with no Speed Class rating or playing back photos recorded with another device and then transferred to a memory card conne...

Page 88: ... emit strong electromagnetic fields plasma TVs cellular phones etc keep a distance between the camcorder and these devices Sound is distorted or is recorded at lower levels When recording near loud sounds such as fireworks shows or concerts sound may become distorted or it may not be recorded at the actual levels This is not a malfunction The picture is displayed correctly but there is no sound fr...

Page 89: ...onnection The camcorder doesn t recognize the DW 100 DVD Burner even though it is connected correctly USB SETTING is set to PC PRINTER Set it to DVD BURNER or to CONNECT SET 83 List of Messages Following the list of messages for the camcorder you can find separate lists for printing related messages 95 and for messages that appear only when using the optional DW 100 DVD Burner 94 ACCESSING THE CAR...

Page 90: ...ER The scene could not be divided because data could not be added to the camcorder s file management data Save the recordings 71 and initialize the memory 28 Use the supplied supplied software ImageMixer 3 SE Transfer Utility to transfer the scene to a computer and divide it CANNOT EDIT Cannot move or delete original scenes or scenes in the playlist CANNOT EDIT CHECK THE CARD The memory card in th...

Page 91: ... is full Erase some recordings 39 59 to free some space or replace the memory card CARD REACHED THE MAXIMUM NUMBER OF SCENES The memory card already contains 3 999 scenes the maximum number of scenes no further scenes can be copied onto the memory card Delete some recordings 39 to free some space CARD INITIALIZE USING ONLY THE CAMCORDER There is a problem that prevents accessing the memory card In...

Page 92: ...interrupted while the camcorder was writing to the memory card and later the position of the card s LOCK switch was changed to prevent erasure Change the position of the LOCK switch NO CARD There is no memory card in the camcorder NO PHOTOS There are no photos to play back NO SCENES There are no scenes recorded in the memory selected NOT AVAILABLE IN DUAL SHOT You pressed a button that cannot be u...

Page 93: ...DER IS SET TO MOVIE MODE You pressed while the camera mode dial was set to THE CAMCORDER IS SET TO PHOTO MODE You pressed while the camera mode dial was set to THE CARD IS SET FOR ERASURE PREVENTION The LOCK switch on the SD or SDHC memory card is set to prevent accidental erasure Change the position of the LOCK switch THE MEMORY CARD COVER IS OPEN After inserting a memory card close the memory ca...

Page 94: ...a commercially available DVD disc or a brand new DVD disc is inserted CLOSE THE MEMORY CARD SLOT COVER The memory card slot cover is open Close the cover after correctly inserting the memory card 27 CONNECT THE COMPACT POWER ADAPTER The camcorder is being powered by the battery pack Connect the compact power adapter to the camcorder DISC ACCESS FAILURE CHECK THE DISC There was an error when readin...

Page 95: ...gs to print X photos that have a different compression Alternatively you attempted to print X photos that were edited on a computer or recorded with another camcorder and then transferred to a memory card connected to a computer FILE ERROR You attempted to print a photo that has a different compression Alternatively you attempted to print a photo that was edited on a computer or recorded with anot...

Page 96: ...status When you are printing using the button check the print settings PRINTER COVER OPEN Close the printer cover securely PRINTER ERROR A malfunction has occurred that may require repairs Canon inkjet printers the printer s green power lamp and orange error lamp flash alternately Disconnect the USB cable and turn off the printer Unplug the printer s power cord from the power outlet and contact th...

Page 97: ...the camcorder in dusty or sandy places The camcorder is not waterproof avoid also water mud or salt If any of the above should get into the camcorder it may damage the camcorder and or the lens Be careful of heat generated by lighting equipment Do not disassemble the camcorder If the camcorder does not function properly consult qualified service personnel Handle the camcorder with care Do not subj...

Page 98: ... be charged even if you attach them to this camcorder or to the optional CG 800E Battery Charger If you use with the camcorder battery packs that are not genuine Canon battery packs will appear and the remaining battery time will not be displayed Memory Card We recommend saving the recordings on the memory card onto your computer Data may be corrupted or lost due to memory card defects or exposure...

Page 99: ...ever it will become totally discharged if you do not use the camcorder for about 3 months To recharge the built in lithium battery Connect the compact power adapter to the camcorder and leave it connected for about 24 hours with the camcorder off Disposal When you delete movies or initialize the built in memory only or memory card only the file allocation table is altered and stored data is not ph...

Page 100: ...ontinued use may damage the camcorder Condensation may form in the following cases When the camcorder is moved quickly from cold to warm places When the camcorder is left in a humid room When a cold room is heated rapidly Do not expose the camcorder to sudden or extreme changes in temperature Place the camcorder in an airtight plastic bag and let it adjust to temperature changes slowly before remo...

Page 101: ...c Files The specifications of the music files compatible with the camcorder are as follows Audio encoding Linear PCM Audio sampling 48 kHz 16 bits 2 channels Minimum length 10 seconds File extension WAV The music files are saved in the memory under the following folder structure The supplied Instruction Manual Music Data Disc CD ROM contains a folder called MUSIC Windows users This folder contains...

Page 102: ...harger STV 250N Stereo Video Cable SC 2000 Soft Carrying Case WS 20 Wrist Strap SS 600 SS 650 Shoulder Strap SD SDHC memory card BP 808 Battery Pack Computer TV Card reader writer PictBridge compatible printers IFC 300PCU USB Cable VCR DVD recorder DW 100 DVD Burner DVD discs SCART Adapter CA 570 Compact Power Adapter ...

Page 103: ...sted battery pack for the first 20 minutes it can be used for 3 times longer than it was charged In other words you can record with the camcorder for 60 minutes after a 20 minute charge Optional Accessories Use of genuine Canon accessories is recommended This product is designed to achieve excellent performance when used with genuine Canon accessories Canon shall not be liable for any damage to th...

Page 104: ...power on off Shoulder Strap You can attach a shoulder strap for more security and portability SC 2000 Soft Carrying Case A handy camcorder bag with padded compartments and plenty of space for accessories Recording mode XP SP LP Usage time Maximum recording time 210 min 210 min 210 min Typical recording time 105 min 105 min 105 min Playback time 295 min 295 min 295 min Recording mode XP SP LP Usage...

Page 105: ...5 min SP 1 hr 20 min LP 2 hr 35 min Image Sensor 1 6 type CCD approx 800 000 pixels Effective pixels2 all figures are approximate values 16 9 Movies advanced zoom IMG STAB set to OFF or STANDARD 440 000 T 540 000 W pixels optical zoom IMG STAB set to DYNAMIC 440 000 pixels 4 3 Movies optical zoom 400 000 pixels Photos 530 000 pixels LCD Screen 6 7 cm 2 7 in wide TFT color approx 123 000 dots Micro...

Page 106: ...mized yielding extremely high quality prints 2 When two values are given the first indicates the value at full telephoto T and the second indicates the value at full wide angle W Terminals AV OUT Terminal 3 5 mm minijack Output only Video 1 Vp p 75 Ω unbalanced Audio 10 dBV 47 kΩ load 3 kΩ or less USB Terminal mini B USB 2 0 Hi Speed USB Output only Power Others Power supply rated 7 4 V DC battery...

Page 107: ... The information in this manual is verified as of March 2010 Subject to change without notice Battery type Rechargeable lithium ion battery compatible with Intelligent System Rated voltage 7 4 V DC Operating temperature 0 40 C Battery capacity 890 mAh Dimensions 30 7 23 3 40 2 mm Weight 46 g ...

Page 108: ...ry 99 C Calendar display 37 Condensation 100 Connections to external devices 69 Copying Movies 54 Photos 62 D Data code 82 Date and time 25 Date format 84 Daylight saving time 26 Time zone 26 Deleting Erasing Movies 39 53 Photos 56 59 Digital effects 49 Direct print 63 Dividing scenes 51 Dual Shot 21 DVD authoring 71 E Error messages 89 Exposure 46 F Fireworks recording program 41 Focus Focus prio...

Page 109: ... R Recording Movies 30 Photos 55 Recording mode 31 Recording programs 40 41 Recording time 31 RESET 88 Reviewing photos 80 S Screen icons 13 SD SDHC memory card 27 Searching scenes by date 36 Selecting the media for playback 35 for recording 28 Self timer 46 Serial number 12 Setup menus 24 80 Shutter speed 41 Slideshow 58 Snow recording program 41 Special Scene recording programs 40 Sports recordi...

Page 110: ... other countries Manufactured under license from Dolby Laboratories Dolby and the double D symbol are trademarks of Dolby Laboratories Other names and products not mentioned above may be trademarks or registered trademarks of their respective companies ANY USE OF THIS PRODUCT OTHER THAN CONSUMER PERSONAL USE IN ANY MANNER THAT COMPLIES WITH THE MPEG 2 STANDARD FOR ENCODING VIDEO INFORMATION FOR PA...

Page 111: ...w canon com au Canon New Zealand Ltd Tel 800 222 666 within New Zealand only 64 02 9805 2555 www canon co nz Canon Singapore Pte Ltd 1 HarbourFront Avenue 04 01 Keppel Bay Tower Singapore 098632 Tel 65 6799 8888 Fax 65 6799 8882 Canon Hongkong Company Ltd 19 F The Metropolis Tower 10 Metropolis Drive Hunghom Kowloon Hong Kong Tel 852 3191 2333 Fax 852 2428 3963 Canon Latin America Inc Sales Enquir...

Reviews: