background image

MG3500 series

Online Manual

Read Me First

Useful Functions Available on the Machine

Overview of the Machine

English

Summary of Contents for MG3560

Page 1: ...MG3500 series Online Manual Read Me First Useful Functions Available on the Machine Overview of the Machine English...

Page 2: ...22 Printing from Computer or Smartphone with Google Cloud Print 25 Using Remote UI 27 Printing from AirPrint Compliant Device 30 How to Use Print from E mail 34 Preparing to Use Print from E mail 39...

Page 3: ...a FINE Cartridge 88 Checking the Ink Status 93 Checking the Ink Status with the Ink Lamps on the Operation Panel 94 Maintenance 95 When Printing Becomes Faint or Colors Are Incorrect 96 Maintenance Pr...

Page 4: ...g 137 Turning on off the Machine Automatically 138 Information about Network Connection 139 Useful Information about Network Connection 140 Initial Values Set at Factory Network 141 Connecting the Mac...

Page 5: ...uring Optimal Printing Quality 178 Useful Information about Ink 179 Key Points to Successful Printing 180 Be Sure to Make Paper Settings after Loading Paper 181 Canceling a Print Job 182 Key to Enjoyi...

Page 6: ...stoppage of disclosure of this guide Although the contents of this guide have been prepared with utmost care please contact the service center if you find any incorrect or missing information In prin...

Page 7: ...personal injury or material damage caused by incorrect operation of the equipment These must be observed for safe operation Important Instructions including important information To avoid damage and i...

Page 8: ...rademarks of Apple Inc IOS is a trademark or registered trademark of Cisco in the U S and other countries and is used under license Google Cloud Print Google Chrome Android and Google Play are either...

Page 9: ...ctions You can find target pages easily by entering your product s model name and a keyword for the function you want to learn about Example When you want to learn how to load paper Enter your product...

Page 10: ...window and perform a search Searching for Reference Pages You can search for reference pages described in this guide by entering your model name and a page title You can find reference pages more eas...

Page 11: ...Window Used in Operation Explanation In this guide most of the operations are described based on the windows displayed when Mac OS X v10 8 is used 11...

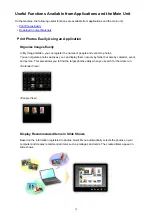
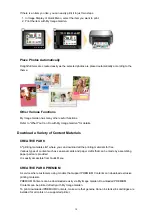
Page 12: ...g various functions Useful Functions Available from Applications and the Main Unit You can create items such as collages easily or download delightful printing materials and print them Helpful Functio...

Page 13: ...names of people and events to photos You can organize photos easily as you can display them not only by folder but also by calendar event and person This also allows you to find the target photos easi...

Page 14: ...ls CREATIVE PARK A printing materials site where you can download all the printing materials for free Various types of content such as seasonal cards and paper crafts that can be made by assembling pa...

Page 15: ...Note The designs of PREMIUM Contents provided in this page are subject to change without prior notice 15...

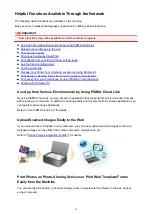
Page 16: ...y using PIXMA Printing Solutions Printing with Windows RT Use App from Various Environments by Using PIXMA Cloud Link By using PIXMA Cloud Link you can access an application that supports this service...

Page 17: ...Various Environments with Google Cloud Print The machine is compatible with Google Cloud Print Google Cloud Print is a service provided by Google Inc By using Google Cloud Print you can print from any...

Page 18: ...enance from your computer or smartphone Because you can use this service from a remote location through the network you can check printer information even when you re out away from the printer Refer t...

Page 19: ...ply connect this machine to the network For information about connecting to the network see here When the connection is complete the Canon Inkjet Print Utility software which allows you to specify det...

Page 20: ...e uploaded images can be browsed from other computers smartphones etc To use Evernote you need to create an account See the CREATE ACCOUNT page of Evernote for account creation Settings In the Setting...

Page 21: ...or services supporting Google Cloud Print 1 Preparations for Printing with Google Cloud Print 2 Printing from Computer or Smartphone with Google Cloud Print Important LAN connection with the machine a...

Page 22: ...notice Registering the Machine with Google Cloud Print Register the machine with Google Cloud Print The authentication procedure using the web browser on the computer or the mobile device is required...

Page 23: ...ntication process following the on screen instructions Note Perform the authentication process with your Google account which you have gotten in advance 9 When the message that the registration is com...

Page 24: ...t the machine is turned on If your printer has a LCD monitor 2 From the Home screen select Setup or press the Setup button on the operation panel 3 Select Web service setup Connection setup Google Clo...

Page 25: ...ting with Google Cloud Print is complete and when the machine is turned on the machine receives the print data and prints it automatically Note Depending on the communication status it may take a whil...

Page 26: ...s function is not available depending on the printer you are using To confirm whether this function is available with your printer refer to List of Function for Each Model Google Cloud Print 1 Make su...

Page 27: ...the machine is connected to the LAN and the LAN environment is connected to the Internet Note that the customer is responsible for paying all Internet connection fees 1 Check that the machine has been...

Page 28: ...ne The Remote UI starts 1 From your computer smartphone or tablet device open the Web browser and enter the following URL http Printer IP address For Printer IP address enter the IP address that you c...

Page 29: ...utility functions such as cleaning AirPrint settings This function allows you to specify the Apple AirPrint settings such as position information Google Cloud Print setup This function allows you to r...

Page 30: ...d one of the following Apple devices running the latest version of iOS iPad all models iPhone 3GS or later or iPod touch 3rd generation or later Network Environment The Apple device iPad iPhone or iPo...

Page 31: ...oftware does not let you use printer options you cannot print from that application software Note The printer options differ depending on the application software and model you are using Normally when...

Page 32: ...is selected automatically according to the application software being used on the Apple device and the region in which AirPrint is used When Apple s photo application software is used the default pap...

Page 33: ...the device on which iOS is installed 3 Check that the machine has enough paper and ink 4 Check that no error message is displayed on the machine operation panel If the problem persists use the printe...

Page 34: ...This function may not be available in some countries regions This function is not available depending on the printer you are using To confirm whether this function is available with your printer refer...

Page 35: ...can be printed E mail messages cannot be printed Encrypted Adobe PDF files password protected files and files that are set to print disabled cannot be printed Files that are attached as compressed fi...

Page 36: ...and click Register A URL of the member registration page is sent to the e mail address of the newly registered member 3 Registered member accesses to the URL that is included in the e mail and complet...

Page 37: ...com po Note For a wireless LAN connection after the printer is turned on it may take a few minutes before communication becomes possible Confirm that your printer is connected to the wireless LAN and...

Page 38: ...deleted and Print from E mail can no longer be used If you want to use this service again you must re register the printer and the printer owner For information about the re registration procedure se...

Page 39: ...he home window and select Setup Web service setup Web service connection setup Print from E mail setup Register printer From the operation panel of this machine display the home window and select Web...

Page 40: ...intenance starts 4 In the Printer Owner Registration window enter the information shown below and click Next User Name Enter any name The name that you enter is displayed at login Important The maximu...

Page 41: ...mail Important You have to complete the registration within 30 minutes 2 Enter the registered e mail address of the printer s owner the temporary password and click Log In 3 Set a password of your cho...

Page 42: ...Zagreb Brussels Copenhagen Madrid Paris Belgrade Bratislava Budapest Ljubljana Prague West Central Africa UTC 02 00 Athens Bucharest Istanbul Amman Windhoek Jerusalem Cairo Harare Pretoria Beirut Hel...

Page 43: ...00 MG6500 MG6400 MG5500 MG3500 MG2500 MG2400 MX series Model name Print from E mail Google Cloud Print Canon Inkjet Cloud Printing Center MX920 MX720 MX530 MX520 MX470 MX450 MX390 E series Model name...

Page 44: ...s Model name Print from E mail Google Cloud Print Canon Inkjet Cloud Printing Center iP8700 iP2800 iX series Model name Print from E mail Google Cloud Print Canon Inkjet Cloud Printing Center iX6800 i...

Page 45: ...e Machine Settings Changing Machine Settings from Your Computer Changing the Machine Settings Using the Operation Panel Information about Network Connection Useful Information about Network Connection...

Page 46: ...Safety Guide Safety Precautions Regulatory and Safety Information 46...

Page 47: ...o the On screen Manual Do not place any object on the machine Especially do not place metal objects paper clips staples etc or containers of flammable solvents alcohol thinners etc on top of the machi...

Page 48: ...ation If this equipment does cause harmful interference to radio or television reception which can be determined by turning the equipment off and on the user is encouraged to try to correct the interf...

Page 49: ...r mit s mains poignets pieds et chevilles Users in Jordan This printer contains WLAN Module K30356 approved by TRC SS 2013 36 or WLAN Module K30357 approved by TRC LPD 2013 130 European Union and EEA...

Page 50: ...ode it can print again immediately if required If the product is not used for a time the device switches to its Power Save Mode The devices consume less power Watt in these modes If you wish to set a...

Page 51: ...Main Components and Basic Operations Main Components About the Power Supply of the Machine 51...

Page 52: ...Main Components Front View Rear View Inside View Operation Panel 52...

Page 53: ...guides Slide to align with both sides of the paper stack 6 front tray Load various sizes or types of paper which you can use on the machine Two or more sheets of the same size and type of paper can be...

Page 54: ...10 operation panel Use to change the settings of the machine or to operate it Operation Panel 11 platen glass Load an original to copy or scan 54...

Page 55: ...connector Plug in the supplied power cord 3 USB port Plug in the USB cable to connect the machine with a computer Important Do not touch the metal casing Do not plug in or unplug the USB cable while...

Page 56: ...cartridge should be installed into the right slot 4 head cover Opens to enable replacement of the FINE cartridge The head cover will open automatically when you open the paper output cover Note For de...

Page 57: ...r of Flashes of the Alarm Lamp in If an Error Occurs ON lamp flashes green and Alarm lamp flashes orange alternately An error that requires contacting the service center may have occurred Support Code...

Page 58: ...own lets you select maintenance options or machine settings 9 Color button Starts color copying You can also press this button to finalize your selection for the setting item 10 Black button Starts bl...

Page 59: ...About the Power Supply of the Machine Confirming that the Power Is On Turning the Machine On and Off Notice for the Power Plug Power Cord Notice for Unplugging the Power Cord 59...

Page 60: ...Confirming that the Power Is On The ON lamp is lit green when the machine is turned on Note It may take a while for the machine to start printing immediately after you turn on the machine 60...

Page 61: ...is performed from a computer connected by USB cable or wireless network This feature is set to off by default Managing the Machine Power Turning off the machine 1 Press the ON button to turn off the...

Page 62: ...power plug power cord is rusty The power plug power cord is bent The power plug power cord is worn The power plug power cord is split Caution If you find anything unusual with the power plug power cor...

Page 63: ...m that the ON lamp is off Unplugging the power cord while the ON lamp is lit or flashing may cause drying or clogging of the print head and print quality may be reduced 1 Press the ON button to turn t...

Page 64: ...Loading Paper Originals Loading Paper Loading Originals 64...

Page 65: ...Loading Paper Loading Plain Paper Photo Paper Loading Envelopes Media Types You Can Use Media Types You Cannot Use Printing Area 65...

Page 66: ...ing Loading paper without aligning the edges may cause paper jams If paper is curled hold the curled corners and gently bend them in the opposite direction until the paper becomes completely flat For...

Page 67: ...too hard against the paper The paper may not be fed properly Important Always load paper in the portrait orientation B Loading paper in the landscape orientation C can cause paper jams Note Do not ov...

Page 68: ...ently and extend the paper output support Important Be sure to open the paper output tray when printing If not open the machine cannot start printing Note After loading paper Select the size and type...

Page 69: ...e already moistened and adhesive 1 Prepare envelopes Press down on all four corners and edges of the envelopes to flatten them If the envelopes are curled hold the opposite corners and gently twist th...

Page 70: ...ap of the envelope will be faced up on the left side B Rear side C Address side Push the envelopes all the way to the back of the front tray Up to 5 envelopes can be loaded at once 4 Slide the right p...

Page 71: ...the paper output tray 1 Open the paper output tray gently and extend the paper output support Important Be sure to open the paper output tray when printing If not open the machine cannot start printi...

Page 72: ...t be able to purchase some Canon genuine papers depending on the country or region of purchase Paper is not sold in the US by Model Number Purchase paper by name Paper for printing photos Photo Paper...

Page 73: ...0 mm Maximum size 8 50 x 26 61 inches 215 9 x 676 0 mm Paper Weight You can use paper in the following weight range 17 to 28 lb 64 to 105 g m2 except for Canon genuine paper Do not use heavier or ligh...

Page 74: ...x 7 13 x 18 cm and 8 x 10 20 x 25 cm 20 sheets 4 x 6 10 x 15 cm Photo Paper Pro Luster LU 101 3 10 sheets A4 and Letter Photo Paper Plus Semi gloss SG 201 3 10 sheets A4 Letter 5 x 7 13 x 18 cm and 8...

Page 75: ...3 When loading paper in stacks the print side may become marked as it is fed or paper may not feed properly In this case load one sheet at a time 75...

Page 76: ...105 g m2 except for Canon genuine paper Paper thinner than a postcard including plain paper or notepad paper cut to a small size when printing on paper smaller than A5 Picture postcards Postcards aff...

Page 77: ...Printing Area Printing Area Other Sizes than Letter Legal Envelopes Letter Legal Envelopes 77...

Page 78: ...enlarged to fill the whole page For Borderless Printing use the following paper Photo Paper Pro Platinum PT 101 Glossy Photo Paper Everyday Use GP 501 GP 601 Photo Paper Glossy GP 601 Photo Paper Plu...

Page 79: ...x 9 80 inches 175 2 x 249 0 mm 4 x 6 10 x 15 cm 3 73 x 5 69 inches 94 8 x 144 4 mm 5 x 7 13 x 18 cm 4 73 x 6 69 inches 120 2 x 169 8 mm 8 x 10 20 x 25 cm 7 73 x 9 69 inches 196 4 x 246 0 mm Recommende...

Page 80: ...r 8 00 x 10 69 inches 203 2 x 271 4 mm Legal 8 00 x 13 69 inches 203 2 x 347 6 mm Recommended printing area A 1 28 inches 32 5 mm B 1 32 inches 33 5 mm Printable area C 0 12 inches 3 0 mm D 0 20 inche...

Page 81: ...g Area width x height Envelope DL 3 88 x 7 06 inches 98 8 x 179 5 mm Envelope Com 10 3 68 x 7 90 inches 93 5 x 200 8 mm Recommended printing area A 0 31 inches 8 0 mm B 1 28 inches 32 5 mm C 0 22 inch...

Page 82: ...Loading Originals Loading Originals on the Platen Glass Originals You Can Load How to Detach Attach the Document Cover 82...

Page 83: ...nment mark Important Be sure to observe the following when loading the original on the platen glass Do not place any objects weighing 4 4 lb 2 0 kg or more on the platen glass Do not put any pressure...

Page 84: ...Important After loading the original on the platen glass be sure to close the document cover before starting to copy or scan 84...

Page 85: ...document magazine or newspaper Printed photo postcard business card or disc BD DVD CD etc Size width x height Max 8 5 x 11 7 inches 216 x 297 mm Note When loading a thick original such as a book on th...

Page 86: ...ng the document cover Hold up the document cover vertically and then pull it up Attaching the document cover Fit both hinges A of the document cover into the holder B and insert both hinges of the doc...

Page 87: ...Replacing a FINE Cartridge Replacing a FINE Cartridge Checking the Ink Status 87...

Page 88: ...NE cartridge to dry out and the machine may not operate properly when it is reinstalled To maintain optimal printing quality use a FINE cartridge within six months of first use Note If a FINE cartridg...

Page 89: ...f you have closed the head cover while replacing a FINE cartridge close the paper output cover then open it again Trying to force open the head cover with your hand may cause the machine to malfunctio...

Page 90: ...oid staining of clothing or the surrounding area Discard the empty FINE cartridge according to the local laws and regulations regarding disposal of consumables 4 Prepare a new FINE cartridge 1 Take a...

Page 91: ...ad nozzle on a FINE cartridge The machine may not print properly if you touch them 5 Install the FINE cartridge 1 Insert the new FINE cartridge straight into the FINE cartridge holder all the way unti...

Page 92: ...aper output cover is closed take appropriate action If an Error Occurs When you start printing after replacing the FINE cartridge the machine starts cleaning the print head automatically Do not perfor...

Page 93: ...Checking the Ink Status Checking the Ink Status with the Ink Lamps on the Operation Panel You can also check the ink status on the computer screen Checking the Ink Status from Your Computer 93...

Page 94: ...orange to inform you of the error Count the number of flashes and take appropriate action If an Error Occurs In the copy standby mode you can check the ink status with the Color Ink lamp and Black In...

Page 95: ...Maintenance When Printing Becomes Faint or Colors Are Incorrect Performing Maintenance from a Computer Cleaning the Machine 95...

Page 96: ...g Becomes Faint or Colors Are Incorrect Maintenance Procedure Printing the Nozzle Check Pattern Examining the Nozzle Check Pattern Cleaning the Print Head Cleaning the Print Head Deeply Aligning the P...

Page 97: ...installed correctly Replacing Procedure Also check if the protective tape on the bottom of the FINE cartridge is removed If the Alarm lamp lights or flashes orange see If an Error Occurs Increasing th...

Page 98: ...an the print head deeply again after 24 hours If the problem is still not resolved Step 4 Replace a FINE cartridge Replacing a FINE Cartridge Note If the problem is still not resolved after replacing...

Page 99: ...4 or Letter sized plain paper 1 Make sure that the power is turned on 2 Load a sheet of A4 or Letter sized plain paper in the front tray 3 Open the output tray extension open the paper output tray the...

Page 100: ...ar If there are missing lines in the pattern A Cleaning the print head is required Cleaning the Print Head D Good E Bad lines are missing If there are horizontal white streaks in the pattern B Cleanin...

Page 101: ...Alarm lamp flashes orange twice then release it immediately The machine starts cleaning the print head The cleaning will be complete when the ON lamp lights green after flashing Do not perform any oth...

Page 102: ...head deeply The cleaning will be complete when the ON lamp lights green after flashing Do not perform any other operations until the machine completes the deep cleaning of the print head This takes ab...

Page 103: ...use paper that is white and clean on both sides 1 Make sure that the power is turned on 2 Load a sheet of A4 or Letter sized plain paper in the front tray 3 Open the output tray extension open the pa...

Page 104: ...stment will be complete when the ON lamp lights green after flashing Remove the print head alignment sheet on the platen glass Important Do not open the document cover or move the print head alignment...

Page 105: ...he Machine Cleaning the Paper Feed Rollers from Your Computer Use Your Computer to Print a Nozzle Check Pattern Aligning the Print Head Aligning the Print Head Position Automatically from Your Compute...

Page 106: ...ck dialog opens after the confirmation message 5 Check the results To check whether the print quality has improved click Print Check Pattern To cancel the check process click Cancel If cleaning the he...

Page 107: ...To cancel the check process click Cancel Important Deep Cleaning consumes a larger amount of ink than Cleaning Cleaning the print head frequently will rapidly deplete your printer s ink supply Conseq...

Page 108: ...Canon IJ Printer Utility 2 Click the Bottom Plate Cleaning icon The dialog opens 3 Load paper in the machine As instructed in the dialog fold the A4 size or Letter size plain paper in half horizontall...

Page 109: ...ont tray 2 Select Cleaning from the pop up menu on the Canon IJ Printer Utility 3 Click the Roller Cleaning icon The confirmation message appears 4 Execute paper feed roller cleaning Make sure that th...

Page 110: ...confirmation message appears Click to display the items that you need to check before printing the nozzle check pattern 3 Load paper in the machine Load one sheet of A4 size or Letter size plain paper...

Page 111: ...djustment position are corrected and conditions such as color and line streaking are improved If the print results appear uneven because of line shifts or other conditions adjust the position of the p...

Page 112: ...tch head alignment to manual Check the Align heads manually check box 3 Apply the settings Click Apply and when the confirmation message appears click OK 4 Select Test Print from the pop up menu on th...

Page 113: ...is difficult to pick the best pattern pick the setting that produces the least noticeable horizontal streaks A Least noticeable horizontal streaks B Most noticeable horizontal streaks 9 Confirm the di...

Page 114: ...cal streaks A Least noticeable vertical streaks B Most noticeable vertical streaks 11 Confirm the displayed message and click OK The third pattern is printed 12 Check the printed pattern Enter the num...

Page 115: ...ceable horizontal stripes A Least noticeable horizontal stripes B Most noticeable horizontal stripes Note After head alignment is completed you can print and check the current setting To do so click t...

Page 116: ...A message is displayed 3 Load paper in the machine Load one sheet of A4 size or Letter size plain paper into the front tray Note The number of sheets to be used differs when you select the manual hea...

Page 117: ...e Cleaning the Exterior of the Machine Cleaning the Platen Glass and Document Cover Cleaning the Paper Feed Roller Cleaning the Inside of the Machine Bottom Plate Cleaning Cleaning the Protrusions ins...

Page 118: ...to turn off the power and disconnect the power plug before cleaning the machine Do not use tissue paper paper towels rough textured cloth or similar materials for cleaning so as not to scratch the su...

Page 119: ...and dry cloth Never use volatile liquids such as thinners benzene acetone or any other chemical cleaner to clean the machine as this may cause a malfunction or damage the surface of the machine With a...

Page 120: ...the Alarm lamp flashes orange seven times then release it immediately The paper feed roller will rotate as it is cleaned 3 Clean the paper feed roller with paper 1 Make sure that the paper feed rolle...

Page 121: ...crease then unfold the paper 3 Load only this sheet of paper in the front tray with the ridges of the creases facing up and the edge of the half with no crease facing away from you 3 Open the output t...

Page 122: ...Note When performing Bottom Plate Cleaning again be sure to use a new piece of paper 122...

Page 123: ...tant Be sure to turn off the power and disconnect the power plug before cleaning the machine You need to prepare cotton swab If the protrusions inside the machine are stained wipe off any ink from the...

Page 124: ...Changing the Machine Settings Changing Machine Settings from Your Computer Changing the Machine Settings Using the Operation Panel 124...

Page 125: ...m Your Computer Checking the Ink Status from Your Computer Registering a Changed Printing Profile Setting the Ink Cartridge to be Used Managing the Machine Power Reducing the Machine Noise Changing th...

Page 126: ...vel occurs the print driver displays an icon to let you know In such cases take the appropriate action as described on the screen 2 If necessary click Ink Details You can check the ink related informa...

Page 127: ...ting Profile 1 In the Print dialog set the necessary items 2 Select Save Current Settings as Preset Save As from the Presets 3 Save the settings In the displayed dialog enter a name in Preset Name and...

Page 128: ...ting profile to be deleted If you are using Mac OS X v10 6 8 On Presets in the Print dialog select the name of printing profile you want to delete 2 Delete the printing profile If you are using Mac OS...

Page 129: ...to be used Select the FINE cartridge you use for printing and click Apply 3 Complete the setup Click OK when the confirmation message appears The specified FINE cartridge will be used from the next pr...

Page 130: ...the machine when there are no operations from the printer driver or the machine for a specified period of time 1 Select Power Settings from the pop up menu on the Canon IJ Printer Utility 2 Check tha...

Page 131: ...Important If you connect this machine to a network and use it you can set Auto Power Off but the power will not switch off automatically 131...

Page 132: ...lect this option when you wish to use the machine with volume of normal operating noise Always use quiet mode Select this option when you wish to reduce the operating noise of the machine Use quiet mo...

Page 133: ...Make sure that the machine is on and click Apply Click OK when the confirmation message appears The settings are enabled hereafter Note The effects of the quiet mode may be less depending on the print...

Page 134: ...e machine begins hagaki printing To hide the guide messages starting from the next execution of other than plain paper printing select the Do not show again check box in the displayed dialog To displa...

Page 135: ...rint from the computer this function identifies the paper that was loaded into this machine When the paper width detected by the machine differ from the width of the paper specified in Paper Size on t...

Page 136: ...Changing the Machine Settings Using the Operation Panel About Quiet setting Turning on off the Machine Automatically 136...

Page 137: ...9 times 3 Release the Stop button 4 Press the Color button To disable the function press the Black button in step 4 Important Operating speed may be reduced compared to when the quiet mode is not sel...

Page 138: ...utomatically from the operation panel of the machine or the printer driver No matter how you use to set the quiet mode the mode is applied when a scanning command from a computer or printing data is s...

Page 139: ...Information about Network Connection Useful Information about Network Connection 139...

Page 140: ...Set at Factory Network Connecting the Machine to the Computer Using a USB Cable When Detecting the Printers Have the Same Name Connecting to Other Computer with LAN Changing the Connection Method fro...

Page 141: ...IP address Auto setup IPv6 IP address Auto setup Set printer name XXXXXX000000 Enable disable IPv6 Enable Enable disable WSD WSD settings Enable Timeout setting WSD settings 1 minute Enable disable B...

Page 142: ...Connecting the Machine to the Computer Using a USB Cable Connect the machine and the computer using a USB cable as the illustration below The USB port is located on the rear of the machine 142...

Page 143: ...jour is displayed at the end of the printer name on the detection result screen Select a printer with checking the MAC address or the printer name specified by Bonjour set to the printer against the p...

Page 144: ...er with LAN To add the computer connecting the printer with LAN perform setup according to the instructions on our website Changing the Connection Method from USB to LAN To change the connection metho...

Page 145: ...Disable Connection Status of the Wireless LAN Active Inactive MAC Address MAC Address XX XX XX XX XX XX SSID SSID SSID of the wireless LAN Communication Mode Communication Mode Infrastructure Channel...

Page 146: ...setting Enable Disable Bonjour Service Name Bonjour service name Bonjour service name Up to 52 characters DNS Server Getting DNS Server automatically Auto Manual Primary Server Primary server address...

Page 147: ...About Network Communication Changing and Confirming Network Settings Appendix for Network Communication 147...

Page 148: ...Settings in the Wireless LAN Sheet Changing the WEP Detailed Settings Changing the WPA or WPA2 Detailed Settings Changing the Settings in the Wired LAN Sheet Changing the Settings in the Admin Passwo...

Page 149: ...nt when IJ Network Tool is running If the firewall function of your security software is turned on a message may appear warning that Canon software is attempting to access the network If the warning m...

Page 150: ...ified 3 Update Performs printer detection again Click this button if the target printer is not displayed Important To change the printer s network settings using IJ Network Tool it must be connected v...

Page 151: ...ration Enabled when Utilities is selected Click to display the Configuration screen to configure settings of the selected printer Note This item has the same function as Configuration in the Settings...

Page 152: ...It may take several minutes to detect printers If the printer is not yet detected connect the machine and the computer with a USB cable then select Refresh If the printer is being used from another co...

Page 153: ...hange the settings in the Wireless LAN sheet 1 Start up IJ Network Tool 2 Select the printer in Printers When the printer is connected to the computer with a USB cable temporarily select the printer w...

Page 154: ...easures there is a risk of disclosing data such as your personal information to a third party Do Not Use Select to disable encryption Use Password WEP Transmission is encrypted using a WEP key you spe...

Page 155: ...ress select this option to use a fixed IP address Access Points Screen 1 Detected Access Points The signal strength from the access point encryption type name of access point and the radio channel can...

Page 156: ...k name SSID in Network SSID on the Wireless LAN sheet Note The WEP Details screen the WPA Details screen or the WPA2 Details screen appears if the selected access point is encrypted In this case confi...

Page 157: ...ter is connected to the computer with a USB cable temporarily select the printer with USB appearing in the Connected to column 3 Click the Configuration button 4 Click the Wireless LAN button 5 Select...

Page 158: ...length in the AirPort Base Station Select 1 for Key ID Otherwise your computer will not be able to communicate with the printer via the access point 5 Authentication Select the authentication method t...

Page 159: ...in the Connected to column 3 Click the Configuration button 4 Click the Wireless LAN button 5 Select Use WPA or Use WPA2 in Encryption Method and click Configuration 6 Enter the passphrase confirm th...

Page 160: ...Note This machine supports WPA PSK WPA Personal and WPA2 PSK WPA2 Personal 160...

Page 161: ...tion before the settings are sent to the printer If you click OK the settings are sent to the printer and the Transmitted Settings screen is displayed 1 TCP IP Setting Sets the IP address of the print...

Page 162: ...options To use this feature select this check box and enter a password Important The password should consist of alphanumeric characters and be no longer than 32 characters The password is case sensiti...

Page 163: ...ss point Follow the instructions on the screen to start measuring and display the status Measurement takes a few minutes When is displayed in Connection performance between the printer and the access...

Page 164: ...ess points Check that the printer and the access point face each other Connection performance may depend on the orientations of the wireless devices Replace the access point and the printer in another...

Page 165: ...all the network settings of the printer to factory default 4 Click Initialize The Setting Initialization screen is displayed Click OK to initialize the network settings of the printer Do not turn off...

Page 166: ...ed when you modified the printer settings on the Configuration screen When you click OK on the Confirmation screen the following screen is displayed for confirming the modified settings 1 Settings A l...

Page 167: ...Appendix for Network Communication Using the Card Slot over a Network About Technical Terms Restrictions 167...

Page 168: ...Connect For example if the current printer name is 123ABC000000 then input smb 123ABC000000 canon_memory 5 Make sure that the card slot is mounted When the card slot is mounted the following icon app...

Page 169: ...he operation in the memory card may be impossible or slow Operate after the Access lamp of the machine is lit When you access the network drive for the card slot over the network file names consisting...

Page 170: ...icate directly with each other No access point is required This machine does not support ad hoc communication Admin Password Administration password in IJ Network Tool to restrict access to network us...

Page 171: ...ted using the WEP key that was set for encryption B Bonjour A service built into Mac OS X operating system to detect the connectable devices on a network automatically C Channel Frequency channel for...

Page 172: ...be influenced by the connected apparatus At the maximum transfer rate of 600 Mbps it is possible to communicate with multiple computer terminals within a dozen or so metre radius Compatible with 802...

Page 173: ...s LAN It is often represented such as a network name or a access point name SSID distinguishes one wireless LAN from another to prevent interference The printer and all clients on a wireless LAN must...

Page 174: ...lso be referred to by its network name Stealth In the stealth mode an access point hides itself by not broadcasting its SSID The client must specify the SSID set to the access point to detect it The s...

Page 175: ...than WEP Authentication WPA defines the following authentication methods WPA Personal that can be used without an authentication server plus WPA Enterprise that do require an authentication server Thi...

Page 176: ...t of a wireless network There are 2 primary methods used in the Wi Fi Protected Setup PIN entry a mandatory method of setup for all WPS certified devices Push button configuration PBC an actual push b...

Page 177: ...ems you should set a network key WEP WPA or WPA2 to the access point to encrypt wireless transmission Wireless communication with a product that does not comply with the Wi Fi standard cannot be guara...

Page 178: ...uality Useful Information about Ink Key Points to Successful Printing Be Sure to Make Paper Settings after Loading Paper Canceling a Print Job Key to Enjoying Consistent Printing Quality Precautions f...

Page 179: ...achine has the function to automatically clean the ink jet nozzles to prevent clogging In the cleaning procedure ink is pumped out from the nozzles Used ink for nozzle cleaning is limited to a small a...

Page 180: ...derless printing the area where papers go through may get smeared with ink Clean the inside of your machine with Bottom Plate Cleaning Cleaning the Inside of the Machine Bottom Plate Cleaning Check ho...

Page 181: ...lts Not Satisfactory There are various types of paper paper with special coating on the surface for printing photos with optimal quality and paper suitable for documents Each media type has specific p...

Page 182: ...press the ON button If you press the ON button while printing is in progress the print data sent from the computer queues in the machine and you may not be able to continue to print Press the Stop bu...

Page 183: ...he ON lamp is lit or flashing the print head will not be capped properly and this will cause drying or clogging When disconnecting the power plug make sure that the ON lamp is not lit Notice for Unplu...

Page 184: ...e have its box marked THIS SIDE UP to keep the machine with its bottom facing down Mark also with FRAGILE or HANDLE WITH CARE 1 Turn the machine off 2 Confirm that the ON lamp is off and unplug the ma...

Page 185: ...y orders Certificates of deposit Postage stamps canceled or uncanceled Identifying badges or insignias Selective service or draft papers Checks or drafts issued by governmental agencies Motor vehicle...

Page 186: ...tion Printing Copy Approx 16 W 1 Standby minimum Approx 1 7 W 1 2 OFF Approx 0 3 W 1 Wireless LAN is active 2 The wait time for standby cannot be changed External dimensions Approx 17 7 W x 12 D x 6 H...

Page 187: ...cation Security WEP 64 128 bits WPA PSK TKIP AES WPA2 PSK TKIP AES Setup WPS Push button configuration PIN code method WCN WCN NET Cableless setup Other Features Administration password Minimum System...

Page 188: ...plorer 8 9 or 10 is required to install Easy WebPrint EX Easy WebPrint EX for Internet Explorer 10 can be downloaded from the Canon web site Windows Some functions may not be available with Windows Me...

Reviews: