1
HZ1457−E
Assembling manual
carport KS/KSS-series
Thank you very much for choosing our company's products.
Please be sure to thoroughly read these instructions for assembly in order to properly
and smoothly assemble or attach this product.
Construction shall be implemented by professionals. Problems may occur if the product
is installed by someone without the proper knowledge.
Notice
Please be sure to return the instruction manual in its original package to the
owner after explaining product operation procedures,maintenance and inspection
methods.
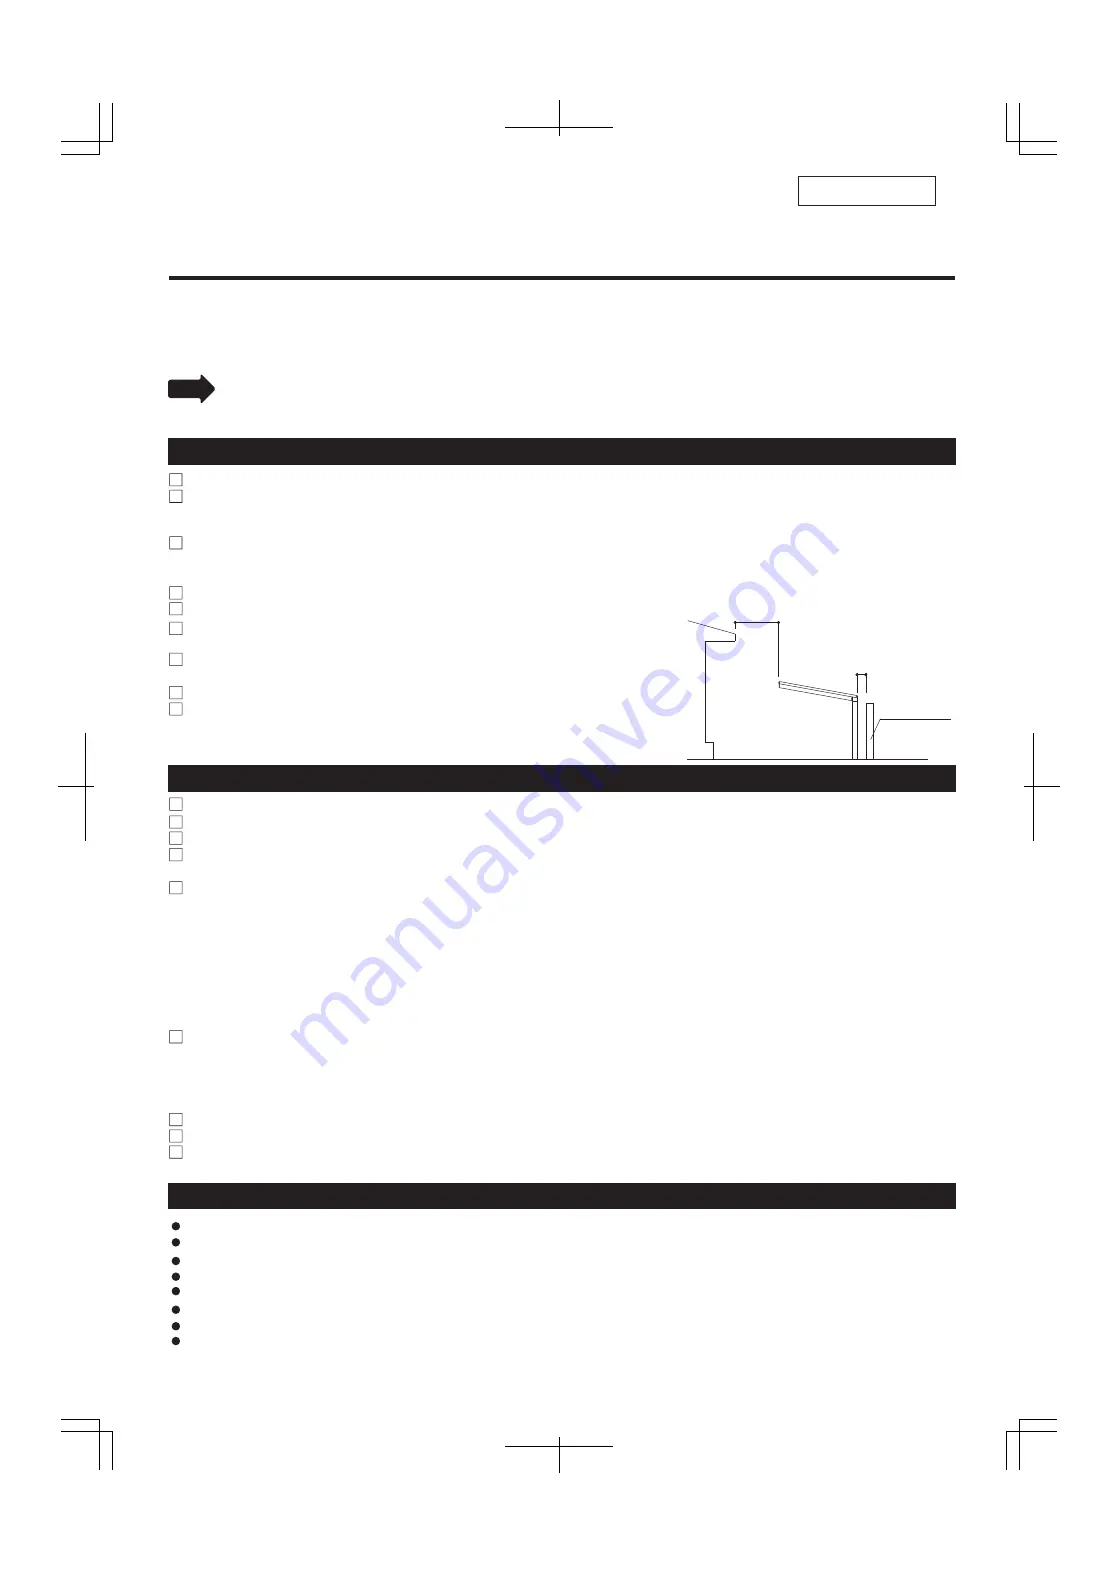
enough space
space move than 10cm
concrete
wall etc
The carport is a simple garage. Do not change or remodel it for storage, recreational or residential purposes.
This product is for general areas. The snow accumulation strength are 2-post type 600N/m
2
(61.2kg/m
2
) and
3-post type 900N/m
2
(91.8kg/m
2
), which corresponds to 20cm (2-post type) and 30cm (3-post type) of
snowfall.Do not install in heavy snow area.
Do not install it in the place where snow slides down from the building roof directly.
When installing it besides concrete wall, etc., leave a 10 cm or larger gap between the post and the wall due to
not clash each other during strong wind.
Be sure to provide extra support post (optional) when installing it in strong wind area.
When installing it with side panel, be sure to set up support post.
When installing it with side panel, recommending to installing its front
frame face to the building due to reduce the wind effect.
Positioning the posts so that they do not affect underground objects
(water supply, drain pipes, etc.).
When moving the posts, please follow the company specifications.
Install it so that the exhaust from burning appliances (hot-water supply,
air heating, etc.) or the car exhaust don t hit directly or remain in the
products. It may cause the aluminum surface to corrode.
Precautions during installation
Precautions during construction
Follow the instructions and be sure that all the specified screws and bolts for assembly are tightened securely.
Do not use anything other than the specified parts or optional parts.
The foundation should comply with or exceed dimension specifications.
Allow sufficient curing time for the concrete (4 to 7 days) and do not place heavy objects on it or subject it to
vibrations during the curing period.
Be sure to keep the note below to prevent aluminum materials corrode.
Do not use sea sand for the foundation since it contains salt and may cause corrosion.
Do not use a cement enhancer, water-reducing agent or cryoprotectant. They may cause the posts to corrode.
Immediately wipe off any mortar or stains from the surface of aluminum parts since they may cause corrosion.
Do not let aluminum parts come in contact with other metals such as copper or iron. Provide insulation with vinyl
tape, by painting,etc,. if necessary. Otherwise the product may corrode.
Be sure to provide gravel for the foundation to allow drainage, insert water drainage holes (φ5) at the base of the
posts and foundation. Failure to do so may lead to water accumulation inside the posts and damage them if the
water freezes and expands inside.
Be sure to put the sealant glue as the following.
Wipe off any stains from the sealing part.
Be sure to apply a sealant, as specified.
After putting the sealant glue on the hole made in its all wall body, fully tighten the screw.
Seal completely deep enough and finish the surface with a pallet.
After construction, check the products to see if the bolts, screws, nuts,etc. loosen or any dangerous places exist.
Be sure to check if the product has scratches, dents or dint.
Be sure to explain product operation procedures,maintenance and inspection methods to the owner.
Electric drill, Drill
Ratchet wrench, Adjustable end wrench
Electric Screwdriver
Measure, Level, Plumb bob, Cutter, Pillar, Plastic hammer
Foundation materials (Cement, Aggregate,etc)
Sealant, Caulk gun, pallet
Cropper or Saw
Please prepare tools and materials as needed
⑴
⑵
⑶
⑷
⑴
⑵
⑶
⑷
Necessary tools and materials for installation


