Fast Facts User Guide
-
Vega 3000 Countertop
Installing the Terminal
•
Plug the
power
supply
into
the back of the terminal in the
port
labelled
9V.
•
Plug the
Violet
colour Ethernet cable into a spare port on
your Broadband router or network point and then into
the back of the term
i
nal in the port labelled
LAN
.
•
Ensure both the power and Ethernet cables are secured
under the protective/cab
l
e tidy clip.
•
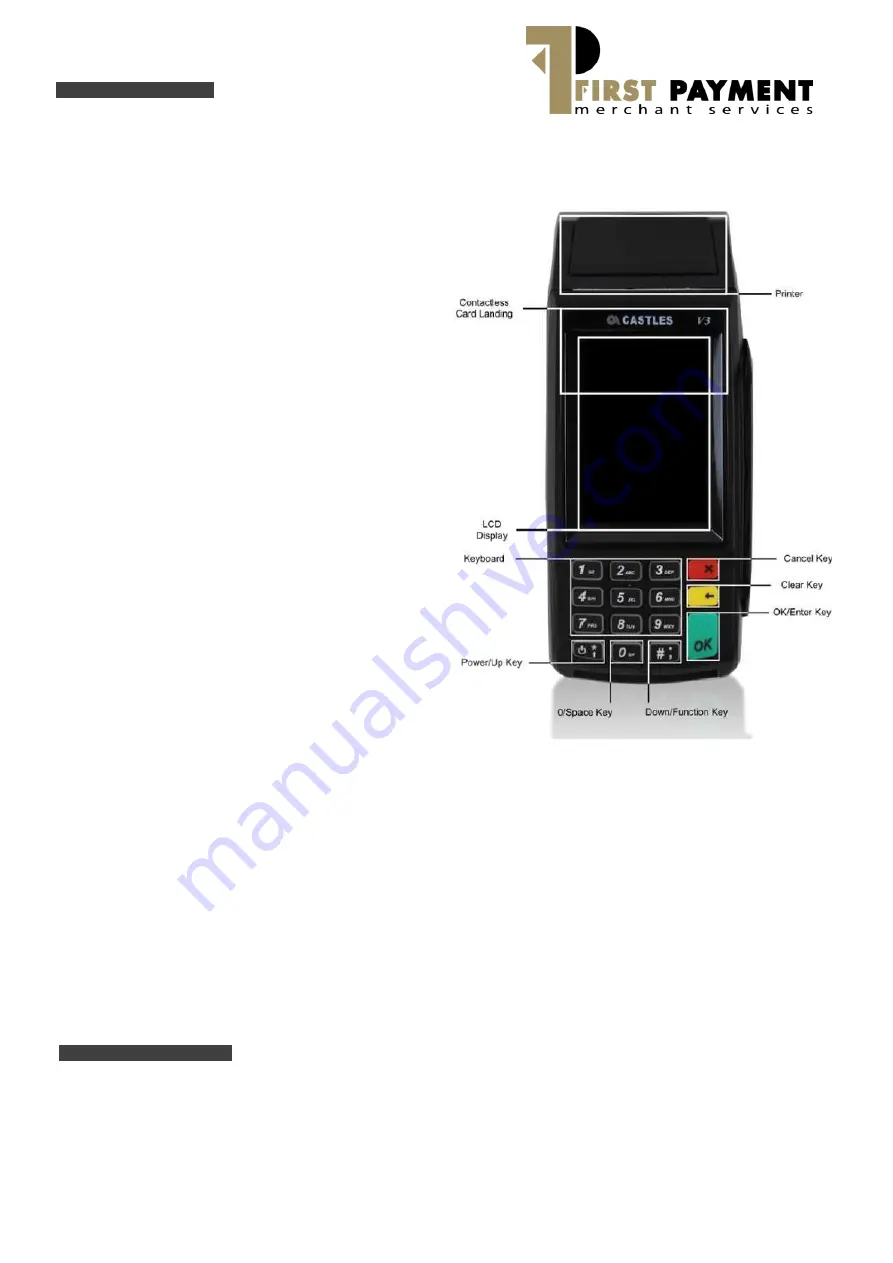
Turn the terminal on by pressing the power button on the
bottom left hand corner/ under the number 7.
•
If prompted, enter the Merchant ID (MID) received from
the Payments Alliance.
•
The terminal wi
l
l now complete a short
installation
and
will be ready for use.
Note:
Your
Merchant
ID
and
Manage
r
Passcod
e
will be sent
to you via emai
l
from The Payments Alliance.
It is
important
that you change your Manager Passcode to a
memorab
l
e number and keep it safe.
To
c
han
ge
the
Manager Pa
ssco
de:
•
From
the
idle
screen, press the red key to enter the
System Menu
•
Enter the Manager Passcode provided
to you in your
Welcome Email and press OK.
•
Scroll down using the# Key to
'C
hange passcode
'
and
press OK.
•
Erase the existing
passcode
using the yellow arrow Key.
•
Now enter your chosen
N
e
w pass
c
od
e
.
•
NOTE: Ple
ase
keep
your
New passcode
SAFE.
Contactless Transactions
•
From the
idle
screen, key in the transaction amount and
press OK (green key).
•
The t ermina
l
will
display the contactless symbol
C">
i
!
•
Ask
the
customer to present their
contactless
card or
device to the terminal screen
.
Th
e
Terminal will BEEP
when it has read the card or device
.
•
The card terminal will then request an authorisation and
complete
the
t
ransaction.
•
The termina
l
wil
l
only automatically print one receipt,
whi
c
h is the merchant (your) copy.
•
If the customer requires a receipt, press the OK key to
print a Cardholder receipt
.
•
If the customer does not require a receipt, press the Red
Key to
return
to the idle screen.


