background image

EF

A60BKM_EF60SS2_A3MUL

TI v2d

Barcode 8422248603355 / 8422248600293 / 8422248602396

GB IE

EFA60BKM - EF60SS2 - A3 MULTI

Multi Function Fan Oven

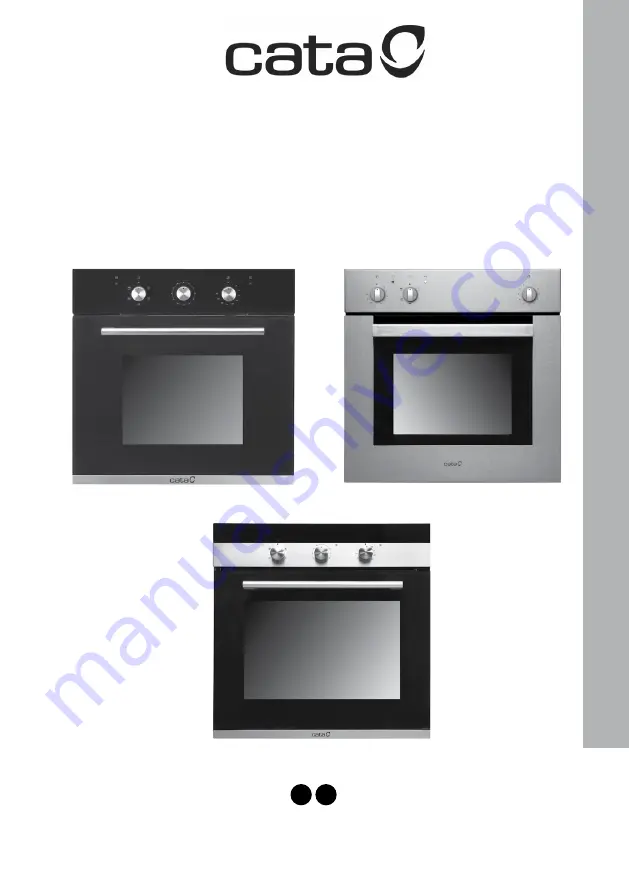
Summary of Contents for A3MULTI

Page 1: ...EFA60BKM_EF60SS2_A3MULTI v2d Barcode 8422248603355 8422248600293 8422248602396 GB IE EFA60BKM EF60SS2 A3 MULTI Multi Function Fan Oven ...

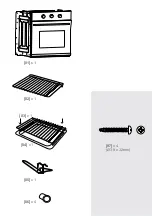
Page 2: ... 07 x 4 Ø3 9 x 32mm 06 x 4 01 x 1 05 x 1 02 x 1 03 x 1 04 x 1 ...

Page 3: ...3 GB IE Built In Multifunction Fan Oven 04 Installation 29 EFA60BKM EF60SS2 A3 MULTI ...

Page 4: ...re you start 06 Safety 09 In more detail 11 Product functions Operation Care and maintenance Troubleshooting Recycling and disposal Technical and legal information Guarantee CE Declaration of conformity 12 16 17 21 22 23 26 28 Appendix 29 Installation ...

Page 5: ...5 Getting started GB IE Getting Started GB IE Before you start 06 Safety 09 ...

Page 6: ...ices on 0844 800 1128 UK 1 800 535542 Ireland and 01 56 48 02 60 France Check the package and make sure you have all of the parts listed Decide on the appropriate location for your product If this product contains glass please take care when fitting or handling to prevent personal injury or damage to the product The specifications plate is available on this appliance This plate displays all the ne...

Page 7: ... first operation is finalised Once this simple operation has been carried out the oven is ready to use for cooking This appliance is exclusively for domestic use Use the oven to cook food only Before cooking make sure all oven accessories that are not required are removed from the oven Pre heat the oven to the cooking temperature before using it Place the cooking trays in the centre of the oven an...

Page 8: ...8 Getting started GB IE Before you start Tools Required We advise when installing this appliance two people are recommended ...

Page 9: ...fied person strictly following the manufacturer s instructions This appliance is not intended for use by persons including children with reduced physical sensory or mental capabilities or by those who lack experience and knowledge unless they have been given supervision and instruction concerning the use of the appliance by a person responsible for their safety Means for isolating the appliance mu...

Page 10: ...ar curtains or upholstered furniture Do not try to lift or move kitchen appliances by pulling any door or handle as this may cause damage If the oven seal is very dirty the door will not close properly when the oven is working The fronts of neighbouring furniture may be damaged Keep the oven seal clean Open the oven carefully as hot steam may escape Do not pour water inside a very hot oven The ena...

Page 11: ... detail GB IE In more detail Product functions 12 Operation 16 Care and maintenance 17 Troubleshooting 21 Recycling and disposal 22 Technical and legal information 23 Guarantee 26 CE Declaration of conformity 28 ...

Page 12: ...and fan come on together and the is is dispersed by force convection The oven does not require pre heating Maxi Grill Grill element comes on and is dispersed by radiant heat Fan Assisted Grill Grill element comes on and is dispersed by the rear fan Even distribution of heat is attained in the cavity Oven door should be open when using grill function Read the information of the food packaging for t...

Page 13: ...sert in Moulds Tart flan base 150 170 1 20 25 Streusel cake 150 170 1 45 55 Cheesecake 150 170 1 70 90 Apple pie 150 170 1 50 70 Apricot tart with topping 150 170 1 55 75 Raised Dough Dessert in Moulds Streusel cake 150 170 1 35 45 White bread 160 180 1 40 50 Pizza tray 3 170 190 1 35 45 Onion tart 170 190 1 35 45 Apple turnovers 150 170 1 3 25 30 Choux pastry 3 Eclairs 160 180 1 3 30 40 Puff past...

Page 14: ...imum 16 20 maximum 20 25 Toast 3 or 4 2 maximum 2 4 maximum 3 6 Cheese toast 3 or 4 2 maximum 7 9 maximum 5 8 Tomatoes 3 or 4 2 maximum 6 8 maximum 8 10 Peaches 2 maximum 6 8 maximum 15 20 Thicker cuts Chicken approx 1 kg 1 3 maximum 50 60 maximum 60 65 Rolled meat 7 cm approx 1 kg 1 maximum 75 85 maximum 100 110 Pork approx 1 kg 1 maximum 100 120 maximum 95 100 Sirloin approx 1 kg 1 _ _ maximum 2...

Page 15: ...or 2 12 20 Place on baking paper directly on the rack Pre cooked mini pizza 220 1 or 2 8 10 Place on baking paper directly on the rack Potato pancakes Rösti croquettes 220 1 or 2 12 20 Place on baking paper directly on the rack Please follow the manufacturer s instructions on the packaging Food Temperature in C Time in min Recommended shelf level from the bottom Lasagne 200 45 60 1 Potato gratin 1...

Page 16: ...ition turn the knob clockwise to the maximum position Then turn it anti clockwise to the desired time At the end of this set time the buzzer will sound The timer only indicates the end of the set time but it does not stop the cooking stroke grilling functions being used 0 30 40 50 10 20 FIG 1 Operation ...

Page 17: ...pray a proprietary oven cleaner inside your oven and leave it to work for the time specified in the manufacturers instructions Then use a clean sponge to wipe off the foam residue Wear rubber gloves to prevent the cleaner coming into contact with your skin and make sure the kitchen is well ventilated to disperse the fumes produced by the cleaner Repeat if necessary Also avoid the use of acid or al...

Page 18: ... the door upwards and remove it sliding it outwards hold the door by the sides close to the hinges when doing this To replace the door first slide the hinges into their grooves and open the door completely Remember to turn the two moving links B used to engage the two hinges before closing the door Fig 2 WARNING Take care not to remove the hinge locking system when taking off the door as the hinge...

Page 19: ...age the glass Remember that if the surface of the glass panel becomes scratched it could cause a dangerous failure To simplify the cleaning the inner glass panel can be taken out of the door The method for removing the glass from the door is shown below After removing the screws fixing the glass located on the inner face of the door lift the glass out carefully In versions with three glasses the i...

Page 20: ... the appliance becomes hot Care should be taken to avoid touching heating elements inside the oven 2 WARNING Ensure that the appliance is switched off before replacing the lamp to avoid the possibility of electric shock 3 Remove the glass cover that protects the light bulb by turning it anti clockwise 4 Unscrew the old light bulb and dispose of it safely and ecologically change it for one as speci...

Page 21: ... has been disconnected Something at house installation is wrong Turn off main supply and check if some wire has been disconnected Oven light doesn t work Light bulb is blown Replace bulb as described in the manual in section Care and maintenance Oven will not heat No function is selected Choose a cooking function turning the selector No temperature is selected Choose a temperature turning the sele...

Page 22: ...duct cannot be treated as normal household waste This product must be handed over to an electric and electronic equipment collection point for recycling On ensuring that this product is disposed of correctly you will help to avoid possible negative consequences for the environment and public health which could occur if this product is not handled correctly To receive more detailed information abou...

Page 23: ...tion 13 A automatic bipolar switch with protected socket with 3 mm separation between contacts Power absorption Base Resistance 1 30 kW Roof Resistance 0 90 kW Fan Resistance 2 30 kW Grill Resistance 1 35 kW Network power cable 3 x 1 5 mm2 type H07RN F HAR Oven light bulb 15 W 25 W 300 C screw type E 14 Final Model Name Gross Volume LITRES Net Volume LITRES EFA60BKM 59 49 EF60SS2 59 49 A3MULTI 59 ...

Page 24: ...POLE SWITCHED FUSED SPUR OUTLET USE A 3AMP FUSE FUSE ON EUR UK Direct Connection If the appliance is being connected directly to the mains an omnipolar circuit breaker must be installed with a minimum opening of 3mm between contacts If the cable is damaged or to be replaced the operation must be carried out the by a qualified electrician with dedicated tools to avoid any accidents The installer mu...

Page 25: ...ING THIS APPLIANCE MUST BE EARTHED The appliance is supplied with a 3 core mains cable and must be connected to the electricity supply via a double pole switch having a 3mm minimum contact gap on each connector For UK only A Switched Fused Connection Unit to BS 1363 Part 4 is recommended The fuse must be rated at 13 Amps The wires in the mains lead are coloured in accordance with the following cod...

Page 26: ...emaining balance of the GAA guarantee will be valid and any further call outs during this prescribed period will be covered by GAA on the replacement appliance Should any person other than an authorized engineer modify or attempt to repair the appliance then the warranty will be invalid The guarantee applies to the UK mainland Scotland Ireland ROI and France but is not transferrable between EU cou...

Page 27: ...ance is glued grouted or tiled in such a manner that it cannot be removed it is the responsibility of the customer installer to remove and reinstall the appliance to facilitate the repair This Guarantee does not affect your statutory rights The guarantee is offered by GAA Ltd 1301 1303 Lu Plaza 2 Wing Yip St Kwun Tong Kowloon Hong Kong Customer Service To arrange an in guarantee service call pleas...

Page 28: ...M EF60SS2 A3MULTI TYPE OVEN EC DIRECTIVES APPLIED EC Symbol 2006 95 EEC Low voltage 73 23 CEM 89 336 APPLIED HARMONIZED STANDARDS Safety Rules EN 60 335 1 EN 60 335 2 6 APPLIED INTERNATIONAL TECHNICAL STANDARDS AND SPECIFICATIONS ISO9001 2008 PLACE Torelló David Sala Technical Manager This appliance respects laws of the suppression of radio interference The Manufacturer has a policy of continuous ...

Page 29: ...29 Appendix Appendix GB IE Installation ...

Page 30: ... this temperature limit or if it is placed less than 4 mm from the adjacent cupboards liability will belong to the owner Installation Notes 1 The oven has to be installed in a standard gap of 600 mm as indicated in Fig 5 whether under a hob or in a column 2 On inserting the oven in a column it is essential in order to ensure there is enough ventilation to remove the rear panel of the furniture and...

Page 31: ...31 Installation Appendix GB IE FIG 5 85mm 90mm 580mm 583mm 560mm 560mm 525mm 580mm 583mm 595mm 595mm 533m m 26m m 580m m M IN EFA60BKM EF60SS2 ...

Page 32: ...32 Apendix GB IE A3MULTI 85mm 90mm 593mm 564mm 564mm 525mm 593mm 595mm 595mm 533m m 26m m 580m m M IN ...

Page 33: ...33 Installation GB IE Appendix 550mm 60 mm 600 mm 85 90mm Minimum ventilation gap 80cm 2 85 90mm ...

Page 34: ...34 Installation 01 02 06 x 4 07 x 4 06 07 Note For electrical connection see Technical and legal information section ...

Page 35: ...35 Installation 03 Note For electrical connection see Technical and legal information section Adjusting the shelf position A B A B A B ...

Page 36: ...GB IE FR CNA Trading U K Ltd Hillbrow House Hillbrow Road Esher Surrey KT10 9NW ...

Reviews: