background image

C O N T E N T S


01

 – BILL OF MATERIAL

02

 – REQUIRED TOOLS

03

 – ASSEMBLY PROCESS 

Summary of Contents for Speed Addict SuperLight

Page 1: ...C O N T E N T S 01 BILL OF MATERIAL 02 REQUIRED TOOLS 03 ASSEMBLY PROCESS...

Page 2: ...SECTION 01 BILL OF MATERIAL...

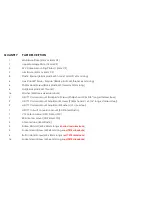
Page 3: ...um 2 HS1177 Camera Mount Backplate Screws Phillips head 2 x 3 8 long x stainless steel 2 HS1177 Camera Mount Adjustment Screws Phillips head 1 x 5 16 long x stainless steel 2 HS1177 Camera Mount Adjus...

Page 4: ...t 3D Printed TPU Optional Not Included Sold separately 1 Universal Xiaomi Yi Camera Mount 3D Printed TPU Optional Not Included Sold separately 1 Universal Mobius Runcam Camera Mount 3D Printed TPU Opt...

Page 5: ...SECTION 02 REQUIRED TOOLS...

Page 6: ...File 1 2mm allen driver or allen wrench 1 2 5mm allen driver or allen wrench 1 5 5mm socket driver 1 Small phillips head screw driver 1 Needle Nose Pliers 1 Loctite 3 Adult beverage of choice or appl...

Page 7: ...SECTION 3 ASSEMBLY PROCESS...

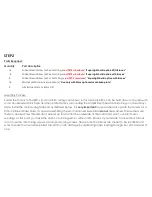
Page 8: ...You must have a basic understanding of how to properly install and setup FPV quad electronics prior to assembling your Speed Addict SuperLight If you are new to FPV racing quads and need help we have...

Page 9: ......

Page 10: ......

Page 11: ......

Page 12: ...tape and then protected by surrounding the arm ESC with heat shrink tubing or colored vinyl tape Install the motors using fasteners as detailed below It is very important to use washers along with the...

Page 13: ......

Page 14: ......

Page 15: ......

Page 16: ......

Page 17: ......

Page 18: ...in base plate as pictured below Make sure the screws are tight into the standoffs however do not over torque Keep in mind these fasteners are nylon which is a soft material Don t strip the standoffs T...

Page 19: ......

Page 20: ......

Page 21: ......

Page 22: ......

Page 23: ...Make all the necessary electrical connections to the PDB and FC then install the FC as shown Make sure to orient the FC s USB port so it is accessible Ideally you should direct solder the ESC signal...

Page 24: ......

Page 25: ......

Page 26: ...t out faces toward the lipo pigtail Install the two antenna tubes as shown At this point you can choose to install the RX radio receiver Thread it s antenna wires through the antenna tubes and then mo...

Page 27: ......

Page 28: ......

Page 29: ......

Page 30: ......

Page 31: ......

Page 32: ...Swift FPV camera However if you want to use a standard HS1177 type FPV camera this is no problem We include a special backplate that can be installed onto the rear of your HS1177 which will adapt it...

Page 33: ......

Page 34: ......

Page 35: ......

Page 36: ......

Page 37: ...der to best facilitate this installation scenario we suggest a VTX with integrated SMA pigtail such as the Hawkeye 200mW or TBS Unify Pro A VTX without integrated SMA pigtail can be used on the SuperL...

Page 38: ......

Page 39: ......

Page 40: ......

Page 41: ......

Page 42: ......

Page 43: ......

Page 44: ......

Page 45: ......

Page 46: ...Mount Adjustment Washers 1 size x steel REFERENCE 2 Swift Camera Mount Adjustment Screws included with the camera REFERENCE Assembly Process Adjust the angle of your camera using the screws as detaile...

Page 47: ......

Page 48: ...Congratulations You are now the proud owner of the most awesome light weight FPV racing machine on the planet Pat yourself on the back You deserve it...

Reviews: