Chenbro SR209 Plus Series, User Manual
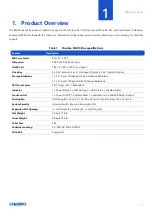
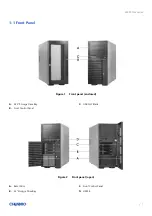
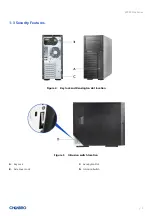
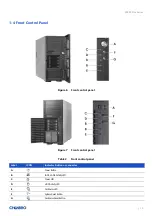
The Chenbro SR209 Plus Series is a high-quality server chassis designed for optimal performance and durability. Ensure you have all the necessary information to set up and maintain your server by downloading the free User Manual from 88.208.23.73:8080. Get detailed instructions and troubleshooting tips at your fingertips.
Share
Download


Reviews:
No comments


