background image

Visit our website at: http://www.harborfreight.com

Email our technical support at: productsupport@harborfreight.com

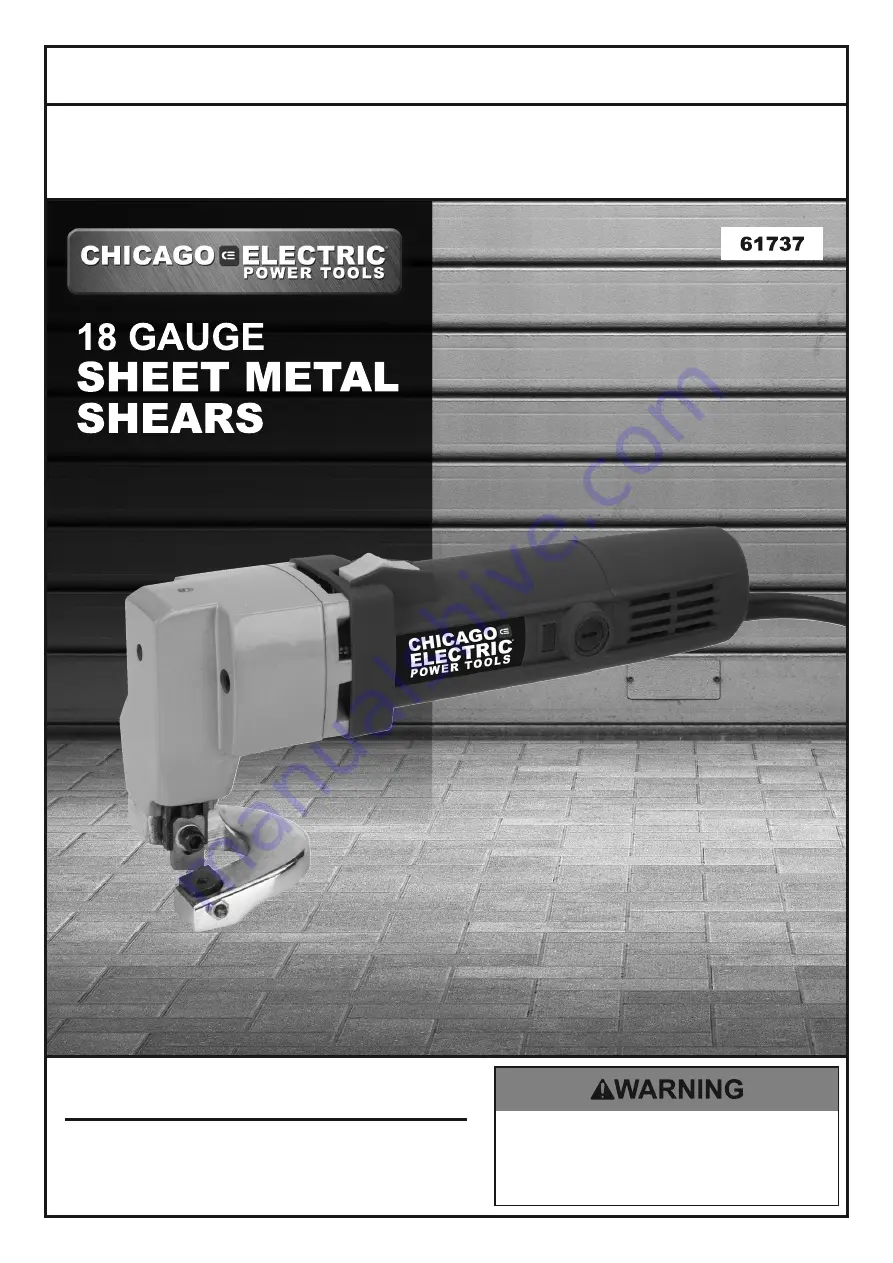
Owner’s Manual & Safety Instructions

Save This Manual


Keep this manual for the safety warnings and precautions, assembly, 

operating, inspection, maintenance and cleaning procedures.  Write the product’s serial number in the 
back of the manual near the assembly diagram (or month and year of purchase if product has no number). 
Keep this manual and the receipt in a safe and dry place for future reference. 

19l

When unpacking, make sure that the product is intact 

and undamaged.  If any parts are missing or broken, 

please call 1-888-866-5797 as soon as possible.

Copyright

©

 2019 by Harbor Freight Tools

®

.  All rights reserved.  

No portion of this manual or any artwork contained herein may be reproduced in 

any shape or form without the express written consent of Harbor Freight Tools.  

Diagrams within this manual may not be drawn proportionally.  Due to continuing 

improvements, actual product may differ slightly from the product described herein.  

Tools required for assembly and service may not be included.

Read this material before using this product. 
Failure to do so can result in serious injury. 
SAVE THIS MANUAL.

Summary of Contents for 61737

Page 1: ...rence 19l When unpacking make sure that the product is intact and undamaged If any parts are missing or broken please call 1 888 866 5797 as soon as possible Copyright 2019 by Harbor Freight Tools All rights reserved No portion of this manual or any artwork contained herein may be reproduced in any shape or form without the express written consent of Harbor Freight Tools Diagrams within this manua...

Page 2: ...on which if not avoided could result in minor or moderate injury Addresses practices not related to personal injury iMpOrtant SaFEty inFOrMatiOn General power tool Safety Warnings read all safety warnings and all instructions Failure to follow the warnings and instructions may result in electric shock fire and or serious injury Save all warnings and instructions for future reference The term power...

Page 3: ...with your finger on the Trigger or energizing power tools that have the Trigger on invites accidents 4 remove any adjusting key or wrench before turning the power tool on A wrench or a key left attached to a rotating part of the power tool may result in personal injury 5 Do not overreach Keep proper footing and balance at all times This enables better control of the power tool in unexpected situat...

Page 4: ... tool live and could give the operator an electric shock 3 Let blades cool before touching changing or adjusting it Blades heat up dramatically while in use and can burn you 4 If the blades jam the Switch off immediately 5 Maintain labels and nameplates on the tool These carry important safety information If unreadable or missing contact Harbor Freight Tools for a replacement 6 Avoid unintentional...

Page 5: ...ion to the hand past hand injuries nervous system disorders diabetes or Raynaud s Disease should not use this tool If you feel any symptoms related to vibration such as tingling numbness and white or blue fingers seek medical advice as soon as possible 2 Do not smoke during use Nicotine reduces the blood supply to the hands and fingers increasing the risk of vibration related injury 3 Wear suitabl...

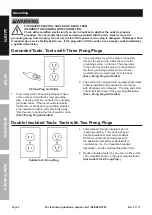
Page 6: ... to carry electricity away from the user reducing the risk of electric shock See 3 prong plug and Outlet 2 The grounding prong in the plug is connected through the green wire inside the cord to the grounding system in the tool The green wire in the cord must be the only wire connected to the tool s grounding system and must never be attached to an electrically live terminal See 3 prong plug and Ou...

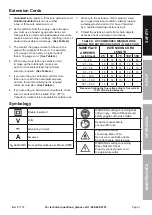
Page 7: ...rd outdoors make sure it is marked with the suffix W A W in Canada to indicate it is acceptable for outdoor use 7 Make sure the extension cord is properly wired and in good electrical condition Always replace a damaged extension cord or have it repaired by a qualified electrician before using it 8 Protect the extension cords from sharp objects excessive heat and damp or wet areas taBLE a rEcOMMEnD...

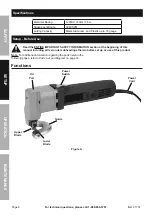
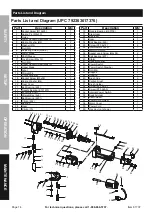
Page 8: ...nd Plastic up to 18 gauge Setup Before use read the EntirE iMpOrtant SaFEty inFOrMatiOn section at the beginning of this manual including all text under subheadings therein before set up or use of this product note For additional information regarding the parts listed in the following pages refer to Parts List and Diagram on page 14 Functions Oil port power Switch power cord Lower Blade upper Blad...

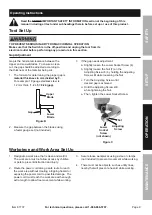
Page 9: ...asure the gap between the blades using a feeler gauge set not included 3 If the gap needs adjustment a Slightly loosen the Lower Socket Screw 4 b Slightly loosen the Nut 7 on the Adjusting Screw 8 by holding the Adjusting Screw still while loosening the Nut c Turn the Adjusting Screw until desired gap is achieved d Hold the Adjusting Screw still while tightening the Nut e Then tighten the Lower So...

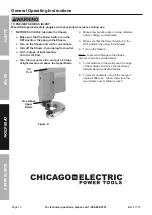
Page 10: ...s of light machine oil in the Oil port e turn the tool on its side and put 1 2 drops of light machine oil above the upper Blade area above upper Blade Oil port Figure D 2 Make a few practice cuts on scrap material before cutting your workpiece 3 Make sure that the Power Switch is in the OFF position then plug in the Shears 4 Turn on the Shears note To prevent damage to the blades do not cut across...

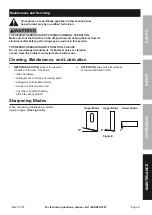
Page 11: ...tO prEVEnt SEriOuS inJury FrOM tOOL FaiLurE Do not use damaged equipment if abnormal noise or vibration occurs have the problem corrected before further use cleaning Maintenance and Lubrication 1 BEFOrE EacH uSE inspect the general condition of the tool Check for loose hardware misalignment or binding of moving parts damaged cord electrical wiring cracked or broken parts and any other condition th...

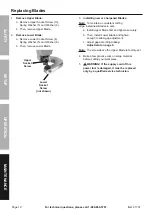
Page 12: ...ew Lower Socket Screw not shown 3 installing new or sharpened Blades note To maintain a consistent cutting edge install new Blades in sets a Install Upper Blade first and tighten securely b Then install Lower Blade and tighten enough to allow gap adjustment c Adjust gap according to Gap adjustment on page 9 note The screw above the Upper Blade is factory set 4 Make a few practice cuts on scrap mat...

Page 13: ... work too fast 2 Blades dull or damaged 3 Blocked motor housing vents 4 Motor being strained by long or small diameter extension cord 1 Allow tool to work at its own rate 2 Keep blades sharp Replace as needed 3 Wear ANSI approved safety goggles and NIOSH approved dust mask respirator while blowing dust out of motor using compressed air 4 Eliminate use of extension cord If an extension cord is need...

Page 14: ...rbor 1 16 Straight Pin 1 17 Connecting Bar 1 18 Socket Screw M5x50 2 19 Spring Washer Ø4 4 20 Gear Cover 1 21 Ball Bearing 628 1 22 Needle Bearing K121610 1 23 Eccentric Shaft 1 24 Straight Key 4x8 1 25 Ball Bearing 6201 1 26 Circlip 932 1 27 Bearing 1 28 Gear 1 29 Circlip 10 1 part Description Qty 30 Needle Bearing HK0709 1 31 Stem Gear 1 32 Key 3x8 1 33 Gear 1 34 Ball Bearing 626 1 35 Screw ST3 ...

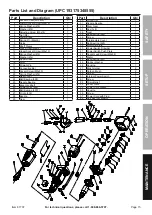
Page 15: ...ring Washer Ø4 4 21 Gear Cover 1 22 Ball Bearing 628 1 23 Needle Bearing 1 24 Eccentric Shaft 1 25 Straight Key 4x8 1 26 Ball Bearing 6201 1 27 Circlip 932 1 28 Bearing 1 29 Gear 1 part Description Qty 30 Circlip 10 1 31 Needle Bearing 1 32 Stem Gear 1 33 Key 3x8 1 34 Gear 1 35 Ball Bearing 626 1 36 Screw 4 37 Intermediate Cover 1 38 Ball Bearing 628 1 39 Motor Armature 1 40 Power Switch Drawbar 1...

Page 16: ... OF ALL OTHER WARRANTIES EXPRESS OR IMPLIED INCLUDING THE WARRANTIES OF MERCHANTABILITY AND FITNESS To take advantage of this warranty the product or part must be returned to us with transportation charges prepaid Proof of purchase date and an explanation of the complaint must accompany the merchandise If our inspection verifies the defect we will either repair or replace the product at our electi...

Reviews: