
Inflatable Kayak Instructions
Thank you for purchasing your Clear Blue Hawaii kayak.
Deflation / Storage
Care and maintenance
Our assembly manual is designed to guide you through the simple assembly process of your Clear Blue Hawaii Kayak, even if you are new to this exciting sport. This document acts as a
useful quick reference and 'working document' that provides all necessary information for use, maintenance, care and safety. Please read these instructions carefully as we guide you
through the assembly process step-by-step.
Inflating your Clear Blue Hawaii Kayak
Before starting, locate a relatively flat, clean space to unpack your boat.
1.
Remove the Kayak from its packaging and unroll the kayak so it is laid out
flat on the ground. You will find that the kayak has four inflatable chambers,
two of which come equipped with Boston valves at the bow and stern and
the other two valves in the seating areas.
2.
After you have identified the parts of the kayak, use a standard, traditional
manual pump that you can buy at any sports department store (not included
in the package) to inflate the kayak. It might harm the Kayak to use an air
compressor designed for auto tires as the boat is designed to work at a far
lower working pressure, so we recommend only using manual pumps or
electrical pumps specifically designed for inflatables.
3.
Your Kayak is ready for use now. Enjoy!
8.
First, inflate the right-hand side chamber of the kayak. Inflate only one chamber
at a time until the kayak has achieved the desired rigidity.
4.
First deflate the kayak entirely.
1.
Once the boat is rolled up, you can easily store or carry it.
5.
Store your kayak in a clean, dry area away from extreme changes in
environmental conditions
6.
Starting from the stern, roll the kayak up like you would roll up a sleeping bag. It
is important to roll it tightly for compact storage.
There is not much that you need to keep in mind when caring for the Hanauma, if
you follow some basic guidelines, it will remain in almost new condition for many
years. It can be stored either inflated or deflated. Inspect and rinse your kayak and
all accessories after use to prevent salt drying on the kayak (if used in salt water).
This can be done with the use of a mild soapy solution, please avoid detergents or
any type of silicone-based products. When storing the Hanauma in confined
spaces, please ensure it is completely clean and dry so that it does not get mold.
When storing it outside, we advise to protect it with a tarp against direct sunlight,
rain, leaves, and so on. In extremely cold temperatures, the PVC might become
brittle; we therefore do not recommend using it in temperatures below 32 degrees
Fahrenheit (0 degrees Celsius).
4.
Fold one side of the kayak toward the center.
2.
Next fold the other side so that it overlaps over the first. There will still be some
air in the kayak. This is normal and no reason to worry.
3.
The straps are adjustable for a comfortable seating position. Position the seats
to your preferences by simply adjusting the buckles and webbing.
6.
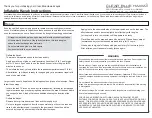
Before use, make sure that all valves are tightened to avoid leakage.
7.
Insert the seats and position them on the deck identifiable by Velcro strips.
5.
You should plan on storing the Hanauma for more than a few days, it is advisable
to towel it off or let the kayak dry in the sun and then deflate and store it.
CLEAR BLUE HAWAI I
www.clearbluehawaii.com
2123 Eluwene St. Honolulu, HI 96819
Tel : (808) 832-2438
Fax : (808) 832-2439


